15 St. Patrick’s Day Snack Ideas Everyone Will Love
Did you know that St. Patrick’s Day is celebrated in more countries than any other national festival? Whether you’re throwing a festive party or enjoying a cozy night in, you’ll want to have some delicious snacks on hand!
In this round-up, we’ve gathered 15 delightful St. Patrick’s Day snack ideas that are sure to impress your guests and fuel your celebrations. From shamrock-shaped treats to indulgent bites of Irish cream truffles, you’ll find something to satisfy every craving. Get ready to bring a bit of luck and a lot of flavor to your festivities!
Shop Our Must-Haves


1 Shamrock-Shaped Guacamole Bites
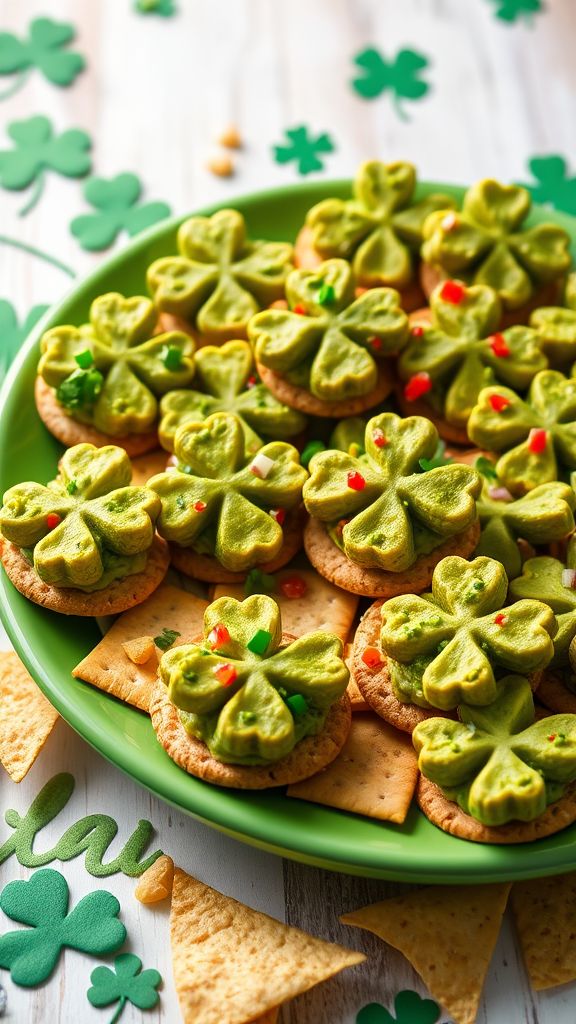
These Shamrock-Shaped Guacamole Bites are the perfect festive treat for your St. Patrick’s Day celebration. They are not only visually appealing but also packed with flavor and healthy ingredients. Gather your friends and family for a delightful snack that will put everyone in the spirit of the holiday!
Prep Time: 15 minutes
Total Time: 15 minutes
Servings: 12 bites
Ingredients:
- 2 ripe avocados
- 1 lime, juiced
- 1 small garlic clove, minced
- Salt and pepper to taste
- 1 small tomato, diced
- 1/4 cup finely chopped red onion
- 1/4 cup chopped cilantro
- Whole grain crackers or tortilla chips (for serving)
Instructions:
Start by halving the avocados and removing the pit. Scoop the flesh into a mixing bowl. Add the lime juice, minced garlic, and a pinch of salt and pepper. Mash everything together until smooth, keeping some texture if desired.
Next, fold in the diced tomato, chopped red onion, and cilantro. Mix gently to combine without mashing the ingredients too much. Taste and adjust the seasoning if necessary with more salt or lime juice.
To shape the bites, use a shamrock-shaped cookie cutter to cut out generous portions of guacamole. Place the shaped guacamole onto individual servings of whole grain crackers or use tortilla chips for a fun dip experience.
Serve immediately to enjoy the fresh flavors, or cover with plastic wrap and refrigerate briefly until ready to serve. If storing, keep them airtight to avoid browning.
Extra Tips:
- Add finely diced jalapeños for a spicy kick to your guacamole.
- For an extra flavor boost, mix in some crumbled feta cheese.
- If you want to prepare the guacamole ahead of time, store it in an airtight container with plastic wrap pressed directly onto the surface to minimize browning.
Nutrition Facts:
- Calories: 120 per serving
- Fat: 9g
- Carbohydrates: 10g
- Fiber: 4g
- Protein: 2g
2 Leprechaun Popcorn Mix
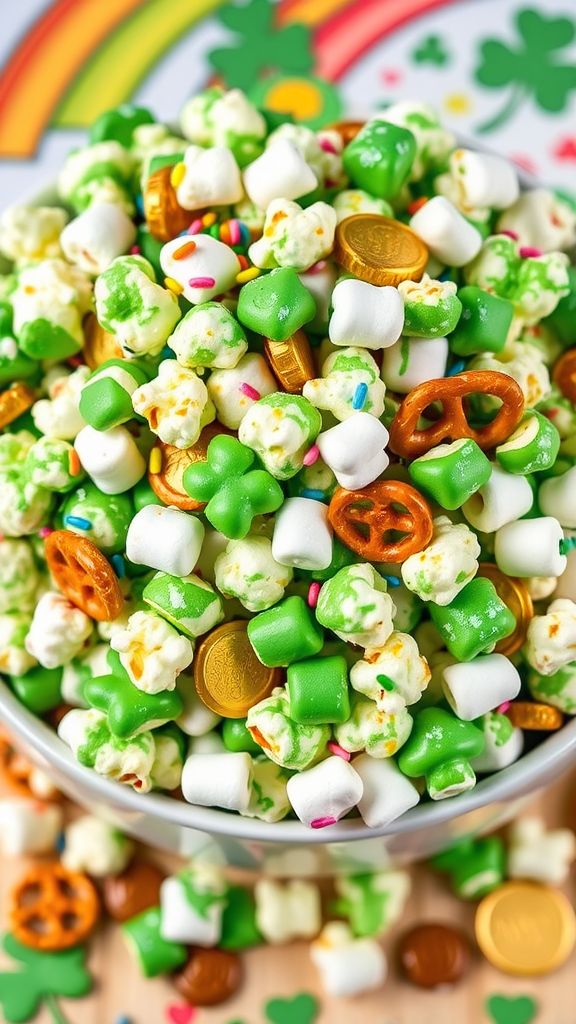
Celebrate St. Patrick’s Day with a delightful and whimsical treat: Leprechaun Popcorn Mix! This colorful and crunchy snack combines sweet and salty flavors, making it perfect for parties or just a fun family movie night. With its vibrant colors and festive charm, this recipe is sure to bring a smile to everyone’s face!
Prep Time: 15 minutes
Total Time: 15 minutes
Servings: 6
Ingredients:
- 8 cups popcorn (popped)
- 1 cup green candy melts
- 1 cup mini marshmallows
- 1 cup rainbow sprinkles
- ½ cup gold chocolate coins (optional)
- ½ cup pretzel sticks
- ¼ teaspoon sea salt
Instructions:
Start by popping your popcorn using an air popper or on the stovetop. Once it’s popped, place the popcorn in a large mixing bowl. Ensure there are no unpopped kernels and that the popcorn is fully cooled.
In a microwave-safe bowl, melt the green candy melts according to the package instructions. Stir the candy until smooth and fully melted. Drizzle the melted candy over the popcorn, using a spatula to mix gently until the popcorn is evenly coated.
Next, add in the mini marshmallows, rainbow sprinkles, and pretzel sticks. Gently fold in all the ingredients to ensure an even distribution, being careful not to crush the popcorn. If you’re using gold chocolate coins, break a few coins in half and sprinkle them in for that extra festive touch.
Finally, sprinkle the sea salt over the mixed popcorn for a perfect sweet-salty balance. Transfer the Leprechaun Popcorn Mix to a decorative bowl or seal it in a zip-top bag for later snacking!
Extra Tips:
- For a more intense green color, consider adding a few drops of green food coloring to the melted candy melts.
- Experiment with other add-ins, such as chocolate chips or nuts, to customize your mix!
- Store the popcorn in an airtight container to keep it fresh and crunchy.
Nutrition Facts:
- Calories: 220
- Total Fat: 9g
- Saturated Fat: 4g
- Cholesterol: 0mg
- Sodium: 250mg
- Total Carbohydrates: 34g
- Dietary Fiber: 1g
- Sugars: 20g
- Protein: 2g
3 Irish Cheddar and Chive Soda Bread Bites

These Irish Cheddar and Chive Soda Bread Bites are the perfect blend of savory cheese and fresh chives, all wrapped in a warm, fluffy soda bread. They are simple to make and ideal for sharing during St. Patrick’s Day festivities or any gathering.
Prep Time: 15 minutes
Total Time: 30 minutes
Servings: 12 bites
Ingredients:
- 2 cups all-purpose flour
- 1 tsp baking soda
- 1 tsp salt
- 1/2 cup cold butter, cubed
- 1 cup grated Irish cheddar cheese
- 1/4 cup chopped fresh chives
- 3/4 cup buttermilk
Instructions:
Begin by preheating your oven to 425°F (220°C). Line a baking sheet with parchment paper for an easy cleanup.
In a large mixing bowl, combine the flour, baking soda, and salt. Make sure to whisk them together until well blended. Then, add the cold cubed butter to the dry ingredients.
Use a pastry cutter or your fingers to work the butter into the flour mixture until it resembles coarse crumbs. Incorporate the grated Irish cheddar cheese and chopped chives, mixing until evenly distributed.
Next, make a well in the center of the mixture and pour in the buttermilk. Stir gently with a spoon until the dough comes together. Be careful not to overmix; a few lumps are fine.
Turn the dough out onto a lightly floured surface. Knead the dough gently for about a minute, then shape it into a round loaf. Cut the loaf into 12 equal wedges and arrange them on the prepared baking sheet, making sure to leave space between each bite.
Bake in the preheated oven for approximately 15–20 minutes, or until the tops are golden brown and a toothpick inserted into the center comes out clean. Once baked, remove from the oven and let cool for a few minutes before serving.
Extra Tips:
- For an extra touch, brush the tops of the bites with melted butter before baking.
- You can substitute green onions for chives if you prefer a milder flavor.
- These bites can be served warm or at room temperature, making them perfect for gatherings.
Nutrition Facts:
- Calories: 120 per bite
- Protein: 4g
- Fat: 7g
- Carbohydrates: 11g
- Fiber: 0.5g
- Sodium: 150mg
4 Green Velvet Mini Cupcakes

Indulge in the festive spirit of St. Patrick’s Day with these delightful Green Velvet Mini Cupcakes. Bursting with vibrant color and rich flavor, these bite-sized treats are perfect for your celebrations. Topped with a creamy frosting, they will surely impress your family and friends.
Prep Time: 20 minutes
Cook Time: 15 minutes
Additional Time: 30 minutes
Total Time: 1 hour 5 minutes
Servings: 24 mini cupcakes
Ingredients:
- 1 ½ cups all-purpose flour
- 1 cup granulated sugar
- ½ teaspoon baking soda
- ½ teaspoon baking powder
- ½ teaspoon salt
- 1 cup vegetable oil
- 1 cup buttermilk, at room temperature
- 2 large eggs
- 2 tablespoons green food coloring
- 1 teaspoon vanilla extract
- 1 teaspoon cocoa powder
Instructions:
In a large mixing bowl, combine the flour, sugar, baking soda, baking powder, and salt. Whisk these dry ingredients together until well mixed. In another bowl, blend the vegetable oil, buttermilk, eggs, green food coloring, vanilla extract, and cocoa powder until smooth.
Next, gradually add the wet mixture to the dry mixture and stir until fully combined. Be careful not to overmix; it’s okay to have a few lumps. Preheat your oven to 350°F (175°C) and line a mini cupcake pan with paper liners.
Fill each cupcake liner about 2/3 full with the batter. Bake for 12-15 minutes or until a toothpick inserted in the center comes out clean. Once baked, remove from the oven and let the cupcakes cool in the pan for about 5 minutes before transferring them to a wire rack to cool completely.
While the cupcakes are cooling, prepare your favorite frosting. A cream cheese frosting works wonderfully with these cupcakes. Once the cupcakes are completely cooled, generously frost each one and decorate as desired.
Extra Tips:
- For added flair, mix in some mini chocolate chips into the batter before baking.
- Ensure the buttermilk is at room temperature for the best results in texture.
- You may substitute the green food coloring with natural alternatives like spinach powder for a healthier option.
Nutrition Facts:
- Calories: 140 per cupcake
- Total Fat: 7g
- Saturated Fat: 1g
- Cholesterol: 20mg
- Sodium: 100mg
- Total Carbohydrates: 18g
- Dietary Fiber: 0g
- Sugars: 10g
- Protein: 2g
5 Spinach and Artichoke Dip with a Twist

This Spinach and Artichoke Dip with a Twist is a delightful spin on a classic favorite! Packed with rich flavors and creamy textures, it’s perfect for any gathering or holiday celebration.
Prep Time: 15 minutes
Cook Time: 25 minutes
Additional Time: 5 minutes
Total Time: 45 minutes
Servings: 6-8
Ingredients:
- 1 cup fresh baby spinach, chopped
- 1 can (14 oz) artichoke hearts, drained and chopped
- 1 cup cream cheese, softened
- 1/2 cup sour cream
- 1/2 cup mayonnaise
- 1 cup shredded mozzarella cheese
- 1/2 cup grated Parmesan cheese
- 2 cloves garlic, minced
- 1 teaspoon red pepper flakes (adjust for spice preference)
- 1 teaspoon lemon juice
- Salt and pepper to taste
- Tortilla chips or pita bread for serving
Instructions:
Start by preheating your oven to 350°F (175°C). In a large mixing bowl, combine the cream cheese, sour cream, and mayonnaise. Mix well until smooth and creamy.
Next, add in the chopped spinach, artichoke hearts, mozzarella cheese, Parmesan cheese, garlic, and lemon juice. Stir the ingredients together until they are thoroughly combined.
Season the mixture with red pepper flakes, salt, and pepper to taste. If you prefer a spicy kick, feel free to add more red pepper flakes.
Transfer the mixture into a baking dish and spread it evenly. Bake in the preheated oven for about 25 minutes or until the top is golden and bubbly.
Once done, remove from the oven and let it cool for about 5 minutes. Serve warm with tortilla chips or pita bread for dipping.
Extra Tips:
- For a healthier option, consider using Greek yogurt instead of sour cream and mayonnaise.
- Add some cooked diced bacon for an extra layer of flavor and richness.
- To enhance the flavors, let the dip sit for a few minutes before serving. This allows the ingredients to meld together.
Nutrition Facts:
- Calories: 250 per serving
- Total Fat: 20g
- Saturated Fat: 10g
- Cholesterol: 50mg
- Sodium: 400mg
- Total Carbohydrates: 10g
- Dietary Fiber: 1g
- Protein: 7g
6 St. Patty’s Day Pretzel Bites
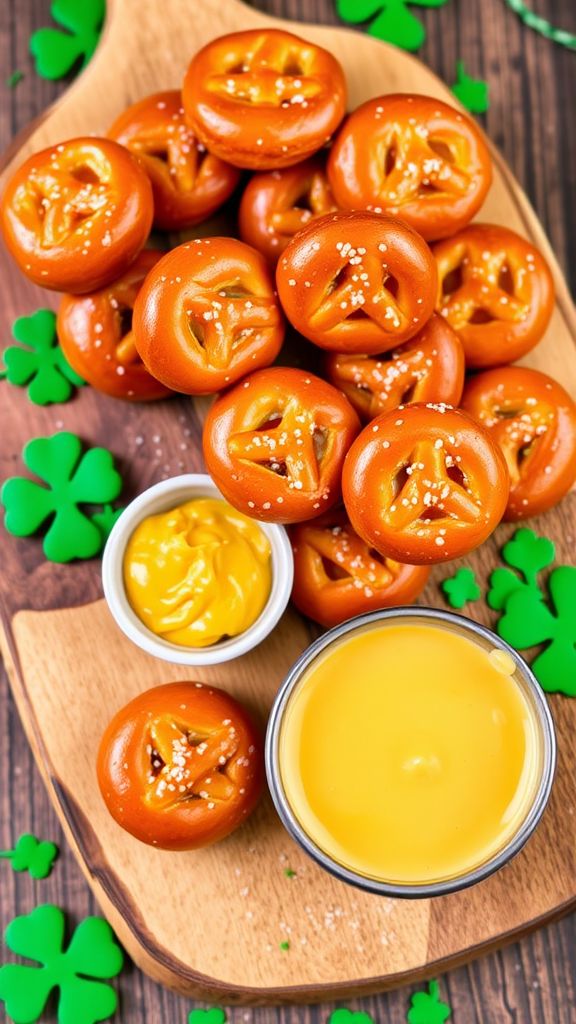
These delightful St. Patty’s Day Pretzel Bites are the perfect festive snack to celebrate the occasion! Soft, chewy, and sprinkled with delicious coarse salt, these pretzel bites are also an ideal finger food for parties, gatherings, or just a cozy night in.
Prep Time: 20 minutes
Cook Time: 10 minutes
Additional Time: 1 hour
Total Time: 1 hour 30 minutes
Servings: 4-6
Ingredients:
- 1 cup warm water (110°F to 115°F)
- 2 ¼ teaspoons active dry yeast (1 packet)
- 1 tablespoon granulated sugar
- 2 ½ cups all-purpose flour
- 1 teaspoon kosher salt
- ¼ cup baking soda
- 1 egg, beaten (for egg wash)
- Coarse salt for sprinkling
Instructions:
Start by combining the warm water, yeast, and granulated sugar in a bowl. Let it sit for about 5 minutes until it becomes frothy. This step ensures that the yeast is activated.
In a large mixing bowl, combine flour and kosher salt. Pour the frothy yeast mixture into the flour mixture and stir until a dough forms. Knead the dough for about 5 minutes on a lightly floured surface until smooth.
Place the kneaded dough into a greased bowl, cover it with a clean kitchen towel, and set it aside in a warm place to rise for about 1 hour, or until it has doubled in size.
Preheat your oven to 450°F (230°C) and line a baking sheet with parchment paper. Once the dough has risen, punch it down and turn it out onto a floured surface. Roll it into a long rope, then cut the rope into small bite-sized pieces.
In a large saucepan, bring about 10 cups of water to a boil and add the baking soda. Carefully drop the pretzel bites into the boiling water for about 30 seconds. Remove them with a slotted spoon and place them on the prepared baking sheet.
Brush the pretzel bites with the beaten egg, and sprinkle them with coarse salt. Bake in the preheated oven for about 10 minutes, or until golden brown.
Allow the pretzel bites to cool slightly before serving. Enjoy them warm, maybe with a side of mustard or cheese sauce!
Extra Tips:
- For an extra festive touch, you can add green food coloring to the dough!
- If you prefer a sweeter option, try tossing the pretzel bites in cinnamon sugar after baking.
- Store leftovers in an airtight container for up to 2 days for maximum freshness.
Nutrition Facts:
- Calories: 120 per serving
- Total Fat: 1.5g
- Saturated Fat: 0.5g
- Cholesterol: 25mg
- Sodium: 150mg
- Total Carbohydrates: 22g
- Dietary Fiber: 1g
- Sugars: 0g
- Protein: 4g
7 Lucky Charms Rice Krispie Treats
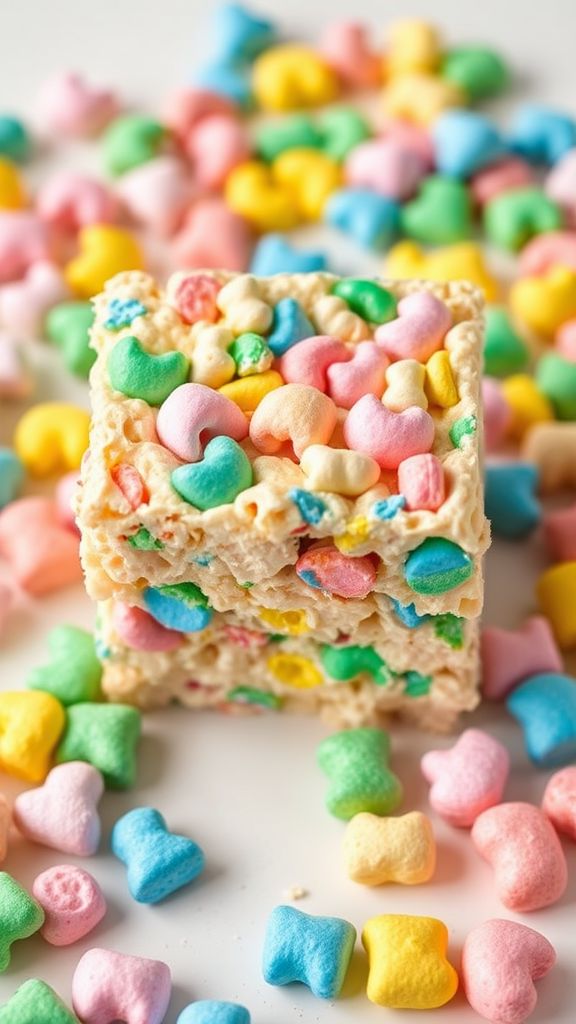
Combining the classic taste of Rice Krispie treats with the whimsical charm of Lucky Charms cereal creates a delightful treat perfect for any celebration. These colorful, chewy goodies are not only easy to prepare but also a hit with both kids and adults alike. Let’s gather our ingredients and get started!
Prep Time: 10 minutes
Cook Time: 0 minutes
Additional Time: 30 minutes
Total Time: 40 minutes
Servings: 12
Ingredients:
- 3 tablespoons butter
- 4 cups mini marshmallows (plus an extra cup for topping)
- 6 cups Rice Krispies cereal
- 2 cups Lucky Charms cereal
- A pinch of salt
Instructions:
Start by greasing a 9×13 inch baking dish with a bit of butter or cooking spray to prevent sticking. In a large saucepan, melt the butter over low heat. Once melted, add in the mini marshmallows and stir continuously until they are completely melted and smooth.
Remove the pan from the heat and add a pinch of salt for flavor. Gradually fold in the Rice Krispies and Lucky Charms cereal, mixing gently until all the cereal is well coated with the marshmallow mixture. Be careful not to crush the Lucky Charms too much.
Transfer the mixture into the prepared baking dish. Use a spatula or your hands (lightly buttered for ease) to gently press the mixture down into an even layer. Sprinkle an extra cup of mini marshmallows on top for added texture and visual appeal.
Allow the treats to cool at room temperature for about 30 minutes before cutting them into squares. Serve and enjoy these festive treats!
Extra Tips:
- For a chocolatey twist, drizzle melted chocolate over the top once cooled.
- Store any leftovers in an airtight container to maintain their chewy texture.
- To make cutting easier, lightly spray your knife with cooking spray before slicing.
Nutrition Facts:
- Serving Size: 1 treat
- Calories: 150
- Total Fat: 5g
- Saturated Fat: 3g
- Cholesterol: 15mg
- Sodium: 60mg
- Total Carbohydrates: 25g
- Dietary Fiber: 0g
- Sugars: 12g
- Protein: 1g
8 Clover-Leaf Veggie Platter with Green Hummus
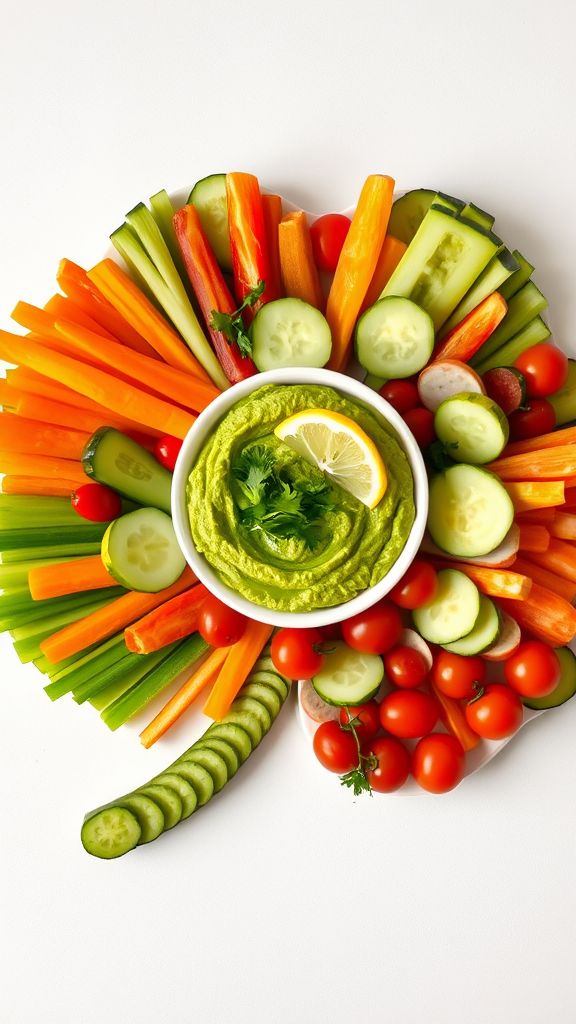
Celebrate St. Patrick’s Day with a vibrant and nutritious Clover-Leaf Veggie Platter paired with a delightful green hummus. This platter is not only visually appealing but also packed with flavors, making it a perfect appetizer for your festive gathering.
Prep Time: 15 minutes
Total Time: 15 minutes
Servings: 4-6
Ingredients:
- 1 cup of canned chickpeas, rinsed and drained
- 1/4 cup of tahini
- 2 tablespoons of olive oil
- 2 tablespoons of lemon juice
- 1 clove of garlic, minced
- 1/2 teaspoon of cumin
- 1/2 teaspoon of salt
- 1/4 teaspoon of pepper
- 1 cup of fresh spinach
- 1/4 cup of fresh parsley
- Assorted veggies (such as carrots, bell peppers, cucumbers, and cherry tomatoes)
- Optional: lemon wedges for garnish
Instructions:
Begin by making the green hummus. In a food processor, add the canned chickpeas, tahini, olive oil, lemon juice, minced garlic, cumin, salt, and pepper. Blend until smooth. If the mixture is too thick, you can add a splash of water to reach your desired consistency.
Next, add the fresh spinach and parsley to the food processor. Pulse again until the greens are well incorporated and the hummus is vibrant and green. Taste and adjust the seasoning if necessary.
Now it’s time to assemble your platter. Arrange the assorted veggies in a clover-leaf shape on a large serving plate, utilizing the colorful display to enhance visual appeal. Place the green hummus in the center of the veggies for easy dipping.
Optionally, garnish with lemon wedges around the hummus for a fresh touch. Serve immediately or refrigerate until ready to serve.
Extra Tips:
- For added flavor, consider roasting the garlic before blending it into the hummus.
- You can customize the veggie selection based on what’s in season or your personal preferences.
- This platter is perfect for meal prep; you can prepare the hummus a day in advance and store it in an airtight container.
Nutrition Facts:
- Calories: 120
- Protein: 4g
- Fat: 8g
- Carbohydrates: 10g
- Fiber: 4g
- Sugars: 1g
- Sodium: 120mg
9 Irish Cream Truffles

Indulge in the rich and velvety world of Irish Cream Truffles, a delightful treat perfect for any celebration, especially St. Patrick’s Day! These chocolatey bites are infused with smooth Irish cream liqueur, making them a crowd-pleaser and an elegant addition to any dessert table.
Prep Time: 20 minutes
Additional Time: 1 hour
Total Time: 1 hour 20 minutes
Servings: 24 truffles
Ingredients:
- 8 oz semi-sweet chocolate, chopped
- 1/2 cup heavy cream
- 1/4 cup Irish cream liqueur
- 1 tablespoon unsalted butter
- Cocoa powder (for dusting)
- Chopped nuts or chocolate sprinkles (for coating, optional)
Instructions:
Begin by placing the chopped semi-sweet chocolate in a heatproof bowl. In a small saucepan, bring the heavy cream to a gentle simmer over medium heat. Pour the simmering cream over the chopped chocolate, letting it sit for about two minutes to allow the chocolate to melt.
Next, stir the mixture gently until it’s smooth and creamy. Add the Irish cream liqueur and unsalted butter to the bowl, mixing until fully combined and silky. Cover the bowl with plastic wrap and refrigerate the mixture for about 1 hour, or until it is firm enough to handle.
Once the mixture is chilled, use a melon baller or your hands to scoop out small portions and roll them into balls. Aim for about 1 inch in diameter for each truffle. Roll the truffles in cocoa powder, or coat them with chopped nuts or chocolate sprinkles if desired. Place each coated truffle on a parchment-lined baking sheet.
Finally, refrigerate the truffles for an additional 30 minutes to set before serving. Enjoy your delicious Irish Cream Truffles!
Extra Tips:
- For a richer flavor, use dark chocolate instead of semi-sweet chocolate.
- Make the truffles ahead of time and store them in an airtight container in the refrigerator for up to 5 days.
- For a festive touch, add a splash of green food coloring to the chocolate mixture or dust with edible glitter.
Nutrition Facts:
- Calories: 90
- Total Fat: 6g
- Saturated Fat: 3.5g
- Cholesterol: 10mg
- Sodium: 5mg
- Total Carbohydrates: 9g
- Dietary Fiber: 1g
- Sugars: 6g
- Protein: 1g
10 Pistachio-Pesto Pinwheels

Indulge in the delightful flavors of Pistachio-Pesto Pinwheels that make for a perfect St. Patrick’s Day snack. With a creamy pesto spread enveloped in a soft tortilla and topped with crunchy pistachios, these pinwheels are as festive as they are delicious! Prepare them ahead of time for an easy yet appealing appetizer.
Prep Time: 15 minutes
Additional Time: 30 minutes
Total Time: 45 minutes
Servings: 12 pinwheels
Ingredients:
- 4 large flour tortillas
- 1 cup basil pesto
- 1 cup cream cheese, softened
- 1/2 cup shelled pistachios, finely chopped
- 1/2 cup sun-dried tomatoes, chopped (optional)
- Fresh basil leaves for garnish (optional)
Instructions:
Start by mixing the basil pesto and cream cheese in a bowl until fully combined. This mixture will serve as the spread for your pinwheels.
Spread the pesto-cream cheese mixture evenly over each flour tortilla, making sure to reach all edges for full flavor in every bite.
Next, sprinkle the finely chopped pistachios over the pesto spread, ensuring an even distribution. If you’re using them, add the sun-dried tomatoes atop the pistachios.
Carefully roll up each tortilla tightly from one end to the other. Be gentle to avoid spilling the filling out of the sides.
Once rolled, wrap each tortilla in plastic wrap and place them in the fridge for about 30 minutes. This chilling time will help the pinwheels hold their shape when cut.
After the chilling period, remove the pinwheels from the fridge and unwrap them. Use a sharp knife to slice them into 1-inch thick pinwheels.
Arrange the pinwheels on a serving platter and garnish with fresh basil leaves if desired. Serve immediately or keep them covered in the fridge until ready to enjoy!
Extra Tips:
- For an extra crunch, lightly toast the pistachios before chopping and using them in the recipe.
- Feel free to add other ingredients like roasted red peppers or sliced olives for a different flavor profile.
- To make them ahead of time, prepare and roll the pinwheels, then slice just before serving to maintain freshness.
Nutrition Facts:
- Calories: 120 per pinwheel
- Total Fat: 8g
- Saturated Fat: 3g
- Cholesterol: 15mg
- Sodium: 200mg
- Total Carbohydrates: 10g
- Dietary Fiber: 1g
- Sugars: 1g
- Protein: 3g
11 Mint Chocolate Chip Dip with Graham Crackers
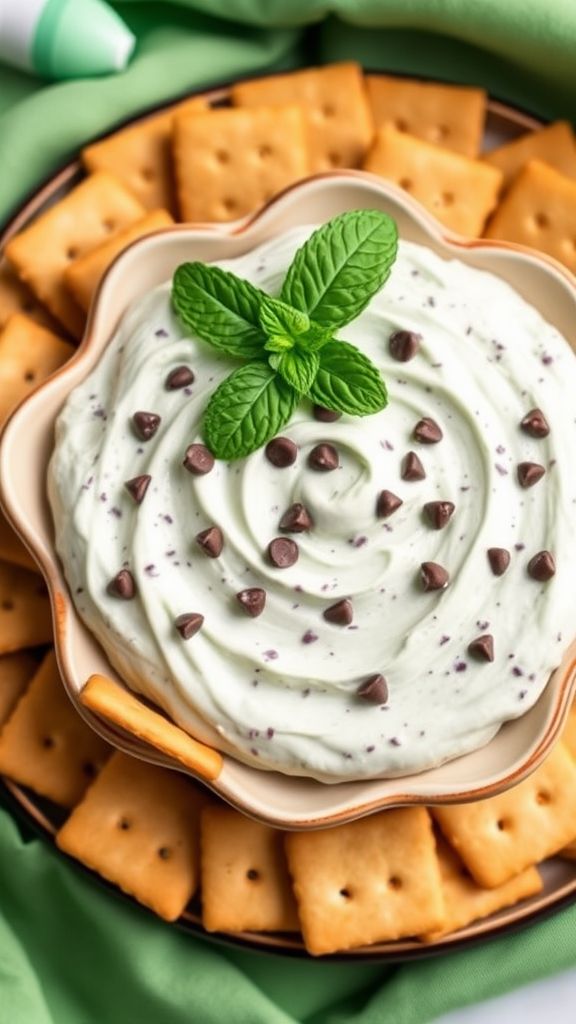
This delightful Mint Chocolate Chip Dip is a perfect treat for St. Patrick’s Day! Creamy, sweet, and bursting with minty flavor, this dip pairs wonderfully with crunchy Graham Crackers. It’s easy to make and will quickly become a favorite for your festive gatherings.
Prep Time: 10 minutes
Additional Time: 30 minutes (Chill Time)
Total Time: 40 minutes
Servings: 8
Ingredients:
- 1 cup cream cheese, softened
- 1 cup powdered sugar
- 1 teaspoon vanilla extract
- 1/2 cup cool whip
- 1/2 teaspoon mint extract
- 1 cup mini chocolate chips
- Green food coloring (optional)
- Graham Crackers for serving
Instructions:
Start by using a medium-sized mixing bowl to combine the softened cream cheese and powdered sugar. Beat them together until the mixture is smooth and creamy. This step ensures that your dip has a rich and velvety texture.
Next, add in the vanilla extract, mint extract, and a few drops of green food coloring if you want to enhance the festive look. Mix again until all the ingredients are fully incorporated and you achieve a lovely mint hue.
Gently fold in the cool whip to maintain its light and airy texture. This is essential for creating that fluffy dip everyone loves. After that, carefully stir in the mini chocolate chips, allowing them to distribute evenly throughout the dip.
Transfer the mixture into a serving bowl and cover it with plastic wrap. Let it chill in the refrigerator for about 30 minutes. Chilling will help the flavors meld beautifully and serve as a refreshing treat.
Once ready, serve the dip alongside crunchy Graham Crackers for dipping. Enjoy this minty delight with friends and family!
Extra Tips:
- For a richer chocolate flavor, consider adding a tablespoon of cocoa powder to the dip.
- To make it more festive, sprinkle extra chocolate chips or crushed mint candies on top before serving.
- If you don’t have Graham Crackers, fresh fruit like strawberries or apple slices also complement this dip nicely.
Nutrition Facts:
- Calories: 170 per serving
- Total Fat: 8g
- Saturated Fat: 4g
- Cholesterol: 20mg
- Sodium: 80mg
- Total Carbohydrates: 22g
- Dietary Fiber: 0g
- Sugars: 12g
- Protein: 2g
12 Rainbow Fruit Skewers

Brighten up any gathering with these colorful Rainbow Fruit Skewers! They are not only visually stunning but also a refreshing snack option that everyone will love. Perfect for St. Patrick’s Day or any festive occasion, these skewers are sure to add a bit of cheer to your table.
Prep Time: 15 minutes
Total Time: 15 minutes
Servings: 8 skewers
Ingredients:
- 1 cup of strawberries, hulled and halved
- 1 cup of orange slices
- 1 cup of pineapple chunks
- 1 cup of green grapes
- 1 cup of blueberries
- 1 cup of purple grapes
- Wooden skewers (8 inches long)
Instructions:
Start by preparing your fruits. Wash and hull the strawberries, slicing them in half for easy skewer assembly. Then, peel and slice the oranges into small rounds. Take the pineapple and cut it into chunks. Ensure your green grapes are rinsed and dried, and do the same for the blueberries and purple grapes.
Next, create your fruit skewers. Take a wooden skewer and begin layering the fruits in order of the rainbow. Start with the strawberries, followed by the orange slices, then the pineapple, and continue with the green grapes. Add the blueberries and finish with the purple grapes at the end.
Once all the skewers are assembled, arrange them on a platter for a beautiful presentation. They are ready to serve immediately or can be chilled in the refrigerator for a refreshing treat later.
Extra Tips:
- Feel free to substitute any fruit with your favorites, ensuring they correspond to the rainbow colors.
- For a fun twist, drizzle a light honey or yogurt dip on the side for added flavor.
- Make it a DIY activity by letting kids create their own skewers, mixing and matching fruits.
Nutrition Facts:
- Calories: 85 per skewer
- Total Fat: 0.5g
- Sodium: 1mg
- Total Carbohydrates: 22g
- Dietary Fiber: 2g
- Sugars: 15g
- Protein: 1g
13 Green Apple and Blue Cheese Crostini

Indulge in the vibrant flavors of Green Apple and Blue Cheese Crostini that perfectly blend sweetness and savory notes. This easy-to-make appetizer is a hit for any gathering, delivering a delightful crunch and a burst of flavor in every bite.
Prep Time: 15 minutes
Total Time: 15 minutes
Servings: 12 crostini
Ingredients:
- 1 baguette, sliced into 12 rounds
- 2 tablespoons olive oil
- 1 green apple, thinly sliced
- 4 ounces blue cheese, crumbled
- 2 tablespoons honey
- Fresh arugula leaves for garnish
- Salt and pepper, to taste
Instructions:
Begin by preheating your oven to 400°F (200°C). Lay out the baguette slices on a baking sheet and brush each side lightly with olive oil. Bake for about 5-7 minutes, or until they are golden and slightly crisp.
Once your crostini are toasted, remove them from the oven and allow them to cool slightly. While the crostini are cooling, prepare the toppings. Slice the green apple thinly and set aside.
Carefully layer a few slices of apple on each toasted crostini. Next, sprinkle a generous amount of crumbled blue cheese over the apple slices, ensuring every bite is packed with flavor.
Drizzle honey over the assembled crostini for a touch of sweetness, balancing the tanginess of the blue cheese. Season with a pinch of salt and pepper to enhance the flavors.
Finally, garnish each crostini with a couple of fresh arugula leaves for a refreshing crunch. Serve immediately and enjoy this delightful blend of flavors!
Extra Tips:
- For added texture, consider toasting the crostini a bit longer until they are very crisp.
- If you prefer a milder cheese, you can substitute blue cheese with feta or goat cheese.
- For a refreshing twist, add a squeeze of lemon juice over the apples before assembling.
Nutrition Facts:
- Calories: 150 per serving
- Total Fat: 9g
- Saturated Fat: 4g
- Cholesterol: 15mg
- Sodium: 200mg
- Total Carbohydrates: 15g
- Dietary Fiber: 1g
- Sugars: 4g
- Protein: 4g
14 Irish Potato Nachos

Celebrate St. Patrick’s Day with a delightful twist on traditional nachos by making Irish Potato Nachos! These crispy potato slices are layered with mouthwatering toppings, creating a savory snack that’s perfect for sharing. It’s a fun and festive dish that will surely impress your guests!
Prep Time: 15 minutes
Cook Time: 25 minutes
Total Time: 40 minutes
Servings: 4
Ingredients:
- 4 large russet potatoes
- 2 tablespoons olive oil
- 1 teaspoon garlic powder
- 1 teaspoon onion powder
- Salt and pepper to taste
- 1 cup shredded cheddar cheese
- 1 cup cooked corned beef, chopped
- 1/2 cup sour cream
- 1/4 cup green onions, sliced
- 1/4 cup pickled jalapeños (optional)
Instructions:
Preheat your oven to 425°F (220°C). While it’s heating, wash and scrub the potatoes thoroughly to remove any dirt. You can choose to peel them if preferred, but leaving the skin on adds extra flavor and crunch.
Slice the potatoes into thin rounds, about 1/4 inch thick. In a large mixing bowl, toss the potato slices with olive oil, garlic powder, onion powder, and a generous pinch of salt and pepper. Ensure that each slice is well-coated for optimal flavor.
Arrange the seasoned potato slices in a single layer on a baking sheet lined with parchment paper. Bake in the preheated oven for about 20-25 minutes, or until they are crispy and golden brown. Flip them halfway through for even cooking.
Once the potatoes are done, remove them from the oven and sprinkle the shredded cheddar cheese and chopped corned beef evenly over the top. Return them to the oven for an additional 5 minutes, allowing the cheese to melt beautifully.
Remove the nachos from the oven and let them cool for a moment. Then, drizzle the crispy nachos with sour cream, and garnish with green onions and pickled jalapeños if using. Serve immediately while they’re still warm and enjoy this delicious Irish twist on nachos!
Extra Tips:
- For a spicier kick, add some crushed red pepper flakes in the seasoning mix.
- Feel free to top the nachos with other ingredients like sautéed mushrooms or bell peppers for added flavor and texture.
- To make this dish vegetarian, simply omit the corned beef and use additional toppings such as black beans or guacamole.
Nutrition Facts:
- Calories: 450
- Total Fat: 22g
- Saturated Fat: 10g
- Cholesterol: 40mg
- Sodium: 650mg
- Total Carbohydrates: 46g
- Dietary Fiber: 5g
- Sugars: 2g
- Protein: 20g
15 Matcha Buttercream Frosted Cookies
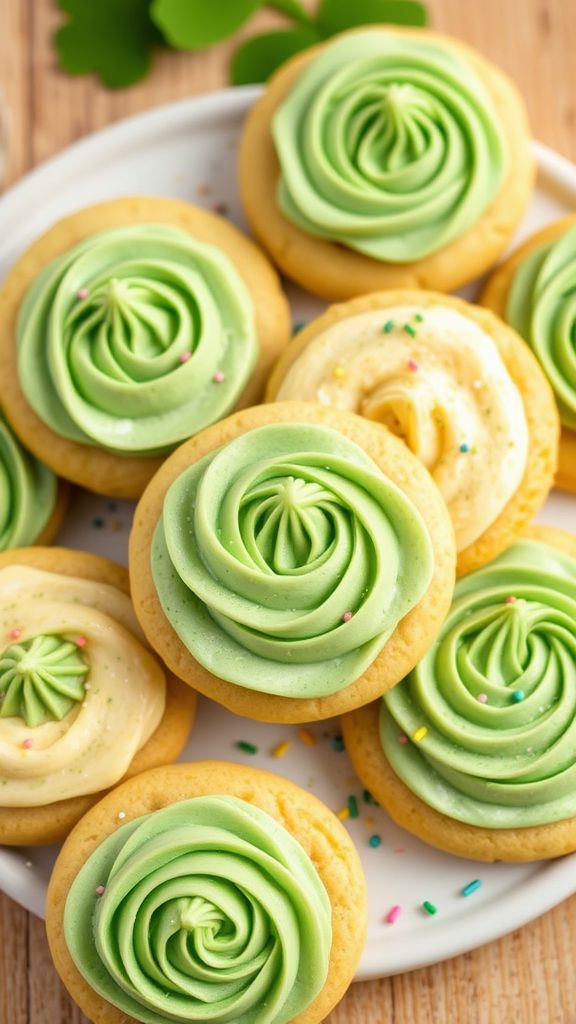
These Matcha Buttercream Frosted Cookies are a delightful treat that perfectly blend the earthy flavor of matcha with the sweetness of buttercream. They’re not only visually appealing but also make for a festive addition to any St. Patrick’s Day celebration!
Prep Time: 20 minutes
Cook Time: 10 minutes
Additional Time: 30 minutes
Total Time: 1 hour
Servings: 12 cookies
Ingredients:
- 1 ½ cups all-purpose flour
- ½ teaspoon baking soda
- ¼ teaspoon salt
- ½ cup unsalted butter, softened
- ½ cup granulated sugar
- ½ cup brown sugar, packed
- 1 large egg
- 1 teaspoon vanilla extract
- 2 tablespoons matcha powder
Instructions:
Start by preheating your oven to 350°F (175°C) and line a baking sheet with parchment paper. In a medium bowl, whisk together the flour, baking soda, and salt until well combined. This will ensure that your dry ingredients are evenly distributed.
Next, in a large mixing bowl, beat the unsalted butter, granulated sugar, and brown sugar together until the mixture becomes light and fluffy. This should take about 3-4 minutes. Add in the egg and vanilla extract, mixing until fully incorporated.
Gradually add the dry ingredient mixture to the wet ingredients, making sure to mix until just combined. Then, gently fold in the matcha powder until the dough is a vibrant green color.
Using a tablespoon, scoop the cookie dough onto the prepared baking sheet, spacing them two inches apart. Bake in the preheated oven for 10 minutes, or until the edges are lightly golden. Once baked, allow the cookies to cool on the baking sheet for 5 minutes before transferring them to a wire rack to cool completely.
While the cookies are cooling, prepare the matcha buttercream frosting. In a mixing bowl, beat together 1 cup of softened butter and 4 cups of powdered sugar. Gradually add in 2 tablespoons of matcha powder and a splash of milk to reach your desired consistency.
Once the cookies are completely cooled, frost them generously with the matcha buttercream. Garnish with additional matcha powder or decorative sprinkles if desired, and enjoy your stunning and tasty cookies!
Extra Tips:
- Use high-quality ceremonial matcha for the best flavor and color.
- If you like a stronger matcha flavor, increase the amount of matcha powder in the frosting.
- These cookies can be stored in an airtight container for up to 5 days.
Nutrition Facts:
- Calories: 150
- Fat: 7g
- Carbohydrates: 21g
- Sugar: 10g
- Protein: 2g
- Fiber: 0g