18 Easy Easter Appetizers for a Crowd
Planning a big Easter gathering can feel overwhelming, especially when it comes to choosing the right appetizers. You want to impress your guests with delicious, easy-to-make bites that everyone will love. In this round-up, you’ll discover 18 delightful appetizers that are perfect for a crowd, ensuring your celebration is both special and stress-free!
Shop Our Must-Haves


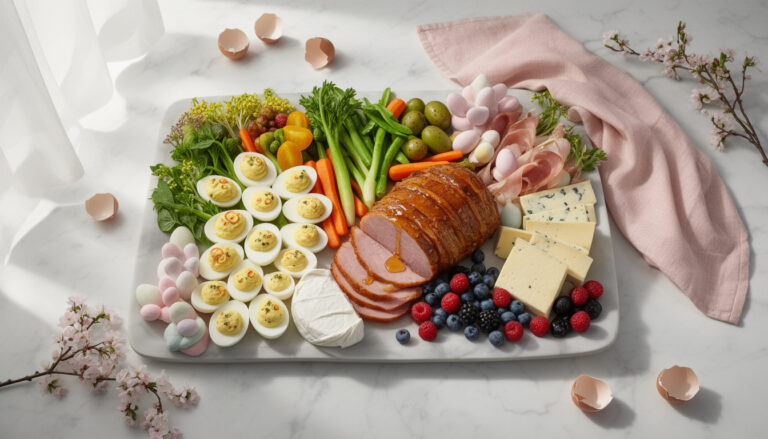
1 Deviled Egg Delight Bites

These Deviled Egg Delight Bites are a fun twist on classic deviled eggs! They are perfect for any gathering, especially during Easter. Bursting with flavor and easy to prepare, everyone will be reaching for seconds.
Prep Time: 15 minutes
Total Time: 15 minutes
Servings: 12
Ingredients:
- 6 large eggs
- 3 tablespoons mayonnaise
- 1 teaspoon Dijon mustard
- 1 teaspoon apple cider vinegar
- Salt and pepper to taste
- 1/4 teaspoon paprika, plus extra for garnish
- 1 avocado, mashed
- 1/2 small red onion, finely chopped
- 2 tablespoons fresh cilantro, chopped
- Mini tortilla chips for serving
Instructions:
Start by boiling the eggs. Place them in a pot, cover with water, and bring to a gentle boil. Once boiling, let them cook for about 10 minutes then transfer to an ice bath to cool. This makes peeling the eggs easier.
Once the eggs are cool, peel and slice them in half lengthwise. Carefully pop the yolks out into a bowl. Place the whites on a serving platter.
To the bowl with the yolks, add mayonnaise, Dijon mustard, apple cider vinegar, salt, pepper, and paprika. Use a fork to mash everything together until smooth.
Next, fold in the mashed avocado, red onion, and cilantro. Mix well to combine all the flavors. Spoon or pipe the yolk mixture back into the egg white halves.
Sprinkle a little extra paprika on top for a pop of color. Finally, serve each stuffed egg portion on a mini tortilla chip for a crunchy twist.
Tips:
- For added flavor, try using spicy mustard instead of Dijon.
- If you want a creamier texture, mix in a bit more mayonnaise or avocado.
- Garnish with extra cilantro or a slice of jalapeño for a zesty kick!
Nutrition Facts:
- Calories: 90 per serving
- Protein: 4g
- Fat: 7g
- Carbohydrates: 5g
- Fiber: 1g
2 Spring Vegetable Crudités Platter
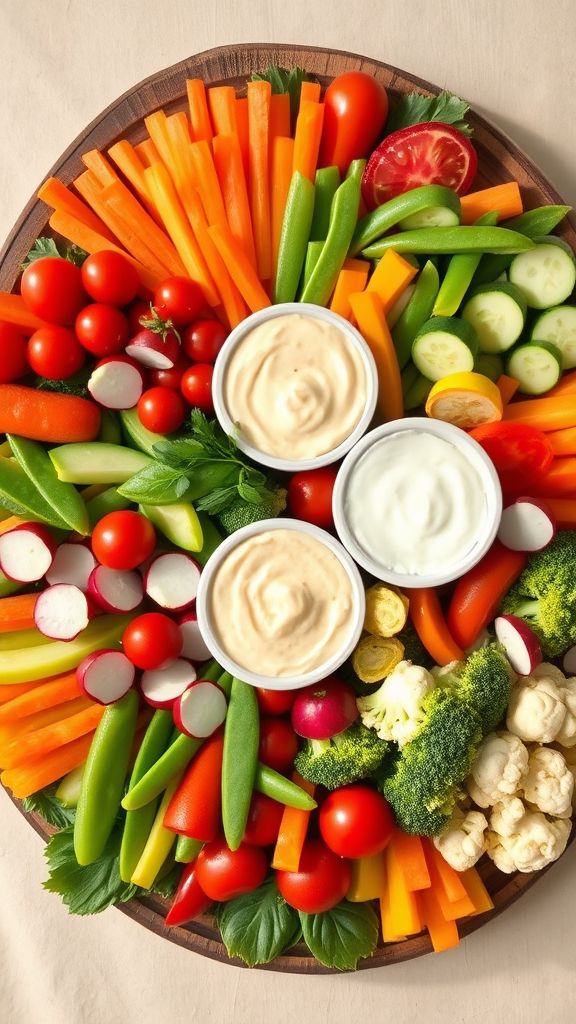
Spring Vegetable Crudités Platter is a colorful and fresh way to enjoy the season’s best vegetables. It’s perfect for gatherings, parties, or just a nice snack at home. Pair these bite-sized delights with a tasty dip for a refreshing springtime treat!
Prep Time: 15 minutes
Total Time: 15 minutes
Servings: 6
Ingredients:
- 1 cup baby carrots
- 1 cup cherry tomatoes
- 1 cup cucumber, sliced
- 1 cup bell peppers, sliced (red, yellow, or green)
- 1 cup radishes, halved
- 1 cup snap peas
- 1 cup broccoli florets
- 1 cup cauliflower florets
- Hummus or ranch dressing for dipping
Instructions:
Begin by washing all of your vegetables thoroughly to remove any dirt or pesticides. After washing, dry them on a clean towel to ensure they’re crispy and fresh.
Next, prepare the vegetables for serving. Cut the cucumber into rounds, slice the bell peppers into strips, and halve the radishes. For the baby carrots, you can keep them whole, or you may slice them in half if they are large.
Then, arrange all the prepared vegetables on a large platter. Place the baby carrots, cherry tomatoes, cucumber slices, sliced bell peppers, halved radishes, snap peas, broccoli, and cauliflower in an organized way to make your platter colorful and inviting.
Finally, put the hummus or ranch dressing in small bowls and place them in the center of the platter. This makes it easy for everyone to dip their favorite vegetables into the tasty sauce.
Tips:
- You can add other vegetables like celery, asparagus, or even jicama for extra crunch and color.
- For a fun twist, you can sprinkle some herbs or spices on the vegetables before serving for added flavor.
- If you have leftovers, store the veggies in an airtight container in the refrigerator for up to 3 days.
Nutrition Facts:
- Calories: 80
- Total Fat: 4g
- Sodium: 150mg
- Total Carbohydrate: 11g
- Dietary Fiber: 3g
- Sugars: 4g
- Protein: 2g
3 Mini Caprese Skewers with Balsamic Drizzle
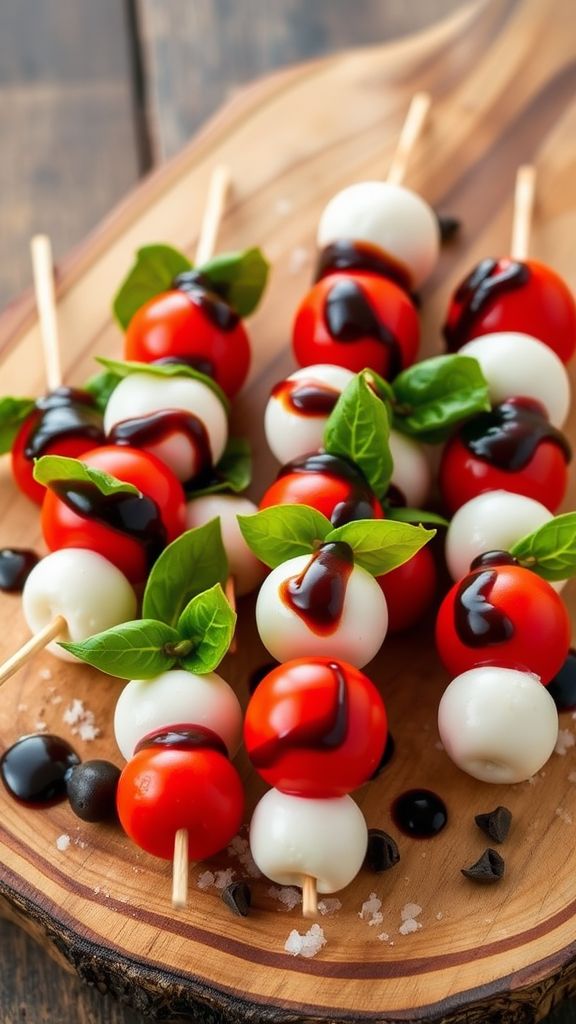
Mini Caprese Skewers with Balsamic Drizzle are a fun and tasty way to enjoy classic Italian flavors! These bite-sized treats are perfect for parties, picnics, or any festive occasion. With fresh ingredients and a delicious balsamic drizzle, they are sure to impress your guests.
Prep Time: 15 minutes
Total Time: 15 minutes
Servings: 12 skewers
Ingredients:
- 12 cherry tomatoes
- 12 fresh basil leaves
- 12 mozzarella balls (bocconcini)
- 1/2 cup balsamic glaze
- Salt and pepper to taste
- Skewers (6-inch bamboo skewers work well)
Instructions:
Start by gathering all your ingredients. Lay out the cherry tomatoes, mozzarella balls, fresh basil leaves, and skewers on a clean surface. This will make assembly easier.
Next, take one skewer and thread a cherry tomato onto it. Follow that with a basil leaf, then a mozzarella ball. Repeat this process until you’ve used all the ingredients or filled up your skewers.
Once all the skewers are assembled, arrange them on a serving platter. You can have them next to each other in a neat row for a fancy look.
Now it’s time to drizzle! Using a spoon, drizzle the balsamic glaze over the skewers. Make sure to cover them evenly for a burst of flavor in every bite.
Finally, sprinkle a little salt and pepper over the skewers to enhance the taste. Enjoy your Mini Caprese Skewers with Balsamic Drizzle right away or keep them in the fridge until serving!
Tips:
- For extra flavor, try adding a slice of avocado or a piece of prosciutto to each skewer.
- You can make the balsamic glaze at home by reducing balsamic vinegar on low heat until it thickens.
- These skewers can be made a few hours in advance. Just keep them covered in the fridge until you are ready to serve.
Nutrition Facts:
- Calories: 70 per skewer
- Protein: 4g
- Carbohydrates: 5g
- Fat: 3g
- Sodium: 90mg
4 Cheesy Spinach and Artichoke Dip

Cheesy Spinach and Artichoke Dip is a crowd-pleasing appetizer that brings a cheesy, creamy flavor to any gathering. It’s perfect for parties or family get-togethers and is super easy to make. Serve this warm, and your guests will want to go back for seconds!
Prep Time: 15 minutes
Cook Time: 25 minutes
Total Time: 40 minutes
Servings: 8
Ingredients:
- 1 cup frozen spinach, thawed and drained
- 1 cup canned artichoke hearts, chopped
- 1 cup cream cheese, softened
- 1 cup sour cream
- 1 cup shredded mozzarella cheese
- 1/2 cup grated Parmesan cheese
- 1 teaspoon garlic powder
- 1/2 teaspoon salt
- 1/2 teaspoon black pepper
- 1/4 teaspoon red pepper flakes (optional)
- Tortilla chips or toasted bread for serving
Instructions:
Preheat your oven to 375°F (190°C). This helps the dip to cook evenly and get bubbly when baked.
In a mixing bowl, combine the cream cheese and sour cream. Mix them well until smooth and creamy. It’s important to have the cream cheese softened, so it’s easy to blend.
Add the drained spinach, chopped artichokes, mozzarella cheese, and Parmesan cheese into the bowl. Then, sprinkle in the garlic powder, salt, black pepper, and red pepper flakes if you’re using them. Mix everything until well combined.
Transfer the mixture into a baking dish and spread it out evenly. This helps it cook uniformly.
Place the baking dish into the preheated oven and bake for about 25 minutes. You want the dip to be hot and bubbly, with a slight golden top.
Once it’s done, let it sit for a few minutes before serving. This dip is best enjoyed warm with tortilla chips or toasted bread for dipping.
Tips:
- For a creamier dip, use extra creamy cheese or add more sour cream.
- You can make this dip ahead of time. Just cover and refrigerate it before baking, then bake it right before serving.
- Add some extra flavor by mixing in fresh herbs like parsley or basil.
Nutrition Facts:
- Calories: 250 per serving
- Total Fat: 18g
- Saturated Fat: 10g
- Cholesterol: 45mg
- Sodium: 550mg
- Total Carbohydrates: 14g
- Dietary Fiber: 2g
- Sugars: 1g
- Protein: 7g
5 Savory Puff Pastry Easter Bunnies

These Savory Puff Pastry Easter Bunnies are not only adorable but also delicious! They’re perfect for your Easter gathering and are sure to impress your guests. With a flaky crust and a tasty filling, everyone will love these cute little bunnies.
Prep Time: 20 minutes
Cook Time: 25 minutes
Additional Time: 10 minutes
Total Time: 55 minutes
Servings: 12 bunnies
Ingredients:
- 1 sheet of puff pastry, thawed
- 1 cup cooked and shredded chicken
- 1/2 cup shredded mozzarella cheese
- 1/4 cup chopped spinach
- 1/4 cup cream cheese, softened
- 1 egg, beaten (for egg wash)
- Salt and pepper, to taste
- Flour, for dusting
Instructions:
Begin by preheating your oven to 400°F (200°C). Dust a clean surface with flour to prevent sticking. Roll out the puff pastry until it’s about 1/8 inch thick. Cut the pastry into bunny shapes using a cookie cutter.
In a mixing bowl, combine the shredded chicken, mozzarella cheese, chopped spinach, and cream cheese. Season with salt and pepper to taste. Stir until all ingredients are well mixed.
Spoon a small amount of the filling onto one half of each bunny shape, leaving some space around the edges. Fold the other half of the bunny over to cover the filling. Press around the edges with a fork to seal them well.
Place the bunnies on a baking sheet lined with parchment paper. Brush the tops with the beaten egg to give them a nice golden color as they bake.
Bake in the preheated oven for about 20-25 minutes, or until the bunnies are puffed and golden brown. Once done, let them cool for about 10 minutes before serving. They will be hot inside, so be careful!
Tips:
- Feel free to substitute the chicken with ham or vegetables for a different flavor.
- You can use cookie decorating icing to add fun details on the bunnies after baking.
- Serve them with a side of dipping sauce like ranch or marinara for added fun!
Nutrition Facts:
- Calories: 200 per bunny
- Protein: 8g
- Carbohydrates: 12g
- Fat: 12g
- Fiber: 1g
- Sugar: 1g
6 Honey Glazed Carrot Hummus
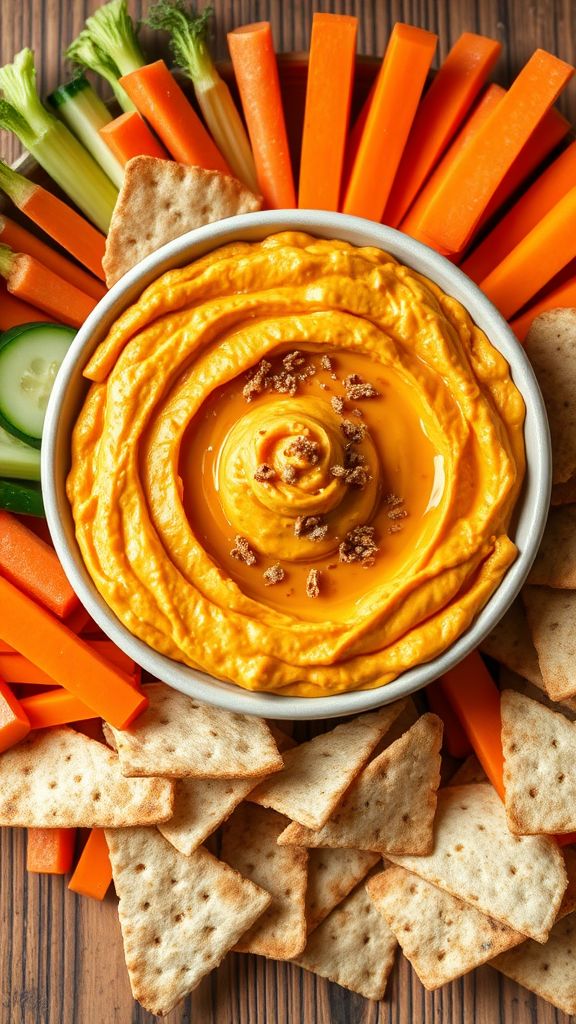
This Honey Glazed Carrot Hummus is a tasty twist on the classic dip. The sweetness of the honey combined with the earthy flavor of carrots makes for a delicious snack perfect for any occasion. Serve it with fresh veggies, pita chips, or spread it on sandwiches for an extra zing!
Prep Time: 10 minutes
Total Time: 10 minutes
Servings: 4-6
Ingredients:
- 1 cup cooked and cooled carrots (about 2 medium-sized carrots)
- 1 can (15 oz) chickpeas, drained and rinsed
- 3 tablespoons tahini
- 2 tablespoons honey
- 2 tablespoons olive oil
- 1 tablespoon lemon juice
- 1 teaspoon ground cumin
- Salt and pepper to taste
- Water (as needed for consistency)
Instructions:
Start by cooking the carrots until they are tender. You can steam or boil them for about 10 minutes. Once the carrots are soft, drain and let them cool.
In a blender or food processor, combine the cooked carrots, chickpeas, tahini, honey, olive oil, lemon juice, and ground cumin. Blend the mixture until it’s smooth and creamy.
If the hummus is too thick, add a little water a tablespoon at a time until you reach your desired consistency. Be sure to taste your hummus and add salt and pepper as needed.
Once everything is well blended, transfer the hummus to a bowl. You can drizzle a little extra honey or olive oil on top for a beautiful presentation.
Serve the hummus with fresh veggies, pita chips, or your favorite dippers.
Tips:
- For added flavor, roast the carrots in the oven with a little olive oil and salt before blending.
- You can adjust the sweetness by adding more or less honey to your taste.
- Store any leftovers in an airtight container in the fridge for up to 5 days.
Nutrition Facts:
- Calories: 150
- Protein: 5g
- Carbohydrates: 25g
- Fat: 5g
- Fiber: 6g
- Sugar: 7g
7 Shrimp Cocktail with Zesty Lemon Sauce
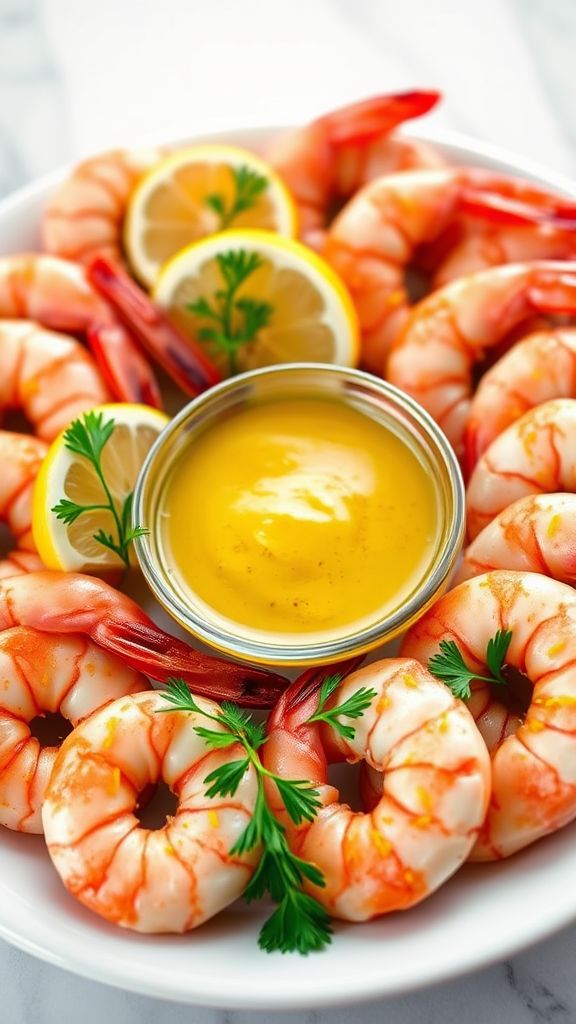
Shrimp Cocktail with Zesty Lemon Sauce is a delightful and refreshing appetizer perfect for any gathering. The bright lemon sauce adds a tangy kick that complements the succulent shrimp beautifully. Simple to prepare, this dish is sure to impress your guests!
Prep Time: 15 minutes
Total Time: 15 minutes
Servings: 4
Ingredients:
- 1 pound large shrimp, peeled and deveined
- 1 lemon, juiced and zested
- 2 tablespoons olive oil
- 1 tablespoon Dijon mustard
- 1 tablespoon Worcestershire sauce
- 1 teaspoon hot sauce (optional)
- Salt and pepper, to taste
- Fresh parsley, for garnish
Instructions:
First, prepare a pot of salted water and bring it to a boil. Once boiling, add the shrimp and cook for about 2-3 minutes, or until they turn pink and opaque. Be careful not to overcook them.
Next, drain the shrimp and place them in a bowl of ice water to stop the cooking process. Let them cool for a few minutes before draining again.
In another bowl, prepare the zesty lemon sauce. Combine the lemon juice, lemon zest, olive oil, Dijon mustard, Worcestershire sauce, and hot sauce (if using). Whisk the mixture well until it’s smooth.
Now, season the shrimp with salt and pepper. You can either toss the shrimp in the sauce or serve the sauce on the side for dipping.
Finally, arrange the shrimp on a serving dish and garnish with fresh parsley. Your Shrimp Cocktail with Zesty Lemon Sauce is ready to enjoy!
Tips:
- For extra flavor, let the shrimp marinate in the lemon sauce for about 10 minutes before serving.
- If you prefer, you can add other spices or herbs to the sauce for a personal touch.
- Serve with lemon wedges on the side for an additional dose of citrus.
Nutrition Facts:
- Calories: 150
- Protein: 24g
- Fat: 5g
- Carbohydrates: 2g
- Sodium: 300mg
- Cholesterol: 150mg
8 Easter Egg Salad Lettuce Wraps
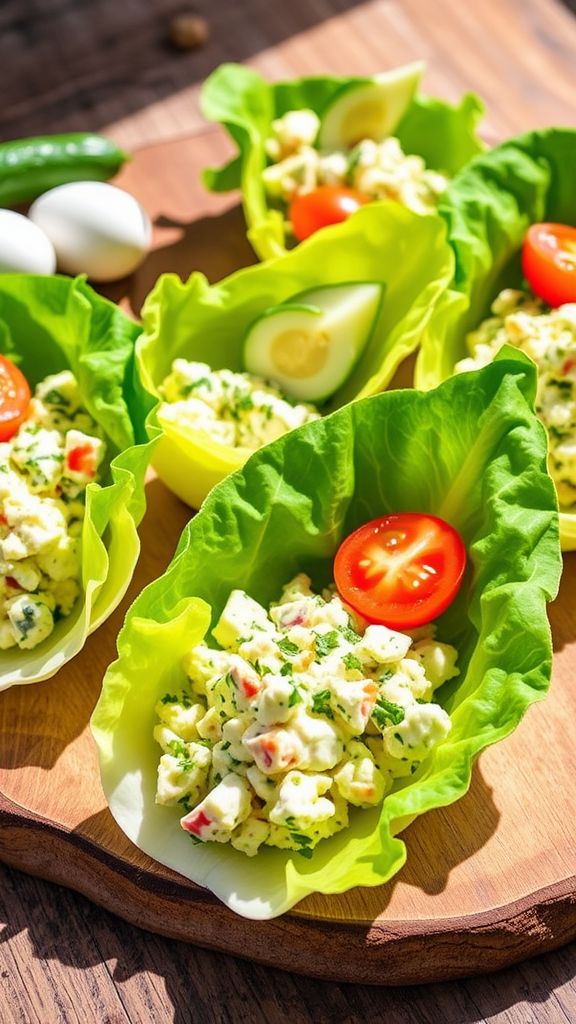
Easter Egg Salad Lettuce Wraps are a fun and light way to celebrate the holiday. This tasty dish combines eggs with fresh ingredients, all wrapped up in crunchy lettuce leaves. Perfect for a spring gathering, these wraps will delight your family and friends!
Prep Time: 15 minutes
Total Time: 15 minutes
Servings: 4
Ingredients:
- 4 large hard-boiled eggs, chopped
- 1/4 cup mayonnaise
- 1 tablespoon Dijon mustard
- 1 tablespoon fresh dill, chopped (or 1 teaspoon dried dill)
- 1 tablespoon fresh chives, chopped
- Salt and pepper to taste
- 8-10 large romaine lettuce leaves
- 1/2 cup cherry tomatoes, halved (optional)
- 1/4 cup cucumber, diced (optional)
Instructions:
Start by peeling the hard-boiled eggs and chopping them into small pieces. Place the chopped eggs into a mixing bowl.
Next, add mayonnaise, Dijon mustard, dill, and chives to the bowl. Gently mix everything together until well combined. Be careful not to mash the eggs too much; you want some chunks for texture.
Now, season the egg salad with salt and pepper to your liking. Give it one last gentle stir to mix in the seasoning.
Take your romaine lettuce leaves and carefully wash them. Pat them dry so your wraps won’t be soggy.
To assemble, spoon a generous amount of the egg salad into the center of each lettuce leaf. If desired, add some cherry tomatoes and cucumber on top for extra freshness.
Finally, fold the lettuce leaves around the filling like a taco, and they’re ready to serve!
Tips:
- For extra crunch, try adding some diced celery or bell peppers to the egg salad.
- Make the egg salad a few hours in advance and chill it in the fridge for the best flavor.
- Serve with a side of extra veggies or chips for a complete snack!
Nutrition Facts:
- Calories: 160 per serving
- Protein: 10g
- Fat: 12g
- Carbohydrates: 5g
- Fiber: 1g
- Sugar: 1g
9 Stuffed Mushroom Caps with Goat Cheese
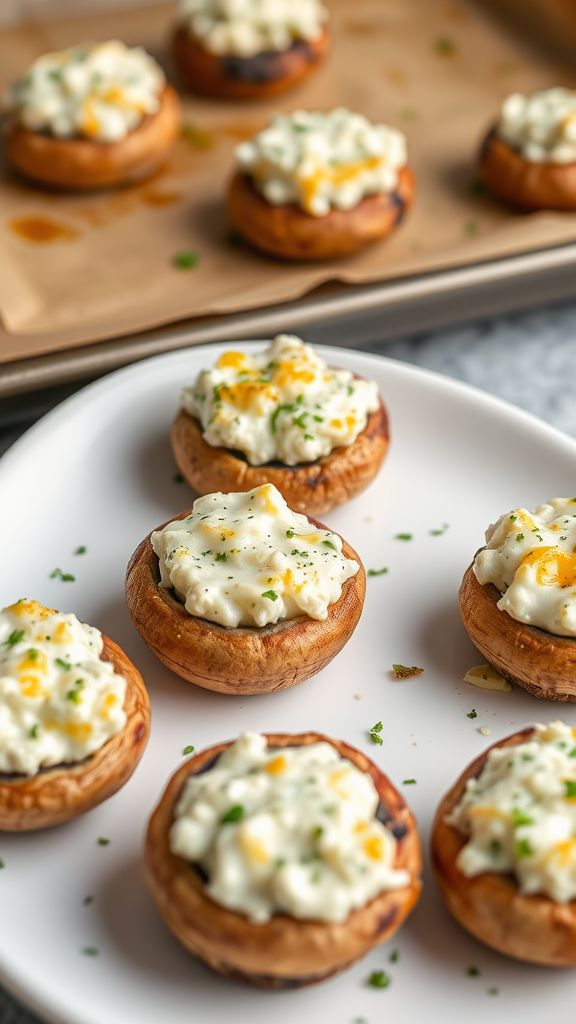
Stuffed Mushroom Caps with Goat Cheese are the perfect combination of earthy flavors and creamy goodness. These bite-sized delights are easy to make and are sure to impress your guests during any occasion. Let’s whip up this delicious appetizer!
Prep Time: 15 minutes
Cook Time: 20 minutes
Total Time: 35 minutes
Servings: 4
Ingredients:
- 12 large mushroom caps
- 4 oz goat cheese, softened
- 1/4 cup cream cheese, softened
- 1/4 cup bread crumbs
- 2 cloves garlic, minced
- 2 tablespoons fresh parsley, chopped
- 1 tablespoon olive oil
- Salt and pepper to taste
Instructions:
First, preheat your oven to 375°F (190°C). This will ensure that your mushrooms cook evenly and get nice and hot.
Next, clean the mushroom caps gently with a damp cloth. Remove the stems and chop them finely. Set the caps aside for later.
In a mixing bowl, combine the goat cheese, cream cheese, chopped mushroom stems, bread crumbs, garlic, and parsley. Mix everything together until it’s well combined. This will create your cheesy stuffing.
Add a pinch of salt and pepper to the mixture. Stir again to make sure the seasoning is even. Taste it if you want to, to see if it needs more flavor.
Now, take a spoon and fill each mushroom cap with the creamy filling. Make sure to pack it in well so it doesn’t fall out during baking.
Drizzle a little bit of olive oil over the stuffed mushrooms for added flavor. Arrange them on a baking sheet lined with parchment paper for easy cleanup.
It’s time to bake! Place the baking sheet in the preheated oven and bake for 20 minutes. You want the tops to be golden and bubbly.
After 20 minutes, take the mushrooms out of the oven and let them cool for a few minutes. Serve them warm and enjoy these tasty bites!
Tips:
- You can add different herbs like thyme or chives for extra flavor.
- For a little crunch, sprinkle some extra bread crumbs on top before baking.
- If you like a bit of spice, consider adding red pepper flakes to the stuffing mixture.
Nutrition Facts:
- Calories: 150 per serving
- Total Fat: 10g
- Saturated Fat: 4g
- Cholesterol: 25mg
- Sodium: 150mg
- Total Carbohydrates: 10g
- Dietary Fiber: 1g
- Sugars: 1g
- Protein: 5g
10 Bacon-Wrapped Asparagus Bundles
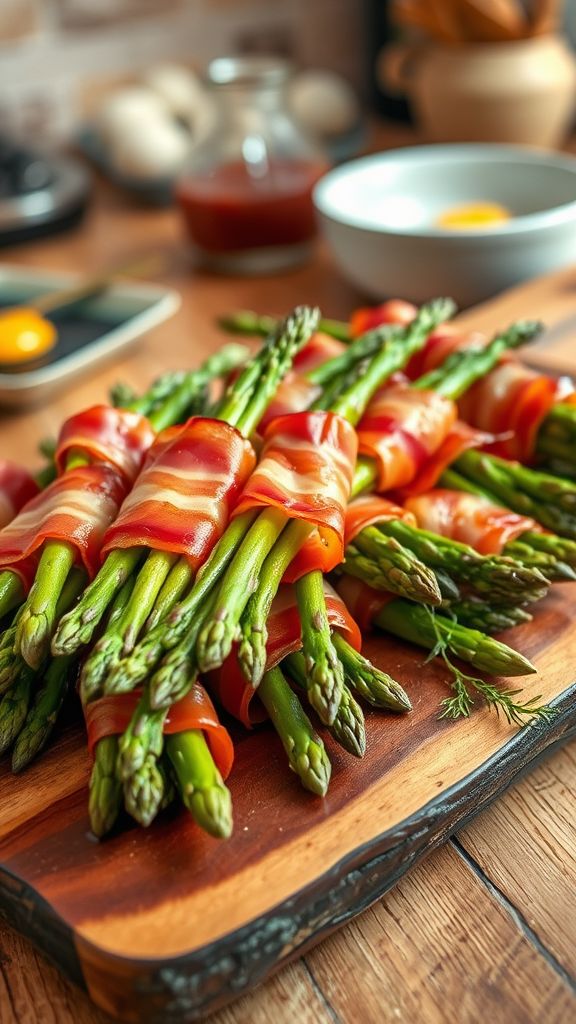
Bacon-Wrapped Asparagus Bundles are the perfect appetizer for any gathering! They combine crispy bacon with tender asparagus in a deliciously savory bite. These bundles are sure to impress your friends and family.
Prep Time: 10 minutes
Cook Time: 20 minutes
Additional Time: 5 minutes
Total Time: 35 minutes
Servings: 4
Ingredients:
- 1 pound of fresh asparagus, trimmed
- 8 slices of bacon
- 2 tablespoons of olive oil
- 1 teaspoon of garlic powder
- 1 teaspoon of black pepper
- Salt to taste
Instructions:
Start by preheating your oven to 400°F (200°C). Lay out a baking sheet and line it with aluminum foil for easier cleanup later.
Next, prepare your asparagus. Trim the ends of the stalks if you haven’t done so already. They should be about 5-6 inches long.
Take each slice of bacon and cut it in half. Wrap one half of bacon around each asparagus stalk. Make sure the bacon covers the asparagus well.
Place the wrapped asparagus bundles onto the prepared baking sheet. Drizzle them with olive oil and sprinkle the garlic powder, black pepper, and salt over them.
Now, bake the bundles in the preheated oven for about 15-20 minutes. Keep an eye on them, and remove them when the bacon is crispy and cooked through.
After removing from the oven, let the bundles rest for about 5 minutes. This will help them cool slightly and allow the flavors to meld together before serving.
Tips:
- For extra flavor, try adding a sprinkle of Parmesan cheese on top before baking.
- You can substitute turkey bacon for a lighter version of this recipe.
- Pair these bundles with a dipping sauce like ranch or balsamic glaze for added taste.
Nutrition Facts:
- Calories: 250 per serving
- Total Fat: 18g
- Saturated Fat: 5g
- Cholesterol: 30mg
- Sodium: 450mg
- Total Carbohydrates: 6g
- Dietary Fiber: 2g
- Sugars: 1g
- Protein: 16g
11 Sweet Pea and Mint Crostini
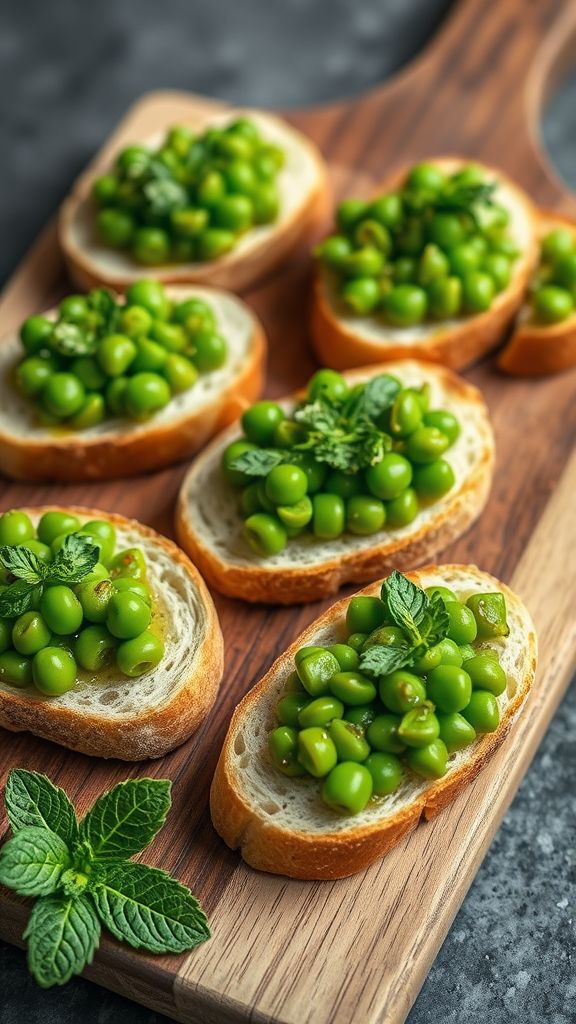
Sweet Pea and Mint Crostini is a delicious and easy-to-make appetizer perfect for any gathering! It’s a wonderful way to enjoy fresh flavors and a beautiful splash of green on your table. This crunchy, creamy bite-sized treat is sure to impress your friends and family.
Prep Time: 15 minutes
Total Time: 15 minutes
Servings: 12
Ingredients:
- 1 cup fresh or frozen peas, thawed
- 1 tablespoon fresh mint leaves, chopped
- 2 tablespoons cream cheese, softened
- 1 tablespoon lemon juice
- 12 pieces crostini or toasted baguette slices
- Salt and pepper, to taste
- Optional: Olive oil for drizzling
Instructions:
First, start by preparing the peas. If you are using frozen peas, thaw them in warm water and drain. Next, in a medium bowl, combine the peas, chopped mint, cream cheese, and lemon juice. Use a fork to mash everything together until it’s mostly smooth but still a bit chunky.
Then, taste your mixture and season it with salt and pepper according to your preference. Mix well to ensure the seasoning is evenly distributed.
Once your pea mixture is ready, it’s time to assemble the crostini. Take a spoonful of the mixture and spread it on each piece of crostini. Make sure to cover the bread well to enjoy the flavors in every bite. If you’d like, drizzle a little olive oil over the top for added richness.
Finally, serve the Sweet Pea and Mint Crostini fresh. This delightful appetizer is best enjoyed right away to keep the crostini crispy!
Tips:
- For added flavor, you can sprinkle some feta cheese or parmesan on top before serving.
- If you want a smoother spread, you can blend the peas and mint in a food processor.
- Experiment by adding other herbs like basil or chives for a twist!
Nutrition Facts:
- Calories: 120
- Protein: 5g
- Fat: 4g
- Carbohydrates: 18g
- Fiber: 2g
- Sugar: 1g
12 Caprese Pasta Salad Cups
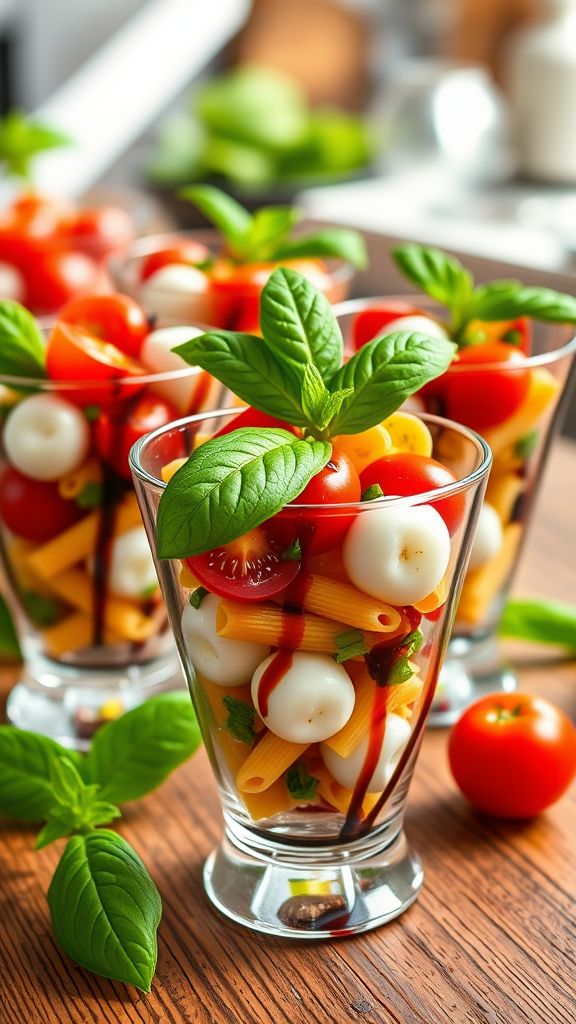
These Caprese Pasta Salad Cups are a fun and delicious way to enjoy a classic salad in a handy little serving. Made with pasta, fresh vegetables, and a hint of balsamic, these cups are perfect for parties or family gatherings. They are easy to make and add a burst of flavor to your table!
Prep Time: 15 minutes
Total Time: 15 minutes
Servings: 12
Ingredients:
- 2 cups cooked pasta (like bowtie or rotini)
- 1 cup cherry tomatoes, halved
- 1 cup fresh mozzarella balls
- 1/2 cup fresh basil leaves, chopped
- 1/4 cup balsamic glaze
- 2 tablespoons olive oil
- Salt and pepper to taste
- 12 small cups or serving bowls
Instructions:
Start by cooking your pasta according to the package instructions. Make sure it’s al dente so it holds up in the cups. Once cooked, drain the pasta and let it cool.
In a large mixing bowl, combine the cooled pasta, halved cherry tomatoes, fresh mozzarella balls, and chopped basil leaves. This mixture is where you’ll get a lot of flavor.
Next, drizzle the balsamic glaze and olive oil over the pasta salad mix. Gently toss everything together, and seasoning it with salt and pepper to your liking.
Once everything is combined evenly, take your small cups and fill each one with the Caprese pasta salad. You can pack them tightly, so they look full and inviting.
Finally, you can drizzle a little extra balsamic glaze on top of each cup for decoration if you wish. Serve immediately or refrigerate for a short time if you prefer them chilled.
Tips:
- Make sure to cook your pasta al dente for the best texture.
- You can add other ingredients like avocado or cucumber for extra flavor.
- If you want to make these cups ahead of time, prepare and refrigerate but add the balsamic glaze right before serving.
Nutrition Facts:
- Calories: 150 per cup
- Fat: 9g
- Carbohydrates: 14g
- Protein: 5g
- Sugar: 2g
- Fiber: 1g
13 Radish and Butter Bites on Rye
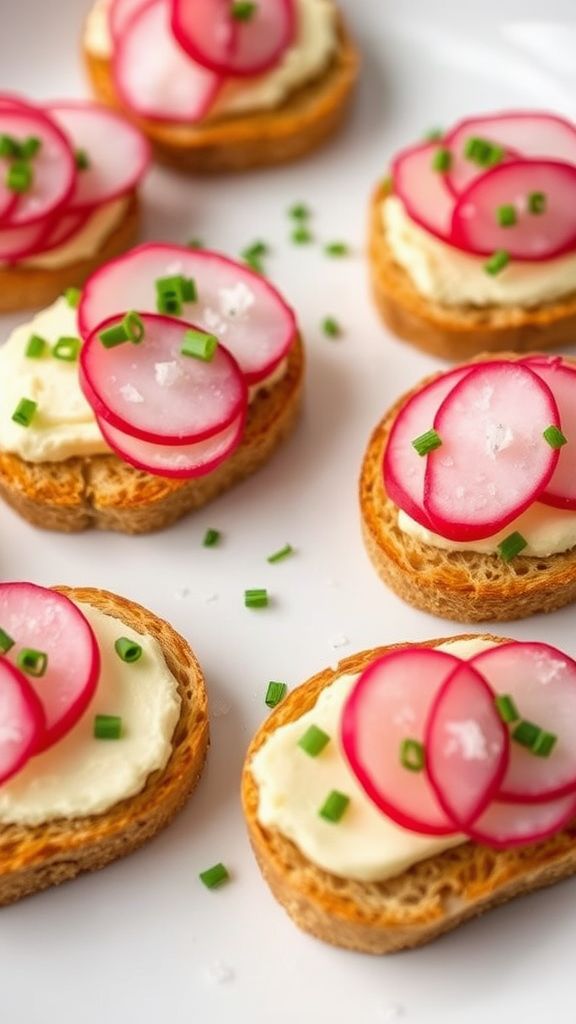
These Radish and Butter Bites on Rye are a simple and tasty appetizer that will impress your guests. With a mix of fresh radishes and creamy butter on hearty rye bread, it’s a perfect combination for any gathering. Let’s get started!
Prep Time: 10 minutes
Total Time: 10 minutes
Servings: 4
Ingredients:
- 8 slices of rye bread
- 4 tablespoons of unsalted butter, softened
- 1 bunch of fresh radishes, thinly sliced
- Salt to taste
- Fresh herbs (like chives or parsley) for garnish, optional
Instructions:
Begin by laying out the slices of rye bread on a clean cutting board or plate. Take the softened butter and spread about 1 tablespoon evenly over each slice of bread. Make sure the butter is spread right to the edges to enhance the flavor.
Next, take the thinly sliced radishes and arrange them on top of the buttered bread. You can make it look pretty by overlapping the slices or creating a nice pattern. Sprinkle a little salt over the radishes to boost their flavor.
If you want to add some color and freshness, chop some fresh herbs like chives or parsley. Sprinkle these herbs over the radishes for a finishing touch.
Finally, cut each slice into quarters or triangles for easy eating. Serve your Radish and Butter Bites on Rye on a platter and enjoy!
Tips:
- You can use different types of bread like sourdough or pumpernickel for a change.
- Try adding a squeeze of lemon juice to the radishes for extra tanginess.
- These bites are best enjoyed fresh, so prepare them just before serving.
Nutrition Facts:
- Calories: 150 per serving
- Total Fat: 10g
- Saturated Fat: 6g
- Cholesterol: 20mg
- Sodium: 150mg
- Total Carbohydrates: 15g
- Dietary Fiber: 2g
- Sugars: 1g
- Protein: 2g
14 Creamy Avocado Deviled Eggs
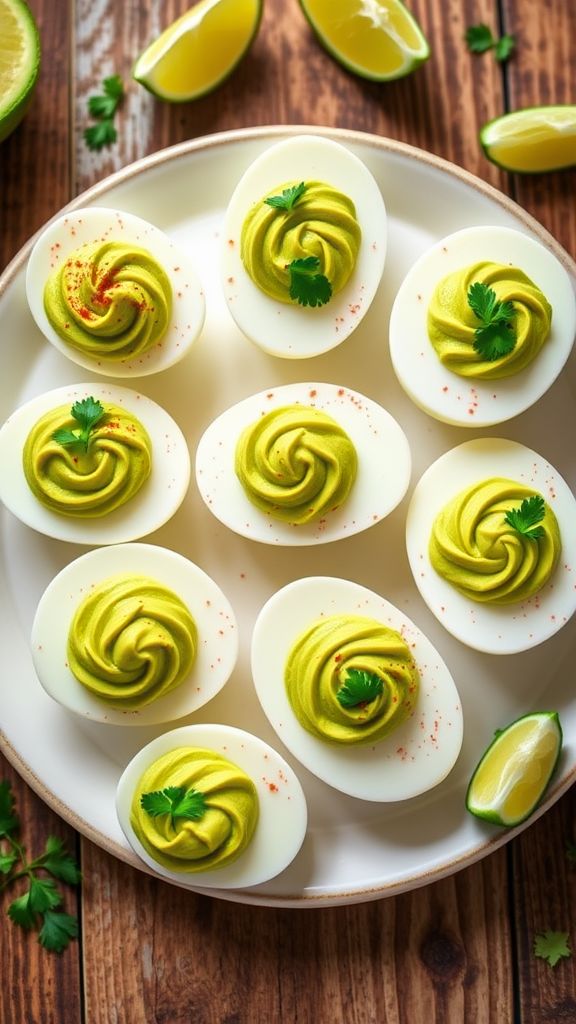
Creamy Avocado Deviled Eggs are a tasty twist on the classic recipe. The blend of creamy avocado and zesty seasonings makes these deviled eggs exceptionally delightful. They are perfect for your next gathering or Easter brunch!
Prep Time: 10 minutes
Total Time: 10 minutes
Servings: 6
Ingredients:
- 6 large eggs
- 1 ripe avocado
- 1 tablespoon lime juice
- 1 tablespoon mayonnaise
- 1 teaspoon Dijon mustard
- Salt and pepper to taste
- Paprika for garnish
- Fresh cilantro for garnish (optional)
Instructions:
Start by boiling the eggs. Place the eggs in a pot and cover them with cold water. Bring the water to a boil over medium-high heat. Once boiling, remove the pot from heat and cover it. Let the eggs sit for 12 minutes to hard boil.
After the 12 minutes, transfer the eggs to a bowl of ice water. Let them cool for about 5 minutes. This makes them easier to peel. Once cool, peel the eggs and slice them in half lengthwise.
Carefully scoop out the yolks into a mixing bowl. Add the ripe avocado, lime juice, mayonnaise, Dijon mustard, salt, and pepper. Use a fork to mash and mix everything together until it’s smooth and creamy.
Spoon or pipe the avocado mixture back into the egg white halves. You can use a piping bag for a nicer presentation or just a spoon. Sprinkle paprika on top for a pop of color, and add fresh cilantro if you like.
Tips:
- Make sure your avocado is ripe for the best flavor and creaminess.
- You can adjust the lime juice to your taste; add more if you like it tangy!
- These deviled eggs are best served fresh but can be made a few hours in advance. Just keep them in the fridge until serving.
Nutrition Facts:
- Calories: 120
- Protein: 6g
- Carbohydrates: 7g
- Fat: 10g
- Fiber: 2g
- Sodium: 100mg
15 Antipasto Skewers with a Twist
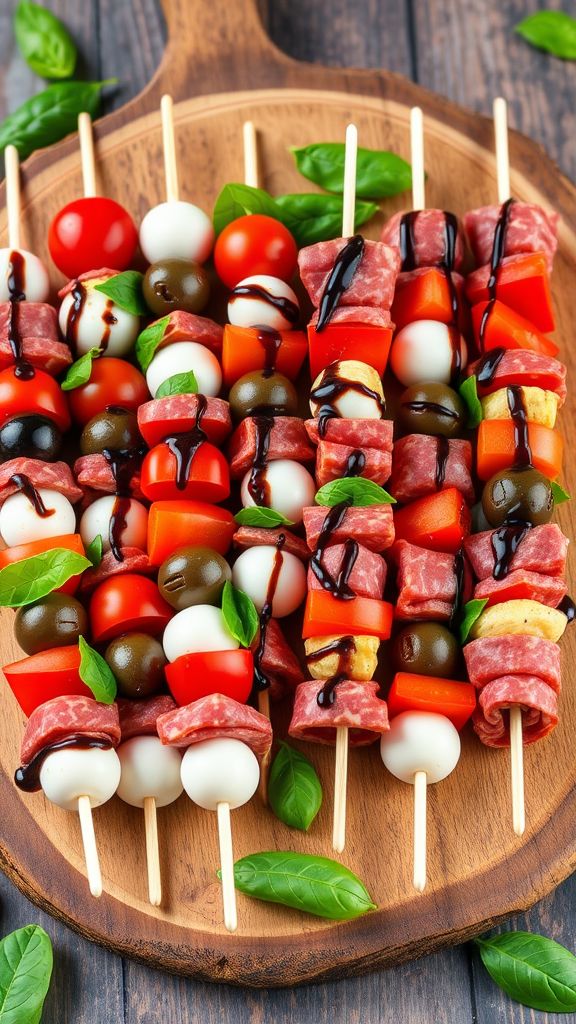
Antipasto skewers are a fun and easy way to enjoy a variety of flavors in a bite-sized treat. These skewers are simple to assemble and pack a punch with every bite. With a twist on classic ingredients, they will impress your guests at any gathering!
Prep Time: 15 minutes
Total Time: 15 minutes
Servings: 12 skewers
Ingredients:
- 12 bamboo skewers
- 12 cherry tomatoes
- 12 mozzarella balls
- 12 slices of salami, folded
- 12 olives (green or black)
- 1 red bell pepper, cut into squares
- Fresh basil leaves
- 2 tablespoons balsamic glaze
- Salt and pepper to taste
Instructions:
First, gather all your ingredients on a clean surface. This will make assembling the skewers quicker and easier.
Next, take a bamboo skewer and start by sliding a cherry tomato onto it. Follow this with a mozzarella ball.
Then, add a folded slice of salami and an olive. Make sure to thread the ingredients snugly together for a great presentation.
Continue by adding a square of red bell pepper next, followed by a fresh basil leaf. This combination adds a lot of color and flavor!
Repeat this process on each skewer until you have 12 delicious antipasto skewers ready to go.
Finally, drizzle balsamic glaze over the skewers and sprinkle with a little salt and pepper. Enjoy them fresh or chill them in the fridge for a bit before serving!
Tips:
- You can substitute salami with prosciutto or cooked ham for a different taste.
- Feel free to add other ingredients like artichoke hearts or pickles for extra variety.
- If you make them ahead of time, keep them refrigerated until you’re ready to serve.
Nutrition Facts:
- Calories: 150 per skewer
- Protein: 5g
- Carbohydrates: 4g
- Fat: 10g
- Sodium: 300mg
16 Beet and Goat Cheese Salad Bites
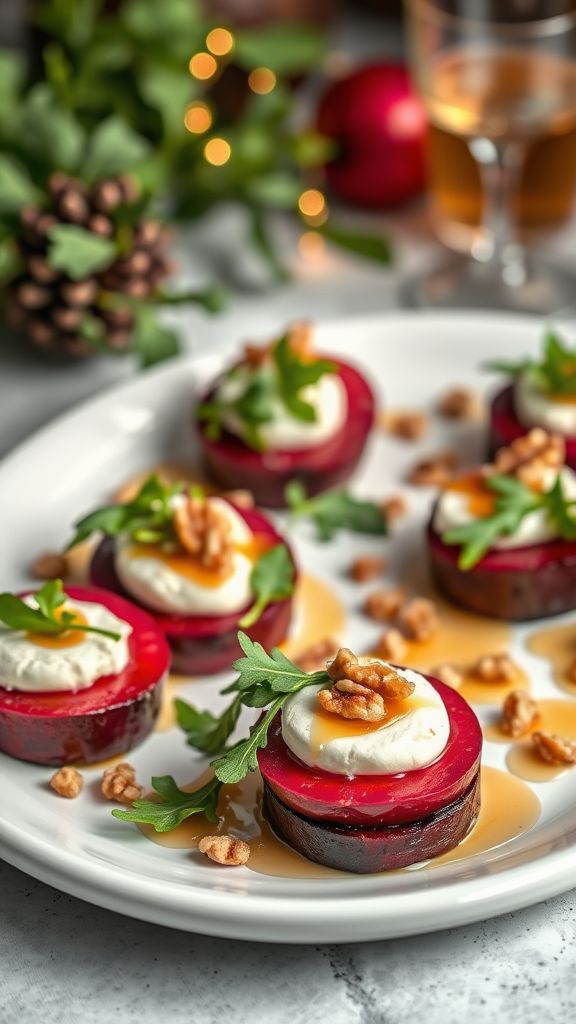
These Beet and Goat Cheese Salad Bites are a delightful treat perfect for your next gathering. They are colorful, tasty, and super easy to make. This unique combination of sweet beets and creamy goat cheese will surprise and please your guests!
Prep Time: 15 minutes
Additional Time: 30 minutes
Total Time: 45 minutes
Servings: 12
Ingredients:
- 3 medium-sized beets
- 4 ounces goat cheese, softened
- 2 tablespoons olive oil
- 1 tablespoon balsamic vinegar
- Salt and pepper, to taste
- Fresh arugula or spinach leaves for garnish
- 1 tablespoon chopped walnuts (optional)
- Honey (for drizzling, optional)
Instructions:
First, start by cooking the beets. You can either boil them for about 30 minutes in water until they are tender or roast them in the oven at 400°F (200°C) wrapped in foil for around an hour. Once cooked, let them cool, then peel and slice them into 1/4-inch rounds.
Next, take a mixing bowl and combine the softened goat cheese, olive oil, and balsamic vinegar. Mix these ingredients well until smooth. You can add a pinch of salt and pepper to enhance the flavor.
Now, it’s time to assemble the bites! On each beet slice, place a small spoonful of the goat cheese mixture. You can stack multiple layers if you like, creating a mini tower.
Once assembled, arrange your salad bites on a serving platter. Garnish the bites with a few fresh arugula or spinach leaves to add a pop of color. If you’d like, sprinkle some chopped walnuts on top and drizzle with a hint of honey for a finishing touch.
Let the bites chill in the fridge for about 30 minutes before serving. This step allows all the flavors to meld together beautifully!
Tips:
- You can substitute goat cheese with feta cheese for a different flavor.
- Consider adding fresh herbs like basil or chives for an extra zing.
- For a unique twist, try adding a slice of apple or pear between the beet and cheese layers.
Nutrition Facts:
- Calories: 90 per serving
- Total Fat: 6g
- Saturated Fat: 2g
- Cholesterol: 10mg
- Sodium: 70mg
- Total Carbohydrates: 8g
- Dietary Fiber: 2g
- Sugars: 4g
- Protein: 2g
17 Mini Quiche Lorraine Muffins

Mini Quiche Lorraine Muffins are a perfect blend of creamy, savory goodness that everyone will love. These bite-sized treats are ideal for brunch, parties, or just a snack at home. Plus, they are simple to make and can be customized with your favorite ingredients!
Prep Time: 15 minutes
Cook Time: 20 minutes
Total Time: 35 minutes
Servings: 12 muffins
Ingredients:
- 6 large eggs
- 1 cup heavy cream
- 1 cup shredded Swiss cheese
- 1/2 cup cooked and crumbled bacon
- 1/4 cup finely chopped onions
- 1/4 teaspoon salt
- 1/4 teaspoon black pepper
- 1/4 teaspoon nutmeg
- 1 package (1 roll) refrigerated pie crusts
Instructions:
Start by preheating your oven to 375°F (190°C). This will ensure that your quiches cook evenly and get a nice golden color.
Next, take your refrigerated pie crusts and unroll them. Use a round cookie cutter or a glass to cut circles from the pie crust and press them into a greased muffin tin. Make sure to press the dough up the sides to form little cups.
In a bowl, whisk together the eggs and heavy cream until combined. Then, stir in the Swiss cheese, bacon, onions, salt, black pepper, and nutmeg. Mix it well to evenly distribute all the flavors.
Now, pour the egg mixture into each pie crust cup, filling them about three-quarters full. Be careful not to overfill, as the quiche will puff up while baking.
Place the muffin tin in the preheated oven and bake for about 20 minutes, or until the egg is set and the tops are lightly golden.
Once done, carefully remove the muffin tin from the oven. Allow the quiches to cool for a few minutes before gently popping them out. Serve warm or at room temperature, and enjoy!
Tips:
- Feel free to add other ingredients like spinach, mushrooms, or different cheeses to personalize your mini quiches.
- These muffins can be made ahead of time and stored in the fridge for a quick snack or breakfast.
- For a healthier version, you can use half-and-half instead of heavy cream and substitute turkey bacon for a lighter option.
Nutrition Facts:
- Calories: 212 per muffin
- Protein: 10g
- Fat: 16g
- Carbohydrates: 8g
- Fiber: 1g
- Cholesterol: 142mg
18 Cucumber and Dill Tea Sandwiches
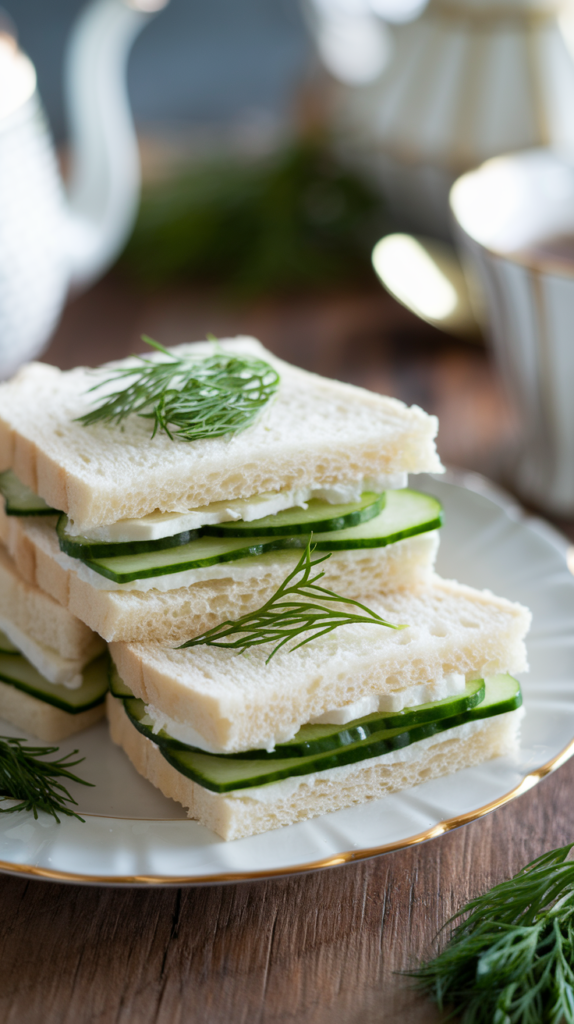
Cucumber and Dill Tea Sandwiches are a refreshing and light treat, perfect for any gathering or afternoon tea. The crisp cucumber paired with the fragrant dill creates a delightful flavor that’s sure to impress your guests. These sandwiches are easy to make and visually appealing, making them an ideal choice for special occasions.
Prep Time: 15 minutes
Total Time: 15 minutes
Servings: 8 sandwiches
Ingredients:
- 8 slices of white or whole wheat bread
- 1 medium cucumber, thinly sliced
- 4 oz cream cheese, softened
- 2 tablespoons fresh dill, chopped
- 1 tablespoon lemon juice
- Salt and pepper, to taste
- Butter, for spreading (optional)
Instructions:
Start by preparing the cream cheese spread. In a mixing bowl, combine the softened cream cheese, chopped dill, and lemon juice. Mix until everything is well blended and smooth. You can add a pinch of salt and pepper for extra flavor.
Next, lay out your slices of bread on a clean surface. If desired, you can spread a thin layer of butter on one side of each slice. This adds a nice richness to the sandwich but is optional.
Spread a generous layer of the cream cheese mixture on half of the slices of bread. Then, layer the thinly sliced cucumber on top of the cream cheese. Make sure to add enough slices for a good crunch in every bite.
Top each cucumber-covered slice with another slice of bread, cream cheese side down, to form a sandwich. Press down lightly to secure the filling.
Using a sharp knife, cut each sandwich into quarters or halves, depending on your preference. Arrange them on a platter and serve immediately, or refrigerate until ready to serve.
Tips:
- For added flavor, try using flavored cream cheese instead of plain.
- If you prefer a different herb, fresh parsley or chives also work well.
- These sandwiches are best served fresh so try to prepare them shortly before serving.
Nutrition Facts:
- Calories: 120 per sandwich
- Total Fat: 7g
- Saturated Fat: 4g
- Cholesterol: 20mg
- Sodium: 180mg
- Total Carbohydrates: 10g
- Dietary Fiber: 1g
- Sugars: 1g
- Protein: 3g