15 Spring Cookies Decorated That Are Absolutely Stunning
Spring deserves cookies that look just as pretty as the season itself — think hand-painted petals, pastel glazes, and delicate floral details that make you almost too happy to eat them.
From lemon buttercream daisies to speckled robin egg chocolates, every recipe in this list brings a little seasonal magic to your cookie tray. There’s something here for decorating beginners and seasoned bakers alike.
Bookmark this one — it’s the kind of list you’ll come back to for Easter, Mother’s Day, spring birthdays, or honestly any excuse to bake something beautiful.
1. Lemon Buttercream Daisy Sugar Cookies
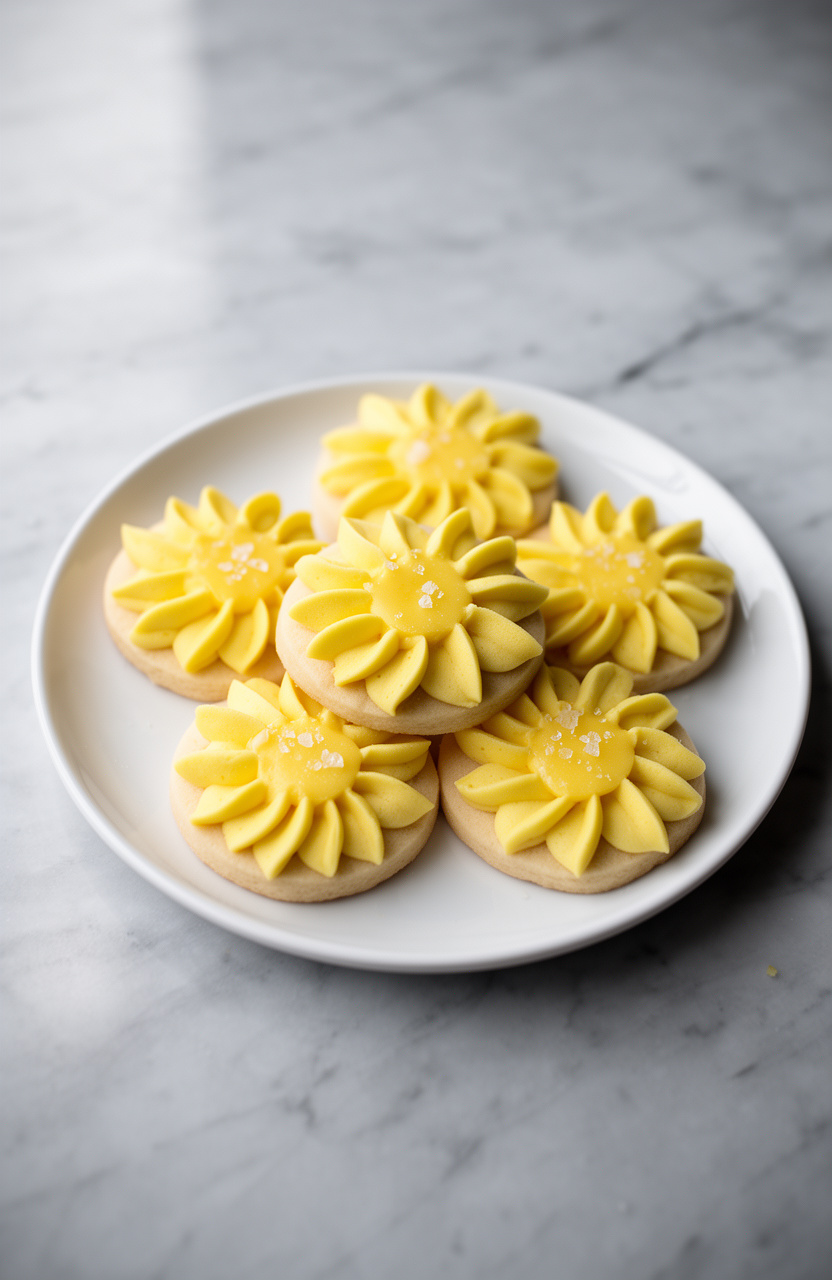
Combining dry ingredients first gives these daisy sugar cookies a tender, evenly textured base that holds its shape through baking. Softened butter, bright lemon buttercream, and a touch of sea salt balance the richness with just enough citrus sharpness.
Lemon Buttercream Daisy Sugar Cookies
Sugar Cookie Dough
Lemon Buttercream
Decoration
- 🔌Stand mixer or hand electric mixer
- 🥣Large mixing bowl
- 🥣Medium mixing bowl
- 🍴Daisy-shaped cookie cutter (3-inch)
- 🥧Baking sheets (2–3)
- 📄Parchment paper or silicone baking mats
- 🫙Rolling pin
- 📄Plastic wrap
- 🪜Wire cooling rack
- 🎂Piping bags
- 🍴Large open star piping tip (1M)
- 🍴Small round piping tip (#3 or #4)
- 🥄Rubber spatula
- 🔪Zester or microplane
- 🍴Citrus juicer
- 🪣Sifter or fine mesh strainer
- 🍴Ruler or cookie thickness guides
Combine Dry Ingredients
In a medium bowl, whisk together 2 3/4 cups all-purpose flour, 1 teaspoon baking powder, and 1/2 teaspoon fine sea salt. Set aside.
Cream Butter and Sugar
In the bowl of a stand mixer fitted with the paddle attachment (or using a hand mixer), beat 1 cup softened unsalted butter and 1 cup granulated sugar on medium-high speed for 3–4 minutes until pale, light, and fluffy. Scrape down the sides of the bowl as needed.
Add Wet Ingredients
Add 1 large egg, 2 teaspoons vanilla extract, 1 tablespoon lemon zest, and 1 tablespoon fresh lemon juice to the butter mixture. Mix on medium speed for 1–2 minutes until fully incorporated and smooth.
Mix in Flour
Reduce mixer speed to low and gradually add the flour mixture in three additions, mixing just until a soft dough forms and no dry streaks remain. Do not overmix.
The dough will be slightly soft but should hold its shape.
Chill the Dough
Divide the dough in half. Flatten each portion into a disk about 1-inch thick, wrap tightly in plastic wrap, and refrigerate for at least 2 hours or up to 48 hours.
Chilling is essential for clean cookie shapes.
Preheat the Oven
When ready to bake, preheat your oven to 350°F (175°C). Line 2–3 baking sheets with parchment paper or silicone baking mats and set aside.
Roll and Cut Cookies
Remove one disk of dough from the refrigerator. On a lightly floured surface, roll the dough out to an even 1/4-inch thickness using a rolling pin (use thickness guides for consistency).
Cut out daisy shapes using a 3-inch daisy-shaped cookie cutter, pressing firmly and straight down. Re-roll scraps once and cut additional cookies.
Place cut cookies 1 inch apart on the prepared baking sheets.
Bake the Cookies
Bake the cookies in the preheated oven for 10–12 minutes, until the edges are just set and the centers look barely done — they should not brown. The cookies will firm up as they cool.
Let cookies cool on the baking sheet for 5 minutes, then transfer to a wire rack to cool completely, at least 30 minutes, before frosting.
Beat the Butter
While the cookies cool, make the lemon buttercream. In the bowl of a stand mixer fitted with the paddle attachment, beat 1 cup softened unsalted butter on medium-high speed for 3 minutes until very pale and fluffy.
Add a pinch of salt and mix briefly.
Make the Buttercream
Reduce speed to low and gradually add 3 1/2 cups sifted powdered sugar, 1 cup at a time, mixing well after each addition. Once all the sugar is incorporated, add 3 tablespoons fresh lemon juice, 1 tablespoon lemon zest, and 1 teaspoon vanilla extract.
Increase speed to medium-high and beat for 2 minutes.
Finish and Tint Buttercream
Add 2–3 tablespoons heavy cream, one tablespoon at a time, beating on high speed for 1–2 minutes after each addition until the buttercream is light, fluffy, and easily spreadable. Taste and adjust lemon juice or sugar as desired.
Divide the buttercream: reserve about 1 cup for the yellow daisy centers and tint it with yellow gel food coloring. Leave the remaining buttercream white (or tint with white gel food coloring for a brighter finish) for the petals.
Decorate the Cookies
Fit one piping bag with a large open star tip (1M) and fill with the white buttercream. Fit a second piping bag with a small round tip (#3 or #4) and fill with the yellow buttercream.
Pipe white buttercream petals around the outer edge of each fully cooled cookie, following the daisy petal shapes. Then pipe a generous yellow buttercream rosette or swirl in the center of each daisy.
Immediately sprinkle yellow sanding sugar and yellow nonpareils over the centers for texture and sparkle.
Set and Store
Allow the decorated cookies to set at room temperature for 30 minutes before serving, so the buttercream firms slightly. Store cookies in a single layer in an airtight container at room temperature for up to 3 days, or refrigerate for up to 1 week.
Bring to room temperature before serving for the best flavor and texture.
Per serving (1 decorated cookie) — values are estimates
Trending on Amazon
2. Watercolor Tulip Royal Icing Cookies
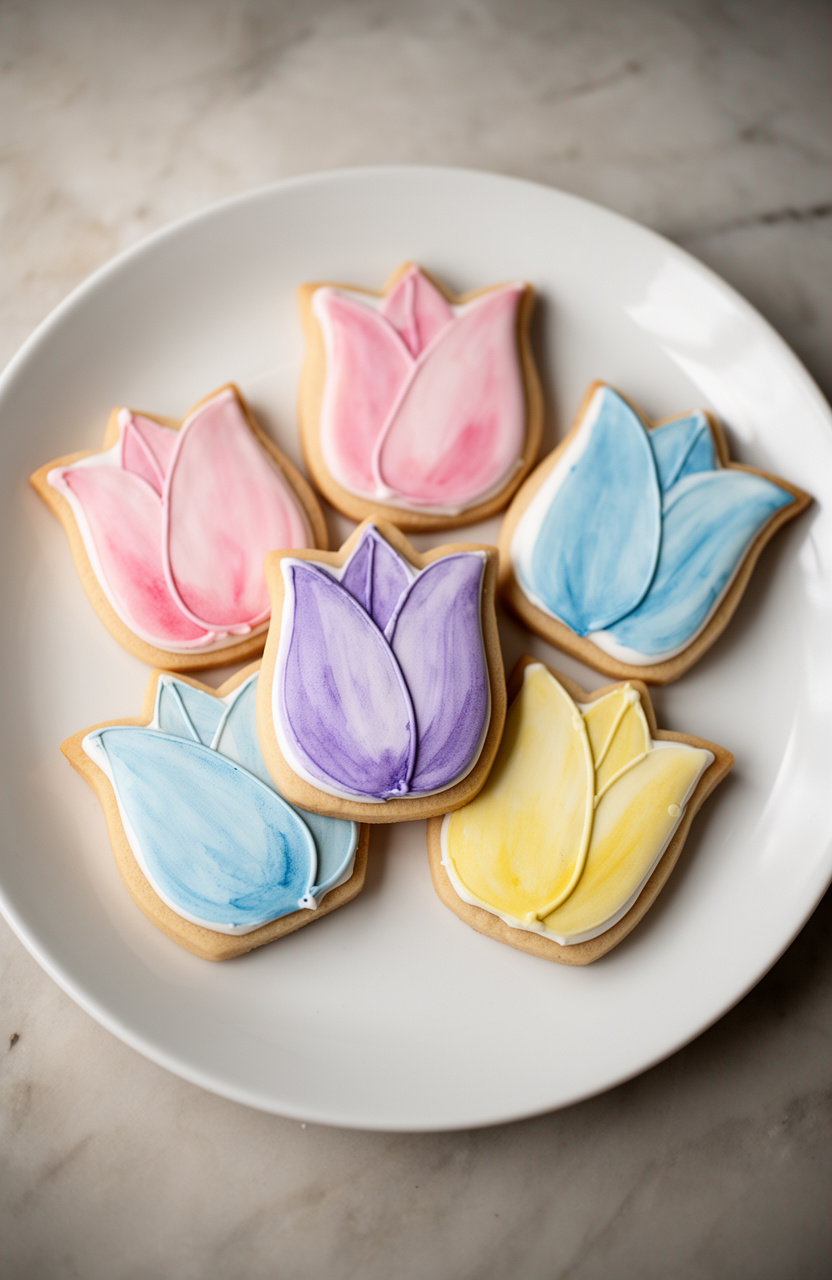
Creaming softened butter with sugar builds a rich, structured base for these tulip-shaped royal icing cookies, giving the dough a smooth, rollable consistency that holds clean edges after baking. The finished cookies contrast a firm, lightly crisp bite with a delicate, hand-painted watercolor icing surface.
Watercolor Tulip Royal Icing Cookies
Sugar Cookies
Royal Icing
Watercolor Painting
- 🔌Stand mixer with paddle attachment
- 🥣Large mixing bowls
- 🍴Tulip-shaped cookie cutters (3-inch)
- 🫙Rolling pin with 1/4-inch guide rings
- 🥧Baking sheets (2 large)
- 📄Parchment paper or silicone baking mats
- 🪜Wire cooling racks
- 🎂Piping bags (6-8)
- 🍴Coupler sets
- 🍴PME #1.5 or #2 round piping tips
- 🍴Squeeze bottles with fine tips
- 🖌️Fine-tipped food-safe paint brushes (sizes 0, 2, and 4)
- 🍽️Small palette or ceramic plate for mixing colors
- 📄Plastic wrap
- 📍Toothpicks or scribe tools
- ⚖️Digital kitchen scale
- 🪣Sifter or fine mesh strainer
- 🥄Rubber spatulas
- 🫙Airtight containers for icing
Cream Butter Sugar
In a medium bowl, whisk together 2 3/4 cups (330g) all-purpose flour, 1/2 teaspoon baking powder, and 1/4 teaspoon fine sea salt. Set aside.
In the bowl of a stand mixer fitted with the paddle attachment, beat 1 cup (225g) softened unsalted butter and 3/4 cup (150g) granulated sugar on medium-high speed for 3 minutes until light and fluffy, scraping down the sides as needed.
Form Cookie Dough
Add 1 large egg, 1 1/2 teaspoons pure vanilla extract, and 1/2 teaspoon almond extract to the butter mixture. Mix on medium speed for 1 minute until fully incorporated.
Reduce mixer speed to low and gradually add the flour mixture in three additions, mixing just until no dry streaks remain. Do not overmix — the dough should be soft but not sticky.
Chill the Dough
Divide the dough into two equal portions. Flatten each into a 1-inch thick disc, wrap tightly in plastic wrap, and refrigerate for at least 2 hours or up to 48 hours.
Chilled dough is essential for clean-cut tulip shapes that hold their detail during baking.
Roll and Cut
Preheat your oven to 350°F (175°C). Line two baking sheets with parchment paper.
Remove one disc of dough from the refrigerator. On a lightly floured surface, roll the dough to exactly 1/4-inch thickness using a rolling pin with guide rings.
Cut out tulip shapes using a 3-inch tulip cookie cutter, pressing firmly and cleanly. Re-roll scraps once and cut additional cookies.
Place cut cookies 1 inch apart on prepared baking sheets.
Bake the Cookies
Bake the cookies in the preheated 350°F oven for 10 to 12 minutes, until the edges are just barely set and the centers look slightly underdone — they will firm up as they cool. Do not allow the edges to brown, as this can cause the royal icing to crack later.
Remove from the oven and let cookies cool on the baking sheet for 5 minutes before transferring to a wire rack to cool completely, at least 30 minutes.
Make Royal Icing
Prepare the royal icing base: In the bowl of a stand mixer fitted with the paddle attachment, combine 3 tablespoons (27g) meringue powder with 6 tablespoons (90ml) warm water. Beat on medium speed for 1 minute until foamy.
Add 4 cups (480g) sifted powdered sugar and 1/2 teaspoon clear vanilla extract. Beat on medium-high speed for 5 to 7 minutes until the icing is thick, glossy, bright white, and holds stiff peaks.
This is your stiff-consistency royal icing.
Tint and Thin Icing
Divide the stiff royal icing into portions. Reserve one large portion (about 1 cup) as white base icing.
Tint separate small portions with gel food coloring: deep pink, coral, soft purple, and forest green for the stem and leaf sections. For the watercolor base flood icing, thin the white portion with water added drop by drop, stirring gently, until it reaches a 10-second consistency — when you drag a knife through the surface, the line disappears in exactly 10 seconds.
Thin colored icings to the same consistency for flooding.
Outline the Cookies
Transfer stiff icing to piping bags fitted with PME #1.5 round tips for outlining. Transfer flood-consistency icing into squeeze bottles or piping bags.
Outline the tulip bloom portion of each cookie with white stiff icing, then outline the stem and leaf sections with green stiff icing. Allow outlines to dry for 15 minutes before flooding.
Flood and Wet-on-Wet
Flood the stem and leaf sections of each cookie with green flood icing, using a toothpick or scribe tool to spread the icing into corners and pop any air bubbles. Immediately flood the tulip bloom sections with white flood icing.
While the icing is still wet, drop small dots or thin lines of pink, coral, and purple flood icing onto the white base using a piping bag or toothpick. This wet-on-wet technique allows colors to blend seamlessly for the watercolor effect.
Create Watercolor Swirls
Using a clean toothpick or fine scribe tool, gently drag through the wet colored dots in sweeping petal-shaped strokes — working from the base of the tulip upward toward the petal tips. Alternate the direction of strokes to create soft, organic blending.
For a marble effect, make gentle S-curves through the colors. Work quickly, as the icing begins to set within 3 to 5 minutes.
Allow cookies to dry at room temperature uncovered for a minimum of 8 hours, or overnight.
Mix Petal Dust Paint
Once the base icing is completely dry and hard to the touch (after 8 hours), prepare the watercolor paint effect. On a small ceramic palette, mix pink, coral, and purple petal dust powders separately with a few drops of food-safe isopropyl alcohol or vodka to create a thin, translucent paint.
The alcohol evaporates quickly, leaving only the color behind without softening the icing surface.
Paint Watercolor Layers
Using a size 4 food-safe paintbrush, apply a light wash of diluted pink petal dust paint over the upper petals of each tulip, using loose, flowing brush strokes. Layer coral paint along the petal edges for depth.
Add soft purple shading at the base of the bloom where petals meet the stem. Use a size 2 brush for medium details and a size 0 brush for fine vein lines within the petals.
Build color gradually in thin layers, allowing each layer to dry for 2 to 3 minutes before adding the next.
Add Gold Accents
Using a dry size 0 brush dipped lightly into gold luster dust (no alcohol), gently dust the very tips of the tulip petals and along the center of each petal for a luminous shimmer accent. Brush away any excess dust with a clean dry brush.
Add thin green accent lines along the leaf veins using diluted green petal dust and a size 0 brush. Allow all painted details to dry completely for 20 to 30 minutes.
Finish and Store
For optional finishing details, pipe small white or ivory dots along the base of the tulip bloom using stiff icing and a PME #1.5 tip to simulate stamens. You may also pipe a thin green stem line detail over the dried green base.
Allow any final piped details to dry for 1 hour before packaging or serving. Store finished cookies in a single layer in an airtight container at room temperature for up to 10 days.
Per serving (1 decorated cookie) — values are estimates
Highly Recommended
3. Pastel Butterfly Shortbread Cookies
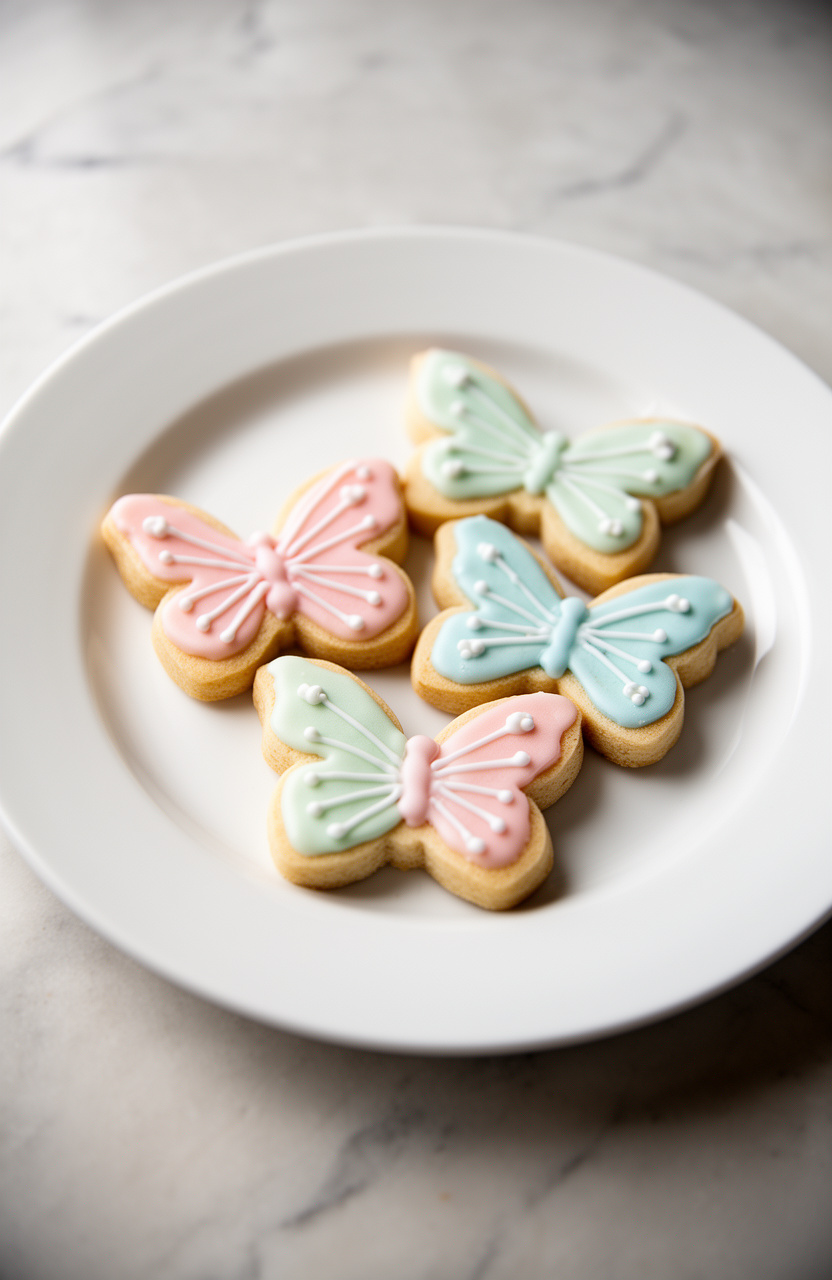
Butter and powdered sugar come together into a smooth, melt-in-your-mouth dough that bakes into delicate butterfly-shaped shortbreads with a fine, crumbly texture and soft pastel-tinted finish.
Pastel Butterfly Shortbread Cookies
Dough
Royal Icing
Coloring
Decoration
- 🔌Stand mixer or hand mixer with paddle attachment
- 🥣Large mixing bowl
- 🥣Medium mixing bowls (4–5 for icing colors)
- 🍴Butterfly-shaped cookie cutter (3-inch)
- 🫙Rolling pin
- 🥧Baking sheets (2 large)
- 📄Parchment paper or silicone baking mats
- 📄Plastic wrap
- 🪜Wire cooling rack
- 🎂Piping bags (4–5)
- 🍴Fine tip piping tips (#1 or #2)
- 🥄Small offset spatula
- 📍Toothpicks or scribe tool
- 🪣Sifter or fine mesh strainer
- 🍴Ruler or bench scraper
Combine Dry Ingredients
In a medium bowl, whisk together 2 1/4 cups all-purpose flour and 1/4 teaspoon fine sea salt. Set aside.
Cream Butter and Sugar
In the bowl of a stand mixer fitted with the paddle attachment (or using a hand mixer), beat 1 cup softened unsalted butter on medium speed for about 2 minutes until light and creamy. Add 1/2 cup sifted powdered sugar and continue beating on medium-high for another 2 minutes until fluffy and pale.
Add Extracts
Add 1 teaspoon pure vanilla extract and 1/2 teaspoon almond extract to the butter mixture. Mix on low until just combined, about 30 seconds.
Form the Dough
With the mixer on low speed, gradually add the flour-salt mixture in three additions, mixing just until the dough comes together and no dry streaks remain. Do not overmix — the dough should be soft but not sticky.
Chill the Dough
Turn the dough out onto a lightly floured surface and gently press it into a flat disc. Wrap tightly in plastic wrap and refrigerate for at least 2 hours, or up to overnight, until firm.
Preheat the Oven
When ready to bake, preheat your oven to 350°F (175°C). Line two large baking sheets with parchment paper or silicone baking mats.
Roll the Dough
Remove the chilled dough from the refrigerator and let it sit at room temperature for 5 minutes to soften slightly. On a lightly floured surface, roll the dough out to an even 1/4-inch thickness using a rolling pin.
Work quickly to keep the dough cold.
Cut the Cookies
Press a 3-inch butterfly-shaped cookie cutter firmly into the rolled dough and cut out as many butterflies as possible. Carefully transfer each cutout to the prepared baking sheets, spacing them about 1 inch apart.
Re-roll scraps once and cut additional cookies.
Chill Before Baking
Place the baking sheets with the cut cookies into the refrigerator for 10 minutes to firm up — this helps the cookies hold their shape during baking.
Bake the Cookies
Bake the cookies in the preheated 350°F oven for 12–14 minutes, or until the edges are just barely beginning to turn light golden and the centers appear set. They should look pale — do not overbake.
Rotate the pans halfway through baking for even results.
Cool Completely
Remove the baking sheets from the oven and allow the cookies to cool on the pans for 5 minutes. Then carefully transfer them to a wire cooling rack and let them cool completely, about 30 minutes, before decorating.
Make Royal Icing
Make the royal icing: In a large bowl, combine 2 1/2 cups sifted powdered sugar, 3 tablespoons meringue powder, 5–6 tablespoons warm water, and 1/2 teaspoon clear vanilla extract. Beat with a hand mixer on medium-high speed for 4–5 minutes until the icing is bright white, glossy, and holds stiff peaks.
This is your base icing.
Color the Icing
Divide the stiff royal icing evenly among 4–5 small bowls. Tint each bowl with a few drops of gel food coloring: one bowl pastel pink, one pastel lavender, one pastel yellow, and one pastel mint green.
Stir each until the color is uniform. Reserve a small amount of white icing if desired.
Thin and Fill Piping Bags
Thin each colored icing to a flood consistency by stirring in warm water, one teaspoon at a time, until the icing flows smoothly and a drizzled line disappears back into the surface within 10–12 seconds. Transfer each color to a separate piping bag fitted with a fine tip (#1 or #2).
Outline and Flood Cookies
To decorate, first outline the wings of each butterfly cookie with a thin border of your chosen pastel color, then immediately flood the inside of the wings with the same color, using a toothpick or scribe tool to spread the icing to the edges and pop any air bubbles. You can use one color per cookie or split the wings into two different pastel shades for a two-tone effect.
Add Wing Details
While the base icing is still wet, use contrasting pastel colors to pipe small dots, swirls, or delicate lines on the wings to mimic butterfly wing patterns. Gently drag a toothpick through the wet dots to create heart or feather shapes.
Work quickly before the base icing sets.
Add Decorations
Immediately scatter white pearlized sugar pearls and pastel rainbow sprinkles over the wet icing as desired. For an extra magical touch, lightly dust the dried cookies with edible luster dust using a dry brush once the icing has set.
Dry and Store
Allow the decorated cookies to dry and set completely at room temperature for at least 4–6 hours, or overnight, until the icing is fully hardened and no longer tacky. Do not stack the cookies until completely dry.
Store in an airtight container at room temperature for up to 1 week.
Per serving (2 cookies) — values are estimates
Recommended for You
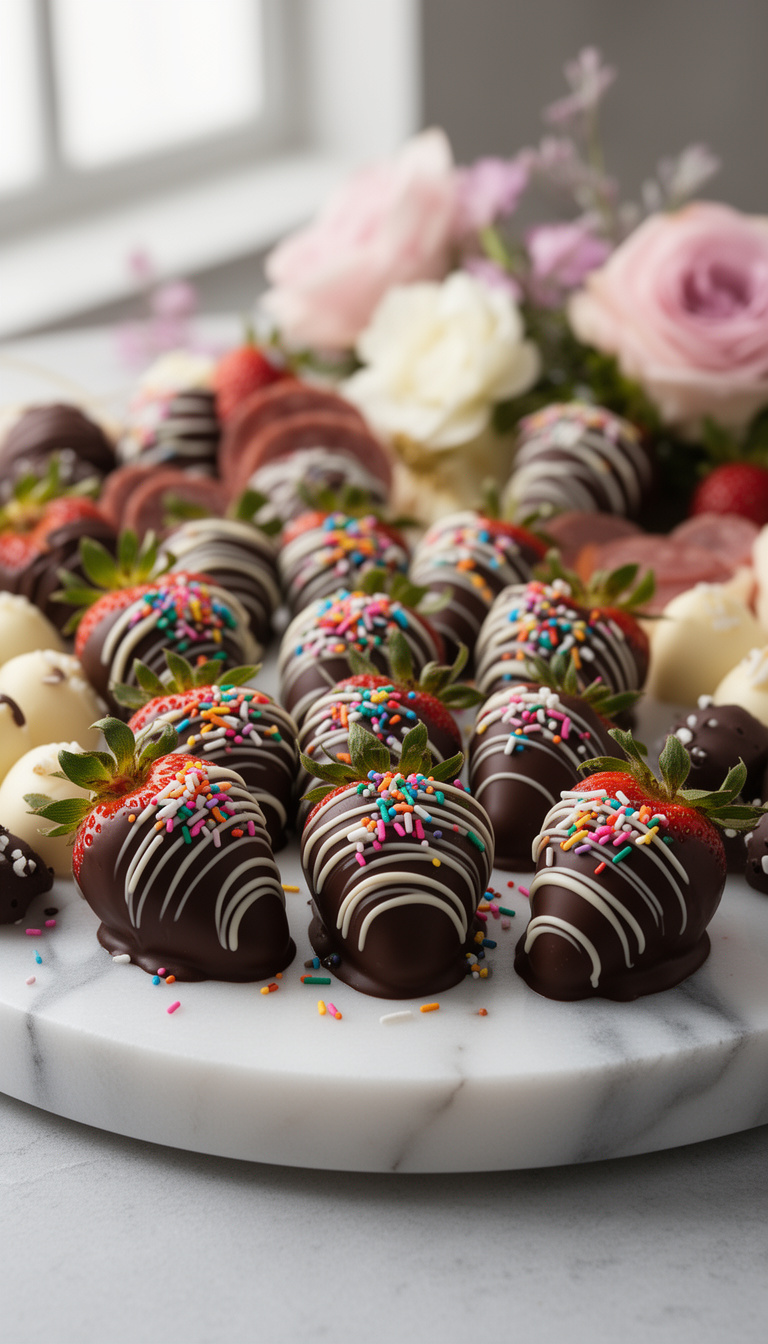
4. Speckled Robin Egg Chocolate Cookies
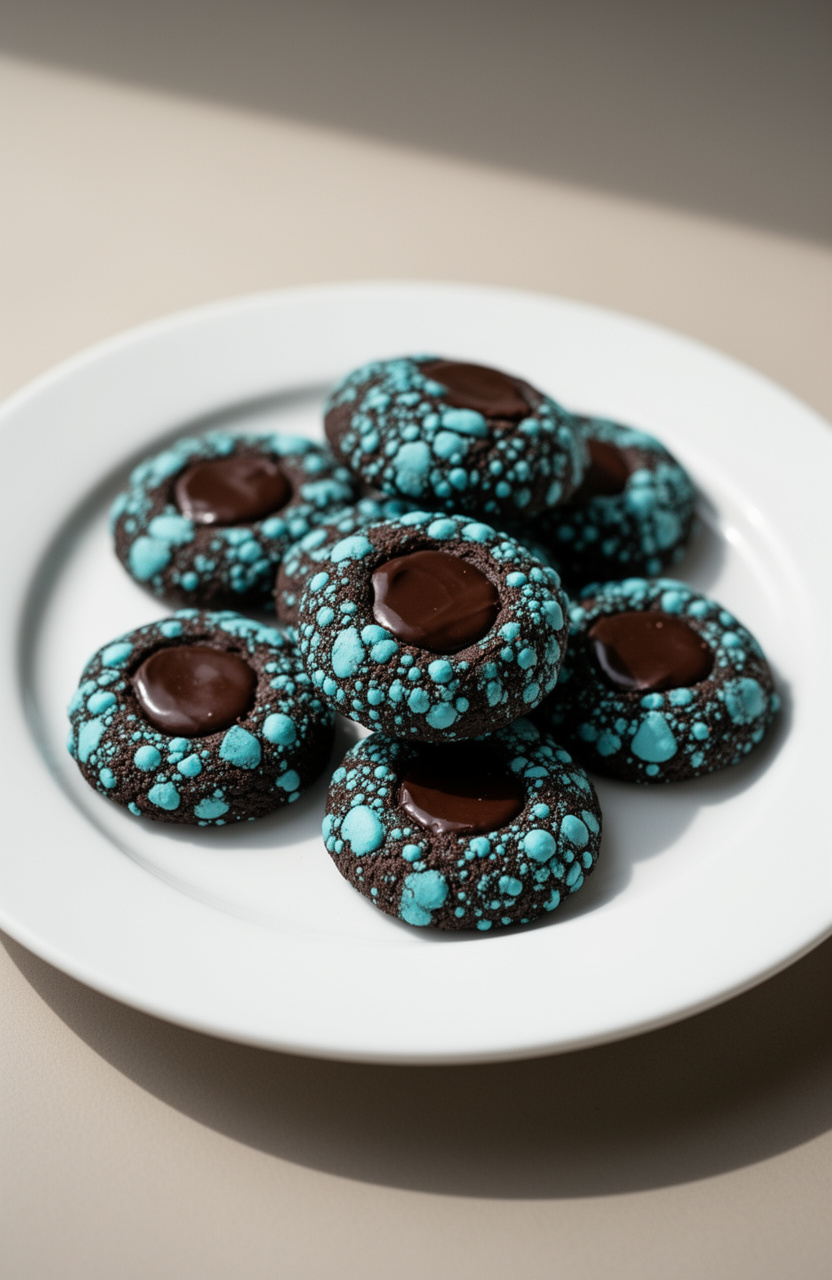
Speckled like a robin’s nest find, these deep chocolate cookies get their signature mottled shell finish from a careful flicking technique applied over the baked surface. Dutch-process cocoa gives the dough a dense, bittersweet depth that makes the speckled candy coating pop against the dark background.
Speckled Robin Egg Chocolate Cookies
Dry
Wet
Mix-Ins
Speckle Coating
Tools
- 🔌Stand mixer or hand electric mixer
- 🥣Large mixing bowl
- 🥣Medium mixing bowl
- 🥄Whisk
- 🥄Rubber spatula
- 📄Plastic wrap
- 🥧Baking sheets (2)
- 📄Parchment paper or silicone baking mats
- 🪜Wire cooling rack
- 🥄Cookie scoop (1.5 tablespoon)
- 🥣Small bowls for food coloring
- 🖌️Food-safe paintbrush or pastry brush
- 🪣Sifter or fine mesh strainer
- ⚖️Kitchen scale (optional)
Combine Dry Ingredients
In a medium bowl, whisk together 2 1/4 cups all-purpose flour, 1/2 cup Dutch-process cocoa powder, 1 teaspoon baking soda, and 1/2 teaspoon fine sea salt until evenly combined. Set aside.
Cream Butter and Sugar
In the bowl of a stand mixer fitted with the paddle attachment (or using a hand mixer and large bowl), beat 1 cup softened unsalted butter on medium speed for 2 minutes until light and creamy. Add 3/4 cup granulated sugar and 3/4 cup packed light brown sugar.
Beat on medium-high speed for 3 minutes until pale and fluffy, scraping down the sides of the bowl as needed.
Add Eggs and Vanilla
Add 2 large eggs to the butter mixture one at a time, beating well on medium speed for 30 seconds after each addition. Add 2 teaspoons pure vanilla extract and mix until fully incorporated, about 15 seconds.
Mix in Dry Ingredients
Reduce mixer speed to low. Gradually add the flour-cocoa mixture in three additions, mixing just until no dry streaks remain after each addition.
Do not overmix. Fold in 1 cup semi-sweet chocolate chips using a rubber spatula.
Chill the Dough
Cover the dough tightly with plastic wrap and refrigerate for at least 2 hours or up to 48 hours. Chilling is essential to prevent spreading and to develop flavor.
Do not skip this step.
Preheat and Prep
When ready to bake, preheat your oven to 350°F (175°C). Line two baking sheets with parchment paper or silicone baking mats.
Remove the dough from the refrigerator and let it sit at room temperature for 5 minutes to slightly soften for easier scooping.
Scoop Cookie Dough
Using a 1.5-tablespoon cookie scoop, portion the dough into balls and place them 2 inches apart on the prepared baking sheets. You should get approximately 24 cookies.
Gently roll each portion between your palms into a smooth ball.
Bake the Cookies
Bake one sheet at a time in the preheated oven for 10 to 12 minutes, until the edges are set but the centers still look slightly underdone and glossy. They will firm up as they cool.
Do not overbake. Remove from the oven and let the cookies rest on the baking sheet for 5 minutes before transferring to a wire cooling rack.
Make Blue Icing
Allow cookies to cool completely on the wire rack, about 30 minutes. While they cool, prepare the robin egg blue coating: in a medium bowl, whisk together 2 cups sifted powdered sugar, 2 tablespoons meringue powder, and 3 tablespoons warm water until a smooth, thick but spreadable icing forms.
Add more water one teaspoon at a time if needed. Add sky blue gel food coloring, a small amount at a time, stirring until you reach a soft robin’s egg blue color.
Coat Cookies in Blue
Dip the top of each fully cooled cookie into the blue icing, letting the excess drip off, or use a spoon to coat the top surface. Set the iced cookies back on the wire rack over a sheet of parchment paper to catch drips.
Allow the icing to dry until just set but not fully hardened, about 10 to 15 minutes.
Speckle the Cookies
To create the speckled robin egg effect, mix 1 tablespoon cocoa powder with 1 tablespoon water and a tiny drop of black gel food coloring in a small bowl to form a thin, dark brown liquid. Dip a food-safe paintbrush or the bristles of a clean pastry brush into the mixture, then hold it over each cookie and flick the bristles with your finger or a knife to splatter small brown-black specks across the blue surface.
Work quickly and vary the distance for natural-looking speckles. Repeat for all cookies.
Set and Serve
Allow the speckled icing to fully set and dry at room temperature for at least 20 to 30 minutes before serving or packaging. Store finished cookies in an airtight container at room temperature for up to 5 days, or freeze uniced cookies for up to 2 months.
Per serving (1 cookie) — values are estimates
Recommended for You
5. Cherry Blossom Painted Sugar Cookies
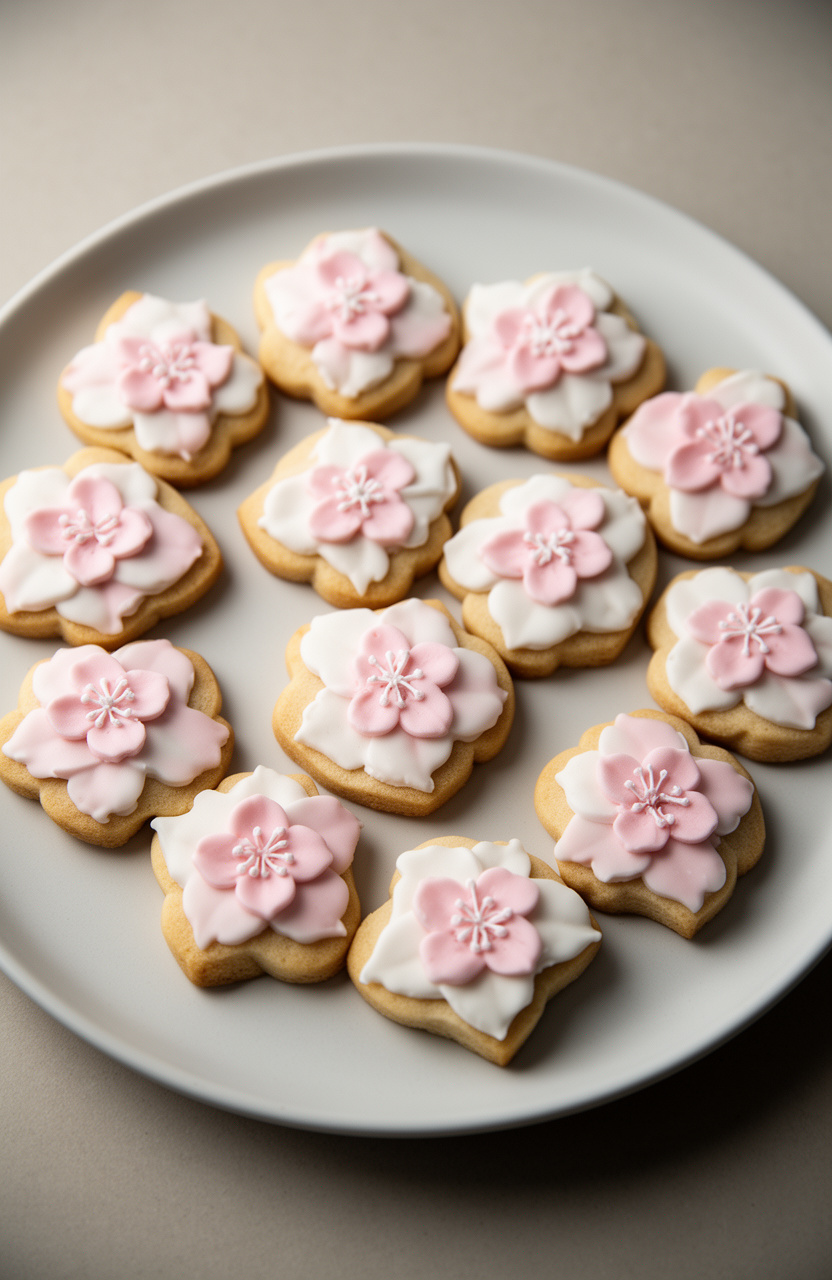
Painted with soft pink and white royal icing to mimic cherry blossoms in bloom, these butter-rich sugar cookies deliver a crisp, clean snap at the edges with a slightly tender center that holds the delicate floral detail without crumbling.
Cherry Blossom Painted Sugar Cookies
Cookie Dough
Royal Icing Base
Painting Palette
Decorating Tools
- 🔌Stand mixer with paddle attachment
- 🥣Large mixing bowls
- 🥄Whisk
- 🥄Rubber spatula
- 📄Plastic wrap
- 🫙Rolling pin
- 📄Silicone rolling mat or parchment paper
- 🍴Cherry blossom flower cookie cutter (3-inch)
- 🍴Round cookie cutter (3-inch, optional)
- 🥧Baking sheets (2 large)
- 📄Parchment paper or silicone baking mats
- 🪜Wire cooling rack
- 🖌️Fine-tip food-safe paintbrushes (sizes 00, 0, and 2)
- 🥤Small ceramic or glass palette or ice cube tray for mixing colors
- 🎂Disposable piping bags
- 🍴Piping tips #2 and #3
- 🍴Squeeze bottles (optional)
- 📍Toothpicks or scribe tool
- 🥄Offset spatula
- ⚖️Kitchen scale
- 🍴Sifter
- ⏱️Timer
Whisk Dry Ingredients
In a medium bowl, whisk together 3 cups (360g) all-purpose flour, 1/2 teaspoon baking powder, and 1/4 teaspoon fine sea salt. Set aside.
Cream Butter and Sugar
In the bowl of a stand mixer fitted with the paddle attachment, beat 1 cup (226g) softened unsalted butter and 1 cup (200g) granulated sugar on medium-high speed for 3–4 minutes until the mixture is pale, light, and fluffy. Scrape down the sides of the bowl with a rubber spatula halfway through.
Add Egg and Extracts
Add 1 large room-temperature egg, 2 teaspoons vanilla extract, and 1/2 teaspoon almond extract to the butter mixture. Beat on medium speed for about 1 minute until fully incorporated.
The mixture may look slightly curdled — this is normal.
Incorporate Flour
Reduce the mixer speed to low and add the flour mixture in three additions, mixing just until each addition is incorporated and no dry streaks remain. Do not overmix — the dough should be soft and slightly tacky but not sticky.
Chill the Dough
Divide the dough into two equal portions. Flatten each into a 1-inch thick disc, wrap tightly in plastic wrap, and refrigerate for at least 2 hours or overnight.
This chilling step is critical for preventing spreading during baking and for achieving clean, sharp cookie edges.
Preheat Oven
When ready to bake, preheat your oven to 350°F (175°C). Line two large baking sheets with parchment paper or silicone baking mats.
Remove one disc of dough from the refrigerator and let it sit at room temperature for 5 minutes to soften slightly.
Roll and Cut Cookies
Lightly flour your work surface and rolling pin. Roll the dough out to an even 1/4-inch thickness, rotating the dough frequently to prevent sticking.
For the most consistent results, roll between two sheets of parchment paper. Use your cherry blossom cookie cutter to cut out shapes, pressing firmly and straight down.
Re-roll scraps once only. Place cut cookies 1 inch apart on the prepared baking sheets.
Freeze and Bake
Place the baking sheets with the cut cookies in the freezer for 10 minutes before baking. This helps the cookies hold their shape perfectly in the oven.
Bake one sheet at a time on the center rack for 10–12 minutes, until the edges are just set and the centers look barely done — they should not brown. The cookies will continue to set as they cool.
Cool Completely
Remove the cookies from the oven and allow them to cool on the baking sheet for 5 minutes without moving them. Then carefully transfer to a wire cooling rack and allow to cool completely, at least 30 minutes, before decorating.
Decorating warm cookies will melt your icing.
Make Royal Icing
Make the royal icing base: In the clean bowl of your stand mixer fitted with the paddle attachment, combine 4 cups (480g) sifted powdered sugar, 3 tablespoons meringue powder, 1 teaspoon vanilla extract, and 1/4 teaspoon almond extract. With the mixer on low, add warm water one tablespoon at a time, mixing for 5–7 minutes total, until the icing is thick, glossy, and holds stiff peaks.
This is your stiff-consistency icing, used for outlining.
Color the Icing
Divide the stiff royal icing into five portions. Color the first portion with a few drops of soft pink gel coloring for the base flood coat.
Color the second portion with deep rose gel for petal details. Tint the third with a tiny touch of mauve for shading.
Leave the fourth portion white (or tint very slightly ivory). Color the fifth portion yellow for the flower centers.
Keep all bowls covered with a damp towel or plastic wrap pressed directly onto the surface to prevent crusting.
Prepare Icing Consistencies
Thin the soft pink icing to a flood consistency by adding water a few drops at a time and stirring gently. The icing is ready when a ribbon of icing drizzled from a spoon disappears into the surface in about 10 seconds.
Transfer the flood icing to a squeeze bottle or piping bag fitted with a #3 tip. Transfer the stiff versions of rose, mauve, white, and yellow icings to separate piping bags fitted with #2 tips.
Outline and Flood Cookies
Outline each cherry blossom cookie using the stiff soft-pink icing and a #2 tip, tracing just inside the edge of each petal. Work one cookie at a time.
Immediately flood the interior with the thinned soft-pink flood icing, using a toothpick or scribe tool to guide the icing into the corners and edges of each petal. Allow the base coat to dry completely at room temperature for at least 2 hours, or ideally overnight, until the surface is hard and no longer tacky.
Prepare Painting Palette
Once the base coat is fully dry and hard, prepare your painting palette. Pour a small amount of vodka or clear extract into separate wells of your palette.
Using a toothpick, add a tiny amount of rose gel coloring to one well, mauve to another, and soft pink to a third. Mix each with the vodka to create thin, watercolor-like paint.
The vodka evaporates quickly, leaving only the color behind without softening the icing surface.
Paint Petal Shading
Using a size 2 food-safe paintbrush loaded with the rose-vodka paint, paint the base of each petal where it meets the center, pulling strokes outward toward the petal tips in a fan-like motion. Use a lighter touch as you move toward the tips to create a natural gradient.
Work quickly and with a light hand — the vodka evaporates fast. Rinse your brush between colors.
Add Petal Veining
Switch to a size 0 paintbrush and the deeper mauve-vodka paint. Paint fine, delicate veining lines from the base of each petal outward, following the natural shape of cherry blossom petals.
Use a very light touch and thin, slightly curved strokes. Add a subtle darker shadow at the very center of the flower where all petals meet.
Allow this layer to dry for 10 minutes before adding more detail.
Paint Petal Highlights
Using a size 00 paintbrush and white-vodka paint, add thin highlights along the upper edges of each petal to create dimension and a soft, luminous quality. Paint small, slightly curved strokes following the petal outline.
This step mimics the way light catches the translucent edges of real cherry blossoms.
Pipe and Gild Stamens
Pipe a small cluster of 5–7 tiny dots in the center of each flower using the yellow stiff royal icing and a #2 tip to represent stamens. While the dots are still wet, use a size 00 paintbrush to dab a tiny amount of gold luster dust mixed with a drop of vodka onto the tips of each dot.
Allow to dry for 15 minutes.
Add Final Details
For finishing touches, use the rose stiff icing and a #2 tip to pipe tiny teardrop-shaped petals or small accent dots around the outer edges of some cookies for a layered, dimensional look. Optionally, use a clean brush to dust the entire surface lightly with pearl luster dust mixed with vodka for an ethereal shimmer that mimics the delicate glow of cherry blossoms.
Dry and Store
Allow all decorated cookies to dry uncovered at room temperature for at least 6 hours, or overnight, until the icing is completely set and hard before stacking or packaging. Store in a single layer in an airtight container at room temperature for up to 2 weeks, or stack with parchment paper between layers once fully cured.
Per serving (1 decorated cookie) — values are estimates
Our Best Picks
6. Ombre Lavender Floral Shortbread
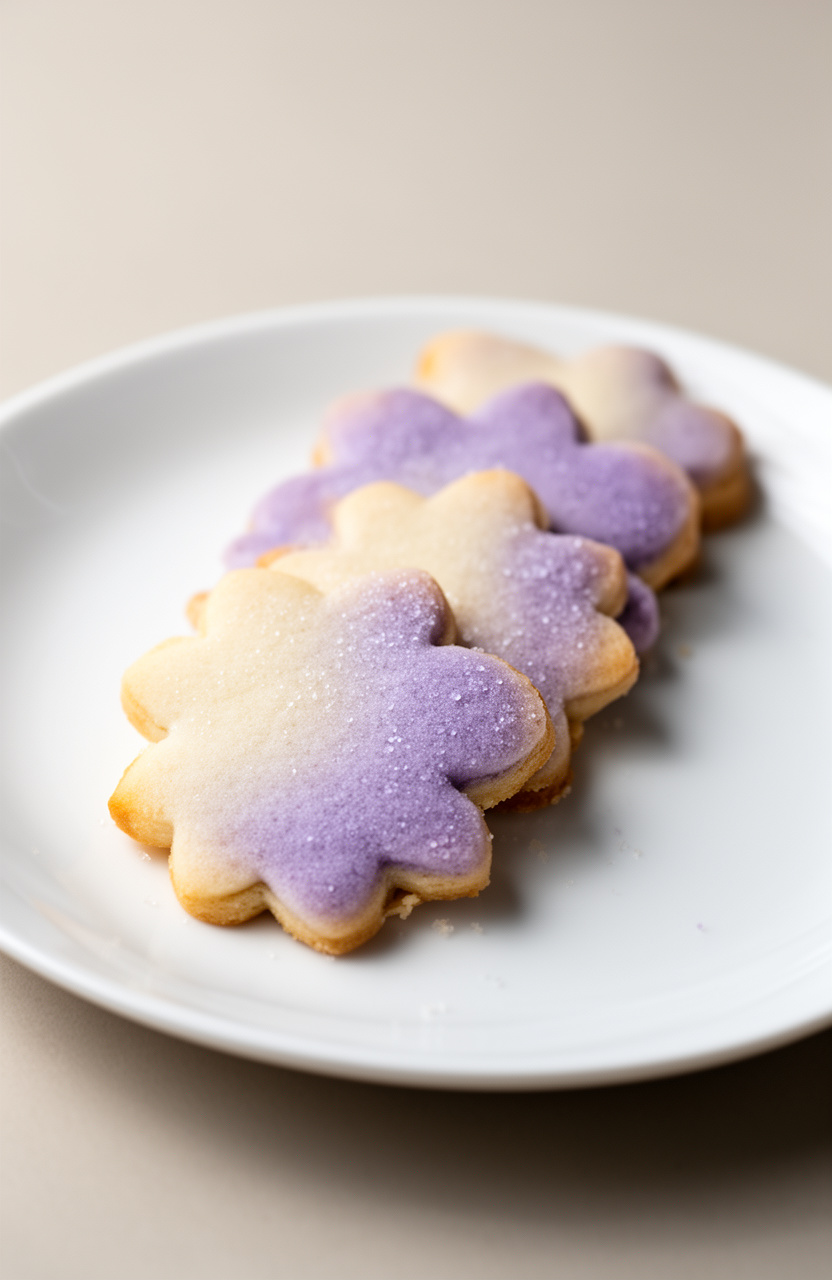
Finely ground culinary lavender buds infuse the butter-rich dough with a floral, lightly herbal flavor that deepens as the shortbread bakes. The finished cookies deliver a classic crumbly, melt-in-your-mouth texture with a delicate ombre tint layered across each piece.
Ombre Lavender Floral Shortbread
Shortbread
Royal Icing
Decoration
- 🔌Stand mixer or electric hand mixer
- 🥣Large mixing bowl
- 🪣Sifter or fine mesh sieve
- ⚗️Spice grinder or mortar and pestle
- 📄Plastic wrap (cling film)
- 🫙Rolling pin
- 📄Non-stick baking mat or parchment paper
- 🥧2 large baking sheets
- 🍴Fluted round or floral-shaped cookie cutter (6cm / 2.5 inch)
- 🪜Wire cooling rack
- 🥣4 small bowls (for ombre icing)
- 📍Cocktail sticks or toothpicks
- 🥄Small offset spatula or the back of a teaspoon
- 🖌️Fine paintbrush (food-safe, for lustre dust)
Prepare Lavender
Using a spice grinder or mortar and pestle, finely grind 1 tablespoon of dried culinary lavender buds into a fine powder. Set aside.
Ensure your butter is fully softened at room temperature — it should leave an indent when pressed but not be greasy or melted.
Cream Butter and Sugar
In the bowl of a stand mixer fitted with the paddle attachment (or using a large bowl with a hand mixer), beat 225g softened unsalted butter and 100g caster sugar together on medium speed for 3–4 minutes until the mixture is pale, light, and fluffy. Scrape down the sides of the bowl as needed.
Add Lavender and Vanilla
Add 1 teaspoon vanilla extract and the ground lavender powder to the butter mixture. Mix on low speed for 30 seconds until just combined and fragrant.
Combine Dry Ingredients
Sift together 300g plain flour, 50g cornflour, and ¼ teaspoon fine sea salt into a separate bowl. Add the dry ingredients to the butter mixture in two additions, mixing on the lowest speed until the dough just comes together and no dry streaks remain.
Do not overmix — the dough should be soft but not sticky.
Chill the Dough
Turn the dough out onto a lightly floured surface and gently bring it together with your hands into a smooth disc. Wrap tightly in plastic wrap (cling film) and refrigerate for 2 hours, or until firm enough to roll without sticking.
Preheat and Prepare
Preheat your oven to 170°C (150°C fan) / 340°F / Gas Mark 3. Line two large baking sheets with parchment paper or non-stick baking mats.
Remove the chilled dough from the refrigerator and allow it to rest at room temperature for 5 minutes.
Roll and Cut Cookies
On a lightly floured surface, roll the dough out to approximately 6mm (¼ inch) thickness. Using a 6cm fluted round or floral-shaped cookie cutter, cut out 12 shapes, re-rolling scraps as needed.
Place the cut cookies 3cm apart on the prepared baking sheets. If the dough becomes too soft, return it to the refrigerator for 10 minutes before continuing.
Bake Shortbread
Bake the shortbread cookies in the preheated oven for 16–18 minutes, until the edges are just barely beginning to turn a very pale golden colour and the centres look set. The cookies should remain mostly pale — do not allow them to brown.
Rotate the baking sheets halfway through baking for even results.
Cool Completely
Remove the baking sheets from the oven and allow the cookies to cool on the sheets for 10 minutes — they will be very fragile when hot. Transfer carefully to a wire cooling rack and allow to cool completely to room temperature before icing, approximately 30 minutes.
Make the Icing
To make the ombre icing, whisk together 200g sifted icing sugar, 2½ tablespoons whole milk, and ½ teaspoon clear vanilla extract in a bowl until smooth and glossy. The icing should be thick enough to coat the back of a spoon but still spreadable — add milk ½ teaspoon at a time if needed.
Divide the icing evenly among 4 small bowls.
Create Ombre Colours
Create the ombre colour gradient: leave the first bowl of icing white. To the second bowl, add a very small amount (the tip of a toothpick) of purple gel food colouring and stir to achieve a very pale lavender.
To the third bowl, add a slightly larger amount of purple gel colouring plus a tiny touch of pink to create a medium lilac. To the fourth bowl, add a generous amount of purple and a little more pink to create a deep violet-purple.
Stir each bowl well.
Apply Ombre Icing
To ice the cookies with an ombre effect, use a small offset spatula or the back of a teaspoon. Working one cookie at a time, spread a thin layer of white icing on one quarter of the cookie’s surface, pale lavender on the next quarter, medium lilac on the third, and deep violet on the final quarter.
Use a clean toothpick to gently drag and blend the colours where they meet, creating a soft gradient transition across the cookie surface.
Decorate with Flowers
While the icing is still wet, immediately decorate each cookie. Place 2–3 small edible dried lavender buds on the deeper purple section.
Add 1–2 small edible sugar flowers across the gradient. Allow the icing to set at room temperature for 45–60 minutes until completely firm and dry.
Add Lustre Dust
Once the icing is fully set and dry, use a dry fine food-safe paintbrush to lightly dust the white and pale lavender sections of each cookie with edible silver or pearl lustre dust, sweeping gently across the surface to create a soft shimmer effect. This adds an elegant, ethereal finish to the ombre design.
Serve and Store
Serve the shortbread immediately, or store in a single layer in an airtight container at room temperature for up to 5 days. Do not stack the decorated cookies as this will damage the icing and decorations.
These cookies make a beautiful gift when arranged in a decorative box lined with parchment paper.
Per serving (1 cookie) — values are estimates
Top Picks Today
7. Honey Bee Garden Party Cookies

Softened butter and honey-sweet dough combine into a smooth, rollable base that bakes into crisp-edged, lightly golden bee-shaped cookies with a tender, buttery crumb beneath a glossy decorated finish.
Honey Bee Garden Party Cookies
Cookie Dough
Royal Icing
Decoration
- 🔌Stand mixer or hand electric mixer
- 🥣Large mixing bowl
- 🥣Medium mixing bowl
- 🥄Rubber spatula
- 🫙Rolling pin
- 🍴Honeybee-shaped cookie cutter (2.5 inch)
- 🍴Flower-shaped cookie cutter (2 inch)
- 🍴Hexagon-shaped cookie cutter (2 inch)
- 🥧Baking sheets (2 large)
- 📄Parchment paper
- 📄Plastic wrap
- 🪜Wire cooling rack
- 🎂Piping bags (at least 6)
- 🍴Piping tips (Wilton #2 and #3 round tips)
- 🥄Small offset spatula
- 📍Toothpicks
- 🥣Small bowls for dividing icing
- 🖌️Fine paintbrush (food-safe, for luster dust)
- ⚖️Kitchen scale (optional)
Combine Dry Ingredients
In a medium bowl, whisk together 2 1/4 cups all-purpose flour, 1/2 teaspoon baking powder, and 1/4 teaspoon fine sea salt. Set aside.
Cream Butter and Sugar
In the bowl of a stand mixer fitted with the paddle attachment (or using a hand mixer and large bowl), beat 3/4 cup softened unsalted butter and 1/2 cup granulated sugar on medium-high speed for 3 minutes until light and fluffy. Scrape down the sides of the bowl as needed.
Add Wet Ingredients
Add 1/4 cup wildflower honey, 1 large egg, 1 teaspoon vanilla extract, and 1/2 teaspoon almond extract to the butter mixture. Beat on medium speed for about 1 minute until fully combined and smooth.
The mixture may look slightly curdled — this is normal.
Mix Cookie Dough
With the mixer on low speed, gradually add the flour mixture in three additions, mixing just until no dry streaks remain after each addition. Do not overmix — the dough should be soft but not sticky.
If the dough is too sticky, add flour one tablespoon at a time.
Chill the Dough
Divide the dough evenly into two flat discs. Wrap each disc tightly in plastic wrap and refrigerate for at least 2 hours, or overnight.
The dough must be well-chilled to hold its shape during cutting and baking.
Make Royal Icing
While the dough chills, prepare the royal icing. In a clean stand mixer bowl fitted with the whisk attachment, combine 3 cups sifted powdered sugar, 3 tablespoons meringue powder, and 6 tablespoons warm water.
Beat on medium-high speed for 5 minutes until the icing is thick, glossy, and holds stiff peaks. Add 1 teaspoon vanilla extract and beat for 30 more seconds.
Cover the bowl tightly with plastic wrap to prevent drying.
Color and Thin Icing
Divide the royal icing into separate small bowls: a large portion for yellow (honeybee bodies and hexagons), a small portion for black (stripes and outlines), a small portion for white (wings and flower centers), and keep a small amount uncolored. Tint each portion with gel food coloring, mixing thoroughly.
For flooding consistency, thin the icing by adding warm water a few drops at a time and stirring until a ribbon of icing dissolves back into the surface within 10 seconds. Keep piping-consistency icing thicker (for outlines).
Cover all bowls with plastic wrap.
Roll and Cut Cookies
Preheat your oven to 350°F (175°C). Line two large baking sheets with parchment paper.
Remove one disc of chilled dough from the refrigerator. On a lightly floured surface, roll the dough to an even 1/4-inch thickness.
Work quickly to keep the dough cold. Cut out shapes using honeybee, flower, and hexagon cookie cutters.
Place cut cookies 1 inch apart on the prepared baking sheets. Re-roll scraps once to cut additional cookies.
Repeat with the second disc of dough.
Bake the Cookies
Bake the cookies at 350°F for 10 to 12 minutes, until the edges are just set and the bottoms are very lightly golden. The centers may look slightly underdone — this is correct, as they will firm up as they cool.
Do not overbake. Remove from the oven and let the cookies rest on the baking sheet for 5 minutes before transferring to a wire cooling rack.
Allow cookies to cool completely, at least 30 minutes, before decorating.
Outline and Flood Bees
Transfer piping-consistency yellow icing to a piping bag fitted with a Wilton #2 tip. Outline all honeybee-shaped cookies with a thin yellow border, then switch to flood-consistency yellow icing to fill in the body.
Use a toothpick to spread the icing to the edges and pop any air bubbles. Let the yellow base layer set for 20 to 30 minutes before adding details.
Decorate Bee Cookies
Once the yellow base on the honeybee cookies is set, use black piping-consistency icing in a bag with a #2 tip to pipe 3 to 4 horizontal stripes across the body of each bee. Pipe small antennae and a tiny dot for the eye.
Use white flood-consistency icing to pipe two rounded wing shapes on each side of the bee body. While the white wings are still wet, sprinkle lightly with white edible glitter for a shimmery effect.
Place black edible pearls on the bee body for texture if desired.
Decorate Hexagon Cookies
For hexagon cookies (honeycomb theme), flood with yellow flood icing and let set for 20 minutes. Once set, use black piping-consistency icing with a #2 tip to pipe a hexagon outline on top and add thin lines to create a honeycomb cell pattern.
Sprinkle with yellow sanding sugar while still slightly wet for sparkle.
Decorate Flower Cookies
For flower-shaped cookies, flood with white icing and let set for 15 minutes. Use yellow icing to pipe a circle in the center of each flower.
While the yellow center is wet, press 5 to 6 black edible pearls in a ring around the center. Use a toothpick to add small petal detail lines in white or pale yellow icing radiating from the center outward.
Apply Gold Luster Dust
Allow all decorated cookies to dry completely at room temperature for at least 4 hours, or ideally overnight, before applying finishing touches. Once fully set, use a dry fine food-safe paintbrush to lightly dust gold luster dust over the bee bodies and hexagon cookies for a luminous, garden-party-ready finish.
Serve and Store
Once all icing is completely hardened and the luster dust is applied, arrange the cookies on a decorative platter or tiered stand. Store in a single layer in an airtight container at room temperature for up to 7 days.
Do not stack decorated cookies unless separated by parchment paper.
Per serving (1 cookie (approximately 35g)) — values are estimates
Highly Recommended
8. Strawberry Lemonade Glazed Flower Cookies
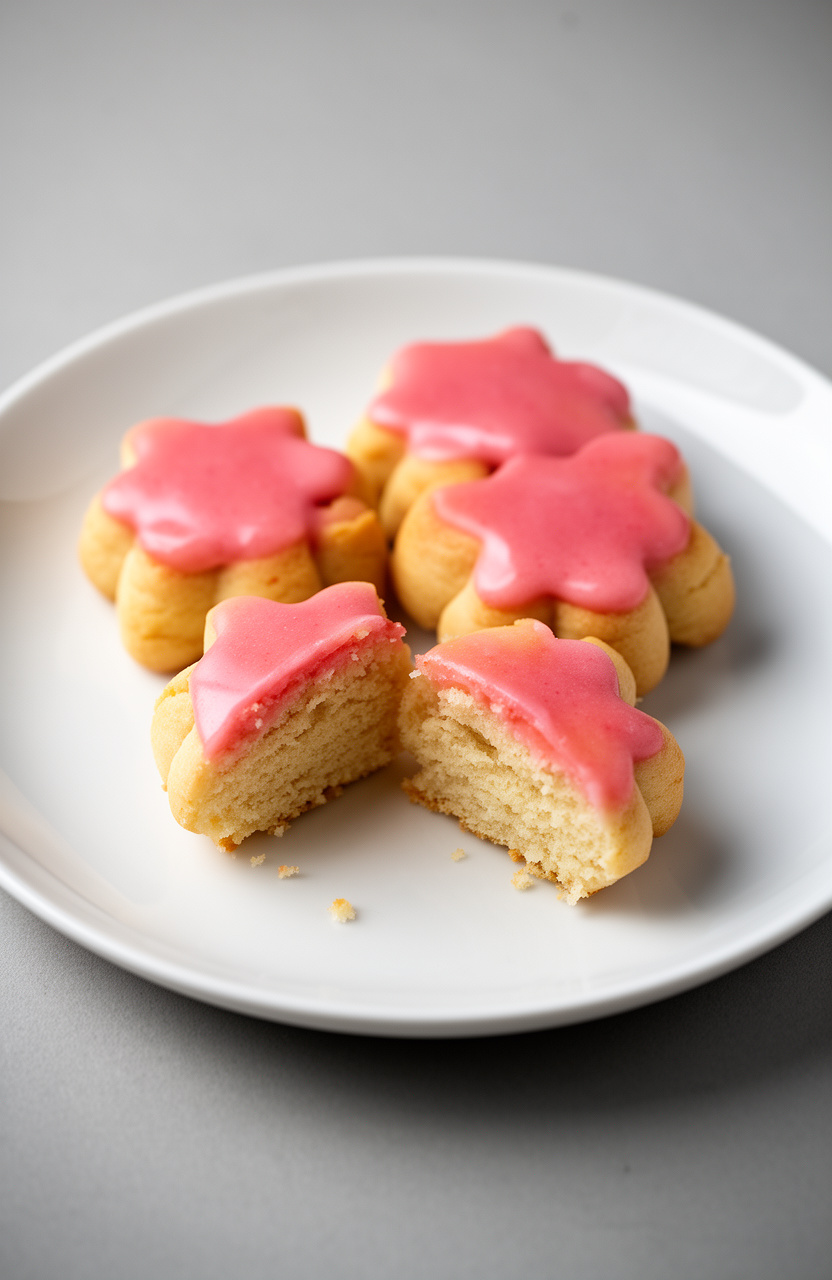
Flour, butter, and a touch of baking powder build a sturdy yet tender flower-shaped cookie base that holds its crisp edges beneath a bright strawberry lemonade glaze, where the tangy citrus-berry sweetness cuts through the rich, buttery crumb.
Strawberry Lemonade Glazed Flower Cookies
Cookie Dough
Strawberry Lemonade Glaze
Decoration
- 🔌Stand mixer or hand electric mixer
- 🥣Large mixing bowl
- 🥣Medium mixing bowl
- 🥣Small mixing bowl
- 🥄Rubber spatula
- 📄Plastic wrap
- 🫙Rolling pin
- 📄Lightly floured work surface or parchment paper
- 🍴3-inch flower-shaped cookie cutter
- 🥧2 large baking sheets
- 📄Parchment paper or silicone baking mats
- 🪜Wire cooling rack
- 🌀Blender or food processor (for strawberry puree)
- 🪣Fine mesh strainer
- 🥄Whisk
- 🥄Spoon or small offset spatula (for glazing)
- 🔪Zester or microplane
Combine Dry Ingredients
In a medium bowl, whisk together 2 1/4 cups all-purpose flour, 1/2 teaspoon baking powder, and 1/4 teaspoon salt. Set aside.
Cream Butter and Sugar
In the bowl of a stand mixer fitted with the paddle attachment (or using a hand mixer and a large bowl), beat 3/4 cup softened unsalted butter and 3/4 cup granulated sugar on medium-high speed for 3 minutes, until the mixture is light, pale, and fluffy.
Add Wet Ingredients
Add 1 large egg, 1 teaspoon vanilla extract, 2 teaspoons fresh lemon zest, and 1 tablespoon fresh lemon juice to the butter mixture. Beat on medium speed for about 1 minute until fully combined, scraping down the sides of the bowl as needed.
Mix in Flour
Reduce the mixer to low speed and gradually add the flour mixture in two additions, mixing just until no dry streaks remain. Do not overmix — the dough will be soft but should hold together when pressed.
Chill the Dough
Divide the dough in half, flatten each portion into a disc about 1-inch thick, and wrap tightly in plastic wrap. Refrigerate for at least 1 hour, or until the dough is firm enough to roll without sticking.
Prepare Strawberry Puree
While the dough chills, prepare the strawberry puree for the glaze. Hull 4–5 fresh strawberries, place them in a blender, and blend until smooth.
Pour the puree through a fine mesh strainer into a small bowl, pressing with a spoon to extract the liquid. Discard the seeds.
You will need 3 tablespoons of strained puree. Set aside.
Preheat Oven
When ready to bake, preheat your oven to 350°F (175°C). Line two large baking sheets with parchment paper or silicone baking mats.
Roll and Cut Cookies
Remove one disc of dough from the refrigerator. On a lightly floured surface or between two sheets of parchment paper, roll the dough to an even 1/4-inch thickness.
Using a 3-inch flower-shaped cookie cutter, cut out as many shapes as possible, pressing firmly and cleanly. Transfer the cut cookies to the prepared baking sheets, spacing them about 1 inch apart.
Re-roll scraps once and cut additional cookies. Repeat with the second disc of dough.
Bake the Cookies
Bake the cookies one sheet at a time on the center rack for 10–12 minutes, until the edges are just set and the bottoms are very lightly golden. The tops should still look pale — do not overbake.
Remove from the oven and allow the cookies to cool on the baking sheet for 5 minutes before transferring to a wire cooling rack to cool completely, about 20 minutes.
Make the Glaze
While the cookies cool, make the strawberry lemonade glaze. In a medium bowl, whisk together 1 1/2 cups sifted powdered sugar, 3 tablespoons strained strawberry puree, 1 tablespoon fresh lemon juice, and 1 teaspoon fresh lemon zest until smooth.
Add 1–2 tablespoons of whole milk, one teaspoon at a time, until the glaze is thick but pourable — it should coat the back of a spoon and slowly drip off. If you want a more vibrant pink color, add 1–2 drops of pink or red gel food coloring and stir to combine.
Glaze the Cookies
Once the cookies are completely cool, spoon about 1 teaspoon of glaze onto the center of each flower cookie. Use the back of the spoon or a small offset spatula to gently spread the glaze toward the petal edges, leaving a very thin border if desired.
Work quickly, as the glaze begins to set within a few minutes.
Decorate and Set
Immediately while the glaze is still wet, decorate the cookies as desired. Sprinkle a pinch of yellow sanding sugar or sprinkles in the center of each flower to mimic a flower’s center.
Add a few crushed freeze-dried strawberry pieces and a small curl of lemon zest for a bright, fresh garnish. Allow the glaze to set completely at room temperature for 20–30 minutes before stacking or storing.
Per serving (2 cookies) — values are estimates
Shop Our Must-Haves
9. Painted Iris Almond Sugar Cookies

Almond-scented butter dough rolls out smooth and cuts into crisp iris-shaped cookies with a lightly golden edge and a soft, tender crumb beneath hand-painted watercolor icing that captures the delicate veining and violet hues of the flower.
Painted Iris Almond Sugar Cookies
Cookie_Dough
Royal_Icing
Painting
- 🔌Stand mixer with paddle attachment
- 🥣Large mixing bowls
- 🍴Iris-shaped cookie cutter (3-inch)
- 🫙Rolling pin
- 📄Silicone baking mats or parchment paper
- 🥧2 large rimmed baking sheets
- 🎂Piping bags (at least 6)
- 🍴Piping tips: #2 and #3 round tips
- 🍴Small squeeze bottles for flood icing
- 🖌️Fine-tip food-safe paintbrushes (sizes 00, 0, and 2)
- 🍽️Small ceramic or glass palette or white plate for mixing colors
- 🥄Offset spatula
- 🪜Wire cooling racks
- 📄Plastic wrap
- 📍Toothpicks or scribe tool
- 🍴Ruler
- ⚖️Digital kitchen scale
Combine Dry Ingredients
In a medium bowl, whisk together 2 3/4 cups (330g) all-purpose flour, 1 teaspoon baking powder, and 1/2 teaspoon fine sea salt. Set aside.
This dry mixture ensures even leavening and seasoning throughout the dough.
Cream Butter and Sugar
In the bowl of a stand mixer fitted with the paddle attachment, beat 1 cup (226g) softened unsalted butter and 3/4 cup (150g) granulated sugar on medium-high speed for 3 to 4 minutes until the mixture is pale, light, and fluffy. Scrape down the sides of the bowl with a spatula halfway through.
Add Wet Ingredients
Add 1 large room-temperature egg, 1 teaspoon pure almond extract, 1/2 teaspoon pure vanilla extract, and 1 tablespoon sour cream to the butter mixture. Mix on medium speed for about 1 minute until fully combined and smooth.
The sour cream adds tenderness and helps the cookies hold their shape.
Mix in Flour
Reduce the mixer to low speed and gradually add the flour mixture in three additions, mixing just until the dough comes together and no dry streaks remain. Do not overmix or the cookies will be tough.
The dough should be soft but not sticky.
Chill the Dough
Turn the dough out onto a lightly floured surface and divide it into two equal portions. Flatten each portion into a disc about 1-inch thick.
Wrap each disc tightly in plastic wrap and refrigerate for at least 2 hours or up to 48 hours. Chilling is essential for clean edges and preventing spreading during baking.
Preheat and Prep
When ready to bake, preheat your oven to 350°F (175°C) and line two large baking sheets with silicone baking mats or parchment paper. Remove one disc of dough from the refrigerator and let it sit at room temperature for 5 minutes to soften slightly for easier rolling.
Roll and Cut Cookies
On a lightly floured surface, roll the chilled dough to an even 1/4-inch thickness. Use a ruler to check thickness for consistency.
Cut out iris shapes using a 3-inch iris-shaped cookie cutter, pressing firmly and cleanly. Re-roll scraps once and cut additional cookies.
Place cut cookies 1 inch apart on the prepared baking sheets.
Bake the Cookies
Bake the cookies in the preheated oven for 10 to 12 minutes, until the edges are just barely beginning to turn golden and the centers appear set but still slightly pale. Do not overbake — the cookies will firm up as they cool.
Rotate the baking sheet halfway through for even baking.
Cool Completely
Remove the baking sheets from the oven and allow the cookies to cool on the pan for 5 minutes before transferring them to a wire cooling rack. Let the cookies cool completely to room temperature, about 30 minutes, before applying any icing.
Icing warm cookies will cause the icing to melt and run.
Make Royal Icing
Make the royal icing: In the clean bowl of a stand mixer fitted with the whisk attachment, combine 4 cups (480g) sifted powdered sugar, 3 tablespoons meringue powder, 1/2 teaspoon cream of tartar, and 1/2 teaspoon almond extract. With the mixer on low, add 6 tablespoons of warm water and mix for 1 minute.
Increase to medium-high and beat for 5 to 7 minutes until the icing is thick, glossy, and holds stiff peaks. This is your stiff consistency icing.
Color and Thin Icing
Divide the stiff royal icing into separate bowls based on your color plan: one large portion for white base, one for violet/purple, one for yellow, and one for deep blue. Color each portion using gel food coloring, stirring thoroughly.
Thin each portion to flood consistency by adding warm water, one teaspoon at a time, stirring gently until a ribbon of icing drizzled on the surface disappears back in within 10 seconds. Keep stiff icing in separate piping bags for outlines.
Outline the Cookies
Transfer stiff outline icing into piping bags fitted with #2 round tips. Transfer flood icing into squeeze bottles or piping bags fitted with #3 round tips.
Begin by outlining each iris cookie with white stiff icing, tracing the outer petals first. Allow the outline to set for 3 to 5 minutes before flooding.
Flood and Blend Base
Flood the outlined cookies with white flood icing, using a squeeze bottle to fill the interior of each outlined section. Use a toothpick or scribe tool to guide the icing into corners and pop any air bubbles.
Immediately while the white icing is still wet, add small drops of violet and blue flood icing onto the petals to create a wet-on-wet petal effect. Use a toothpick to drag colors gently for a blended, painterly look.
Allow to dry completely at room temperature for at least 4 hours or overnight.
Prepare Edible Paints
Once the base icing is completely dry and hard to the touch, prepare your edible paint palette. Pour a small amount of vodka or clear vanilla extract (about 2 tablespoons total) into the wells of a ceramic palette.
Add tiny amounts of violet, blue, yellow, and white gel food coloring separately to create concentrated watercolor-like paints. Mix each color with the alcohol medium until smooth and fluid.
Paint the Petals
Using a size 2 paintbrush, apply a light wash of diluted violet paint over the upper petals of each iris, working in thin, translucent layers. Let each layer dry for 2 to 3 minutes before adding the next.
Build depth by adding deeper violet or blue in the shadowed areas near the center. Use the size 0 brush to paint delicate veining lines radiating from the center of each petal using deep blue or purple paint.
Add Iris Details
Switch to the size 00 brush and yellow paint to carefully paint the ‘beard’ or signal markings at the center base of each petal — the distinctive yellow stripe that identifies an iris. Add tiny white highlights to the tips of petals using white paint to create dimension and a luminous effect.
Allow all painted details to dry completely for 15 to 20 minutes.
Apply Gold Accents
For the final decorative accent, mix a small amount of gold luster dust with a drop of vodka or clear vanilla extract to create a metallic paint. Using the size 00 brush, apply delicate gold accents along the veining lines or at the very center of the iris where the petals meet.
This adds a luxurious, botanical illustration quality to the finished cookies.
Set and Store
Allow the fully decorated cookies to rest uncovered at room temperature for at least 30 minutes until all painted layers and luster dust are completely set and dry. Once dry, store the cookies in a single layer in an airtight container at room temperature for up to 7 days.
Do not stack decorated cookies without parchment between layers.
Per serving (1 decorated cookie) — values are estimates
Editor’s Choice
10. Pastel Rainbow Sprinkle Easter Cookies
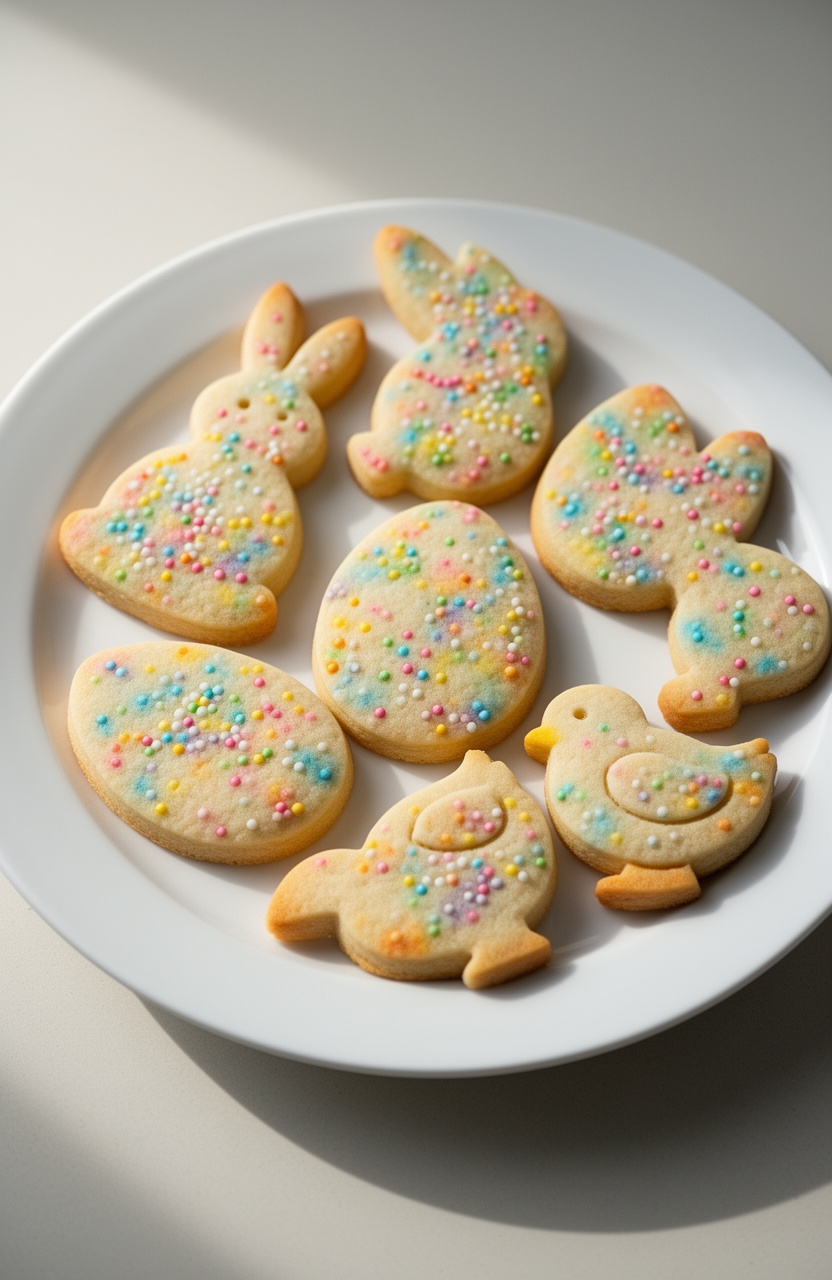
Pastel rainbow sprinkles pressed into a buttery, lightly golden dough give these Easter cookies their eye-catching, festive surface before they even hit the oven. The baked result delivers crisp, defined edges with a soft, slightly dense center that holds the colorful sprinkle coating without crumbling.
Pastel Rainbow Sprinkle Easter Cookies
Dough
Glaze
Decoration
- 🔌Stand mixer or hand electric mixer
- 🥣Large mixing bowl
- 🥣Medium mixing bowl
- 🥄Whisk
- 🥄Rubber spatula
- 📄Plastic wrap
- 🫙Rolling pin
- 🍴Easter-shaped cookie cutters (egg, bunny, chick)
- 🥧Two large rimmed baking sheets
- 📄Parchment paper or silicone baking mats
- 🪜Wire cooling rack
- 🥣Small bowls (5, for dividing glaze)
- 🥄Spoons or small offset spatula for glazing
- 🥄Measuring cups and spoons
Whisk Dry Ingredients
In a medium mixing bowl, whisk together 2 1/4 cups all-purpose flour, 1/2 teaspoon baking powder, and 1/4 teaspoon fine salt until well combined. Set aside.
Cream Butter Sugar
In the bowl of a stand mixer fitted with the paddle attachment (or using a hand mixer and large bowl), beat 1 cup softened unsalted butter and 3/4 cup granulated sugar on medium-high speed for 3 to 4 minutes until light, pale, and fluffy. Scrape down the sides of the bowl as needed.
Add Wet Ingredients
Add 1 large egg, 2 teaspoons vanilla extract, and 1/2 teaspoon almond extract to the butter mixture. Beat on medium speed for 1 to 2 minutes until fully incorporated and the mixture looks smooth and creamy.
Mix Cookie Dough
Reduce the mixer to low speed and gradually add the flour mixture in two additions, mixing just until no dry streaks remain and a soft dough forms. Do not overmix — the dough should be smooth but not sticky.
Chill the Dough
Turn the dough out onto a lightly floured surface and divide it in half. Shape each half into a flat disk, wrap tightly in plastic wrap, and refrigerate for at least 2 hours or up to 48 hours.
Chilling is essential for the cookies to hold their shape when cut.
Preheat the Oven
When ready to bake, preheat your oven to 350°F (175°C). Line two large baking sheets with parchment paper or silicone baking mats and set aside.
Roll and Cut
Remove one disk of dough from the refrigerator and let it sit at room temperature for 5 minutes to soften slightly. On a lightly floured surface, roll the dough out to an even 1/4-inch thickness.
Use Easter-shaped cookie cutters (egg, bunny, chick) to cut out shapes, pressing firmly and straight down. Re-roll scraps once to cut additional cookies.
Repeat with the second disk of dough.
Bake the Cookies
Arrange the cut cookies at least 1 inch apart on the prepared baking sheets. Bake one sheet at a time on the center rack for 10 to 12 minutes, until the edges are just set and the bottoms are very lightly golden.
The tops should still look pale — do not overbake. Allow cookies to cool on the baking sheet for 5 minutes before transferring to a wire cooling rack to cool completely, about 30 minutes.
Make the Glaze
While the cookies cool, make the glaze. In a medium bowl, whisk together 3 cups sifted powdered sugar, 4 tablespoons whole milk, 1 tablespoon light corn syrup, and 1/2 teaspoon vanilla extract until completely smooth.
The glaze should be thick enough to coat a spoon but thin enough to spread easily. Add the remaining tablespoon of milk a little at a time if the glaze is too thick.
Color the Glaze
Divide the glaze evenly among 5 small bowls. Add a small amount of pastel gel food coloring to each bowl — pink, lavender, yellow, mint green, and baby blue — and stir each until the color is uniform and vibrant.
Keep unused bowls covered with plastic wrap to prevent the glaze from drying out.
Glaze the Cookies
Once the cookies are completely cool, use a small spoon or offset spatula to spread a thin, even layer of colored glaze over each cookie, filling to the edges. Work with one color at a time, or mix and match colors across different cookie shapes for a festive rainbow effect.
Add Sprinkles
Immediately after glazing each cookie (while the glaze is still wet), scatter pastel rainbow sprinkles and pastel nonpareils generously over the top. Gently press them in with your fingertip so they adhere.
Allow the glazed cookies to sit at room temperature for at least 30 minutes, or until the glaze is fully set and no longer tacky, before serving or storing.
Store and Serve
Store finished cookies in a single layer (or between sheets of parchment paper) in an airtight container at room temperature for up to 5 days. Cookies can also be frozen unglazed for up to 2 months; thaw completely before decorating.
Per serving (1 cookie) — values are estimates
Highly Recommended
11. Pressed Flower Lemon Shortbread Cookies

Fresh lemon zest and juice work into creamed butter and powdered sugar to build a bright, citrus-forward dough that bakes into crisp-edged shortbread with a delicate, melt-in-your-mouth crumb beneath each pressed flower topping.
Pressed Flower Lemon Shortbread Cookies
Dough
Decoration
- 🔌Stand mixer or hand electric mixer
- 🥣Large mixing bowl
- 🥄Rubber spatula
- 🔪Microplane or fine zester
- 📄Plastic wrap
- 🫙Rolling pin
- 📄Parchment paper
- 🥧Two large baking sheets
- 🍴3-inch round cookie cutter
- 🖌️Small pastry brush
- 🪜Wire cooling rack
- 🍴Ruler or bench scraper
Cream Butter and Sugar
In the bowl of a stand mixer fitted with the paddle attachment (or using a hand mixer and large bowl), beat 1 cup softened unsalted butter on medium speed for 2 minutes until smooth and creamy. Add 1/2 cup sifted powdered sugar and beat on low for 30 seconds to combine, then increase to medium-high and beat for another 2 minutes until the mixture is light and fluffy, scraping down the sides of the bowl as needed.
Add Lemon Flavoring
Add 2 tablespoons fresh lemon zest, 1 tablespoon fresh lemon juice, 1 teaspoon vanilla extract, and 1/4 teaspoon fine sea salt to the butter mixture. Beat on medium speed for 1 minute until fully incorporated and fragrant.
The mixture may look slightly curdled from the lemon juice — this is normal.
Mix in Flour
In a separate bowl, whisk together 2 cups all-purpose flour and 2 tablespoons cornstarch until evenly combined. With the mixer on its lowest speed, gradually add the flour mixture to the butter mixture in three additions, mixing just until no dry streaks remain after each addition.
Do not overmix — stop as soon as a soft, slightly crumbly dough comes together. Finish mixing by hand with a rubber spatula if needed.
Chill the Dough
Turn the dough out onto a lightly floured surface and gently press it into a cohesive ball. Divide the dough in half and flatten each half into a 1-inch thick disk.
Wrap each disk tightly in plastic wrap and refrigerate for at least 2 hours, or up to 48 hours. The chilling is essential for the cookies to hold their shape and develop a crisp, sandy texture.
Preheat and Roll Dough
When ready to bake, preheat your oven to 325°F (163°C) and line two large baking sheets with parchment paper. Remove one disk of chilled dough from the refrigerator.
On a lightly floured surface, roll the dough out to an even 1/4-inch thickness, rotating the dough 90 degrees every few rolls to prevent sticking. Use a ruler to check thickness for consistency.
Cut Cookie Rounds
Using a 3-inch round cookie cutter, cut out as many rounds as possible, pressing straight down without twisting. Carefully transfer the rounds to the prepared baking sheets, spacing them about 1 inch apart.
Gather the scraps, re-roll once, and cut additional cookies. Repeat with the second disk of dough.
You should have approximately 12 cookies total.
Apply Pressed Flowers
Using a small pastry brush, lightly brush the top of each cookie with a thin, even layer of beaten egg white — just enough to make the surface tacky. Gently place one pressed edible flower face-up in the center of each cookie, pressing very lightly with your fingertip to adhere.
Brush a second very thin coat of egg white over the top of the flower to seal it in place. Sprinkle a pinch of granulated sugar over each cookie for a subtle sparkle.
Bake the Cookies
Place the baking sheets in the preheated 325°F oven and bake for 12 to 14 minutes, rotating the pans from front to back and top to bottom halfway through baking at the 7-minute mark. The cookies are done when the edges are just barely golden and the centers look set and dry — they should not turn brown.
The pale color is key for showcasing the flowers beautifully.
Cool and Store
Remove the baking sheets from the oven and allow the cookies to cool on the pans for 5 minutes — they will be very fragile when hot. Carefully transfer the cookies to a wire cooling rack and allow them to cool completely to room temperature, about 20 to 30 minutes.
The cookies will firm up significantly as they cool. Store in an airtight container at room temperature, layered between sheets of parchment, for up to 5 days.
Per serving (1 cookie) — values are estimates
Highly Recommended
12. Bumblebee Sunflower Vanilla Cookies
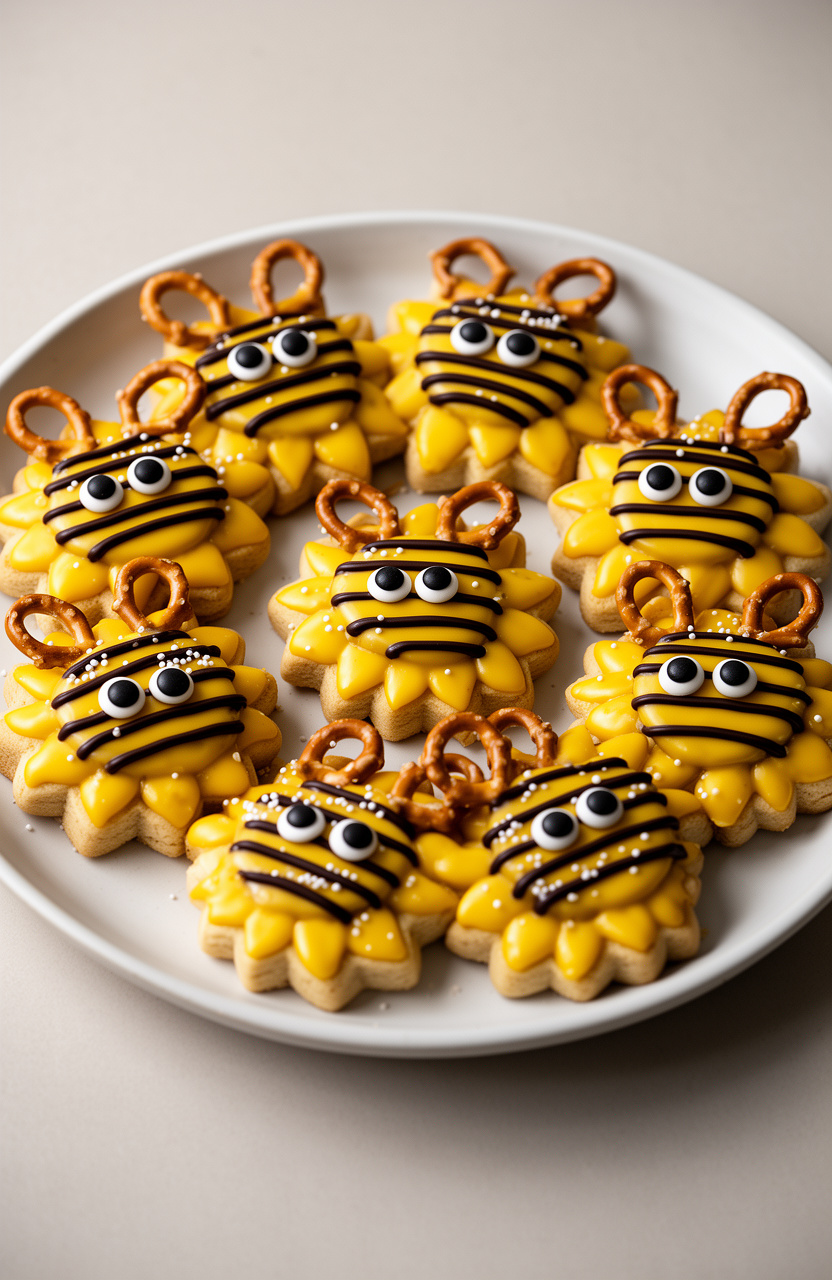
Softened unsalted butter creams into a rich, vanilla-forward dough that bakes into golden, sunflower-shaped cookies with lightly crisp edges and a tender, melt-in-your-mouth crumb at the center.
Bumblebee Sunflower Vanilla Cookies
Decoration
- 🔌Stand mixer or hand electric mixer
- 🥣Large mixing bowl
- 🥣Medium mixing bowl
- 🥧Baking sheets (2)
- 📄Parchment paper
- 🪜Wire cooling rack
- 🥄Measuring cups and spoons
- 🥄Rubber spatula
- 🥣Small microwave-safe bowls (2)
- 🛍️Piping bag or zip-lock bag
- 🥄Cookie scoop (1.5 tablespoon size)
- 🪣Sifter or fine mesh strainer
Preheat the Oven
Preheat your oven to 350°F (175°C). Line two large baking sheets with parchment paper and set aside.
Mix Dry Ingredients
In a medium bowl, sift together 2 1/4 cups all-purpose flour, 1/2 teaspoon baking soda, and 1/4 teaspoon salt. Whisk to combine and set aside.
Cream Butter and Sugar
In a large bowl using a stand mixer or hand mixer, beat 1 cup softened unsalted butter with 3/4 cup granulated sugar and 1/4 cup powdered sugar on medium-high speed for 3 minutes until light and fluffy.
Add Egg and Vanilla
Add 1 large egg and 2 teaspoons pure vanilla extract to the butter mixture. Beat on medium speed for about 1 minute until fully incorporated and smooth.
Combine Dough
Reduce the mixer to low speed and gradually add the flour mixture in three additions, mixing just until no dry streaks remain. Do not overmix.
Fold in 1/2 cup roasted sunflower seeds using a rubber spatula.
Portion the Cookies
Using a 1.5 tablespoon cookie scoop, portion the dough into balls and place them 2 inches apart on the prepared baking sheets. Gently flatten each ball slightly with the palm of your hand to about 1/2 inch thickness.
Bake the Cookies
Bake in the preheated 350°F oven for 11 to 12 minutes, until the edges are just set and lightly golden. The centers may look slightly underdone — that is correct.
Do not overbake.
Cool Completely
Remove from the oven and allow the cookies to cool on the baking sheets for 5 minutes, then transfer to a wire cooling rack and let them cool completely, about 20 minutes, before decorating.
Melt Candy Coatings
Melt 1 cup yellow candy melts in a microwave-safe bowl in 30-second intervals, stirring between each, until smooth. In a separate bowl, melt 1/2 cup dark chocolate chips or black candy melts the same way.
Apply Yellow Coating
Spoon or spread a thin layer of melted yellow candy coating over the top of each cooled cookie, covering it fully. While the yellow coating is still wet, press 2 small pretzel sticks into the top of each cookie as antennae, and place 2 candy eyes in the center.
Pipe Bee Stripes
Transfer the melted dark chocolate or black candy melts into a piping bag or zip-lock bag with a tiny corner snipped off. Pipe 3 to 4 thin stripes horizontally across each yellow-coated cookie to create the bumblebee stripe pattern.
Add a small smile if desired.
Add Final Decoration
While the chocolate stripes are still wet, sprinkle a few white nonpareils or white sprinkles lightly on each cookie to mimic bee wings or pollen dust. Allow the decoration to set completely at room temperature for about 15 minutes before serving or storing.
Per serving (1 cookie) — values are estimates
Top Picks Today
13. Watercolor Carrot Patch Easter Cookies
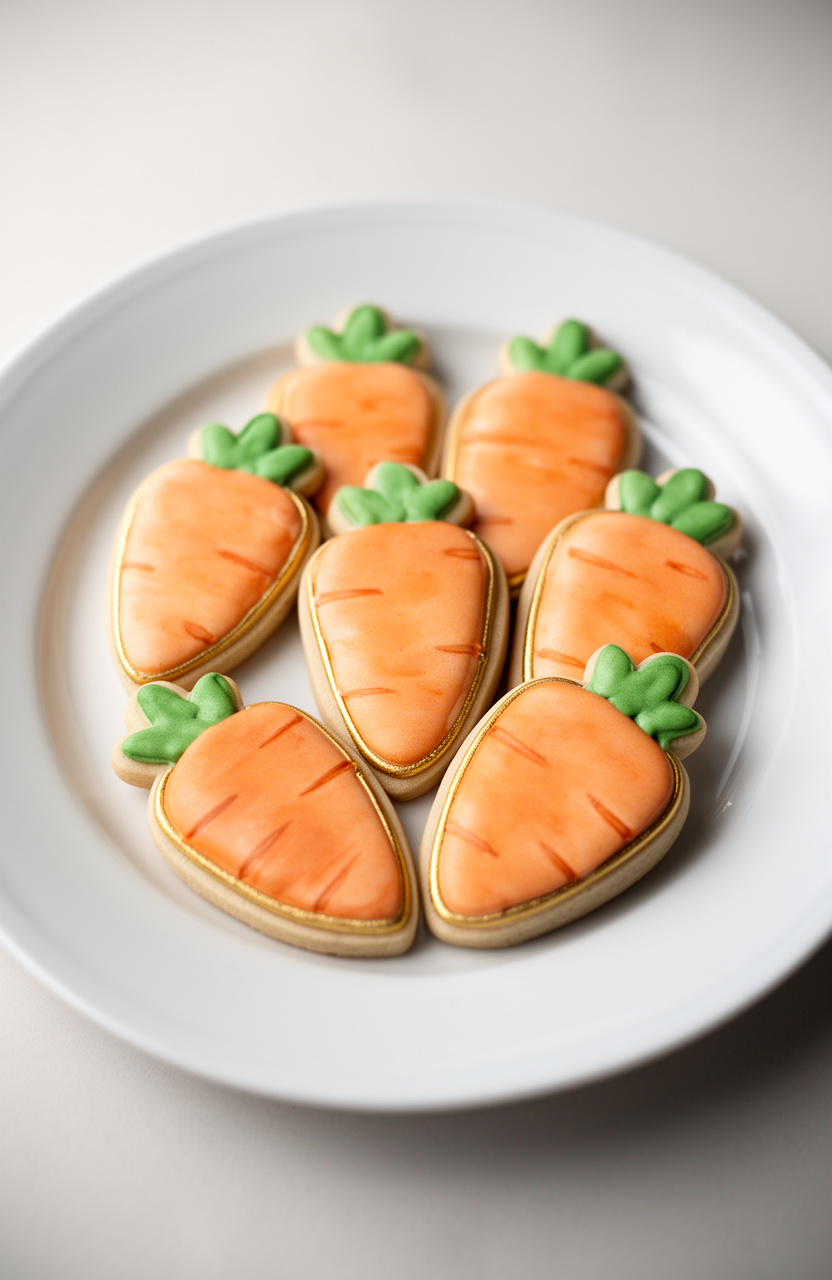
Buttery, golden-edged carrot patch cookies start with whisked dry ingredients folded into a rich, tender dough that bakes into crisp, clean-cut shapes ready for watercolor icing, where soft orange and green hues contrast the warm, lightly salted, melt-in-your-mouth crumb beneath.
Watercolor Carrot Patch Easter Cookies
Cookie Dough
Royal Icing Base
Watercolor Decoration
- 🔌Stand mixer with paddle attachment
- 🥣Large mixing bowls
- 🫙Rolling pin
- 🍴Carrot-shaped cookie cutters (3-inch)
- 🍴Round cookie cutters (3-inch) for patch background cookies
- 🥧Baking sheets (2 to 3)
- 📄Parchment paper or silicone baking mats
- 🪜Wire cooling racks
- 🎂Piping bags (6 to 8)
- 🍴Piping tips: #2 and #3 round tips
- 🍴Small squeeze bottles for flood icing
- 🖌️Fine-tip food-safe paintbrushes (sizes 00 and 2)
- 🍴Small ceramic or palette dishes for mixing colors
- 📍Toothpicks or scribe tool
- 🥄Offset spatula
- 🍴Sifter
- ⚖️Kitchen scale
- 🍴Ruler
- 📄Plastic wrap
Whisk Dry Ingredients
In a medium bowl, whisk together 3 cups (360g) all-purpose flour, 1 teaspoon baking powder, and 1/2 teaspoon fine sea salt until evenly combined. Set aside.
Cream Butter Sugar
In the bowl of a stand mixer fitted with the paddle attachment, beat 1 cup (226g) softened unsalted butter and 1 cup (200g) granulated sugar on medium-high speed for 3 to 4 minutes until light and fluffy, scraping down the sides of the bowl halfway through.
Add Wet Ingredients
Add 1 large room-temperature egg, 2 teaspoons pure vanilla extract, and 1 teaspoon almond extract to the butter mixture. Beat on medium speed for 1 to 2 minutes until fully incorporated and smooth.
Form Cookie Dough
Reduce the mixer to low speed and gradually add the flour mixture in three additions, mixing just until the dough comes together and no dry streaks remain. Do not overmix — the dough should be soft but not sticky.
If it feels too sticky, add 1 tablespoon of flour at a time.
Chill the Dough
Divide the dough into two equal portions. Flatten each into a disc about 1-inch thick, wrap tightly in plastic wrap, and refrigerate for at least 2 hours or up to 48 hours.
Chilling is essential to prevent spreading and maintain sharp cookie edges.
Preheat and Prep
Preheat your oven to 350°F (175°C) and line 2 to 3 baking sheets with parchment paper. Remove one disc of dough from the refrigerator and let it rest at room temperature for 5 to 10 minutes to make it easier to roll.
Roll and Cut Cookies
On a lightly floured surface, roll the dough out to an even 1/4-inch thickness using a rolling pin. Use your 3-inch carrot-shaped cookie cutters and 3-inch round cutters to cut out shapes, placing them 1 inch apart on the prepared baking sheets.
Re-roll scraps once and repeat. You should get approximately 24 cookies total.
Pre-Bake Chill
Place the cut-out cookies on the lined baking sheets and refrigerate for 10 minutes before baking — this helps them hold their shape perfectly in the oven.
Bake the Cookies
Bake the cookies in the preheated 350°F oven for 10 to 12 minutes, until the edges are just barely set and the centers look slightly underdone — they will firm up as they cool. Do not allow the edges to brown.
Rotate the pans halfway through baking.
Cool Completely
Remove the baking sheets from the oven and allow the cookies to cool on the pan for exactly 5 minutes before transferring them to wire cooling racks. Allow cookies to cool completely for at least 30 minutes before decorating — warm cookies will melt the icing.
Make Royal Icing
Make the royal icing: In the clean bowl of a stand mixer fitted with the paddle attachment, combine 4 cups (480g) sifted powdered sugar, 3 tablespoons meringue powder, 1/2 teaspoon cream of tartar, and 1 teaspoon clear vanilla extract. With the mixer on low, add warm water 1 tablespoon at a time, starting with 6 tablespoons.
Increase speed to medium-high and beat for 5 to 7 minutes until the icing is bright white, glossy, and holds stiff peaks. This is your stiff-consistency icing.
Divide and Tint Icing
Divide the stiff royal icing into portions. Reserve about 1/2 cup as stiff white icing for outlining.
Thin the remaining icing to flood consistency by adding warm water, 1/2 teaspoon at a time, stirring gently until a ribbon of icing dropped back into the bowl disappears in 10 to 12 seconds. Divide the flood icing into 4 small bowls: tint one orange, one green, one with a touch of brown (for a dirt/soil effect), and leave one white.
Outline and Flood Carrots
For the carrot-shaped cookies: Using a piping bag fitted with a #2 round tip and the stiff white icing, pipe a clean outline around the edge of each carrot cookie. Allow the outline to dry for 5 minutes.
Then fill the inside using orange flood icing in a squeeze bottle, using a toothpick or scribe tool to guide the icing into the corners. Flood the top quarter of the carrot with green icing for the leafy top.
Allow to dry for 30 minutes at room temperature.
Flood Patch Cookies
For the round ‘carrot patch’ background cookies: Outline with stiff white icing using a #2 tip, then flood with the brown-tinted icing to create a soil effect. While still wet, use a toothpick to swirl in tiny amounts of white and orange flood icing to create a mottled, earthy texture.
Allow to dry for 30 minutes.
Prepare Watercolor Palette
Create the watercolor effect: Once the base flood icing on all cookies has dried for at least 30 minutes, prepare your watercolor palette. In small ceramic dishes, mix tiny drops of gel food coloring (orange, green, yellow, brown) with clear vanilla extract or vodka — about 2 to 3 drops of color per 1 teaspoon of liquid.
The alcohol evaporates quickly, leaving beautiful translucent color washes.
Paint Watercolor Washes
Using a fine-tip size 2 food-safe paintbrush, apply the watercolor washes in loose, organic strokes over the dried iced carrot cookies. Layer orange tones over the carrot body, blending toward yellow at the tips for dimension.
Use green in varying shades on the leafy tops. Apply the colors wet-on-wet for soft blending, or let each layer dry 5 minutes for sharper definition.
Work quickly and use a light hand — less is more with watercolor.
Add Fine Details
Add fine details using a size 00 paintbrush: paint thin horizontal lines across the carrot body using a deeper orange mixed with a touch of brown to suggest texture and ridges. Add tiny feathery strokes in the green section to suggest individual carrot top leaves.
On the round patch cookies, paint tiny orange carrot tips peeking up from the soil using the tip of your smallest brush.
Apply Luster Dust
Optional shimmer step: Mix a small amount of gold luster dust with 1/2 teaspoon of clear vanilla extract or vodka to form a thin, paintable liquid. Using a clean fine brush, lightly dust over the carrot bodies and the edges of the patch cookies for a luminous, springtime glow.
Allow to dry for 5 minutes.
Add Sprinkle Accents
While the painted details are still slightly tacky (within 2 to 3 minutes of painting), add a few white nonpareils or pearl sprinkles to the green leafy sections of the carrot cookies to suggest dewdrops or tiny flowers. Press gently with a clean fingertip to adhere.
Dry and Store
Allow all decorated cookies to dry completely at room temperature, uncovered, for a minimum of 6 to 8 hours or overnight before stacking or packaging. The royal icing must be fully hardened to prevent smudging the watercolor artwork.
Store in an airtight container at room temperature with parchment between layers for up to 10 days.
Per serving (1 decorated cookie) — values are estimates
Top Picks Today
14. Blush Peony Royal Icing Cookies
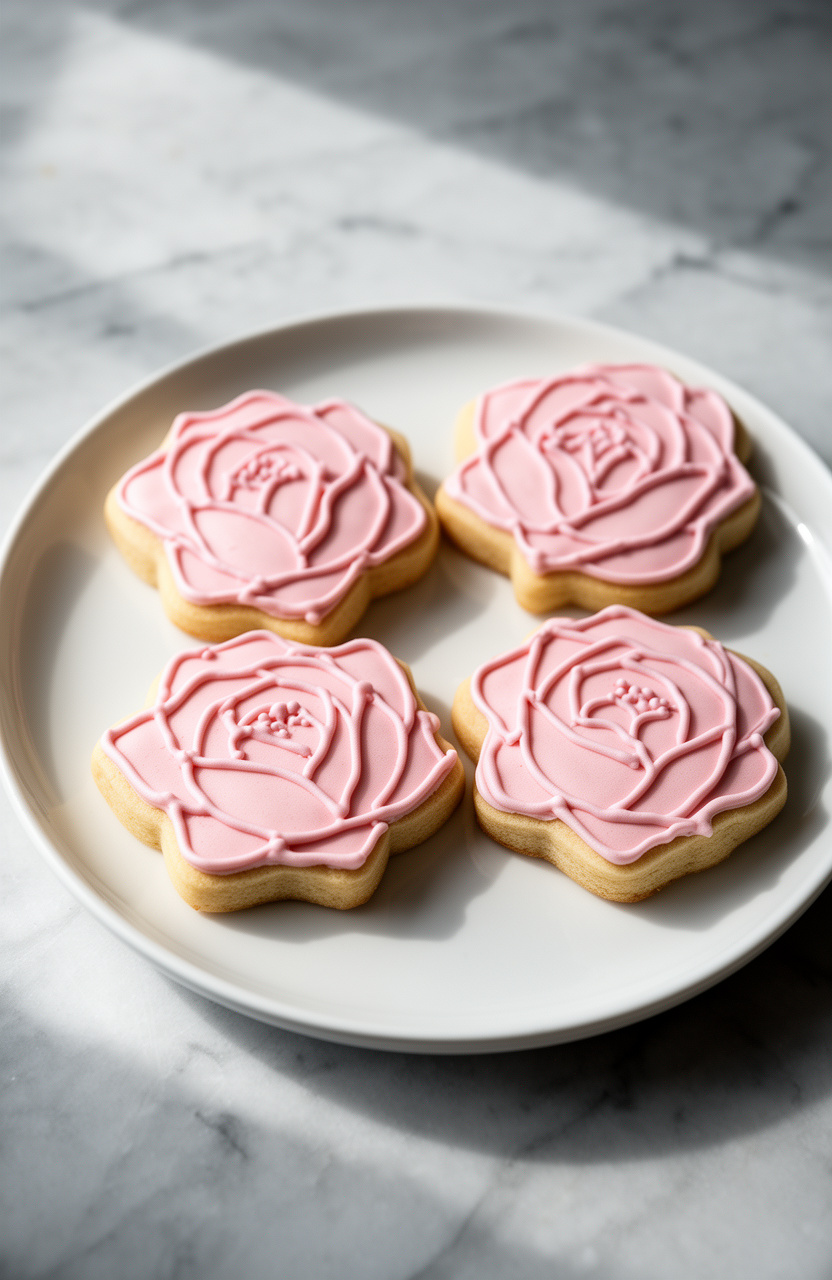
Making the dough starts with creaming softened butter into a flour-based base seasoned with fine sea salt and baking powder, producing a smooth, rollable dough that bakes into crisp-edged cookies with a tender, melt-in-your-mouth crumb beneath blush-toned peony royal icing.
Blush Peony Royal Icing Cookies
Sugar Cookie Dough
Royal Icing
Decoration
- 🔌Stand mixer with paddle attachment
- 🥣Large mixing bowls
- 🍴Round flower or peony-shaped cookie cutters (3-inch)
- 🫙Rolling pin with 1/4-inch guide rings
- 🥧Baking sheets (2 half-sheet pans)
- 📄Parchment paper or silicone baking mats
- 🪜Wire cooling racks
- 🔌Electric hand mixer
- 🪣Fine mesh sieve or sifter
- 🎂Piping bags (at least 6)
- 🍴Piping tips: #2 round, #1 round, #101 petal tip, #103 petal tip
- 🍴Rubber band or bag ties
- 🍴Squeeze bottles (optional, for flooding)
- 📍Toothpicks or scribe tool
- 🥄Small offset spatula
- 🖌️Fine artist’s paintbrush
- 🍽️Small palette or plate for mixing luster dust
- 📄Plastic wrap
- 🍴Ruler
- 🫙Airtight containers for storing finished cookies
Make Cookie Dough
In a medium bowl, whisk together 3 cups all-purpose flour, 1 teaspoon baking powder, and 1/2 teaspoon fine sea salt. Set aside.
In the bowl of a stand mixer fitted with the paddle attachment, beat 1 cup softened unsalted butter and 1 cup granulated sugar on medium-high speed for 3 to 4 minutes until light and fluffy, scraping down the sides as needed.
Combine Wet and Dry
Add 1 large egg, 2 teaspoons pure vanilla extract, and 1/2 teaspoon almond extract to the butter mixture. Beat on medium speed for 1 minute until fully incorporated.
Reduce mixer to low and gradually add the flour mixture, mixing just until a soft dough forms and no dry streaks remain. Do not overmix.
Chill the Dough
Turn the dough out onto a lightly floured surface and divide it in half. Flatten each portion into a 1-inch-thick disc and wrap tightly in plastic wrap.
Refrigerate for at least 2 hours, or up to 48 hours. Chilling is essential for the cookies to hold their shape during baking.
Roll and Cut Cookies
When ready to bake, preheat your oven to 350°F (175°C) and line two baking sheets with parchment paper. Remove one disc of dough from the refrigerator and let it sit at room temperature for 5 minutes.
On a lightly floured surface, roll the dough to exactly 1/4-inch thickness using a rolling pin with guide rings. Cut out shapes with a 3-inch peony or round flower cookie cutter.
Transfer cut-outs to the prepared baking sheets, spacing them 1 inch apart. Re-roll scraps once and cut additional cookies.
Bake the Cookies
Bake the cookies in the preheated 350°F oven for 10 to 12 minutes, until the edges are just barely set and the centers look slightly underdone — they should not brown. The bottoms should be pale golden.
Remove from the oven and let cookies cool on the baking sheet for 5 minutes, then transfer to a wire rack to cool completely, at least 30 minutes. Repeat with the second disc of dough.
Cookies must be completely cool before decorating.
Make Royal Icing Base
Prepare the base royal icing: In a large bowl, combine 4 tablespoons meringue powder, 6 cups sifted powdered sugar, 1 teaspoon vanilla extract, and 7 tablespoons warm water. Beat with an electric hand mixer on medium-high speed for 5 to 7 minutes until the icing is thick, glossy, and forms stiff peaks.
This is your stiff-consistency royal icing base. Cover the bowl tightly with plastic wrap pressed directly onto the surface to prevent crusting.
Color the Icing
Divide the stiff royal icing into four portions. Color the portions as follows: Portion 1 — mix in a generous amount of soft pink gel food coloring to achieve a medium blush pink.
Portion 2 — mix in a small amount of deep rose gel coloring plus a tiny touch of mauve to create a deeper dusty rose. Portion 3 — leave mostly white with the tiniest drop of soft pink for a barely-there blush.
Portion 4 — mix in white gel food coloring to achieve a bright opaque white. Adjust colors by adding coloring drop by drop, mixing thoroughly between additions.
Prepare Flooding Icing
Create flooding (outline-and-flood) consistency icing from each color: Take a small portion of each colored stiff icing and thin it by adding warm water, one teaspoon at a time, stirring gently to avoid incorporating air bubbles. The correct flooding consistency is reached when a ribbon of icing dropped from a spoon disappears back into the surface within 10 seconds (the ’10-second rule’).
Keep the remaining stiff icing for piping petals. Transfer flooding icing into squeeze bottles or piping bags fitted with a #2 round tip.
Keep all icing covered at all times.
Flood Cookie Base
Using a piping bag fitted with a #2 round tip and the medium blush pink stiff icing, pipe a thin outline around the perimeter of each cookie. Work one cookie at a time.
Immediately flood the interior with the medium blush pink flooding icing, using a squeeze bottle or piping bag to fill in the outlined area. Use a toothpick or scribe tool to guide the icing into corners and pop any surface air bubbles.
Allow the flooded base to dry at room temperature for at least 1 hour until a firm crust has formed before adding any detail layers.
Pipe Outer Petals
Once the base flood layer has crusted (about 1 hour), begin building the peony petals using the stiff royal icing. Fit a piping bag with a #103 petal tip.
Fill the bag with the deep dusty rose stiff icing. Hold the bag at a 45-degree angle with the wide end of the tip touching the cookie surface.
Pipe a curved, ruffled petal shape by applying gentle, even pressure while moving the tip in a small arc, creating a slight ruffle effect. Pipe 5 to 6 large outer petals, evenly spaced around the perimeter of the cookie, overlapping slightly.
Pipe Middle Petals
Switch to a #101 petal tip and fill a piping bag with the medium blush pink stiff icing. Pipe a second ring of slightly smaller, more upright petals inside the first ring, overlapping the bases of the outer petals.
Angle these petals slightly inward to create the illusion of depth and a blooming flower. Pipe approximately 5 petals in this layer.
The variation in color between the outer and inner rings adds dimension and a realistic blush gradient.
Pipe Center Petals
Using the #101 petal tip and the barely-blush white icing, pipe a tight cluster of small, tightly furled petals in the very center of the cookie to form the heart of the peony. These petals should be more upright and tightly curved, mimicking the closed center of a real peony bloom.
Pipe 3 to 4 petals, layering them so they appear to spiral inward. Add tiny white dots around the center cluster using a #1 round tip to suggest stamens.
Dry Decorated Cookies
Allow all piped petal details to dry completely at room temperature for at least 6 to 8 hours, or ideally overnight (8 hours). Do not stack or cover the cookies during this drying time.
The icing must be fully hardened before applying the luster dust finish. Set cookies in a single layer on wire racks in a dry environment away from humidity.
Apply Luster Finish
Once fully dry, prepare the pearl luster dust finish. On a small palette or plate, mix 1/4 teaspoon pearl luster dust with just enough vodka or clear extract (approximately 1/2 teaspoon) to create a thin, paintable liquid.
Using a fine artist’s paintbrush, lightly brush the luster dust mixture over the petal surfaces in gentle sweeping strokes, concentrating on the petal edges and tips to catch the light. The alcohol will evaporate quickly, leaving a soft, luminous sheen.
Allow to dry for 5 minutes before handling.
Store and Serve
Once the luster dust is completely dry, the cookies are finished. Store decorated cookies in a single layer in an airtight container at room temperature for up to 1 week.
Do not refrigerate decorated royal icing cookies as condensation can cause the icing to become sticky and colors to bleed. If stacking is necessary, place a sheet of parchment paper between each layer and store in a cool, dry location.
Per serving (1 decorated cookie) — values are estimates
Most Loved Products
15. Spring Garden Basket Sugar Cookies
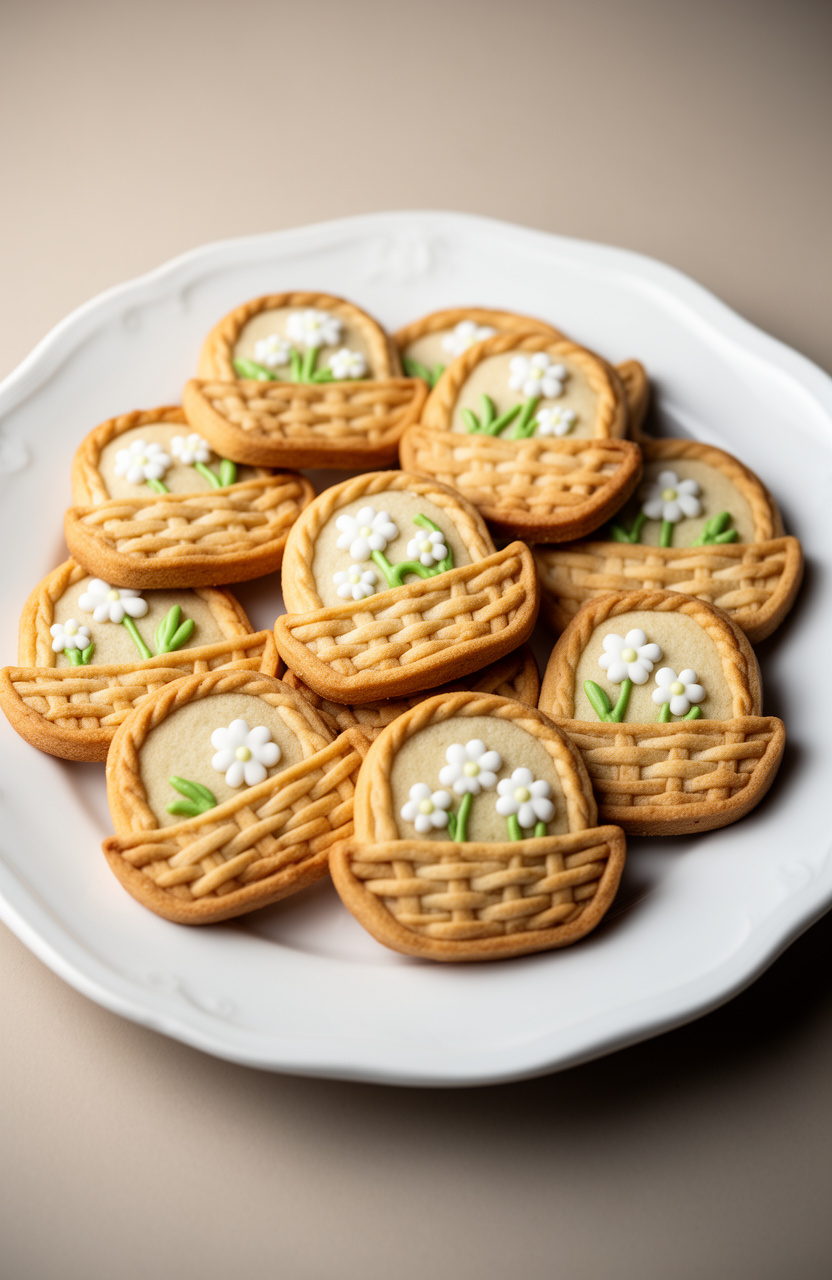
Dry ingredients — flour, baking powder, and fine sea salt — whisk together first before folding into creamed butter, building a smooth, rollable dough that bakes into garden basket-shaped cookies with cleanly defined edges and a tender, lightly crisp crumb throughout.
Spring Garden Basket Sugar Cookies
Cookie Dough
Royal Icing
Decoration
- 🔌Stand mixer with paddle attachment
- 🥣Large mixing bowl
- 🥣Medium mixing bowls (6 for icing colors)
- 🥄Whisk
- 🫙Rolling pin
- 🍴Basket weave cookie cutter (4-inch)
- 🍴Flower-shaped cookie cutters (1-2 inch)
- 🥧Baking sheets (2 large)
- 📄Parchment paper
- 🪜Wire cooling racks
- 📄Plastic wrap
- 🎂Piping bags (6-8)
- 🍴Piping tips: #2 round tip, #1 round tip, #352 leaf tip
- 🥄Rubber spatulas
- 🥄Offset spatula
- 📍Toothpicks
- 🫙Airtight containers for icing
- 🍴Small squeeze bottles (optional)
Mix Dry Ingredients
In a medium bowl, whisk together 3 cups all-purpose flour, 1 teaspoon baking powder, and 1/2 teaspoon fine sea salt until evenly combined. Set aside.
Cream Butter and Sugar
In the bowl of a stand mixer fitted with the paddle attachment, beat 1 cup softened unsalted butter and 1 cup granulated sugar together on medium-high speed for 3-4 minutes until light, pale, and fluffy. Scrape down the sides of the bowl as needed.
Add Wet Ingredients
Add 1 large egg, 2 teaspoons pure vanilla extract, and 1 teaspoon almond extract to the butter mixture. Beat on medium speed for 1-2 minutes until fully incorporated and smooth.
Combine Dough
Reduce mixer speed to low and gradually add the flour mixture in three additions, mixing just until the dough comes together and no dry streaks remain. Do not overmix.
The dough will be soft but not sticky.
Chill the Dough
Divide the dough into two equal portions. Flatten each into a 1-inch thick disc and wrap tightly in plastic wrap.
Refrigerate for at least 2 hours or up to 3 days. This chilling step is essential for the cookies to hold their shape during baking.
Preheat and Prep
When ready to bake, preheat your oven to 350°F (175°C). Line two large baking sheets with parchment paper.
Remove one disc of dough from the refrigerator and let it sit at room temperature for 5 minutes to slightly soften.
Cut Cookie Shapes
On a lightly floured surface, roll the dough out to an even 1/4-inch thickness. Using a 4-inch basket weave cookie cutter, cut out as many shapes as possible.
Re-roll scraps once and cut additional cookies. Use small flower-shaped cutters to cut out flower cookies from remaining dough.
Place all cut cookies 1 inch apart on the prepared baking sheets.
Bake the Cookies
Bake the cookies in the preheated 350°F oven for 10-12 minutes, until the edges are just barely golden and the centers look set but still appear slightly soft. Do not overbake — the cookies will firm up as they cool.
Rotate the baking sheet halfway through baking.
Cool Completely
Remove baking sheets from the oven and allow cookies to cool on the pan for 5 minutes before transferring carefully to wire cooling racks. Allow cookies to cool completely to room temperature, at least 30 minutes, before decorating.
Warm cookies will melt the icing.
Make Royal Icing
Make the royal icing: In the clean bowl of a stand mixer fitted with the whisk attachment, combine 4 cups sifted powdered sugar, 3 tablespoons meringue powder, 6 tablespoons warm water, and 1/2 teaspoon clear vanilla extract. Beat on medium-high speed for 5-7 minutes until the icing is thick, glossy, and holds stiff peaks.
This is your base stiff consistency icing.
Color the Icing
Divide the stiff royal icing into 6 portions in separate medium bowls. Tint one portion green, one yellow, one pink, one lavender, and leave two portions white.
Add gel food coloring a little at a time, stirring thoroughly until you reach your desired spring shades. Cover each bowl with plastic wrap pressed directly against the icing surface to prevent crusting.
Adjust Icing Consistency
For flooding (filling in large areas), thin one portion of white icing and the green icing by adding warm water, one teaspoon at a time, stirring after each addition, until the icing reaches a flood consistency — when you drizzle a ribbon of icing back into the bowl, it disappears and levels out within 10 seconds. Keep the remaining colored icings at stiff or medium consistency for piping details.
Pipe Basket Design
To decorate the basket cookies: Fill a piping bag fitted with a #2 round tip with stiff white icing. Pipe a basket weave pattern on each basket cookie by first outlining the basket shape, then piping horizontal lines across, followed by short vertical lines between each horizontal line to create the woven effect.
Allow the outline to set for 5 minutes before flooding the top portion (the ‘opening’ of the basket) with flood-consistency green icing to represent grass. Use a toothpick to spread evenly.
Add Grass Texture
While the green flood icing is still wet, sprinkle green sanding sugar over the green section to add texture and sparkle. Gently tap off any excess.
Allow the basket cookies to dry at room temperature for at least 1 hour until the flood icing is fully set and no longer tacky.
Decorate Flower Cookies
Decorate the small flower cookies using stiff pink, yellow, and lavender icing in piping bags fitted with #2 round tips. Pipe five small petals on each flower cookie starting from the outside edge and pulling toward the center.
Place a small pastel sugar pearl in the center of each flower while the icing is still wet. Allow to dry for 30 minutes.
Add Garden Details
Once the basket cookies are fully dry, use a piping bag fitted with a #352 leaf tip filled with stiff green icing to pipe small leaves around the green grass area. Then use stiff pink, yellow, and lavender icing to pipe small flower clusters and rosettes on top of the grass section using a #2 tip.
Arrange edible flower sprinkles or wafer paper flowers among the piped designs. Add sugar pearls as flower centers or dewdrops.
Add Luster Dust
Optional finishing touch: Using a dry, clean brush, dust a small amount of edible gold luster dust lightly over the basket weave portion of the cookies to give them a warm, woven-wicker glow. Allow all decorated cookies to dry completely at room temperature for at least 2 hours, or ideally overnight, before stacking or packaging.
Store and Serve
Once fully dry, store the decorated cookies in a single layer in an airtight container at room temperature for up to 1 week. If stacking is necessary, place a sheet of parchment paper between each layer.
Cookies can also be individually wrapped in cellophane bags and tied with ribbon for gifting.
Per serving (1 decorated cookie) — values are estimates
Most Loved Products
From pastel royal icing florals to cheerful Easter-themed sugar cookies, this collection has something worth baking for every spring occasion. Pick one that caught your eye, save or pin your favorites for later, and then come back to leave a comment letting us know which design you’re trying first!