15 Spring Desserts That Taste Like Sunshine in Every Bite
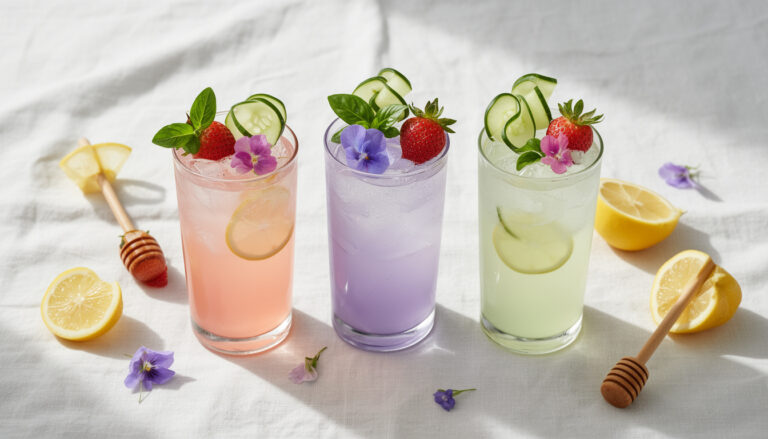
Spring finally has an excuse to show off, and it starts with dessert. From honey-kissed florals to bright citrus and ripe berries, this season’s flavors were basically made for the sweet table.
We’ve pulled together 15 recipes that capture that light, fresh feeling — think Lemon Lavender Shortbread, Strawberry Basil Panna Cotta, and a Rhubarb Custard Tart that’ll have everyone asking for the recipe.
There’s something here for every skill level and every occasion, from lazy weekend baking to a proper spring dinner party. Go ahead and bookmark this one — you’re going to want it all season long.
1. Lemon Lavender Shortbread Cookies
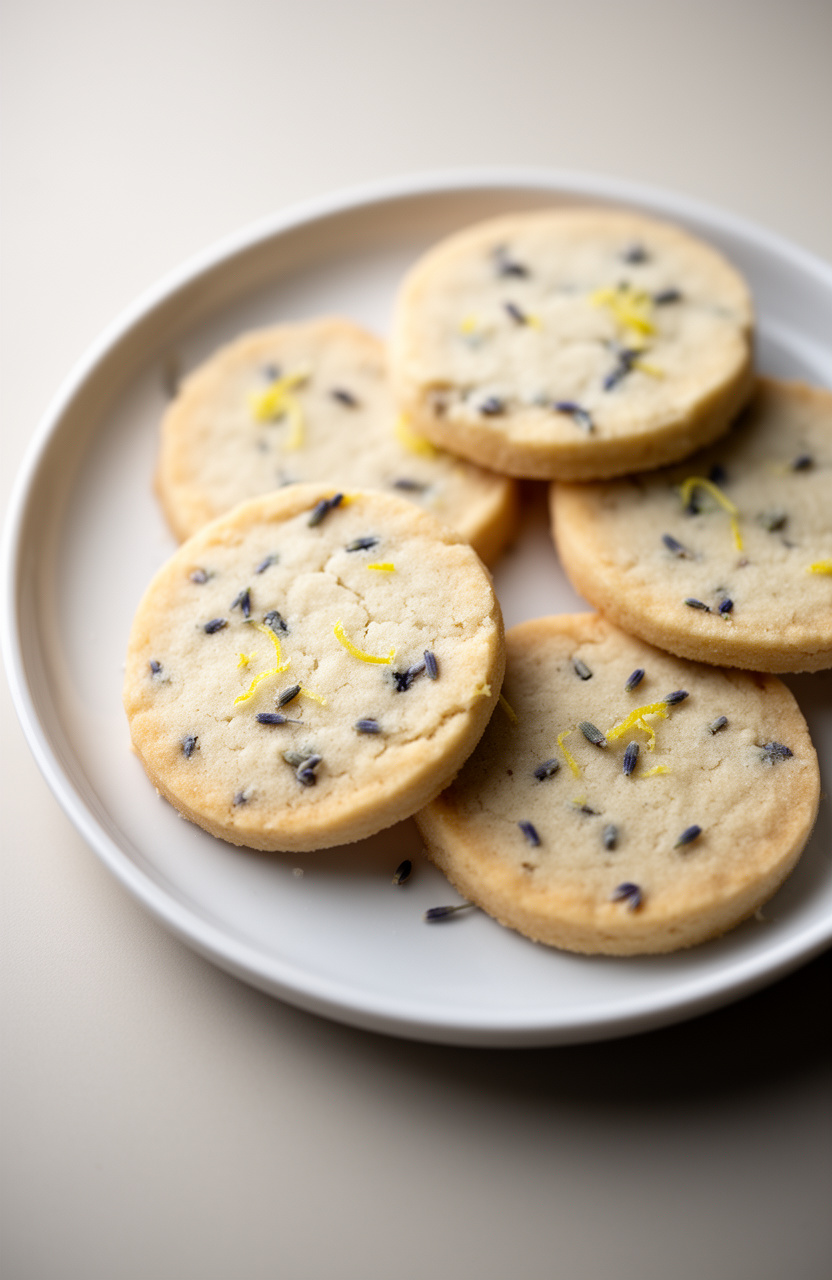
Dried lavender buds and fresh lemon zest infuse these British shortbread cookies with a floral, citrusy depth that starts by combining dry ingredients into a delicate, crumbly dough. They bake into crisp, sandy-textured rounds with a melt-in-your-mouth finish that balances buttery richness against the bright, aromatic notes of lavender.
Lemon Lavender Shortbread Cookies
Glaze
- 🔌Stand mixer or hand electric mixer
- 🥣Large mixing bowl
- 🥄Rubber spatula
- 📄Plastic wrap or cling film
- 🫙Rolling pin
- 🥧Baking sheets (2)
- 📄Parchment paper
- 🍴Round or fluted cookie cutter (5cm / 2-inch)
- 🪜Wire cooling rack
- 🥣Small mixing bowl
- 🔪Microplane or fine zester
- 🔪Sharp knife
- 🥄Whisk
Combine Dry Ingredients
In a large mixing bowl, combine 2 cups (250g) all-purpose flour, 1/2 cup (60g) sifted powdered sugar, and 1/4 teaspoon fine sea salt. Whisk together until evenly combined and set aside.
Add Aromatics
Finely chop 1 tablespoon of dried culinary lavender buds to release their oils and prevent any overly coarse texture in the finished cookies. Zest 2 lemons to yield 1 tablespoon of fresh lemon zest.
Add both the lavender and lemon zest to the flour mixture and whisk again to distribute evenly throughout.
Cut In Butter
Add 1 cup (225g) of cold, cubed unsalted butter to the flour mixture. Using a stand mixer fitted with a paddle attachment (or a hand mixer on low speed), mix on low until the butter is incorporated and the mixture resembles coarse, sandy crumbs, about 2 minutes.
Do not overmix — the butter should remain cold.
Form The Dough
Add 1 teaspoon pure vanilla extract and 1 tablespoon fresh lemon juice to the crumbly mixture. Continue mixing on low speed just until the dough begins to clump together and pulls away from the sides of the bowl, about 1 minute.
The dough will be slightly crumbly but should hold together when pressed between your fingers.
Chill The Dough
Turn the dough out onto a lightly floured surface and gently press it together into a flat disc. Divide in half, shape each half into a disc, and wrap tightly in plastic wrap.
Refrigerate for at least 2 hours or up to 24 hours. Chilling is essential for the cookies to hold their shape during baking.
Preheat The Oven
When ready to bake, preheat your oven to 325°F (160°C / 140°C fan). Line two baking sheets with parchment paper and set aside.
Roll And Cut
Remove one disc of dough from the refrigerator. On a lightly floured surface, roll the dough out to approximately 6mm (1/4-inch) thickness.
Using a 5cm (2-inch) round or fluted cookie cutter, cut out cookies and place them about 2.5cm (1 inch) apart on the prepared baking sheets. Re-roll any scraps and cut additional cookies.
Repeat with the second disc of dough.
Bake The Cookies
Bake the cookies in the preheated oven for 12 to 14 minutes, or until the edges are just barely golden and the tops appear set but still pale. Do not overbake — shortbread should remain light in colour.
Rotate the baking sheets halfway through baking for even results.
Cool Completely
Remove the baking sheets from the oven and allow the cookies to cool on the pan for 5 minutes before carefully transferring them to a wire cooling rack. Allow them to cool completely, about 20 minutes, before glazing.
Make Lemon Glaze
In a small bowl, whisk together 1 cup (120g) sifted powdered sugar and 2 tablespoons fresh lemon juice until smooth and pourable. The glaze should be thick enough to coat the back of a spoon but still drizzle easily.
Add a few extra drops of lemon juice if needed to reach the right consistency.
Glaze And Garnish
Spoon or drizzle about 1 teaspoon of glaze over each cooled cookie, spreading it gently with the back of a spoon. Immediately garnish each cookie with a pinch of dried culinary lavender buds and a small amount of fresh lemon zest before the glaze sets.
Allow the glaze to set fully at room temperature for about 15 minutes before serving or storing.
Store The Cookies
Store the finished cookies in an airtight container at room temperature for up to 5 days, or freeze unglazed cookies in a single layer for up to 2 months. Glaze after thawing for best results.
Per serving (2 cookies) — values are estimates
Trending on Amazon
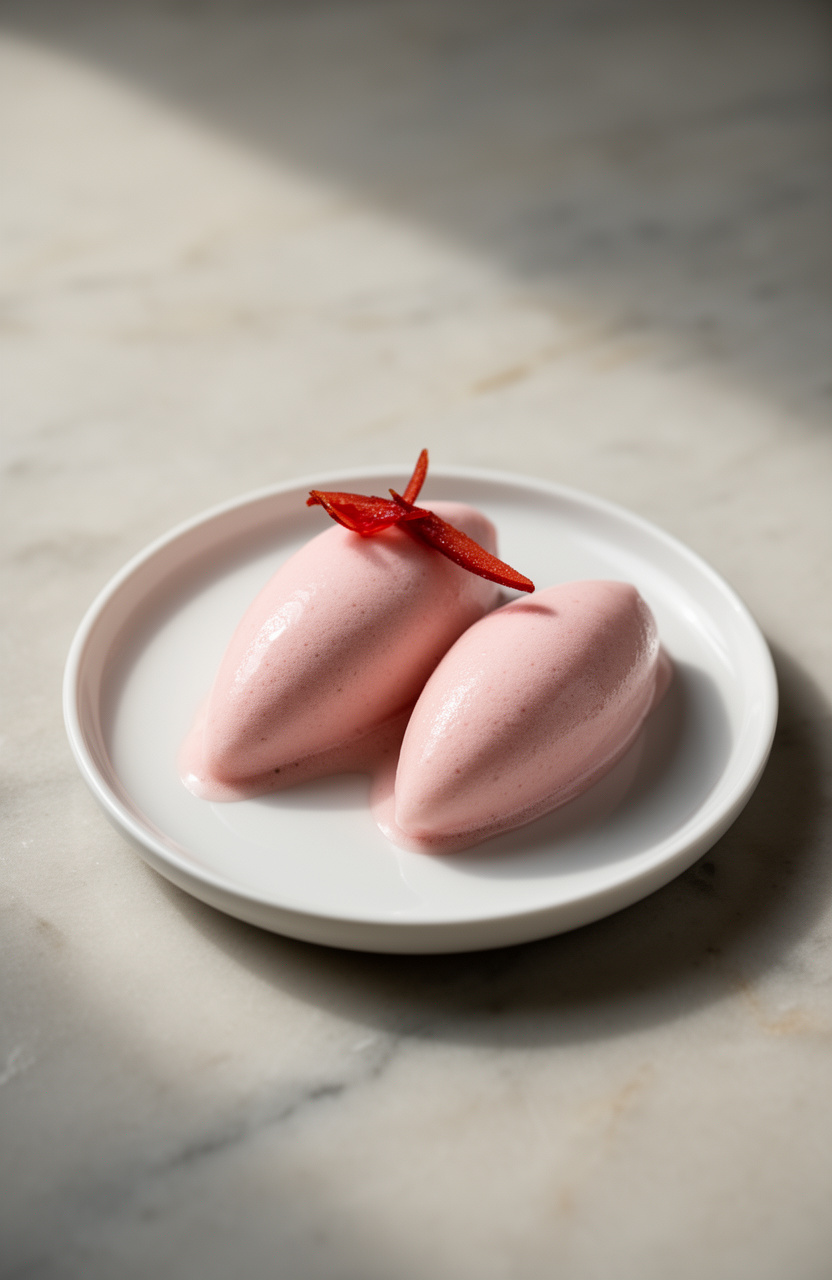
2. Strawberry Basil Panna Cotta
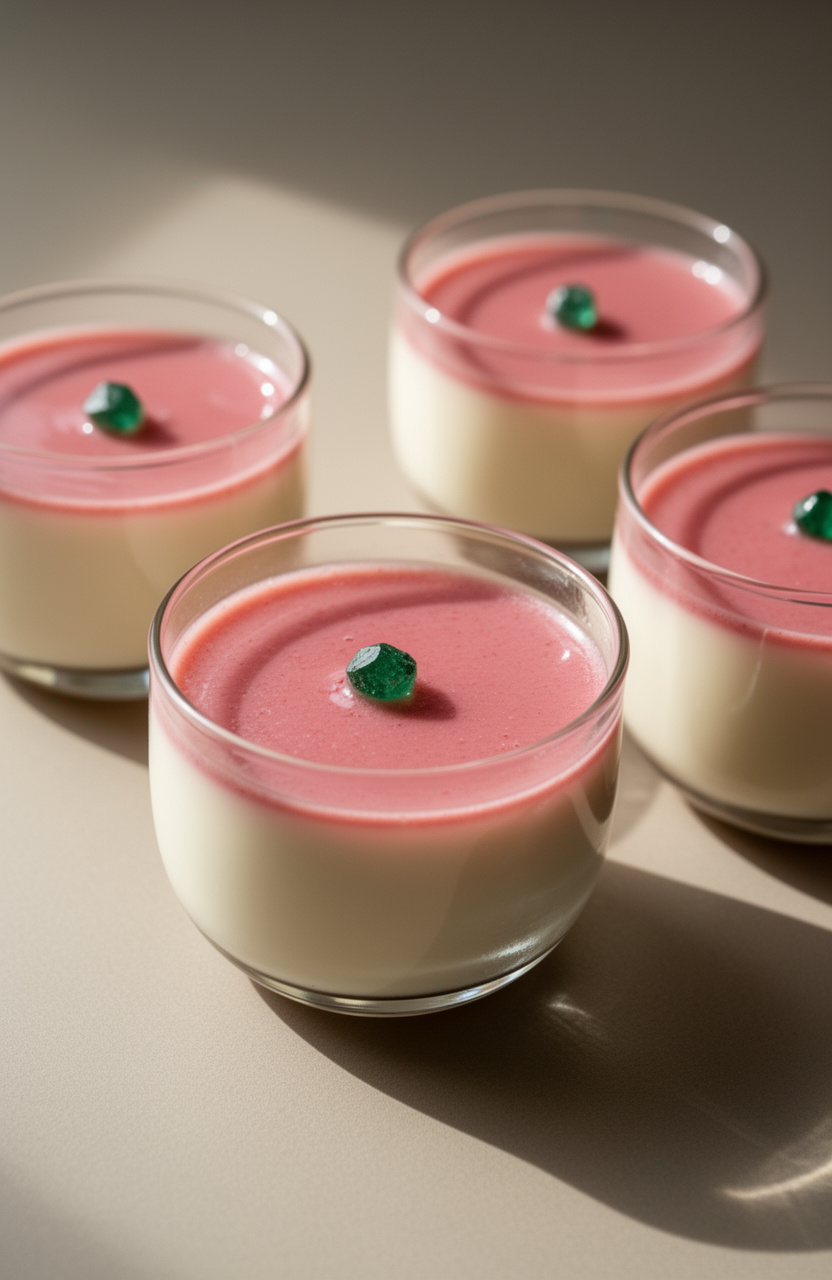
Silky and cool, this strawberry basil panna cotta layers fresh berry brightness against the subtle herbal warmth of basil in a cream-and-gelatin base poured into individual serving vessels. After chilling, it sets into a smooth, lightly wobbly dessert that unmolds cleanly with a delicate, melt-on-the-tongue richness.
Strawberry Basil Panna Cotta
Panna Cotta Base
Strawberry Topping
Garnish
- 🥤4 individual ramekins (6 oz / 180ml each) or dessert glasses
- 🥣Medium microwave-safe mixing bowl
- 🥣Small microwave-safe bowl or cup
- 🪣Fine mesh strainer
- 🥄Whisk
- 🥄Rubber spatula
- 📄Plastic wrap or small plates for covering
- 🥄Measuring cups and spoons
- 🫕Fork or potato masher
- 🍽️Serving platter or individual dessert plates
- 🥄Ladle or large spoon
Prepare Serving Vessels
Prepare your 4 ramekins or dessert glasses by lightly spraying the inside of each with a neutral cooking spray if you plan to unmold the panna cotta, or leave them plain if serving directly in the glass. Arrange them on a small baking sheet or tray for easy transport to the refrigerator.
Heat Cream Mixture
In a medium microwave-safe mixing bowl, combine 2 cups (480ml) heavy whipping cream, 1/4 cup (50g) granulated sugar, 1/4 teaspoon fine sea salt, and the 10 gently torn fresh basil leaves. Stir briefly with a whisk to begin dissolving the sugar.
Microwave the mixture on HIGH for 2 to 2.5 minutes, stopping to stir once at the halfway point, until the cream is very hot and steaming but not boiling. The sugar should be fully dissolved.
Infuse Basil
Once the cream is hot, press the torn basil leaves gently with the back of a spoon to help release their oils. Cover the bowl tightly with plastic wrap and allow the basil to steep and infuse into the hot cream for 30 minutes at room temperature.
Do not refrigerate during this step — the cream needs to stay warm enough to dissolve the gelatin in the next step.
Bloom the Gelatin
While the cream is infusing, bloom the gelatin. Pour 3 tablespoons of cold water into a small microwave-safe bowl or cup.
Sprinkle the 2 1/4 teaspoons (7g) of unflavored powdered gelatin evenly over the surface of the water. Do not stir.
Let the gelatin sit undisturbed for 5 minutes until it absorbs the water and becomes thick and spongy.
Melt Gelatin
After the gelatin has bloomed for 5 minutes, microwave it on HIGH for 10 to 15 seconds until it is fully melted and liquid. Stir with a spoon to ensure no granules remain — the mixture should be completely clear and smooth.
Set aside.
Strain and Flavor
After the 30-minute basil infusion is complete, remove the plastic wrap from the cream bowl. Using a fine mesh strainer held over the bowl, pour the cream through the strainer to remove all basil leaves, pressing them gently with a spatula to extract maximum flavor.
Discard the spent basil leaves. Add 1/2 teaspoon pure vanilla extract to the strained cream and whisk briefly to combine.
Combine Gelatin and Cream
Pour the melted gelatin liquid into the warm basil-infused cream in a slow, steady stream while whisking constantly. Whisk for about 1 minute until the gelatin is completely and evenly incorporated throughout the cream.
The mixture should be smooth, slightly thickened, and uniform in color.
Fill and Chill
Using a ladle or large spoon, carefully divide the panna cotta mixture evenly among the 4 prepared ramekins or glasses, filling each approximately three-quarters full. Tap each ramekin gently on the counter a few times to release any air bubbles.
Cover each ramekin loosely with plastic wrap and transfer the tray to the refrigerator. Chill for a minimum of 4 hours, or until the panna cotta is fully set and jiggles only slightly in the center when gently shaken.
Macerate Strawberries
While the panna cotta chills, prepare the macerated strawberry topping. In a medium bowl, combine 1 pound (450g) hulled and quartered fresh strawberries, 3 tablespoons granulated sugar, and 1 tablespoon fresh lemon juice.
Toss everything together until the strawberries are evenly coated. Using a fork or potato masher, lightly crush about one-quarter of the strawberry pieces to release their juices while leaving the rest chunky.
Cover the bowl with plastic wrap and refrigerate for at least 30 minutes — the berries will release a beautiful, glossy ruby syrup.
Unmold or Top
Once the panna cotta has set for at least 4 hours and is firm to the touch, remove both the panna cottas and the macerated strawberries from the refrigerator. If serving directly in the glass, spoon 2 to 3 tablespoons of the macerated strawberry mixture, including plenty of the accumulated syrup, directly over the top of each panna cotta.
If unmolding, run a thin knife around the edge of each ramekin, place a dessert plate on top, and invert with a firm shake. Spoon the strawberry topping over the unmolded panna cotta.
Garnish and Serve
Finish each serving with a small fresh basil leaf placed decoratively on top of the strawberry topping and one whole small strawberry on the side. Serve immediately for the best contrast between the cool, creamy panna cotta and the juicy, vibrant strawberries.
Any leftover panna cotta (without topping) can be covered and refrigerated for up to 3 days.
Per serving (1 panna cotta with strawberry topping) — values are estimates
Most Loved Products
3. Mango Coconut Chia Pudding
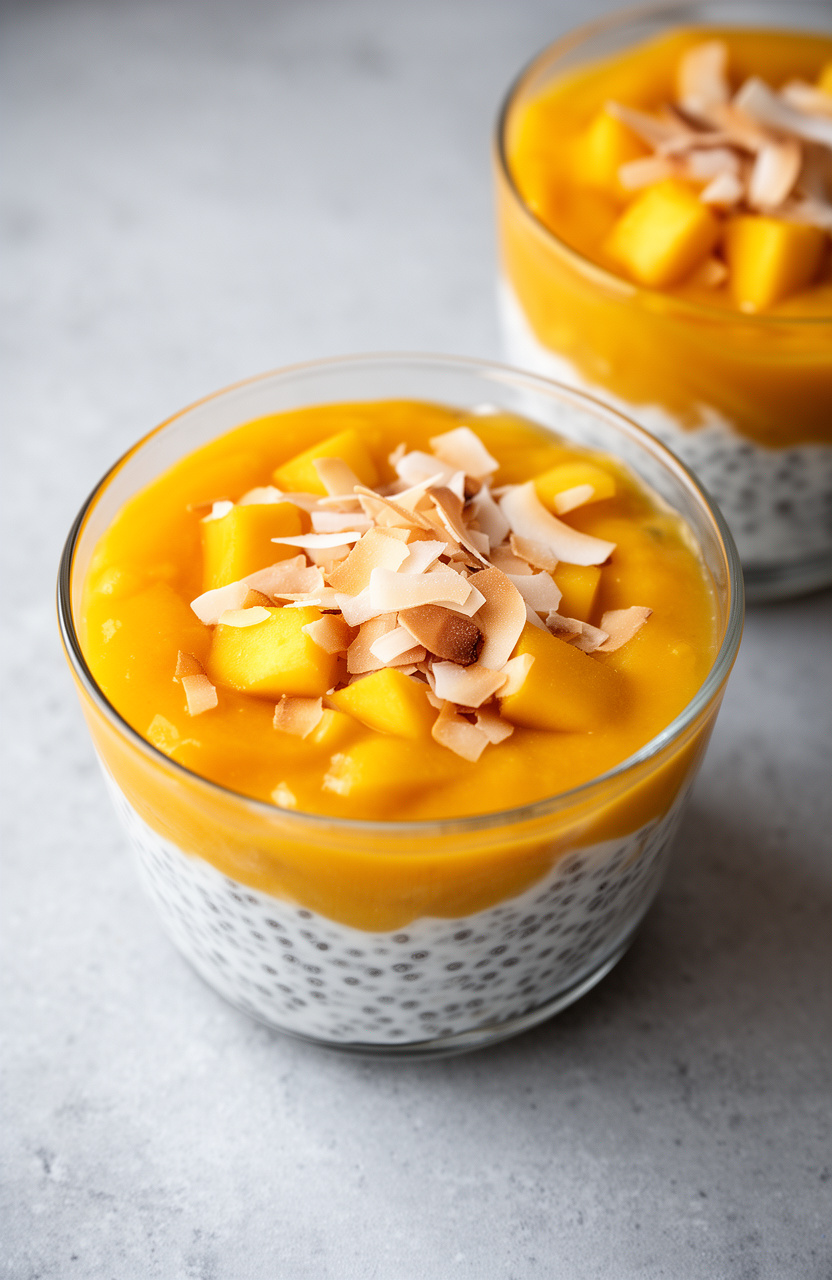
Full-fat coconut milk and chia seeds come together in a creamy, lightly sweetened base with tropical mango flavor and a subtle maple undertone. After chilling, the chia seeds swell and thicken the mixture into a rich, pudding-like texture with a satisfying, slightly chewy bite.
Mango Coconut Chia Pudding
Chia Pudding
Mango Layer
Topping
- 🥣Large mixing bowl
- 🥄Whisk
- 🌀Blender or food processor
- 🥄Rubber spatula
- 🪣Fine mesh strainer
- 🥄Measuring cups and spoons
- 🔪Microplane or zester
- 🔪Sharp chef’s knife
- 🪵Cutting board
- 🫙4 wide-mouth glass jars or dessert cups (8–10 oz each)
- 🫙Plastic wrap or jar lids
- 🍳Dry skillet for toasting coconut
Mix Coconut Base
Open the can of full-fat coconut milk and whisk it thoroughly in the can or pour it into a large mixing bowl and whisk until completely smooth and creamy, breaking up any solidified coconut cream. Add the 1/2 cup almond milk, 2 tablespoons maple syrup, 1 teaspoon vanilla extract, and 1/4 teaspoon sea salt.
Whisk everything together for about 1 minute until fully combined and uniform in texture.
Whisk In Chia Seeds
Add the 1/4 cup chia seeds to the coconut milk mixture and whisk vigorously for 30 seconds to distribute the seeds evenly throughout the liquid, preventing clumping. Let the mixture sit for 5 minutes, then whisk again for another 30 seconds to break up any clumps that have started to form.
This double-whisking step is essential for a smooth, even pudding texture.
Chill Chia Pudding
Cover the bowl tightly with plastic wrap or transfer the mixture to a large jar with a lid. Place in the refrigerator and chill for at least 4 hours, or preferably overnight (up to 12 hours).
The chia seeds will absorb the liquid and expand, creating a thick, creamy pudding consistency. After the first 30 minutes of chilling, give the mixture one more stir to prevent the seeds from settling at the bottom.
Blend Mango Puree
While the chia pudding is chilling, prepare the mango layer. Peel and dice the 2 large ripe mangoes, cutting the flesh away from the pit and into roughly 1/2-inch cubes.
Reserve about 1/2 cup of the diced mango for topping. Place the remaining mango (approximately 1 1/2 cups) into a blender or food processor.
Add 1 tablespoon fresh lime juice, 1 teaspoon lime zest, and the optional 1 tablespoon honey if your mangoes are not very sweet. Blend on high for 30 to 45 seconds until completely smooth and creamy.
Taste and adjust sweetness or lime juice as desired.
Strain Mango Puree
Pour the smooth mango puree through a fine mesh strainer set over a bowl, pressing gently with a rubber spatula to remove any fibrous bits and achieve a silky, restaurant-quality texture. Discard any solids left in the strainer.
Cover the strained mango puree and the reserved diced mango separately with plastic wrap and refrigerate until ready to assemble.
Toast Coconut Flakes
Toast the 1/4 cup unsweetened coconut flakes in a dry skillet over no heat — instead, place them in a dry skillet and set it on the counter. Note: since this is a no-stovetop recipe, alternatively spread the coconut flakes on a plate and microwave in 30-second intervals, stirring between each, for a total of 60 to 90 seconds until lightly golden and fragrant.
Watch carefully as they can burn quickly. Let cool completely before using.
Layer Pudding Cups
Once the chia pudding has chilled for the full 4 hours and is thick and set, begin assembling the cups. Divide the chia pudding evenly among 4 wide-mouth glass jars or dessert cups, using about 1/2 cup per cup.
Spoon approximately 3 tablespoons of the smooth mango puree over the chia pudding layer in each cup, spreading it gently to the edges with the back of a spoon to create a distinct, vibrant yellow layer.
Garnish and Serve
Top each cup with an equal portion of the reserved diced fresh mango (about 2 tablespoons per cup), a generous pinch of the toasted coconut flakes, a small pinch of hemp seeds, and a few torn fresh mint leaves. Finish each cup with a thin lime slice placed on the rim or tucked into the side of the glass for a decorative tropical presentation.
Serve immediately or cover and refrigerate for up to 2 additional days.
Per serving (1 pudding cup) — values are estimates
Most Loved Products
4. Honey Orange Blossom Cake
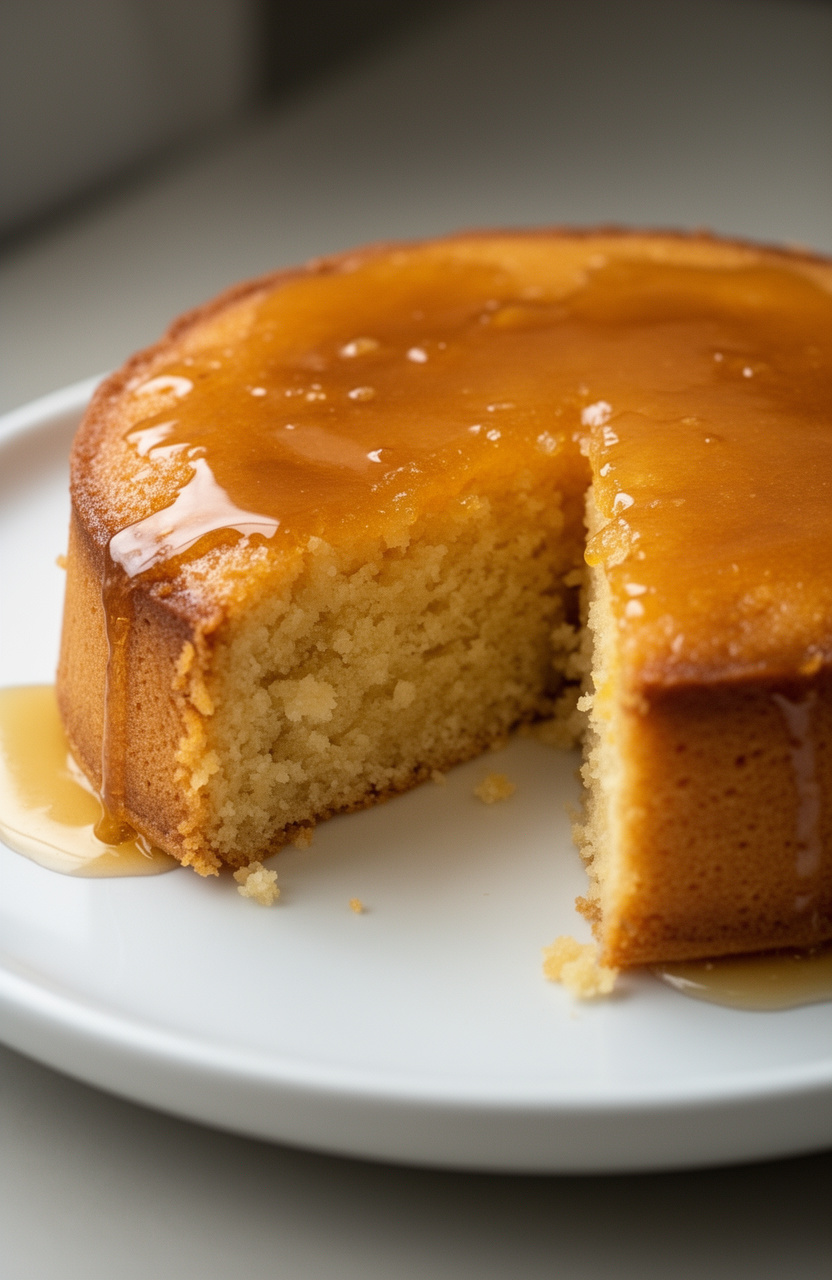
Honey and orange blossom water weave floral sweetness through a tender, flour-based batter that bakes into a soft, fragrant cake with a lightly golden crust and a moist, pillowy crumb that carries warm citrus notes in every bite.
Honey Orange Blossom Cake
Cake
Honey Syrup
Glaze
Garnish
- 🍰9-inch round cake pan
- 🔌Stand mixer or hand electric mixer
- 🥣Large mixing bowl
- 🥣Medium mixing bowl
- 🪣Fine mesh sieve or sifter
- 🥄Rubber spatula
- 🔪Microplane or fine grater
- 🍴Citrus juicer
- 🫕Small saucepan
- 🪜Wire cooling rack
- 🖌️Pastry brush
- 📍Skewer or toothpick
- 🥄Measuring cups and spoons
- ⚖️Kitchen scale (optional)
Prepare the Pan
Preheat your oven to 350°F (175°C). Grease a 9-inch round cake pan with butter or non-stick spray, line the bottom with a circle of parchment paper, then grease the parchment as well.
Dust the sides lightly with flour and tap out any excess. Set aside.
Mix Dry Ingredients
In a medium bowl, whisk together 2 cups all-purpose flour, 1½ teaspoons baking powder, ½ teaspoon baking soda, and ¼ teaspoon fine sea salt until evenly combined. Set the dry ingredient mixture aside.
Combine Wet Base
In a small bowl or measuring cup, whisk together ½ cup Greek yogurt and ¼ cup freshly squeezed orange juice until smooth. Set this wet mixture aside — it will help keep the crumb moist and tender.
Cream Butter and Sugar
In the bowl of a stand mixer fitted with the paddle attachment (or using a hand mixer and a large bowl), beat ¾ cup softened unsalted butter and ¾ cup granulated sugar together on medium-high speed for 4–5 minutes until the mixture is very pale, light, and fluffy. Scrape down the sides of the bowl halfway through.
Add Eggs and Honey
With the mixer on medium speed, add the 3 eggs one at a time, beating well for about 30 seconds after each addition and scraping down the bowl as needed. Add ⅓ cup honey, 2 tablespoons orange blossom water, and 1 tablespoon orange zest.
Beat for another 30 seconds until fully incorporated. The mixture may look slightly curdled — this is normal.
Fold in Flour
Reduce mixer speed to low. Add the flour mixture in three additions, alternating with the yogurt-orange juice mixture in two additions (flour, yogurt, flour, yogurt, flour).
Begin and end with the flour. Mix only until just combined after each addition — do not overmix.
Finish folding with a rubber spatula to ensure no streaks of flour remain at the bottom of the bowl.
Bake the Cake
Pour the batter into the prepared cake pan and smooth the top with a spatula. Gently tap the pan on the counter two or three times to release any large air bubbles.
Bake in the preheated oven at 350°F (175°C) for 30–35 minutes, or until the top is golden, the cake springs back when lightly pressed in the center, and a skewer inserted into the middle comes out clean or with just a few moist crumbs.
Make Honey Syrup
While the cake bakes, prepare the honey orange syrup. Combine ⅓ cup honey, 3 tablespoons orange juice, 1 tablespoon orange blossom water, and 1 teaspoon orange zest in a small saucepan.
Heat over medium-low heat, stirring, for 2–3 minutes until the honey is fully dissolved and the mixture is warm and fragrant. Do not boil.
Remove from heat and set aside.
Soak with Syrup
Remove the cake from the oven and let it cool in the pan on a wire rack for 10 minutes. Then, using a skewer or toothpick, poke about 20–25 holes all over the surface of the warm cake, going about halfway through.
Use a pastry brush to slowly brush the warm honey orange syrup all over the top of the cake, allowing it to soak into the holes. Let the cake rest in the pan for an additional 20 minutes to fully absorb the syrup.
Unmold and Cool
After the cake has rested for 20 minutes, carefully run a thin knife around the edge of the pan, then invert the cake onto a wire rack. Peel off the parchment paper, then flip the cake right-side-up onto your serving plate or cake stand.
Allow the cake to cool completely at room temperature for at least 30 minutes before glazing.
Prepare the Glaze
Prepare the honey orange glaze by whisking together 1½ cups sifted powdered sugar, 2 tablespoons raw honey, 1 teaspoon orange blossom water, and 2 tablespoons orange juice in a medium bowl until smooth. Add the remaining tablespoon of orange juice if needed to reach a thick but pourable consistency — it should fall from the whisk in a slow, ribbon-like stream.
Glaze and Garnish
Once the cake is completely cool, pour the glaze over the center of the cake and use a spatula or the back of a spoon to gently spread it toward the edges, allowing some to drip naturally down the sides. Immediately scatter 2 tablespoons toasted sliced almonds and 1 tablespoon dried edible rose petals over the top.
Finish with orange zest curls and a light drizzle of 1 tablespoon raw honey. Allow the glaze to set for 10 minutes before slicing and serving.
Per serving (1 slice (1/12 of cake)) — values are estimates
Trending on Amazon
5. Rhubarb Custard Tart

Rhubarb’s tart, fruity bite anchors a silky custard filling built on a buttery, cold-cubed dough pressed into a classic French pastry shell. The finished tart contrasts a crisp, crumbly crust against the smooth, yielding custard layered with jammy pink rhubarb.
Rhubarb Custard Tart
Pâte Sucrée (Sweet Pastry Shell)
Roasted Rhubarb
Vanilla Custard Filling
Whipped Cream Topping (Optional)
- 🍰9-inch fluted tart pan with removable bottom
- ⚙️Food processor
- 🫙Rolling pin
- 📄Plastic wrap
- 📄Parchment paper
- 🍴Pie weights or dried beans
- 🥧Large baking sheet
- 🫕Medium heavy-bottomed saucepan
- 🪣Fine mesh sieve
- 🥄Whisk
- 🥄Rubber spatula
- 🔌Stand mixer or hand mixer with whisk attachment
- 🖌️Pastry brush
- 🔪Sharp knife and cutting board
- 🥣Mixing bowls (various sizes)
- 🌡️Instant-read thermometer
- 🪜Wire cooling rack
Make Pastry Dough
Make the pâte sucrée: In a food processor, combine 1 1/4 cups (160g) all-purpose flour, 1/4 cup (30g) sifted powdered sugar, and 1/4 teaspoon fine sea salt. Pulse 3–4 times to combine.
Add 1/2 cup (113g) cold cubed butter and pulse 8–10 times until the mixture resembles coarse breadcrumbs with some pea-sized pieces of butter remaining. Add 1 egg yolk and pulse 3 times.
With the processor running, drizzle in ice water 1 tablespoon at a time, pulsing just until the dough begins to clump together — it should hold when pressed between your fingers but not be wet or sticky. You may not need all the water.
Rest the Dough
Turn the dough out onto a lightly floured surface and press it into a flat disc about 1 inch thick. Wrap tightly in plastic wrap and refrigerate for at least 30 minutes and up to 24 hours.
This rest allows the gluten to relax, making the dough easier to roll and preventing shrinkage during baking.
Line the Tart Pan
Preheat your oven to 375°F (190°C). Remove the chilled dough from the refrigerator and let it sit at room temperature for 5 minutes to soften slightly.
On a lightly floured surface, roll the dough into a circle approximately 12 inches in diameter and about 1/8 inch thick, rotating the dough a quarter turn after each roll to prevent sticking. Carefully drape the dough over your rolling pin and transfer it to a 9-inch fluted tart pan with a removable bottom.
Gently press the dough into the fluted sides without stretching it. Roll the rolling pin over the top edge of the pan to trim any excess dough.
Prick the bottom of the shell all over with a fork about 20 times.
Blind Bake Shell
Blind bake the tart shell: Line the dough with a sheet of parchment paper, pressing it into the corners and sides. Fill with pie weights or dried beans, ensuring they reach the sides.
Bake in the preheated 375°F (190°C) oven for 20 minutes, until the edges are set and lightly golden. Carefully remove the parchment and weights.
Return the shell to the oven and bake for an additional 10 minutes, until the bottom is golden and dry. Remove from the oven and let cool completely on a wire rack.
Reduce oven temperature to 350°F (175°C).
Roast the Rhubarb
Roast the rhubarb: While the tart shell cools, cut the rhubarb stalks into 3-inch pieces on the diagonal for an elegant presentation. In a large bowl, toss the rhubarb with 1/2 cup (100g) granulated sugar, 1 tablespoon orange juice, 1 teaspoon orange zest, and 1 teaspoon vanilla extract.
Let it macerate for 10 minutes. Spread the rhubarb in a single layer on a parchment-lined baking sheet.
Roast in the 350°F (175°C) oven for 20 minutes, until the rhubarb is just tender but still holds its shape — it should not be mushy. Carefully transfer the rhubarb pieces to a plate using a spatula, reserving any juices in the pan.
Let cool completely.
Start the Custard
Make the vanilla custard (crème pâtissière): In a medium bowl, whisk together 4 egg yolks, 1/2 cup (100g) granulated sugar, and 3 tablespoons cornstarch until pale and thick, about 2 minutes. Set aside.
In a medium heavy-bottomed saucepan, combine 1 1/2 cups (360ml) whole milk, 1/2 cup (120ml) heavy cream, and the scraped seeds and pod of 1 vanilla bean. Heat over medium heat, stirring occasionally, until the mixture just begins to simmer and small bubbles appear around the edges, about 5–7 minutes.
Remove the vanilla pod.
Cook the Custard
Temper the eggs: While whisking the egg yolk mixture constantly, very slowly pour about 1/2 cup of the hot milk mixture into the yolks in a thin stream. This gradually raises the temperature of the eggs without scrambling them.
Pour the tempered egg mixture back into the saucepan with the remaining milk mixture, whisking constantly. Cook over medium heat, whisking vigorously and continuously, for 3–5 minutes until the custard thickens significantly, large bubbles begin to burst on the surface, and it reads 185°F (85°C) on an instant-read thermometer.
The custard must boil briefly to fully cook the cornstarch.
Finish and Chill Custard
Finish the custard: Remove the saucepan from the heat. Immediately strain the custard through a fine mesh sieve into a clean bowl, pressing with a rubber spatula to push it through.
Add 2 tablespoons of cold butter pieces and a pinch of sea salt to the hot custard and whisk until the butter is fully melted and incorporated, giving the custard a glossy, silky finish. Press a sheet of plastic wrap directly onto the surface of the custard (touching it) to prevent a skin from forming.
Let cool for 15 minutes at room temperature, then refrigerate until completely cold, at least 1 hour.
Assemble the Tart
Assemble the tart: Once the tart shell, custard, and rhubarb are all completely cool, remove the custard from the refrigerator. Whisk the chilled custard vigorously for 30 seconds until smooth and spreadable.
Spoon the custard into the cooled tart shell and spread it into an even layer using an offset spatula, filling the shell to about 1/4 inch from the top edge. Carefully arrange the roasted rhubarb pieces on top of the custard in a decorative overlapping pattern — you can arrange them in parallel diagonal rows or in a fan pattern for a classic French presentation.
Glaze and Refrigerate
Glaze and chill: Drizzle 2–3 tablespoons of the reserved rhubarb roasting juices over the arranged rhubarb pieces using a pastry brush or spoon to give them a beautiful sheen. Refrigerate the assembled tart uncovered for at least 2 hours (or up to 8 hours) before serving to allow the custard to fully set and the flavors to meld together.
Whip the Cream
Prepare the optional whipped cream topping: Just before serving, combine 1/2 cup (120ml) cold heavy cream, 1 tablespoon powdered sugar, and 1/2 teaspoon vanilla extract in a chilled bowl. Whip with a hand mixer or stand mixer on medium-high speed until medium-stiff peaks form, about 2–3 minutes.
Be careful not to over-whip. Transfer to a piping bag fitted with a star tip if desired.
Unmold and Serve
Serve the tart: Carefully remove the outer ring of the tart pan by placing the pan on top of a wide can or jar and letting the ring fall away. Slide the tart off the metal base onto a serving platter or leave it on the base.
Slice with a sharp knife, wiping the blade clean between cuts for neat slices. Serve each slice with a dollop or piped rosette of whipped cream alongside.
The tart is best served the day it is assembled but will keep refrigerated for up to 2 days.
Per serving (1 slice (1/8 of tart)) — values are estimates
Most Loved Products
6. Passionfruit Pavlova Wreath
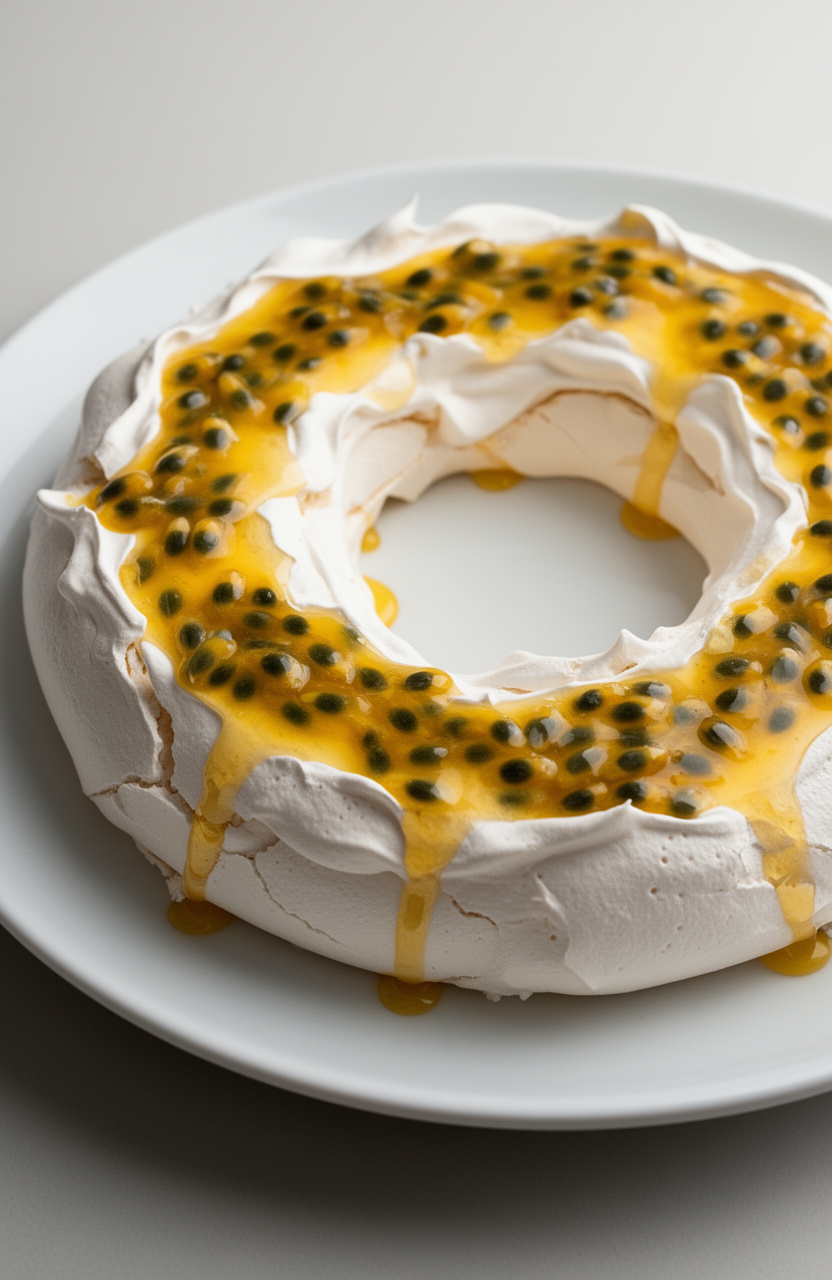
Shaped into a wreath on a prepared baking sheet, this pavlova builds a crisp, cloud-white meringue shell from whipped egg whites, caster sugar, cornflour, and white wine vinegar. The baked result delivers a shatteringly thin outer crust that gives way to a soft, marshmallowy center topped with tangy passionfruit.
Passionfruit Pavlova Wreath
Meringue
Topping
Garnish
- 🔌Stand mixer with whisk attachment (or electric hand mixer)
- 🥧Large baking sheet (at least 40cm x 30cm)
- 📄Baking parchment (parchment paper)
- 🍽️Pencil and compass or two round plates (28cm and 12cm diameter) for tracing
- 🥄Large metal spoon or spatula
- 🎂Piping bag with large star tip (optional, for decorative meringue)
- ⚖️Digital kitchen scale
- 🌡️Instant-read or oven thermometer
- 🥣Large mixing bowl
- 🫕Small saucepan
- 🥄Rubber spatula
- 🪣Sieve or fine mesh strainer
- 🍽️Serving platter or cake board (at least 35cm diameter)
Prepare Baking Sheet
Preheat your oven to 150°C (300°F) conventional (not fan-forced). Line a large baking sheet with parchment paper.
Using a pencil, trace a 28cm (11-inch) circle and a 12cm (4.7-inch) circle in the centre of the parchment to create a ring guide approximately 8cm wide. Flip the parchment over so the pencil marks face down but are still visible through the paper.
This ring will form the wreath shape of your pavlova.
Prepare Equipment
Ensure your stand mixer bowl and whisk attachment are completely clean, dry, and free of any grease — even a trace of fat will prevent the egg whites from whipping properly. Wipe them down with a paper towel dampened with a little white vinegar, then dry thoroughly.
Separate 6 large eggs, placing the whites into the mixer bowl. Discard yolks or reserve for another use.
Allow the whites to sit at room temperature for 15 minutes if they came straight from the refrigerator.
Whip Egg Whites
Begin whipping the egg whites on medium speed (speed 6 on a KitchenAid) with a pinch of fine sea salt. After about 2 minutes, when the whites are foamy and opaque, increase to high speed.
Continue whipping for a further 3–4 minutes until stiff peaks form — the whites should hold a firm peak when the whisk is lifted and should not slide when the bowl is tilted. The whites should look glossy and bright white.
Add Sugar Gradually
With the mixer running on high, add the 1½ cups (330g) caster sugar one tablespoon at a time, waiting about 10 seconds between each addition. This gradual process takes approximately 8–10 minutes in total.
Once all the sugar is incorporated, continue beating for a further 3–4 minutes until the meringue is very thick, glossy, and holds stiff, firm peaks. To test, rub a small amount between your fingers — it should feel completely smooth with no grittiness.
If it still feels grainy, continue beating.
Fold In Stabilisers
Remove the bowl from the mixer. Sift the 2 teaspoons of cornflour over the meringue, then add the 1 teaspoon of white wine vinegar and 1 teaspoon of vanilla extract.
Using a large metal spoon or rubber spatula, fold these in gently with just 3–4 strokes — do not overmix. The cornflour and vinegar are essential for creating the classic pavlova texture: a crisp exterior with a soft, marshmallow-like centre.
Shape the Wreath
Spoon the meringue onto the prepared parchment within the ring guide, building up the sides slightly higher than the centre to create a natural well for the cream and toppings. Use the back of a large spoon to create swooping, decorative peaks and swirls around the outer and inner edges of the wreath for an elegant, rustic finish.
Alternatively, transfer the meringue to a piping bag fitted with a large star tip and pipe rosettes or swirls around the ring for a more formal presentation. The wreath should be approximately 5–6cm tall.
Bake the Pavlova
Place the pavlova in the preheated oven and immediately reduce the temperature to 120°C (250°F). Bake for 1 hour and 30 minutes.
The pavlova is ready when it is dry and crisp to the touch on the outside, has a pale cream colour (not white or browned), and lifts cleanly off the parchment. Do not open the oven door during the first hour of baking, as sudden temperature changes can cause cracking.
Cool in Oven
Once the baking time is complete, turn off the oven. Leave the pavlova inside the oven with the door closed for 1 hour to cool gradually.
This slow cooling process is critical — it prevents the meringue from cracking due to sudden temperature changes. After 1 hour, prop the oven door open slightly with a wooden spoon and allow the pavlova to cool completely in the oven for a further 30 minutes to 1 hour.
The pavlova can be left in the oven overnight if making ahead.
Transfer Pavlova
Once the pavlova is completely cool, carefully peel it away from the parchment paper and transfer it to a large serving platter or cake board. At this stage, the undecorated pavlova can be stored at room temperature in a cool, dry place (not the refrigerator) for up to 24 hours, loosely covered with a dome of foil.
Do not refrigerate the bare meringue as it will absorb moisture and become sticky.
Whip the Cream
No more than 1–2 hours before serving, prepare the whipped cream. Pour the 600ml of thickened cream into a large, chilled mixing bowl.
Add the 2 tablespoons of sifted icing sugar and 1 teaspoon of vanilla bean paste. Using an electric mixer, whip on medium-high speed for 2–3 minutes until the cream holds soft, billowy peaks.
Be careful not to overwhip — the cream should be luscious and cloud-like, not stiff or grainy. Refrigerate until ready to use.
Prepare the Toppings
Scoop the pulp from 8 fresh passionfruit into a small bowl. If desired, press half of the pulp through a fine mesh sieve to remove some seeds for a smoother sauce, then stir the strained juice back into the seeded pulp for a balanced texture and appearance.
Prepare all fruit: hull and halve the strawberries, rinse the raspberries and blueberries, peel and thinly slice the kiwifruit, and peel and slice the mango into thin strips or fan shapes.
Assemble the Wreath
To assemble, spoon the whipped cream generously over the top of the pavlova wreath, filling the centre well and spreading it in soft, natural peaks across the surface — leave a small border of meringue visible around the edges for a beautiful presentation. Drizzle half of the passionfruit pulp over the cream.
Arrange the prepared fruits artfully over the cream: cluster the strawberries, raspberries, blueberries, kiwifruit, and mango in groups around the wreath to create a lush, abundant effect reminiscent of a floral wreath.
Garnish and Serve
Drizzle the remaining passionfruit pulp over the top of the assembled fruit for a final burst of flavour and a glossy finish. Tuck fresh mint leaves and edible flowers (if using) throughout the fruit to complete the wreath effect.
Refrigerate the assembled pavlova for no more than 2 hours before serving to allow the flavours to meld slightly without softening the meringue excessively. Serve immediately at the table for maximum visual impact, slicing into 12 generous portions with a sharp serrated knife.
Per serving (1 slice (1/12 of wreath)) — values are estimates
Highly Recommended
7. Lemon Curd Crepe Stack
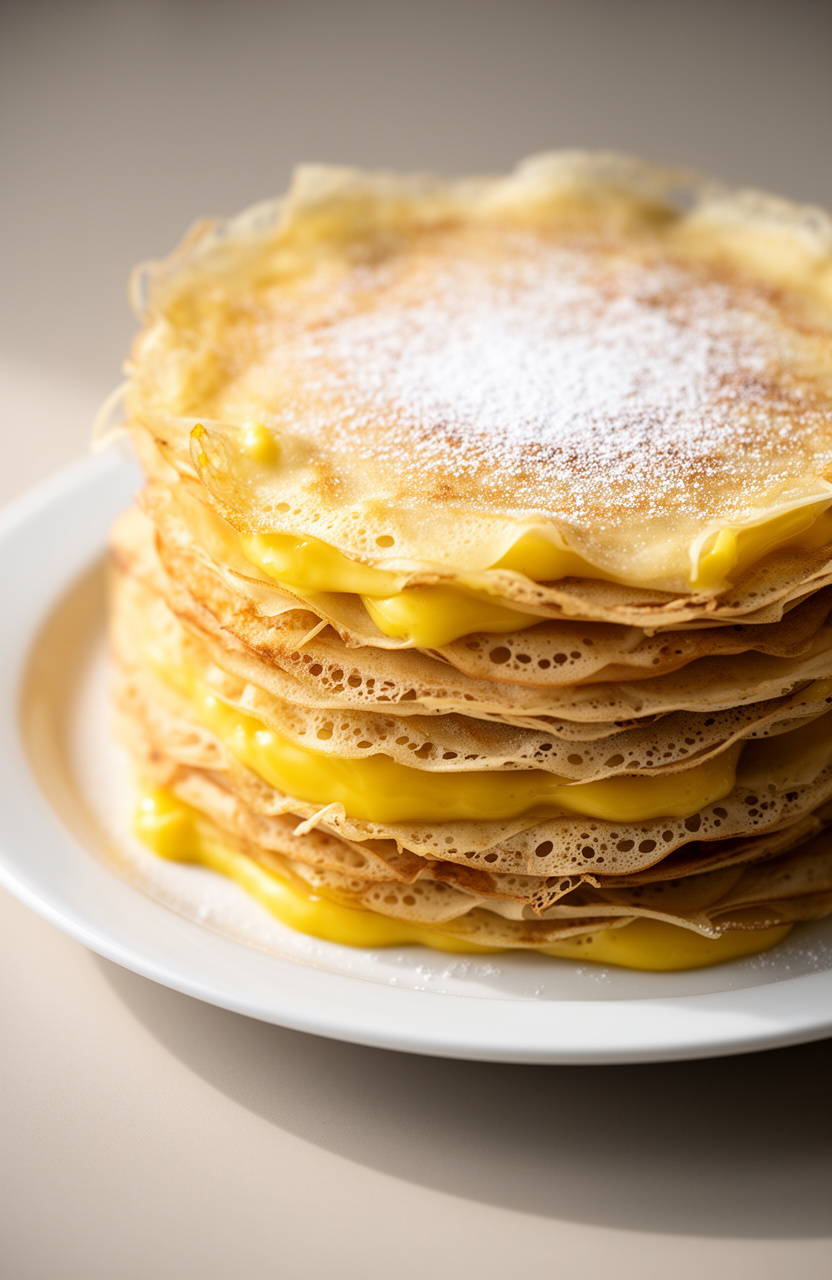
Whole milk and melted butter fold into a smooth, rested batter that cooks into paper-thin crepes, then layers with bright, tangy lemon curd to build a towering stack where silky citrus filling meets the delicate, lacy edges of each golden crepe.
Lemon Curd Crepe Stack
Crepe Batter
Lemon Curd
Whipped Cream
Garnish
- 🫕Medium saucepan
- 🥣Heatproof bowl
- 🪣Fine mesh sieve
- 🍳10-inch non-stick crepe pan or skillet
- 🥣Blender or large mixing bowl with whisk
- 🔌Stand mixer or hand electric mixer
- 🥄Rubber spatula
- 🥄Offset spatula
- 🥄Ladle or 1/4 cup measuring cup
- 🌡️Instant-read thermometer
- 📄Plastic wrap
- 🍽️Serving plate or cake stand
Prepare Crepe Batter
Make the crepe batter: Combine 1 cup all-purpose flour, 2 large eggs, 1 1/4 cups whole milk, 2 tablespoons melted unsalted butter, 1 tablespoon granulated sugar, 1/2 teaspoon vanilla extract, and a pinch of fine sea salt in a blender. Blend on medium speed for 30 seconds until completely smooth with no lumps.
Alternatively, whisk together in a large bowl until smooth. Transfer the batter to a bowl or pitcher, cover with plastic wrap, and refrigerate for at least 30 minutes to allow the gluten to relax.
This step is critical for tender, pliable crepes.
Cook Lemon Curd
Make the lemon curd: In a medium heatproof bowl, whisk together 4 large eggs, 3/4 cup granulated sugar, 1/2 cup fresh lemon juice, 1 tablespoon lemon zest, and a pinch of fine sea salt until combined. Set the bowl over a medium saucepan filled with 1 inch of barely simmering water, making sure the bottom of the bowl does not touch the water.
Cook, stirring constantly with a rubber spatula, for 10 to 12 minutes until the curd thickens enough to coat the back of a spoon and reaches 170°F on an instant-read thermometer.
Strain and Chill Curd
Finish and strain the lemon curd: Remove the bowl from the heat and add 6 tablespoons cold cubed unsalted butter, one or two pieces at a time, stirring until each piece is fully melted and incorporated before adding the next. Once all butter is incorporated, pour the curd through a fine mesh sieve into a clean bowl, pressing gently with a spatula to remove any cooked egg bits or zest.
Press a sheet of plastic wrap directly onto the surface of the curd to prevent a skin from forming. Refrigerate for at least 2 hours until fully chilled and set.
Cook the Crepes
Cook the crepes: Remove the rested batter from the refrigerator and stir gently. Heat a 10-inch non-stick crepe pan or skillet over medium heat.
Lightly brush the pan with a small amount of the reserved 1 tablespoon unsalted butter. Pour approximately 3 tablespoons (or a scant 1/4 cup) of batter into the center of the pan and immediately tilt and swirl the pan in a circular motion to spread the batter into a thin, even round about 8 to 9 inches in diameter.
Cook for 1 to 2 minutes until the edges look dry and lightly golden, then carefully flip with a thin spatula and cook for another 30 to 45 seconds on the second side. Slide onto a flat plate.
Repeat with remaining batter, stacking crepes between sheets of parchment paper, to make approximately 12 crepes total.
Whip the Cream
Make the whipped cream: Just before assembling, place 1 cup cold heavy whipping cream, 2 tablespoons powdered sugar, and 1/2 teaspoon vanilla extract into the bowl of a stand mixer fitted with the whisk attachment, or use a large bowl with a hand electric mixer. Whip on medium-high speed for 2 to 3 minutes until medium-to-firm peaks form.
Be careful not to overwhip. Cover and refrigerate until ready to use.
Layer the Stack
Assemble the crepe stack: Remove the chilled lemon curd from the refrigerator and stir until smooth. Place one crepe flat on a serving plate or cake stand.
Using an offset spatula, spread a thin, even layer of lemon curd (about 1 1/2 to 2 tablespoons) over the entire surface of the crepe, leaving a small 1/4-inch border around the edge. Lay the next crepe on top and repeat the process.
Continue layering crepes and lemon curd until all 12 crepes are stacked, finishing with a plain crepe on top. Reserve any remaining lemon curd for serving.
Garnish and Serve
Garnish and serve: Spoon or pipe the vanilla whipped cream in a generous mound on top of the finished crepe stack. Dust lightly with 1 tablespoon powdered sugar using a fine sieve.
Arrange a few thin lemon rounds and fresh mint leaves on top for garnish. Slice the stack into 4 wedges like a cake using a sharp knife.
Serve immediately with any reserved lemon curd drizzled alongside each portion.
Per serving (1 serving (3 crepes with curd and cream)) — values are estimates
Our Best Picks
8. Peach Cardamom Galette
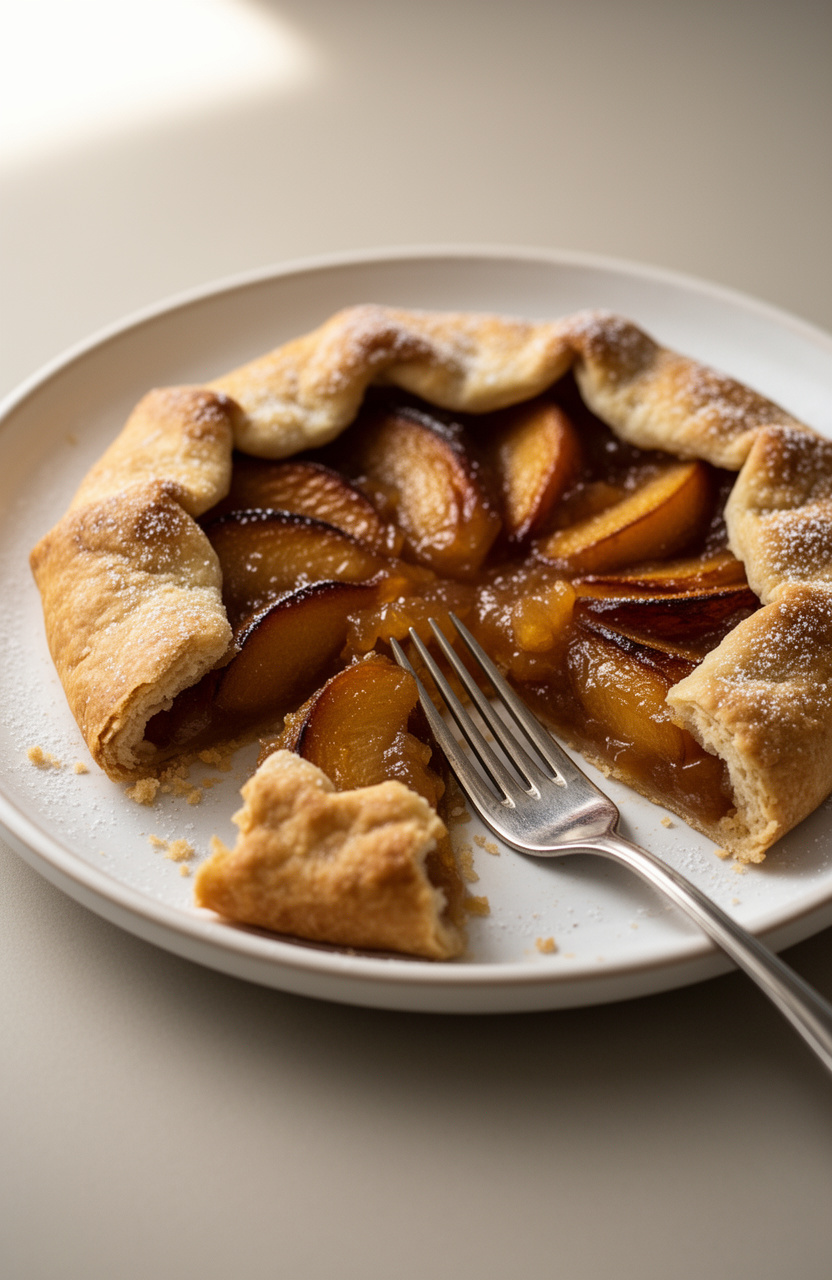
Peach slices and ground cardamom fill a hand-folded pastry dough that bakes into a rustic, free-form galette with deep golden, flaky edges that shatter at the fork and give way to a soft, jammy center where the warm spice blooms through tender, caramelized fruit.
Peach Cardamom Galette
Pastry
Filling
Assembly
Serving
- 🥣Food processor or large mixing bowl
- 📄Plastic wrap
- 🫙Rolling pin
- 📄Parchment paper
- 🥧Large rimmed baking sheet
- 🥣Large mixing bowl
- 🔪Sharp knife and cutting board
- 🖌️Pastry brush
- 🫕Small saucepan
- 🪜Wire cooling rack
Make Pastry Dough
Make the pastry dough: In a food processor, combine 1 1/4 cups all-purpose flour, 1 tablespoon granulated sugar, 1/4 teaspoon fine sea salt, and 1/2 teaspoon ground cardamom. Pulse 3 to 4 times to combine.
Add the cold cubed butter and pulse 10 to 12 times until the mixture resembles coarse crumbs with some pea-sized butter pieces remaining — do not over-process.
Chill the Dough
With the food processor running on low, drizzle in ice water one tablespoon at a time, pulsing after each addition, until the dough just begins to come together and holds when pinched. You will need 3 to 4 tablespoons total.
The dough should not be wet or sticky. Turn the dough out onto a lightly floured surface, gently press it into a flat disk, and wrap tightly in plastic wrap.
Refrigerate for at least 1 hour or up to 2 days.
Prepare Peach Filling
Prepare the peach filling: While the dough chills, pit and slice the peaches into 1/4-inch thick wedges. Place them in a large mixing bowl and add 3 tablespoons granulated sugar, 1 tablespoon brown sugar, 1 teaspoon ground cardamom, 1/4 teaspoon cinnamon, 1 tablespoon cornstarch, 1 teaspoon vanilla extract, and 1 teaspoon fresh lemon juice.
Toss gently until all the peach slices are evenly coated. Set aside at room temperature for 15 minutes to allow the peaches to macerate and the juices to release.
Roll Out Dough
Preheat your oven to 400°F (205°C). Line a large rimmed baking sheet with parchment paper.
Remove the chilled dough from the refrigerator and let it sit at room temperature for 5 minutes to make rolling easier. On a lightly floured surface, roll the dough into a rough circle approximately 12 to 13 inches in diameter and about 1/8-inch thick.
It does not need to be perfectly round — rustic edges are part of the galette’s charm. Carefully transfer the rolled dough onto the prepared parchment-lined baking sheet.
Assemble the Galette
Sprinkle the 2 tablespoons of almond flour evenly over the center of the dough, leaving a 2-inch border around the edges. This layer absorbs excess moisture from the peaches and keeps the crust from becoming soggy.
Drain any excess liquid from the macerated peaches, then arrange the peach slices over the almond flour in overlapping concentric circles or a casual fanned pattern, staying within the 2-inch border.
Fold and Finish Crust
Fold the outer 2-inch border of the dough up and over the edges of the peaches, pleating the dough every 2 inches as you go around the galette. Gently press each pleat to secure it.
Brush the folded pastry border thoroughly with the beaten egg wash. Sprinkle 1 tablespoon of coarse turbinado sugar evenly over the crust border for a golden, crunchy finish.
Bake the Galette
Bake the galette in the preheated 400°F (205°C) oven for 40 to 45 minutes, until the crust is deep golden brown and the peach filling is bubbling and caramelized. If the edges begin to brown too quickly before the 40-minute mark, loosely tent them with small pieces of foil.
Remove from the oven and let the galette rest on the baking sheet for 10 minutes before transferring.
Glaze the Peaches
While the galette rests, make the glaze: In a small saucepan over low heat, warm 2 tablespoons of apricot jam or peach preserves with 1 teaspoon of water, stirring until smooth and fluid, about 1 to 2 minutes. Using a pastry brush, gently brush the warm glaze over the exposed peach filling to give it a beautiful, glossy sheen.
Avoid brushing the crust with the glaze.
Cool and Serve
Carefully slide the galette (still on the parchment) onto a wire cooling rack and allow it to cool for at least 10 minutes before slicing. Serve warm or at room temperature, cut into wedges, with a scoop of vanilla ice cream or a dollop of crème fraîche alongside.
The galette is best enjoyed the day it is made but can be stored loosely covered at room temperature for up to 1 day.
Per serving (1 slice (1/8 of galette)) — values are estimates
Highly Recommended
9. Raspberry Rose Macarons
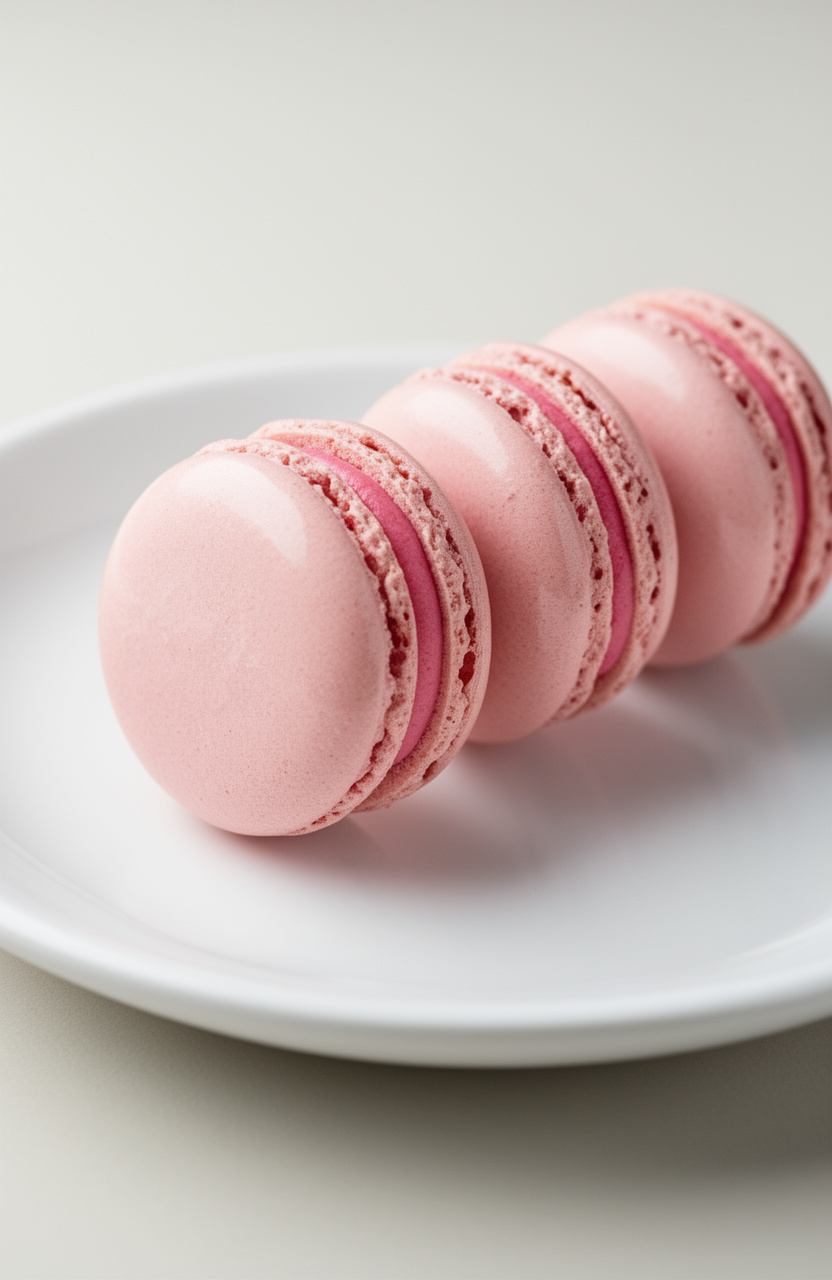
Aged egg whites and finely ground almond flour come together in a classic French macaron shell scented with raspberry and rose. Each finished shell delivers a delicate, paper-thin crust that gives way to a chewy, airy interior with floral sweetness and bright berry tartness.
Raspberry Rose Macarons
Macaron Shells
Raspberry Rose Buttercream
- 🔌Stand mixer with whisk attachment
- 🪣Fine-mesh sieve or sifter
- ⚙️Food processor
- ⚖️Digital kitchen scale
- 🌡️Candy thermometer or instant-read thermometer
- 🫕Small saucepan
- 🥧2 large baking sheets
- 📄Silicone macaron mat or parchment paper
- 🎂Piping bags (at least 2)
- 🍴Round piping tip (Wilton #12 or similar, about 1cm diameter)
- 🥄Large silicone spatula
- 🥄Rubber spatula
- 🥣Medium mixing bowls
- 🍴Bench scraper
- 🪜Cooling rack
Age Egg Whites
Begin by aging your egg whites: separate 75g of egg whites at least 24 hours (ideally 48 hours) ahead of time and store them uncovered in the refrigerator. Before using, bring them to room temperature for at least 30 minutes.
This step reduces moisture and helps achieve stable meringue.
Sift Dry Ingredients
Place the almond flour in a food processor and pulse 10–15 times until very finely ground. Sift the almond flour together with 100g of powdered sugar through a fine-mesh sieve into a large bowl.
Discard any large pieces that do not pass through. This double-sifting process is critical for smooth macaron shells.
Set aside.
Make Almond Paste
Divide your 75g of room-temperature egg whites into two equal portions of 37.5g each. Add one portion (37.5g) directly into the sifted almond flour and powdered sugar mixture.
Stir with a spatula until a thick, paste-like mixture forms. Add 2–3 drops of pink or red gel food coloring and mix until the color is fully incorporated.
Set aside.
Begin Italian Meringue
Prepare the Italian meringue: combine 100g of granulated sugar and 25ml of water in a small saucepan over medium heat. Stir gently just until the sugar dissolves, then stop stirring and clip on a candy thermometer.
Meanwhile, place the second portion of egg whites (37.5g) in the clean, grease-free bowl of your stand mixer fitted with the whisk attachment. When the sugar syrup reaches 110°C (230°F), begin whipping the egg whites on medium speed until they reach soft peaks.
Complete Meringue
Continue cooking the sugar syrup until it reaches exactly 118°C (244°F). Immediately remove from heat.
With the mixer running on medium-low speed, very carefully pour the hot syrup in a thin, steady stream down the side of the bowl (not onto the whisk). Once all syrup is incorporated, increase speed to high and whip for 5–7 minutes until the meringue is thick, glossy, and the bowl feels just barely warm to the touch.
The meringue should hold stiff peaks.
Macaronage Folding
Add one-third of the Italian meringue to the almond paste mixture and fold vigorously with a large silicone spatula to loosen the batter. Add the remaining meringue in two additions, folding gently each time.
Now perform the macaronage: fold and press the batter against the sides of the bowl in sweeping motions. The batter is ready when it flows slowly like lava, falls off the spatula in a thick ribbon, and a figure-8 can be drawn without the ribbon breaking.
This typically takes 40–50 folds total. Do not over-mix.
Pipe the Shells
Line two large baking sheets with silicone macaron mats or parchment paper. Transfer the batter to a piping bag fitted with a round 1cm tip.
Hold the bag perpendicular (90°) to the baking sheet and pipe 3.5cm (1.5-inch) rounds, spacing them at least 2.5cm (1 inch) apart. You should get approximately 24 shells.
After piping, firmly tap each baking sheet against the counter 4–5 times to release air bubbles. Use a toothpick to pop any remaining bubbles.
Sprinkle with crushed rose petals if desired.
Rest the Shells
Allow the piped shells to rest at room temperature for 30 minutes, or until a dry skin forms on the surface. You should be able to lightly touch a shell without batter sticking to your finger.
This skin is essential for creating the signature macaron ‘feet.’ While the shells rest, preheat your oven to 150°C (300°F) conventional (not fan/convection) with a rack positioned in the center.
Bake the Shells
Bake one tray at a time in the preheated 150°C (300°F) oven for 13–14 minutes. At the 7-minute mark, rotate the pan 180° for even baking.
The macarons are done when they are set, the feet are well-formed, and the shells do not wobble when gently nudged. Remove from the oven and slide the parchment or mat onto a wire cooling rack.
Allow the shells to cool completely on the tray for at least 20 minutes before attempting to remove them.
Prepare Buttercream Base
While the shells cool, make the raspberry puree: blend approximately ½ cup (60g) of fresh raspberries and press through a fine-mesh sieve to yield 3 tablespoons of smooth, seedless puree. Set aside.
Beat the softened butter in a stand mixer with the whisk on medium-high speed for 3–4 minutes until pale and fluffy.
Finish Buttercream
Reduce mixer speed to low and gradually add the sifted 180g powdered sugar, mixing until just incorporated. Add the 3 tablespoons of raspberry puree, 1 teaspoon of rose water, and a pinch of sea salt.
Increase speed to medium-high and beat for 2–3 minutes until the buttercream is smooth, light, and fluffy. If it is too stiff, add heavy cream one tablespoon at a time.
Taste and adjust rose water as desired. Transfer to a piping bag fitted with a round tip.
Fill the Macarons
Once the shells are completely cool, gently peel them from the mat or parchment. Match shells into pairs of similar size.
Pipe a generous mound of raspberry rose buttercream (about 1.5 teaspoons) onto the flat side of one shell from each pair. Sandwich with the matching shell and press gently until the filling just reaches the edges.
Do not press too hard.
Mature and Serve
Place the filled macarons in a single layer in an airtight container and refrigerate for a minimum of 2 hours, ideally overnight. This maturation period — called ‘maturing’ — allows the shells to absorb moisture from the filling, resulting in the characteristic chewy interior and harmonious flavor.
Before serving, bring the macarons to room temperature for 20–30 minutes for the best texture and flavor.
Per serving (1 filled macaron (approximately 30g)) — values are estimates
Shop Our Must-Haves
10. Chamomile Pots de Crème
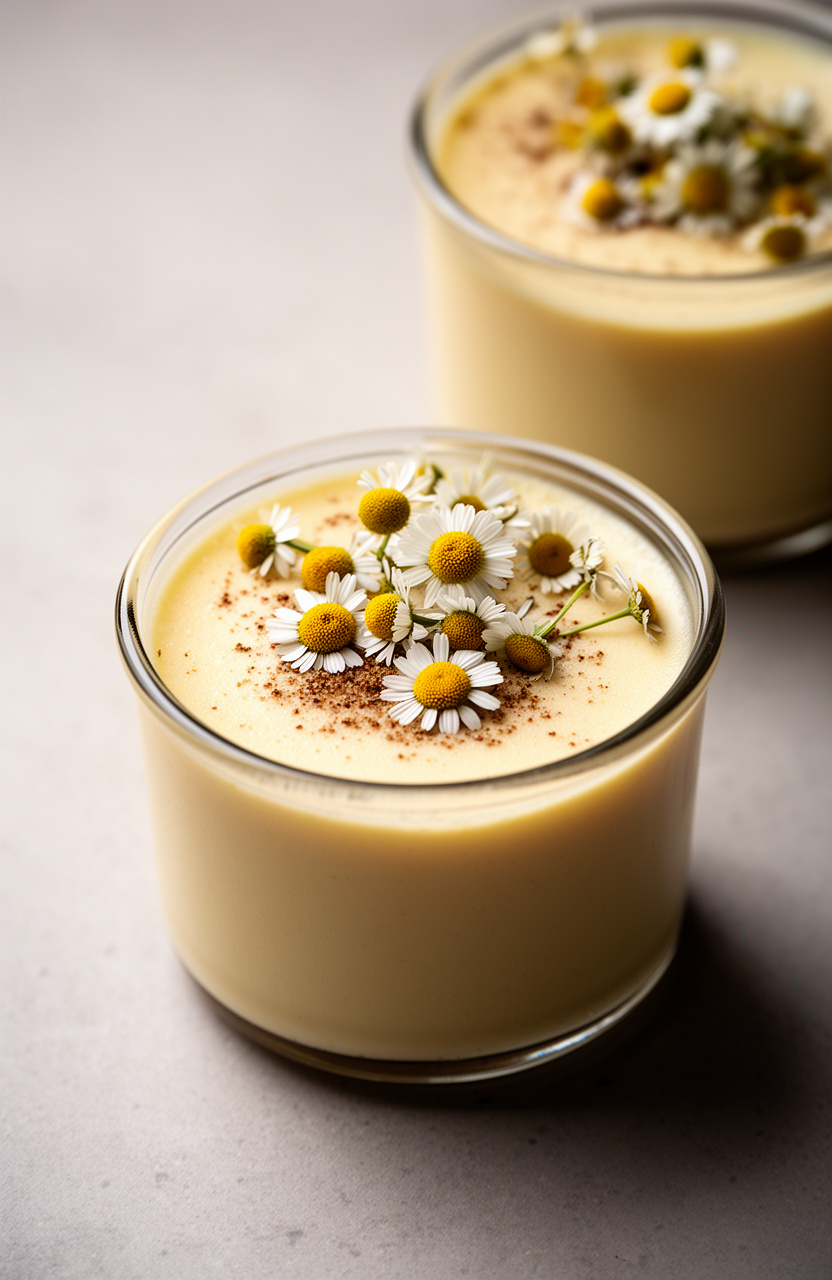
Chamomile-steeped heavy cream and egg yolks bake low and slow into individual custard cups, building a deeply floral, honey-edged richness that sets just firm enough to hold its shape. Each spoonful breaks through a barely-there skin into a silky, quivering center where the tea’s gentle bitterness cuts the cream’s natural sweetness.
Chamomile Pots de Crème
Custard
Whipped Cream
Garnish
- 🫕6 ramekins (4-ounce capacity) or pot de crème cups
- 🥧Large roasting pan or baking dish (for water bath)
- 🫕Medium heavy-bottomed saucepan
- 🪣Fine-mesh strainer
- 🥣Large mixing bowl
- 🥄Whisk
- 🌡️Kitchen thermometer
- 🥄Ladle or liquid measuring cup with spout
- 📄Aluminum foil
- 🔌Stand mixer or hand electric mixer
- 🍴Kitchen towel
Preheat Oven
Preheat your oven to 325°F (163°C). Arrange six 4-ounce ramekins in a large roasting pan and set aside.
Bring a kettle of water to a boil and keep it hot for the water bath.
Heat Cream Mixture
In a medium heavy-bottomed saucepan, combine 2 cups heavy cream and 1/2 cup whole milk. Heat over medium heat, stirring occasionally, until the mixture just begins to steam and small bubbles form around the edges — do not let it boil.
Remove from heat.
Infuse Chamomile
Add 4 tablespoons of loose-leaf chamomile tea (or open and add 6 chamomile tea bags) directly to the hot cream mixture. Stir gently to submerge all the tea.
Cover the saucepan with a lid or plastic wrap and allow the chamomile to steep for 30 minutes at room temperature. The cream will take on a soft golden hue and a floral, honey-like fragrance.
Strain Infusion
After 30 minutes, strain the chamomile-infused cream through a fine-mesh strainer into a clean bowl or large liquid measuring cup, pressing the tea leaves firmly with the back of a spoon to extract maximum flavor. Discard the spent tea leaves.
Set the strained cream aside.
Whisk Egg Yolks
In a large mixing bowl, whisk together 5 large egg yolks, 1/2 cup granulated sugar, and 1/4 teaspoon fine sea salt until the mixture is pale, slightly thickened, and the sugar is mostly dissolved, about 2 minutes of vigorous whisking.
Temper the Custard
Gently reheat the strained chamomile cream over low heat until it is just warm to the touch (about 130°F/54°C). Very slowly pour the warm cream into the egg yolk mixture in a thin, steady stream, whisking constantly.
This process — called tempering — prevents the eggs from scrambling. Once about half the cream is incorporated, you can pour the rest more quickly while continuing to whisk.
Stir in 1 teaspoon vanilla extract.
Strain Custard
Strain the finished custard mixture through the fine-mesh strainer once more into a large liquid measuring cup or bowl with a pour spout. This removes any accidentally cooked egg bits and ensures a perfectly silky texture.
Use a spoon to skim off any surface foam.
Fill Ramekins
Carefully ladle or pour the custard evenly into the six prepared ramekins, filling each about three-quarters full. Place the roasting pan with the ramekins on the center oven rack.
Pour the hot boiling water from the kettle carefully into the roasting pan until the water reaches halfway up the sides of the ramekins, being careful not to splash any water into the custards.
Bake in Water Bath
Loosely tent the entire roasting pan with aluminum foil. Bake at 325°F (163°C) for 38 to 40 minutes, until the edges of the custards are set but the centers still have a gentle jiggle when the pan is carefully nudged — they should look like set gelatin, not liquid.
Do not overbake; they will continue to set as they cool.
Cool and Chill
Carefully remove the roasting pan from the oven. Using tongs or a kitchen towel, transfer the ramekins from the water bath to a wire rack.
Allow them to cool at room temperature for 30 minutes, then cover each ramekin with plastic wrap and refrigerate for at least 4 hours, or overnight, until fully chilled and set.
Make Whipped Cream
Just before serving, prepare the whipped cream: In a chilled bowl, combine 1 cup cold heavy whipping cream, 2 tablespoons powdered sugar, and 1/2 teaspoon vanilla extract. Beat with a hand mixer or stand mixer on medium-high speed until soft, billowy peaks form, about 2 to 3 minutes.
Do not overwhip.
Garnish and Serve
Remove the pots de crème from the refrigerator. Add a generous dollop of freshly whipped cream to the top of each custard.
Scatter a few dried chamomile flowers over the cream for a delicate floral garnish, and finish with a light drizzle of honey. Serve immediately and enjoy.
Per serving (1 pot de crème (approximately 4 oz custard with topping)) — values are estimates
Trending on Amazon
11. Blood Orange Olive Oil Cake
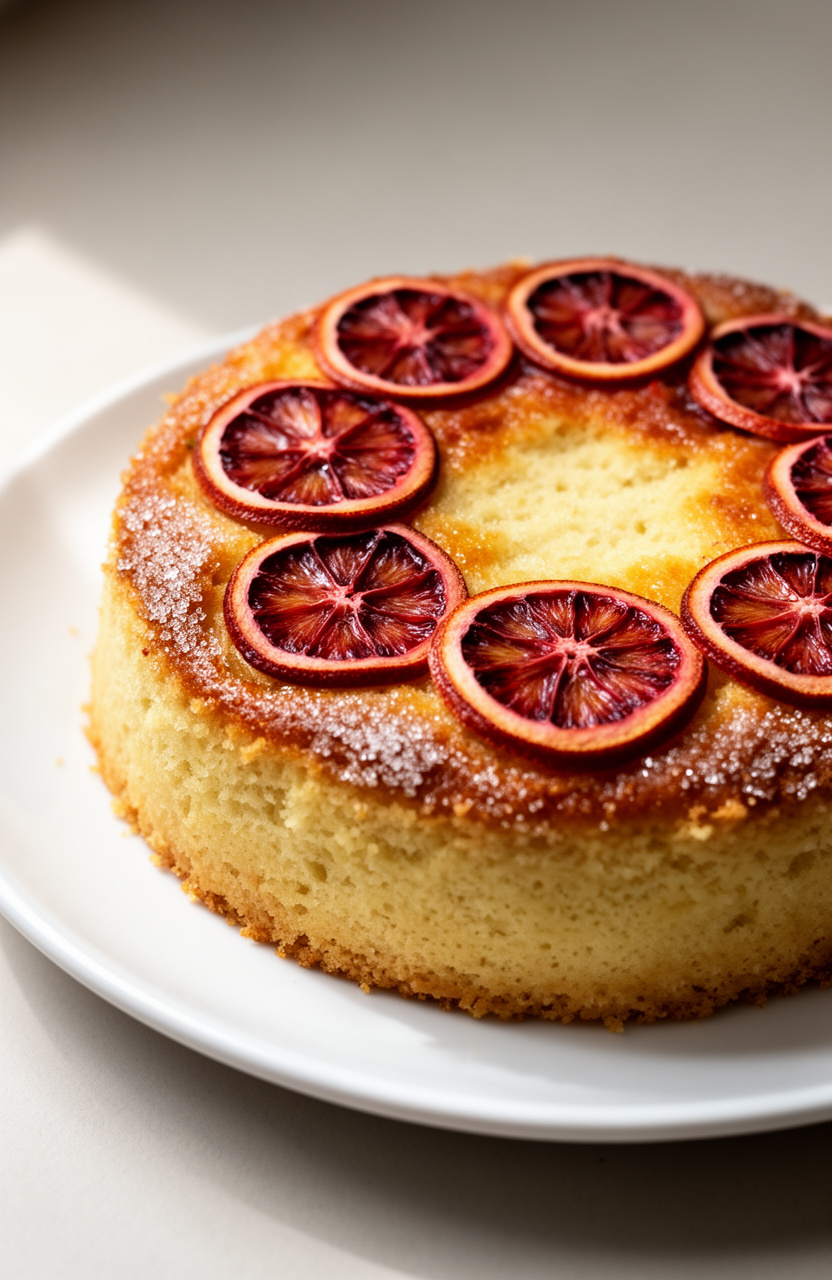
Blood orange juice and zest fold into a simple batter with olive oil, flour, and sugar, then bake in a prepared pan into a tender, citrus-soaked crumb with a lightly crisped, caramelized top where the extra sugar dusting deepens into a golden, fragrant crust.
Blood Orange Olive Oil Cake
Dry
Wet
Topping
- 🍰9-inch (23cm) round cake pan
- 🥣Large mixing bowl
- 🥣Medium mixing bowl
- 🔌Electric hand mixer or stand mixer
- 🔪Microplane or citrus zester
- 🍴Citrus juicer
- 🥄Rubber spatula
- 🪜Wire cooling rack
- 📄Parchment paper
- 🪣Fine mesh sieve
- 🥄Measuring cups and spoons
- ⚖️Kitchen scale
Prepare the Pan
Preheat your oven to 350°F (175°C). Grease a 9-inch round cake pan with 1 tablespoon of olive oil, line the bottom with a circle of parchment paper, then lightly grease the parchment as well.
This double-greasing ensures the cake releases cleanly.
Prep the Citrus
Zest 3 blood oranges to yield 2 tablespoons of zest, then juice 2 of the zested oranges to yield ¼ cup of fresh blood orange juice. Thinly slice the remaining blood orange into rounds approximately ⅛-inch thick for the decorative topping.
Set everything aside.
Combine Dry Ingredients
In a medium bowl, whisk together 1½ cups all-purpose flour, 1½ teaspoons baking powder, and ½ teaspoon fine sea salt until evenly combined. Set the dry ingredient bowl aside.
Infuse the Sugar
In a large mixing bowl, combine 1 cup granulated sugar and the 2 tablespoons of blood orange zest. Using your fingertips, rub the zest into the sugar for about 1 minute until the mixture is fragrant and slightly orange-tinted.
This releases the essential oils from the zest and infuses the sugar with intense citrus flavor.
Beat Eggs and Sugar
Add 3 large room-temperature eggs to the zest-sugar mixture. Using an electric hand mixer or stand mixer on medium-high speed, beat the eggs and sugar together for 3 to 4 minutes until the mixture is pale, thick, and falls from the beaters in a thick ribbon.
Stream in Olive Oil
With the mixer running on low speed, slowly drizzle in ¾ cup of extra-virgin olive oil in a thin, steady stream, taking about 1 minute to add it all. This gradual addition creates a smooth, emulsified batter.
Increase speed to medium and mix for 30 seconds more.
Add Wet Ingredients
Add ½ cup whole milk, ¼ cup blood orange juice, and 1 teaspoon vanilla extract to the batter. Mix on low speed until just combined, about 20 seconds.
The batter may look slightly curdled at this stage — that is normal.
Fold in Flour
Add the dry flour mixture to the wet ingredients in two additions, folding gently with a rubber spatula after each addition until just combined. Do not overmix — stop as soon as no dry streaks of flour remain.
A few small lumps are perfectly fine. Overmixing develops gluten and will make the cake tough.
Fill and Top the Pan
Pour the batter into the prepared cake pan and smooth the top with your rubber spatula. Arrange the thin blood orange slices decoratively on top of the batter, overlapping them slightly in a circular pattern.
Sprinkle the remaining 2 tablespoons of granulated sugar evenly over the orange slices and the surface of the batter.
Bake the Cake
Bake in the preheated 350°F (175°C) oven for 45 to 50 minutes, until the cake is deep golden brown, the top springs back when lightly pressed, and a toothpick inserted into the center comes out with just a few moist crumbs. If the top is browning too quickly after 35 minutes, loosely tent with aluminum foil.
Cool and Unmold
Remove the cake from the oven and let it cool in the pan on a wire rack for 15 minutes. Run a thin knife or offset spatula around the edges of the pan to loosen the cake, then carefully invert it onto the wire rack, peel off the parchment paper, and immediately invert it again so the decorated orange-topped side faces up.
Allow the cake to cool for at least an additional 30 minutes before slicing.
Dust and Serve
Once the cake has cooled completely, use a fine mesh sieve to dust 2 tablespoons of powdered sugar lightly and evenly over the top. Slice into 12 wedges and serve at room temperature.
The cake keeps well at room temperature, covered loosely, for up to 3 days, and its flavor deepens beautifully on day 2.
Per serving (1 slice (1/12 of cake)) — values are estimates
Highly Recommended
12. Apricot Almond Frangipane
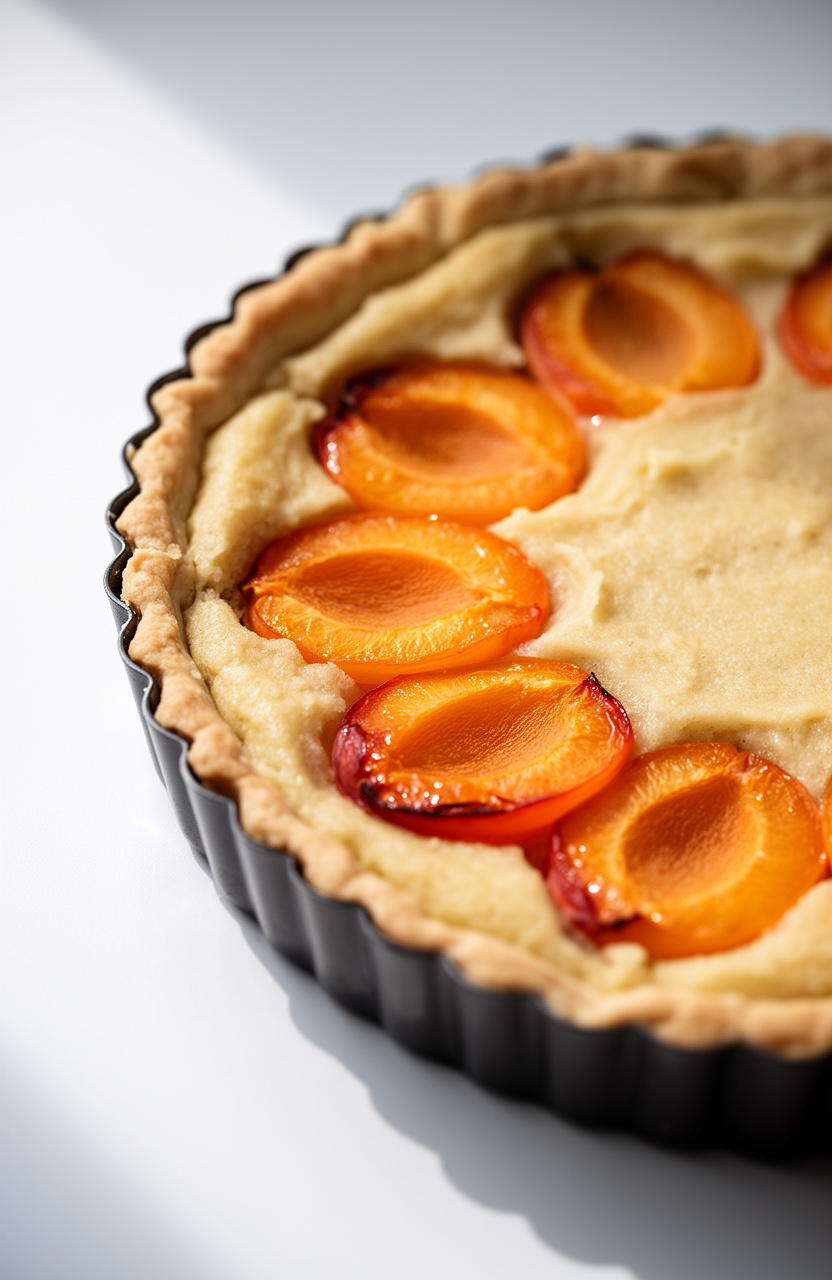
Cold butter cuts into a short, powdered-sugar pastry dough that bakes into a crisp, buttery shell, then fills with silky almond frangipane and tender apricot halves that caramelize at the edges and sink into the nutty, fragrant cream as it sets.
Apricot Almond Frangipane
Pâte Sucrée (Sweet Pastry Shell)
Frangipane Filling
Apricot Topping
Apricot Glaze
Garnish
- 🍰9-inch fluted tart pan with removable bottom
- ⚙️Food processor
- 🔌Stand mixer or hand mixer
- 🥣Mixing bowls
- 🫙Rolling pin
- 📄Plastic wrap
- 📄Parchment paper
- 🍴Pie weights or dried beans
- 🫕Small saucepan
- 🖌️Pastry brush
- 🪜Wire cooling rack
- 🥄Rubber spatula
- 🔪Sharp knife and cutting board
- 🥄Measuring cups and spoons
- ⚖️Kitchen scale
Mix Pastry Dough
Make the pâte sucrée: In a food processor, combine 1 1/4 cups (155g) all-purpose flour, 1/4 cup (30g) powdered sugar, and 1/4 teaspoon fine sea salt. Pulse 3 to 4 times to combine.
Add 1/2 cup (113g) cold cubed butter and pulse 8 to 10 times until the mixture resembles coarse, pea-sized crumbs.
Bind the Dough
In a small bowl, whisk together 1 egg yolk and 2 tablespoons ice-cold water. With the food processor running, drizzle the egg mixture through the feed tube and pulse just until the dough begins to clump together — do not let it form a ball.
The dough should hold together when pinched between your fingers.
Chill Pastry Dough
Turn the dough out onto a lightly floured surface. Gently press it together into a flat disc about 1-inch thick.
Wrap tightly in plastic wrap and refrigerate for at least 1 hour, or up to 2 days. This resting period relaxes the gluten and prevents shrinkage during baking.
Roll Out Dough
Remove the chilled dough from the refrigerator and let it sit at room temperature for 5 minutes to soften slightly. On a lightly floured surface, roll the dough into an 11-inch circle, about 1/8-inch thick, rotating the dough a quarter turn after each roll to prevent sticking.
Carefully drape the dough over your rolling pin and transfer it into a 9-inch fluted tart pan with a removable bottom.
Line Tart Pan
Gently press the dough into the bottom and up the fluted sides of the tart pan, being careful not to stretch it. Use the rolling pin to roll across the top of the pan to trim any excess dough flush with the rim.
Patch any cracks or tears with the trimmed scraps. Prick the bottom all over with a fork, then freeze the lined tart shell for 20 minutes while you preheat the oven.
Blind Bake Shell
Preheat your oven to 375°F (190°C). Line the frozen tart shell with a sheet of parchment paper and fill it with pie weights or dried beans, pressing them into the corners and edges.
Blind bake for 15 minutes until the edges are set and just beginning to turn pale golden. Carefully remove the parchment and weights, then bake for an additional 5 minutes until the bottom looks dry and lightly golden.
Remove from the oven and set aside to cool slightly. Keep the oven on at 375°F (190°C).
Cream Butter and Sugar
Make the frangipane: In the bowl of a stand mixer fitted with the paddle attachment (or using a hand mixer), beat 1/2 cup (113g) softened butter and 1/2 cup (100g) granulated sugar on medium-high speed for 3 to 4 minutes until light, pale, and fluffy. Scrape down the sides of the bowl as needed.
Add Eggs to Filling
Reduce the mixer to medium speed and add 2 large room-temperature eggs one at a time, beating well for 30 seconds after each addition and scraping down the bowl between additions. The mixture may look slightly curdled — this is normal and will smooth out once the dry ingredients are added.
Finish Frangipane
Add 1 teaspoon almond extract and 1 teaspoon vanilla extract. Mix on low speed until incorporated.
Add 1 cup (100g) blanched almond flour, 2 tablespoons all-purpose flour, and 1/4 teaspoon fine sea salt. Mix on low speed until just combined and smooth, about 30 seconds.
Do not overmix. The frangipane should be thick, creamy, and spreadable.
Fill Tart Shell
Spread the frangipane filling evenly into the par-baked tart shell using a rubber spatula, smoothing it into an even layer that reaches all the edges. The filling should fill the shell about three-quarters of the way, as it will puff slightly during baking.
Arrange Apricots
Halve and pit 8 to 10 fresh apricots. Toss the apricot halves gently with 2 tablespoons granulated sugar in a bowl.
Arrange the apricot halves cut-side up in a decorative pattern over the frangipane, pressing them in very gently so they sit level. You can arrange them in concentric circles or in neat rows — the cut side facing up will caramelize beautifully in the oven.
Bake the Tart
Bake the tart at 375°F (190°C) for 40 to 45 minutes, until the frangipane is puffed and deep golden brown around the apricots, the center no longer jiggles when gently shaken, and a toothpick inserted into the frangipane (not an apricot) comes out clean. If the edges of the pastry are browning too quickly after 30 minutes, tent them loosely with strips of aluminum foil.
Cool the Tart
Remove the tart from the oven and place it on a wire rack. Allow it to cool in the pan for 15 minutes before carefully removing the outer ring of the tart pan.
Let the tart cool completely on the rack for at least 30 minutes before glazing — this allows the frangipane to set fully.
Glaze the Tart
Make the apricot glaze: In a small saucepan over medium-low heat, combine 1/4 cup (80g) apricot jam and 1 tablespoon water. Stir constantly and heat for 2 to 3 minutes until the jam is melted and smooth.
If there are large fruit pieces, strain through a fine mesh sieve. Using a pastry brush, gently brush a thin, even layer of warm glaze over the entire surface of the tart, covering the apricots and the exposed frangipane.
Garnish and Serve
Scatter 2 tablespoons toasted sliced almonds over the tart for texture and visual appeal. Dust lightly with powdered sugar just before serving.
Slice with a sharp knife and serve at room temperature. The tart is best enjoyed the day it is made but can be stored loosely covered at room temperature for up to 2 days.
Per serving (1 slice (1/8 of tart)) — values are estimates
Most Loved Products
13. Strawberry Champagne Sorbet
Fresh strawberries blend with dry Champagne and lemon juice into a bright, fruit-forward base that freezes into a smooth, scoopable sorbet with a clean effervescence and a sharp, sun-ripened sweetness that lingers on the palate.
Strawberry Champagne Sorbet
Garnish
- 🌀Blender or food processor
- 🪣Fine mesh strainer
- 🥣Large mixing bowl
- 🥄Whisk
- 🍰9×5 inch loaf pan or shallow freezer-safe container
- 📄Plastic wrap or airtight lid
- 🥄Rubber spatula
- 🍴Fork (for scraping)
- 🍦Ice cream scoop
- 🔪Citrus zester or microplane
- 🍴Citrus juicer
- 🥄Measuring cups and spoons
- ⚖️Kitchen scale (optional)
Blend Strawberry Base
Hull and quarter 2 pounds of fresh strawberries, discarding any bruised or overripe sections. Add the strawberries to a blender or food processor along with 3/4 cup granulated sugar, 3 tablespoons fresh lemon juice, 1 teaspoon lemon zest, and 1 pinch of fine sea salt.
Blend on high speed for 60–90 seconds until completely smooth and the sugar has begun to dissolve.
Strain the Purée
Place a fine mesh strainer over a large mixing bowl. Pour the blended strawberry mixture through the strainer, pressing firmly with a rubber spatula to extract as much juice and pulp as possible.
Discard the remaining seeds and fibrous solids left in the strainer. You should have approximately 2 1/2 to 3 cups of smooth strawberry purée.
Incorporate Champagne
Pour 1 cup of chilled dry Champagne or Prosecco into the strained strawberry purée. Gently whisk the two together using a light hand to combine without losing too much carbonation.
The mixture will bubble slightly — this is normal. Stir until the purée and Champagne are fully integrated and uniform in color.
Chill the Base
Cover the bowl tightly with plastic wrap and refrigerate the sorbet base for at least 2 hours, or until it is thoroughly chilled, reaching approximately 35–40°F (2–4°C). Chilling the base before freezing ensures a smoother, more evenly textured sorbet.
Do not skip this step.
Churn or Pour
If you have an ice cream maker, pour the chilled sorbet base into the machine and churn according to the manufacturer’s instructions, typically 20–25 minutes, until it reaches a soft, slushy consistency. If you do not have an ice cream maker, pour the chilled base directly into a 9×5 inch loaf pan or shallow freezer-safe container and proceed to Step 6.
Scrape and Freeze
For the no-churn method: Cover the loaf pan tightly with plastic wrap or an airtight lid and place it in the freezer. After 1 hour, remove the pan and use a fork to vigorously scrape and stir the partially frozen mixture, breaking up any ice crystals from the edges toward the center.
Return to the freezer. Repeat this scraping process every 45–60 minutes for a total of 3 additional rounds (approximately 3–4 hours total active freezing time) to achieve a light, granita-like texture.
Final Freeze Set
After the final scraping, smooth the surface with a rubber spatula, cover tightly with plastic wrap pressed directly onto the surface of the sorbet to prevent ice crystals from forming, and freeze for a final 2 hours until fully set and firm enough to scoop. The total freeze time from Step 5 through Step 7 is approximately 6 hours.
Scoop and Serve
When ready to serve, remove the sorbet from the freezer and let it sit at room temperature for 3–5 minutes to soften slightly for easier scooping. Use an ice cream scoop dipped in warm water to portion 2–3 rounded scoops per serving into chilled dessert bowls or Champagne coupes.
Garnish each serving with fresh strawberry slices and a sprig of fresh mint. Serve immediately.
Per serving (1 serving (approximately 1/2 cup)) — values are estimates
Recommended for You
14. Lemon Blueberry Semifreddo
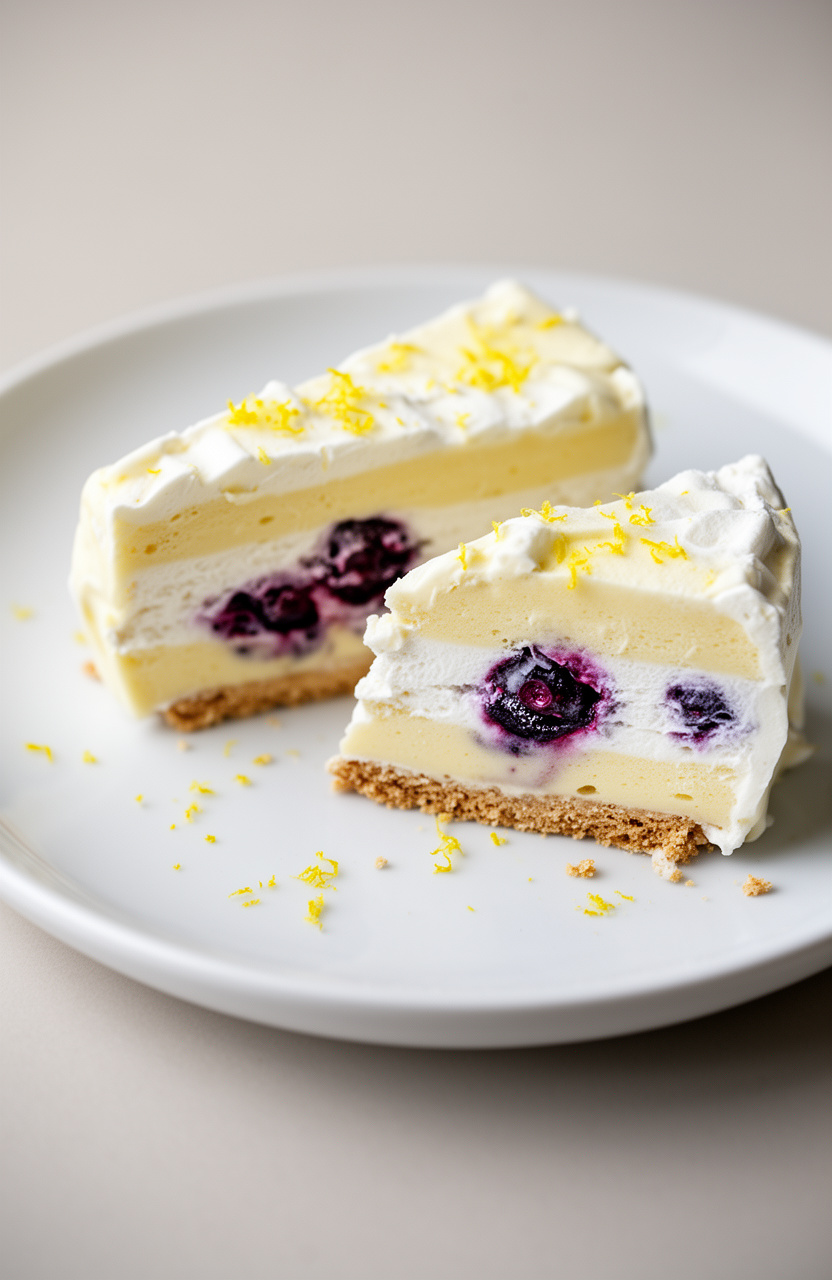
Bright lemon zest and fresh blueberries layer into a whipped cream and egg base that’s poured into a lined pan and frozen until sliceable. Hours in the freezer set it into a silky, mousse-like texture — cool, airy, and tangy-sweet with pockets of jammy fruit throughout.
Lemon Blueberry Semifreddo
Whipped Cream
Lemon Flavor
Blueberry Layer
Base
Garnish
- 🍰9×5-inch loaf pan
- 📄Plastic wrap
- 🥣Large mixing bowl (x2)
- 🔌Hand electric mixer or stand mixer
- 🥄Rubber spatula
- 🔪Microplane or fine zester
- 🍴Citrus juicer
- 🥄Measuring cups and spoons
- 🥄Whisk
- 🥣Small mixing bowl
- 🫕Fork or potato masher
- 🥄Offset spatula
- 🍽️Serving platter
Prepare the Pan
Line a 9×5-inch loaf pan with two overlapping sheets of plastic wrap, leaving at least 4 inches of overhang on all sides. This overhang will be used to cover and unmold the semifreddo later.
Press the plastic wrap into the corners as smoothly as possible. Place the lined pan in the freezer while you prepare the filling.
Crush the Blueberries
Make the quick blueberry crush: In a small bowl, combine 3/4 cup of the blueberries, 2 tablespoons powdered sugar, and 1 tablespoon fresh lemon juice. Use a fork or potato masher to lightly crush the berries until they release their juices but still have some texture.
Stir to combine and set aside. Do not fully puree — you want visible berry pieces.
Mix the Crumb Base
Make the graham cracker base: In a small bowl, combine the 1/2 cup crushed graham crackers or amaretti cookies with 2 tablespoons melted butter. Stir with a fork until the crumbs are evenly moistened.
Set aside at room temperature — this will form the bottom crust layer of the semifreddo.
Whip the Cream
Whip the heavy cream: Pour the 2 cups of very cold heavy whipping cream into a large, chilled mixing bowl. Using a hand electric mixer or stand mixer fitted with the whisk attachment, beat the cream on medium-high speed for 3 to 4 minutes until stiff peaks form.
The cream should hold its shape firmly when the beaters are lifted. Do not overbeat.
Cover and refrigerate while you prepare the egg mixture.
Beat Egg Yolks
Beat the egg yolks: In a second large mixing bowl, combine the 4 egg yolks and 1/2 cup of the granulated sugar. Using the hand mixer (no need to clean the beaters), beat on high speed for 4 to 5 minutes until the mixture is very pale, thick, and nearly tripled in volume — it should fall from the beaters in a thick, ribbon-like stream.
Beat in the 1 tablespoon lemon zest, 1/4 cup lemon juice, and 1 teaspoon vanilla extract until fully incorporated, about 30 seconds more.
Whip Egg Whites
Whip the egg whites: In a clean, grease-free large bowl, combine the 4 egg whites, 1/4 teaspoon cream of tartar, and 1/4 teaspoon fine sea salt. Beat with the hand mixer on medium speed until foamy, about 1 minute.
Gradually add the remaining 1/4 cup granulated sugar, one tablespoon at a time, while increasing speed to high. Continue beating for 3 to 4 minutes until stiff, glossy peaks form.
The whites should not look dry or grainy.
Fold Whites In
Fold together the base: Using a large rubber spatula, gently fold the whipped egg whites into the lemon-yolk mixture in three additions. Use a light, sweeping motion — cut down through the center, sweep along the bottom, and fold up and over — rotating the bowl a quarter turn with each fold.
Stop as soon as no white streaks remain. Overmixing will deflate the mixture.
Fold In Cream
Fold in the whipped cream: Remove the whipped cream from the refrigerator. Add it to the egg mixture in three additions, folding gently with the rubber spatula using the same technique as before.
The final mixture should be light, airy, and pale yellow with a mousse-like consistency. A few small streaks are acceptable — do not overmix.
Layer the Semifreddo
Layer the semifreddo: Remove the prepared loaf pan from the freezer. Pour half of the lemon cream mixture into the lined pan and spread it into an even layer using an offset spatula.
Spoon the crushed blueberry mixture evenly over the top of the first layer, spreading it gently to the edges. Scatter the remaining 3/4 cup of whole fresh blueberries over the blueberry crush.
Pour the remaining lemon cream mixture on top and spread it smooth.
Add Crumb Layer
Add the crumb base: Sprinkle the buttered graham cracker or amaretti crumb mixture evenly over the top of the cream layer. Press it down very gently with your fingertips so it adheres slightly — this layer will become the base when the semifreddo is inverted for serving.
Cover and Freeze
Cover and freeze: Fold the plastic wrap overhang tightly over the top of the semifreddo, pressing it directly against the surface to prevent ice crystals from forming. Place the pan on a flat, level surface in the freezer.
Freeze for at least 6 hours, or preferably overnight, until the semifreddo is completely firm throughout.
Unmold and Serve
Unmold and serve: Remove the semifreddo from the freezer 5 minutes before serving to soften slightly. Unwrap the top layer of plastic wrap.
Place a chilled serving platter upside-down over the loaf pan, then invert both together in one swift motion. Gently lift the pan away and peel off the plastic wrap.
Garnish the top with fresh blueberries, lemon slices or zest curls, and fresh mint leaves. Use a sharp knife dipped in hot water and wiped dry between cuts to slice into 12 even portions.
Serve immediately.
Per serving (1 slice (1/12 of loaf)) — values are estimates
Trending on Amazon
15. Grapefruit Meringue Tartlets

Grapefruit curd fills buttery, short-crust pastry shells made from cold-cubed butter worked into flour and powdered sugar, then topped with torched meringue that billows into glossy, caramelized peaks. Each bite moves from the snap of a crumbly, melt-in-your-mouth shell through tart, citrus-bright curd into a pillowy, lightly charred meringue crown.
Grapefruit Meringue Tartlets
Pâte Sucrée (Sweet Pastry Shell)
Grapefruit Curd Filling
Italian Meringue
Garnish
- 🍴12-cavity tartlet pans (3.5-inch/9cm diameter)
- 🔌Stand mixer with whisk attachment
- ⚙️Food processor
- 🫕Medium heavy-bottomed saucepan
- 🪣Fine-mesh sieve
- 🌡️Candy thermometer or instant-read thermometer
- 🖌️Pastry brush
- 🫙Rolling pin
- 🥧Baking sheet
- 📄Parchment paper
- 🍴Pie weights or dried beans
- 🥣Heatproof bowl
- 🥄Rubber spatula
- 🎂Pastry bag with large star tip
- 🍴Kitchen blowtorch
- 🍴Citrus juicer
- 🔪Microplane zester
- 🥄Whisk
Make Pastry Dough
Make the pâte sucrée: In a food processor, pulse together 1 1/4 cups (160g) all-purpose flour, 1/2 cup (60g) sifted powdered sugar, and 1/4 teaspoon fine sea salt until combined. Add 1/2 cup (115g) cold cubed butter and pulse 8–10 times until the mixture resembles coarse breadcrumbs with pea-sized butter pieces.
In a small bowl, whisk together 2 egg yolks, 2 tablespoons cold heavy cream, and 1 teaspoon vanilla extract. Drizzle the egg mixture over the flour mixture and pulse just until the dough begins to clump together — do not over-process.
Rest the Dough
Turn the dough out onto a lightly floured surface and gently press it into a flat disc. Wrap tightly in plastic wrap and refrigerate for at least 30 minutes.
This resting period allows the gluten to relax and the butter to firm up, making the dough easier to roll and less likely to shrink during baking.
Line Tartlet Pans
After resting, remove the dough from the refrigerator and let it sit at room temperature for 5 minutes to soften slightly. On a lightly floured surface, roll the dough out to a thickness of about 3mm (1/8 inch).
Using a round cutter or a bowl as a guide, cut out 12 circles approximately 5 inches (13cm) in diameter, re-rolling scraps as needed. Carefully press each circle into a 3.5-inch (9cm) tartlet pan, pressing gently into the fluted edges without stretching the dough.
Trim any excess dough flush with the rim using a small knife or rolling pin. Place the lined tartlet pans on a baking sheet and refrigerate for 30 minutes.
Blind Bake Shells
Preheat your oven to 375°F (190°C). Remove the chilled tartlet shells from the refrigerator.
Line each shell with a small square of parchment paper and fill with pie weights or dried beans. Blind bake for 15 minutes, then carefully remove the parchment and weights.
Return the shells to the oven and bake for an additional 10–12 minutes, or until the pastry is deep golden brown and fully cooked through. Allow to cool completely in the pans on a wire rack before filling.
Total bake time is approximately 25–27 minutes.
Cook Grapefruit Curd
Make the grapefruit curd: In a medium heavy-bottomed saucepan, whisk together 4 large eggs, 2 large egg yolks, 3/4 cup (150g) granulated sugar, and 1 tablespoon cornstarch until smooth. Stir in 1 cup (240ml) fresh pink grapefruit juice, 2 tablespoons grapefruit zest, and a pinch of fine sea salt.
Cook over medium heat, stirring constantly with a rubber spatula, for about 8–10 minutes until the mixture thickens noticeably and reaches 170°F (77°C) on an instant-read thermometer. The curd should coat the back of a spoon and hold a line when you run your finger through it.
Finish and Strain Curd
Remove the curd from the heat and immediately strain through a fine-mesh sieve into a clean heatproof bowl, pressing with a rubber spatula to extract as much curd as possible and remove any cooked egg bits or zest. Allow the curd to cool to 140°F (60°C), stirring occasionally.
Once cooled slightly, add the 1/2 cup (115g) room-temperature cubed butter a few pieces at a time, whisking vigorously after each addition until fully incorporated and the curd is glossy and smooth. This emulsification step is critical for a silky texture.
Chill the Curd
Press a sheet of plastic wrap directly onto the surface of the finished grapefruit curd to prevent a skin from forming. Refrigerate for at least 2 hours, or until completely set and cold.
The curd will thicken further as it chills.
Fill Tartlet Shells
Once the curd is set and the tartlet shells are completely cooled, spoon or pipe the grapefruit curd into each baked shell, filling them to just below the rim. Use a small offset spatula to smooth the tops evenly.
Return the filled tartlets to the refrigerator while you prepare the Italian meringue.
Begin Italian Meringue
Make the Italian meringue: Combine 1 cup (200g) granulated sugar and 1/4 cup (60ml) water in a small heavy-bottomed saucepan. Stir gently to combine, then cook over medium-high heat without stirring until the syrup reaches 240°F (115°C) on a candy thermometer — this is the soft-ball stage.
While the syrup is cooking, place 4 large room-temperature egg whites, 1/4 teaspoon cream of tartar, and a pinch of fine sea salt in the bowl of a stand mixer fitted with the whisk attachment. When the syrup reaches approximately 230°F (110°C), begin whipping the egg whites on medium speed until they form soft peaks.
Whip Meringue to Peaks
When the sugar syrup reaches exactly 240°F (115°C), immediately remove it from the heat. With the stand mixer running on medium speed, very carefully and slowly pour the hot syrup in a thin, steady stream down the side of the bowl — avoid pouring directly onto the whisk.
Once all the syrup is incorporated, increase the mixer speed to high and whip for 8–10 minutes until the meringue is thick, glossy, and the bowl feels cool to the touch. Beat in 1/4 teaspoon vanilla extract.
The meringue should hold stiff, shiny peaks and be completely stable.
Pipe the Meringue
Transfer the Italian meringue to a pastry bag fitted with a large star tip. Remove the filled tartlets from the refrigerator and pipe the meringue decoratively over the top of each tartlet, starting from the outside edge and working inward in a spiral, or creating tall rosette peaks — whichever style you prefer.
Make sure the meringue fully covers the curd surface to the edges.
Torch and Garnish
Using a kitchen blowtorch held about 3–4 inches (8–10cm) from the surface, toast the meringue on each tartlet with a steady, sweeping motion until golden brown peaks and caramelized tips appear all over. Work quickly and evenly to avoid burning any single spot.
The toasted meringue should have beautiful amber-tipped peaks with a lightly caramelized surface. Garnish each tartlet with a fresh pink grapefruit supreme segment and a small sprig of fresh mint.
Serve immediately or refrigerate for up to 4 hours before serving.
Per serving (1 tartlet) — values are estimates
Top Picks Today
From bright citrus tarts to floral layer cakes, these spring desserts are made for sharing at garden parties, Easter tables, and lazy weekend afternoons alike. Pick one that caught your eye and give it a try — then drop a comment below letting us know which recipe you’re making first. Pin your favorites now so they’re ready when strawberry season hits!