20 Traditional Easter Recipes to Try
Easter is just around the corner, and you might be wondering how to make your celebration unforgettable. If you’re feeling the pressure to impress family and friends this year, don’t worry—you’re not alone! Discover 20 mouthwatering traditional recipes that will elevate your feast and fill your home with warmth and joy. Get ready to create delicious memories!
Shop Our Must-Haves


1 Honey Glazed Ham
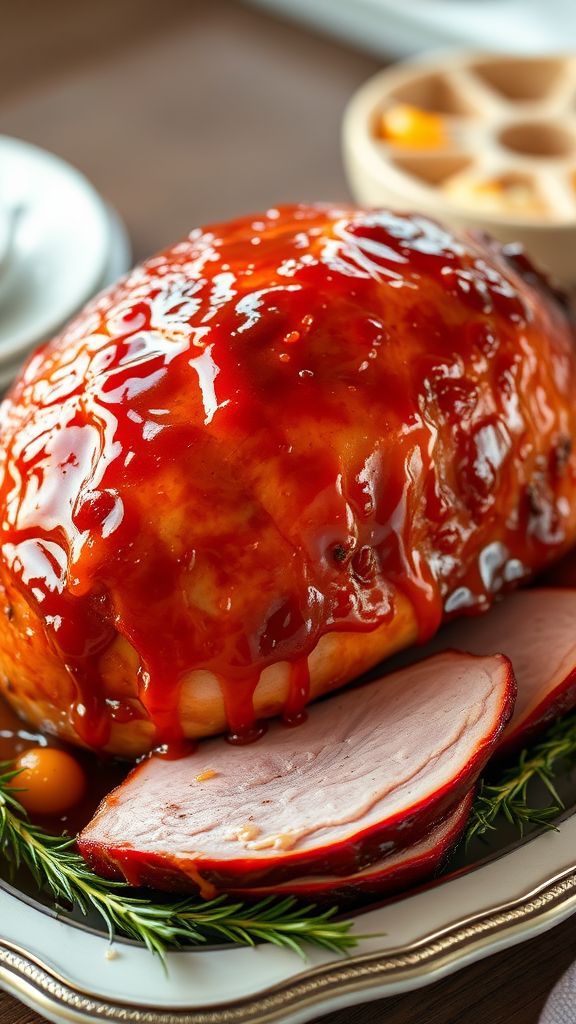
Honey Glazed Ham is a festive dish that brings sweetness and flavor to your table. This recipe is perfect for holidays and special family gatherings. With a delicious combination of honey and spices, your ham will be a hit!
Prep Time: 15 minutes
Cook Time: 1 hour 30 minutes
Additional Time: 10 minutes
Total Time: 1 hour 55 minutes
Servings: 8
Ingredients:
- 1 fully cooked bone-in ham (about 8-10 pounds)
- 1 cup honey
- 1/2 cup brown sugar
- 1/4 cup Dijon mustard
- 1/4 cup apple cider vinegar
- 2 teaspoons ground cinnamon
- 1 teaspoon ground cloves
- 1/2 teaspoon black pepper
Instructions:
Preheat your oven to 325°F (160°C). Place the ham in a large roasting pan, cut side down. This way, it stays juicy while cooking.
In a medium bowl, mix together honey, brown sugar, Dijon mustard, apple cider vinegar, ground cinnamon, ground cloves, and black pepper. Stir it well until the mixture is smooth.
Brush half of the honey glaze over the ham. Make sure to cover all the surfaces. Then, cover the ham loosely with foil to keep it moist during cooking.
Bake the ham for about 1 hour. After an hour, remove it from the oven and brush the remaining glaze on it. Increase the oven temperature to 350°F (175°C) and bake uncovered for an additional 30 minutes. This helps to create a nice sticky and caramelized coating.
When the ham reaches an internal temperature of 140°F (60°C), it’s ready to be removed from the oven. Let it rest for about 10 minutes before slicing. This helps the juices redistribute into the meat.
Tips:
- For an extra pop of flavor, add 1 tablespoon of minced garlic to the glaze mixture.
- If you prefer a spicier glaze, add a pinch of cayenne pepper to the honey glaze.
- Leftover ham can be stored in the fridge for up to 5 days or frozen for longer storage.
Nutrition Facts:
- Calories: 350
- Total Fat: 15g
- Saturated Fat: 5g
- Cholesterol: 90mg
- Sodium: 1200mg
- Total Carbohydrates: 38g
- Dietary Fiber: 0g
- Sugars: 32g
- Protein: 20g
2 Lamb Roast with Garlic and Rosemary
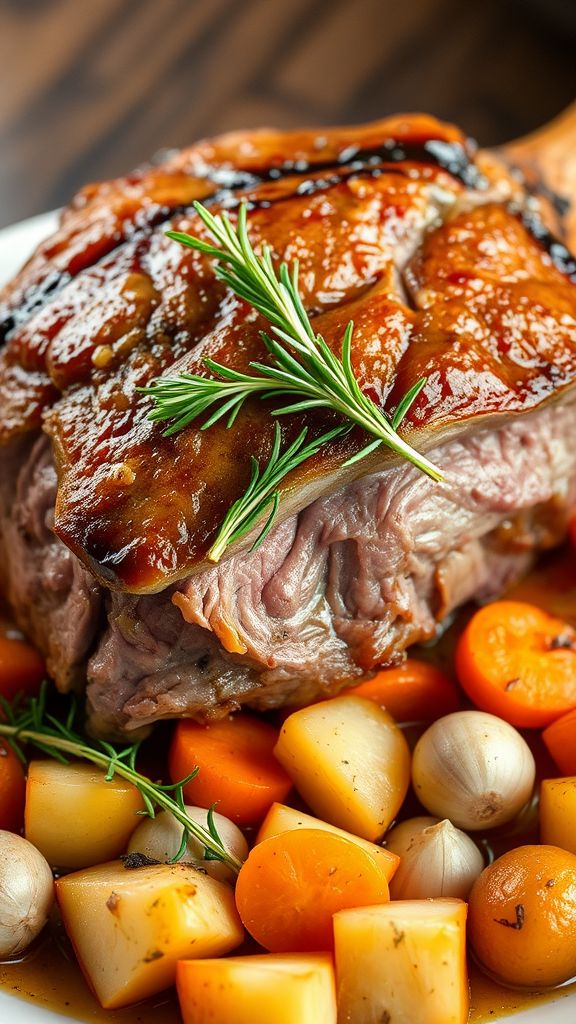
Lamb Roast with Garlic and Rosemary is a classic dish that brings a burst of flavor to any family dinner. It is tender, juicy, and infused with the aromatic taste of garlic and fresh rosemary. Perfect for special occasions or a cozy Sunday dinner, this roast will surely impress your guests.
Prep Time: 15 minutes
Cook Time: 90 minutes
Additional Time: 10 minutes
Total Time: 115 minutes
Servings: 6
Ingredients:
- 4 pounds lamb roast (leg or shoulder)
- 4 cloves garlic, minced
- 2 tablespoons fresh rosemary, chopped
- 2 tablespoons olive oil
- 1 tablespoon salt
- 1 teaspoon black pepper
- 1 cup chicken broth
- 1 lemon, juiced and zested
- 2 carrots, cut into chunks
- 1 onion, quartered
- 4 potatoes, peeled and cut into chunks
Instructions:
Preheat your oven to 425°F (220°C). This high temperature will help create a beautifully caramelized crust on the lamb.
In a small bowl, mix together the minced garlic, chopped rosemary, olive oil, salt, black pepper, lemon juice, and lemon zest. This mixture will be your flavor base.
Rub the garlic and rosemary mixture generously all over the lamb roast. Make sure to get it in all the nooks and crannies for maximum flavor.
Place the seasoned lamb in a roasting pan. Surround it with the carrot, onion, and potato chunks. Pour the chicken broth into the bottom of the pan to ensure the meat stays juicy while roasting.
Roast the lamb in the preheated oven for about 90 minutes, or until it reaches your desired level of doneness. A meat thermometer should read 145°F (63°C) for medium-rare.
Once done, remove the lamb from the oven and cover it with aluminum foil. Let it rest for 10 minutes to allow the juices to redistribute throughout the meat.
After resting, slice the lamb and serve it with the roasted vegetables. Drizzle some pan juices over the top for extra flavor.
Tips:
- For added depth of flavor, let the lamb marinate in the garlic and rosemary mixture overnight before roasting.
- If you prefer a crustier exterior, sear the lamb in a hot skillet for a few minutes on each side before transferring it to the oven.
- Pair this dish with a fresh green salad or some warm bread to complete your meal.
Nutrition Facts:
- Calories: 450
- Protein: 32g
- Carbohydrates: 30g
- Fat: 24g
- Sodium: 700mg
- Fiber: 5g
3 Classic Deviled Eggs

Classic Deviled Eggs are a delicious appetizer that everyone loves! They are easy to make and perfect for gatherings, picnics, or holiday celebrations. With a creamy filling and a sprinkle of paprika on top, these eggs are sure to be a hit.
Prep Time: 15 minutes
Cook Time: 10 minutes
Additional Time: 30 minutes
Total Time: 55 minutes
Servings: 12 eggs
Ingredients:
- 6 large eggs
- 3 tablespoons mayonnaise
- 1 teaspoon Dijon mustard
- 1 teaspoon white vinegar
- Salt and pepper to taste
- Paprika for garnish
- Optional: chives or pickles for extra flavor
Instructions:
Start by boiling the eggs. Place them in a pot and cover with water. Bring the water to a boil over medium heat. Once boiling, cover the pot and remove it from heat. Let the eggs sit for about 10 minutes. This will cook them perfectly.
After 10 minutes, carefully drain the hot water and transfer the eggs to a bowl of ice water. Allow them to cool for about 5-10 minutes. Once cool, peel the eggs under running cold water to help remove the shells easily.
Now, cut each egg in half lengthwise. Remove the yolks and place them in a mixing bowl. Set the egg whites aside on a serving platter. Mash the yolks with a fork until they are crumbly.
Add the mayonnaise, Dijon mustard, white vinegar, salt, and pepper to the yolks. Mix everything together until it is smooth and creamy. Taste the mixture and adjust the seasoning if needed.
Next, spoon or pipe the yolk mixture back into the hollows of the egg whites. You can use a piping bag for a nice presentation if you like. Finally, sprinkle a little paprika on top for color.
Chill the deviled eggs in the refrigerator for at least 30 minutes before serving. This will help the flavors combine.
Tips:
- For a bit of spice, try adding a dash of hot sauce to the yolk mixture.
- You can experiment with different herbs like dill or chives for added flavor.
- Make sure to use fresh eggs for the best peeling experience.
Nutrition Facts:
- Calories: 60 per egg half
- Protein: 3 grams
- Fat: 5 grams
- Carbohydrates: 1 gram
- Sugar: 0 grams
- Fiber: 0 grams
4 Hot Cross Buns

Hot Cross Buns are a delightful treat that bring a warm, sweet aroma to your kitchen. These soft, spiced buns are perfect for sharing with family and friends during the Easter season. Enjoying them fresh out of the oven is an experience you won’t forget!
Prep Time: 15 minutes
Additional Time: 2 hours
Total Time: 2 hours 15 minutes
Servings: 12 buns
Ingredients:
- 4 cups all-purpose flour
- 1/4 cup granulated sugar
- 1 packet (2 1/4 tsp) active dry yeast
- 1 teaspoon salt
- 1 teaspoon ground cinnamon
- 1/2 teaspoon ground nutmeg
- 1/2 teaspoon allspice
- 1 cup milk (warm)
- 1/4 cup unsalted butter (melted)
- 2 large eggs (lightly beaten)
- 1 cup raisin or currants
- 1/4 cup mixed peel (optional)
- 1/2 cup glazing sugar (for icing)
Instructions:
In a large mixing bowl, combine the flour, sugar, yeast, salt, cinnamon, nutmeg, and allspice. Mix it well to ensure that the yeast is evenly distributed.
Next, add the warm milk, melted butter, and eggs into the mixture. Stir until a soft dough forms. If the dough is too sticky, add a little more flour, but don’t overdo it!
Knead the dough on a floured surface for about 5-7 minutes until it becomes smooth and elastic. Then, place the dough in a greased bowl, cover it with a clean kitchen towel, and let it rise in a warm area for about 1 hour or until it doubles in size.
Once the dough has risen, punch it down gently to release the air. Next, fold in the raisins and mixed peel if using. Divide the dough into 12 equal pieces and shape them into rounds. Place the buns on a baking tray lined with parchment paper, leaving some space between them.
Cover the tray with a towel again and let the buns rise for another 30 minutes. While they rise, preheat your oven to 375°F (190°C).
After they have risen, use a sharp knife to carefully cut a cross on the top of each bun. This is what makes them "Hot Cross Buns"! Bake in the preheated oven for about 20 minutes or until golden brown.
Let the buns cool slightly before icing them with glazing sugar. You can mix it with a little water to make a glaze. Drizzle it over the cross for that finishing touch.
Tips:
- For fluffier buns, make sure your ingredients, especially the milk, are warm but not hot.
- If you don’t have mixed peel, feel free to use just raisins or currants.
- These buns are best enjoyed fresh but can also be toasted for a delicious breakfast treat.
Nutrition Facts:
- Calories: 200 per bun
- Total Fat: 5g
- Saturated Fat: 3g
- Cholesterol: 50mg
- Sodium: 200mg
- Total Carbohydrates: 36g
- Dietary Fiber: 1g
- Sugars: 9g
- Protein: 4g
5 Easter Bread with Easter Eggs
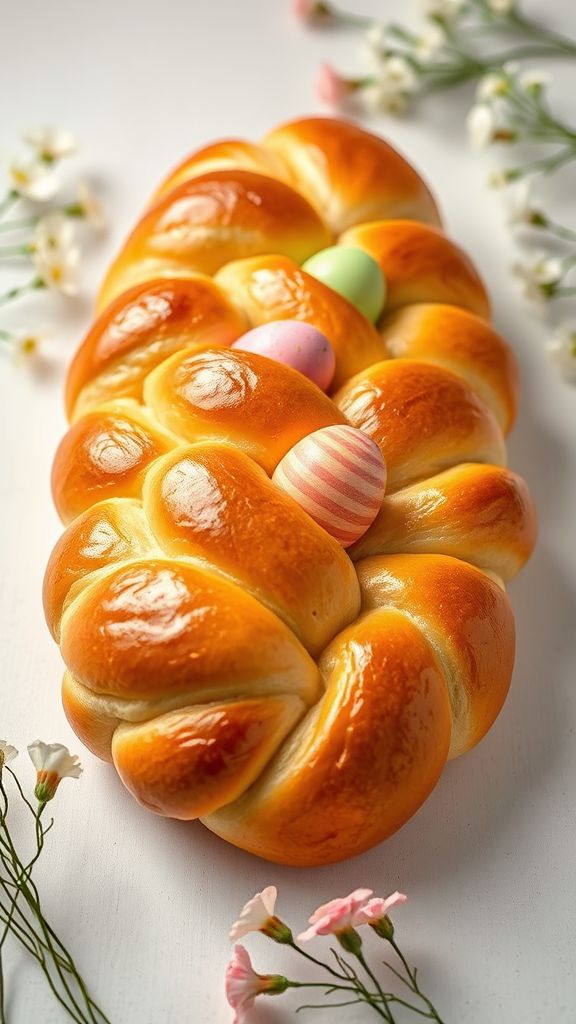
Easter Bread with Easter Eggs is a beautiful and tasty way to celebrate the holiday! This soft, sweet bread, often decorated with colorful eggs, brings joy to any Easter table. It’s a fun recipe to make with family and friends!
Prep Time: 30 minutes
Additional Time: 1 hour 30 minutes
Total Time: 2 hours
Servings: 12
Ingredients:
- 4 cups all-purpose flour
- 1/4 cup granulated sugar
- 2 teaspoons active dry yeast
- 1 teaspoon salt
- 1 cup milk, warmed
- 1/4 cup unsalted butter, melted
- 3 large eggs
- 1 teaspoon vanilla extract
- Colored Easter eggs (as many as you need, preferably hard-boiled)
Instructions:
Start by mixing the milk and butter in a medium bowl until the butter melts. Make sure the milk is warm, but not too hot! In a big bowl, combine flour, sugar, yeast, and salt. Mix them well.
Now, add the warm milk mixture to the dry ingredients. Crack in the eggs and pour in the vanilla extract. Use a wooden spoon or spatula to mix everything together until a dough forms.
Knead the dough on a floured surface for about 8-10 minutes. It should be smooth and elastic. Place the dough in a greased bowl, cover it with a clean cloth, and let it rise in a warm place for about 1 hour or until it doubles in size.
After the dough has risen, punch it down gently and shape it into a long braid. You can also shape it into a round loaf. If you’re using colored eggs, nestle them into the braid or the top of the loaf.
Place the shaped dough onto a baking sheet lined with parchment paper. Cover it with the cloth again and let it rise for another 30 minutes. Preheat your oven to 350°F (175°C) while you wait.
Once the dough has risen, carefully place it in the oven. Bake for about 25-30 minutes or until it is golden brown and sounds hollow when tapped on the bottom. Let it cool on a wire rack before serving.
Tips:
- Add citron peel or chopped nuts to the dough for extra flavor.
- For a shiny finish, brush the bread with a beaten egg before baking.
- Store leftovers in an airtight container to keep them fresh.
Nutrition Facts:
- Calories: 200 per slice
- Fat: 8g
- Carbohydrates: 28g
- Protein: 5g
- Sugars: 3g
6 Potato Gratin with Asparagus

Potato Gratin with Asparagus is a creamy, cheesy dish that makes a perfect side for any meal, especially during special occasions. This recipe combines tender potatoes and fresh asparagus, baked until golden and bubbly, creating a delicious dish everyone will love.
Prep Time: 20 minutes
Cook Time: 1 hour
Total Time: 1 hour 20 minutes
Servings: 6
Ingredients:
- 2 pounds of potatoes, thinly sliced
- 1 pound of asparagus, trimmed and cut into 2-inch pieces
- 2 cups of heavy cream
- 1 cup of grated Gruyère cheese
- 1 cup of grated Parmesan cheese
- 3 cloves of garlic, minced
- 2 tablespoons of butter
- 1 teaspoon of salt
- 1/2 teaspoon of black pepper
- 1/2 teaspoon of ground nutmeg
Instructions:
Start by preheating your oven to 375°F (190°C). Grease a large baking dish with some butter to prevent sticking.
Next, in a large bowl, combine the heavy cream, garlic, salt, black pepper, and nutmeg. Mix everything well until it’s combined.
Now, layer half of the sliced potatoes in the bottom of the prepared baking dish. Pour half of the cream mixture over the potatoes. Then sprinkle half of the Gruyère cheese and Parmesan cheese on top.
After that, add the asparagus pieces in a layer on top of the potatoes and cheeses. Then, repeat the layers with the remaining potatoes, cream mixture, and cheeses.
Cover the baking dish with aluminum foil and bake in the preheated oven for 30 minutes. After that, remove the foil and bake for an additional 20-30 minutes, or until the potatoes are tender and the top is golden brown.
Let it cool for about 10 minutes before serving. This allows the gratin to set up a bit, making it easier to serve.
Tips:
- For extra flavor, add some chopped onions or herbs like thyme to the layers.
- You can substitute the Gruyère cheese with cheddar for a different taste.
- Make it a day ahead for even better flavors, and simply reheat before serving.
Nutrition Facts:
- Calories: 350
- Total Fat: 24g
- Saturated Fat: 14g
- Cholesterol: 85mg
- Sodium: 450mg
- Total Carbohydrates: 30g
- Dietary Fiber: 3g
- Sugars: 1g
- Protein: 10g
7 Spring Vegetable Quiche

Spring Vegetable Quiche is a delightful dish that brings the fresh flavors of the season right to your table. Filled with a colorful mix of veggies and a creamy custard, it’s perfect for brunch or a light dinner. Plus, it’s a great way to use up those fresh spring vegetables!
Prep Time: 20 minutes
Cook Time: 35 minutes
Additional Time: 10 minutes
Total Time: 1 hour
Servings: 8
Ingredients:
- 1 pie crust (store-bought or homemade)
- 1 tablespoon olive oil
- 1 small onion, diced
- 1 cup asparagus, chopped
- 1 cup spinach, chopped
- 1 cup cherry tomatoes, halved
- 4 large eggs
- 1 cup heavy cream or milk
- 1 cup shredded cheese (such as cheddar or feta)
- Salt and pepper to taste
- Fresh herbs (like parsley or chives) for garnish
Instructions:
First, preheat your oven to 375°F (190°C). This will ensure that your quiche bakes evenly and gets nice and golden brown.
Next, roll out the pie crust and fit it into a pie dish. Use a fork to poke holes in the bottom of the crust to prevent bubbles. Bake it in the preheated oven for about 10 minutes, then take it out and let it cool slightly.
In a skillet, heat the olive oil over medium heat. Add the diced onion and sauté until it’s soft and translucent, usually about 5 minutes. Then, toss in the asparagus and cook for an additional 3-4 minutes until it’s tender.
Next, add the spinach and cherry tomatoes to the skillet. Stir everything together and cook for about 2 minutes or until the spinach wilts.
In a bowl, whisk the eggs together with the heavy cream or milk. Mix in the shredded cheese, and season with salt and pepper to taste.
Now, spread the vegetable mixture evenly over the baked pie crust. Pour the egg and cheese mixture on top, making sure it covers the veggies well.
Place the quiche back in the oven and bake for about 25-30 minutes. It’s ready when the top is set and slightly golden.
Once done, let it cool for about 10 minutes before slicing. This makes it easier to serve. Garnish with fresh herbs if you like, and enjoy your delicious Spring Vegetable Quiche!
Tips:
- You can add any seasonal vegetables you like, such as zucchini or bell peppers.
- For extra flavor, consider adding cooked bacon or ham to the quiche.
- Serve your quiche warm or at room temperature for a perfect spring dish.
Nutrition Facts:
- Calories: 300 per slice
- Protein: 10g
- Fat: 22g
- Carbohydrates: 20g
- Fiber: 2g
- Sugar: 2g
8 Grandma’s Strawberry Shortcake

Grandma’s Strawberry Shortcake is a delicious dessert that brings sweet memories of family gatherings. This classic treat features fluffy biscuits topped with fresh strawberries and whipped cream. Perfect for any occasion, this recipe will make your taste buds sing!
Prep Time: 15 minutes
Additional Time: 1 hour
Total Time: 1 hour 15 minutes
Servings: 6
Ingredients:
- 2 cups of sliced fresh strawberries
- 1 tablespoon of sugar
- 2 cups of all-purpose flour
- 1 tablespoon of baking powder
- 1/2 teaspoon of salt
- 1/4 cup of cold unsalted butter, cubed
- 1/2 cup of milk
- 1 cup of heavy whipping cream
- 2 tablespoons of powdered sugar
- 1 teaspoon of vanilla extract
Instructions:
Start by preparing the strawberries. In a medium bowl, mix the sliced strawberries with 1 tablespoon of sugar. Stir well and let them sit for about 1 hour. This will help the strawberries become juicy.
Next, preheat your oven to 425°F (220°C). In another bowl, combine the flour, baking powder, and salt. Mix them together. Cut in the cold butter until the mixture looks like course crumbs. This step is important for getting a flaky texture.
Now, add 1/2 cup milk to the flour mixture and stir gently until everything is combined. Do not overmix! Time to shape the biscuits. Turn the dough onto a floured surface and pat it down to about 1-inch thick. Using a round cutter, cut out the biscuits and place them on a baking sheet.
Bake the biscuits in the preheated oven for about 12-15 minutes or until they are lightly golden. Allow them to cool on a wire rack.
While the biscuits cool, whip the heavy cream in a large bowl. Add the powdered sugar and vanilla extract as you whip until soft peaks form. Make sure not to overwhip.
To serve, slice a biscuit in half. Spoon some of the juicy strawberries on the bottom half, add a dollop of whipped cream, and place the top half back on. Repeat for the remaining biscuits.
Tips:
- Use fresh strawberries for the best flavor. Frozen strawberries can be watery.
- You can add a splash of lemon juice to the strawberries for extra zest.
- Feel free to experiment by adding other fruits like blueberries or raspberries!
Nutrition Facts:
- Calories: 320
- Total Fat: 15g
- Saturated Fat: 9g
- Cholesterol: 50mg
- Sodium: 180mg
- Total Carbohydrates: 45g
- Dietary Fiber: 2g
- Sugars: 14g
- Protein: 4g
9 Carrot Cake with Cream Cheese Frosting

Carrot Cake with Cream Cheese Frosting is a classic dessert that’s always a hit at gatherings. This moist cake combines warm spices with shredded carrots, making it flavorful and satisfying. Topped with rich cream cheese frosting, it’s simply irresistible!
Prep Time: 20 minutes
Cook Time: 30 minutes
Additional Time: 30 minutes (for cooling)
Total Time: 1 hour 20 minutes
Servings: 12
Ingredients:
- 2 cups all-purpose flour
- 2 cups granulated sugar
- 1 teaspoon baking powder
- 1 teaspoon baking soda
- 1 teaspoon ground cinnamon
- ½ teaspoon salt
- 1 cup vegetable oil
- 4 large eggs
- 3 cups grated carrots
- 1 cup crushed pineapple (drained)
- 1 cup chopped walnuts (optional)
Instructions:
First, preheat your oven to 350°F (175°C). Grease and flour two 9-inch round cake pans to prevent sticking. In a large mixing bowl, combine the flour, sugar, baking powder, baking soda, cinnamon, and salt. Mix well until everything is combined.
Next, add the oil and the eggs into the dry ingredients. Stir until smooth. Then, fold in the grated carrots, crushed pineapple, and walnuts (if using). Make sure everything is evenly mixed.
Now, pour the batter evenly into the prepared cake pans. Bake in the oven for about 30 minutes, or until a toothpick inserted in the center comes out clean. Once done, take the cakes out of the oven and let them cool in the pans for about 10 minutes. After that, gently remove them from the pans and let them cool completely on wire racks.
While the cakes are cooling, prepare the cream cheese frosting. In a medium bowl, beat together 8 oz of softened cream cheese and ½ cup of softened butter until creamy. Gradually mix in 4 cups of powdered sugar and 1 teaspoon of vanilla extract. Beat until smooth and fluffy.
Finally, once the cakes are completely cool, spread a layer of frosting on top of one cake layer. Place the second layer on top and frost the top and sides of the entire cake. Enjoy your delicious Carrot Cake with Cream Cheese Frosting!
Tips:
- For extra moistness, add ½ cup of shredded coconut to the batter.
- Make sure your cream cheese is at room temperature for easy mixing.
- You can store the cake in the refrigerator for up to 5 days.
Nutrition Facts:
- Calories: 450 per serving
- Total Fat: 22g
- Saturated Fat: 5g
- Cholesterol: 75mg
- Sodium: 250mg
- Total Carbohydrates: 60g
- Dietary Fiber: 1g
- Sugars: 40g
- Protein: 4g
10 Paska Bread
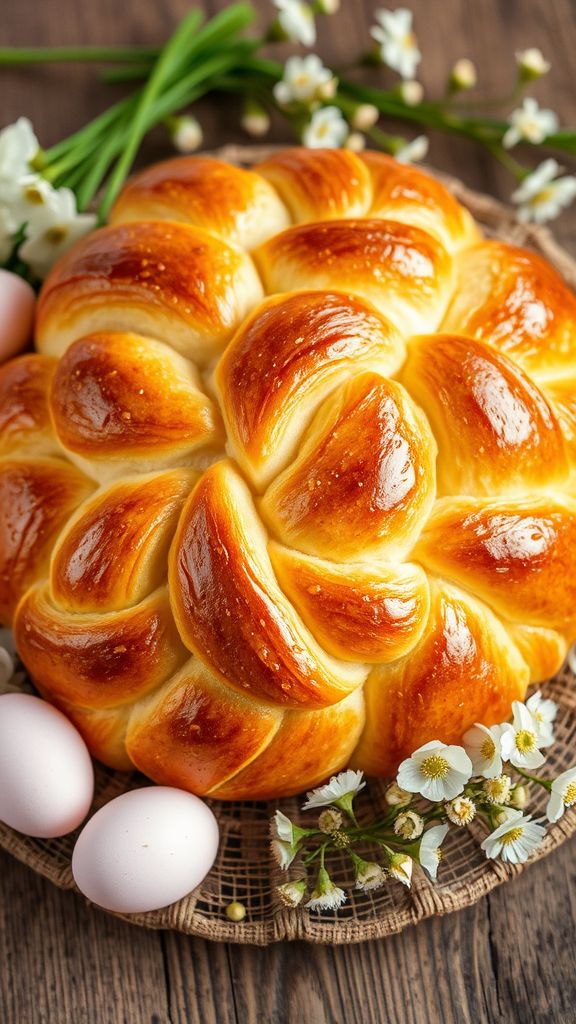
Paska Bread is a sweet and rich bread traditionally baked for Easter. It has a beautiful golden color and a delicate texture, making it the perfect centerpiece for your holiday meal. This bread is not only delicious but also carries a lovely symbolism of the season.
Prep Time: 2 hours
Additional Time: 1 hour
Total Time: 3 hours
Servings: 12
Ingredients:
- 4 cups all-purpose flour
- 1 cup milk, warmed
- 1/2 cup sugar
- 1/4 cup butter, softened
- 1/2 tsp salt
- 2 large eggs
- 2 tsp active dry yeast
- 1 tsp vanilla extract
- 1/2 tsp lemon zest
- 1/4 cup raisins (optional)
- 1 egg for egg wash
Instructions:
First, combine 1/2 cup of the warm milk with the 2 tsp of yeast in a small bowl. Let it sit for about 5 minutes until it becomes frothy. This means your yeast is active and ready to use.
In a large mixing bowl, combine 4 cups of flour, 1/2 cup of sugar, and 1/2 tsp of salt. Mix these dry ingredients well. Then, add the softened 1/4 cup of butter along with the frothy yeast mixture, the remaining 1/2 cup of warmed milk, 2 eggs, 1 tsp of vanilla extract, and 1/2 tsp of lemon zest to the bowl.
Mix everything together until a dough forms. You might need to sprinkle a little more flour if the dough feels too sticky. Place the dough onto a lightly floured surface. Knead it for about 10 minutes until it becomes smooth and elastic.
Next, put the kneaded dough into a greased bowl, cover it with a clean kitchen towel, and let it rise in a warm place for about 1 hour, or until it doubles in size. This rising time is important for creating the light and fluffy texture of the bread.
Once the dough has risen, punch it down gently and knead in the 1/4 cup of raisins if you’re using them. Shape the dough into a loaf or divide it into smaller pieces for mini loaves. Place your shaped dough into greased loaf pans.
Cover the dough again and let it rise for another 30 minutes. Preheat your oven to 350°F (175°C). Before baking, brush the top of the dough with the beaten egg to give it a nice golden color.
Finally, bake in the preheated oven for about 30-35 minutes or until the bread sounds hollow when tapped. Let the bread cool on a wire rack before slicing.
Tips:
- You can enhance the flavor by adding spices like nutmeg or cinnamon if desired.
- For added decoration, sprinkle some sesame or poppy seeds on top before baking.
- Store any leftover bread in an airtight container to keep it fresh.
Nutrition Facts:
- Calories: 220 per serving
- Protein: 5g
- Carbohydrates: 36g
- Fat: 7g
- Sugar: 10g
11 Sweet Potato Casserole with Marshmallows
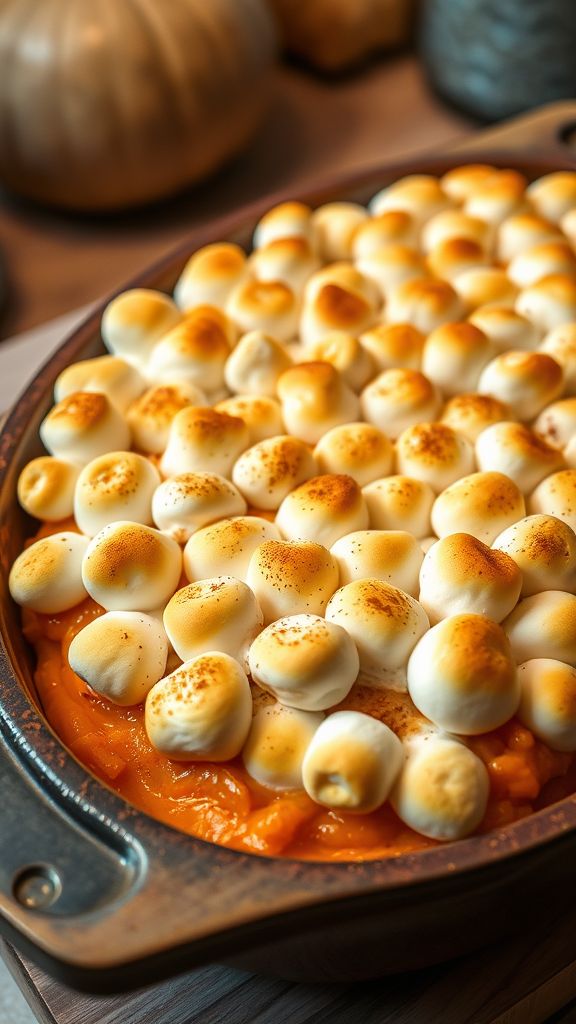
Sweet Potato Casserole with Marshmallows is a delicious and comforting dish that is perfect for holiday gatherings. The combination of creamy sweet potatoes topped with toasted marshmallows creates a delightful sweetness that everyone will enjoy.
Prep Time: 20 minutes
Cook Time: 25 minutes
Additional Time: 10 minutes
Total Time: 55 minutes
Servings: 8
Ingredients:
- 4 medium sweet potatoes
- 1/2 cup brown sugar
- 1/4 cup milk
- 1/4 cup butter, melted
- 1 teaspoon vanilla extract
- 1/2 teaspoon salt
- 1/2 teaspoon ground cinnamon
- 1 cup mini marshmallows
Instructions:
First, preheat your oven to 350°F (175°C). Next, peel the sweet potatoes and cut them into chunks. Boil the sweet potatoes in a large pot of water for about 15-20 minutes, or until they are tender. Drain the sweet potatoes and let them cool slightly.
In a large mixing bowl, mash the sweet potatoes until smooth. Stir in the brown sugar, milk, melted butter, vanilla extract, salt, and ground cinnamon. Mix until everything is well combined and creamy.
Transfer the sweet potato mixture into a greased baking dish. Spread it evenly across the dish. Next, sprinkle the mini marshmallows on top of the sweet potato mixture.
Bake in the preheated oven for 25 minutes, or until the marshmallows are golden and slightly toasted. After baking, let the casserole sit for about 10 minutes before serving. This will help it set up a bit.
Tips:
- For extra flavor, try adding a pinch of nutmeg or ginger to the sweet potato mixture.
- If you like a crunchy topping, consider mixing some crushed pecans or walnuts with the marshmallows before sprinkling them on top.
- You can prepare the sweet potato mixture a day ahead and store it in the refrigerator until you’re ready to bake.
Nutrition Facts:
- Calories: 250 per serving
- Total Fat: 10g
- Saturated Fat: 6g
- Cholesterol: 30mg
- Sodium: 170mg
- Total Carbohydrates: 41g
- Dietary Fiber: 5g
- Sugars: 18g
- Protein: 3g
12 Spinach and Feta Stuffed Pastries

Spinach and Feta Stuffed Pastries are a delicious treat that combines healthy spinach with creamy feta cheese, all wrapped up in flaky pastry. These mouthwatering goodies are perfect for any gathering or as a tasty snack at home.
Prep Time: 20 minutes
Cook Time: 25 minutes
Total Time: 45 minutes
Servings: 12 pastries
Ingredients:
- 1 tablespoon olive oil
- 2 cups fresh spinach, chopped
- 1 cup feta cheese, crumbled
- 1 small onion, finely chopped
- 2 cloves garlic, minced
- 1 egg, beaten (for egg wash)
- 1 package (about 14 oz) puff pastry, thawed
- Salt and pepper, to taste
- 1 tablespoon lemon juice
- 1 teaspoon dried oregano
Instructions:
Start by heating a large skillet over medium heat. Add the olive oil and sauté the onion until it becomes soft and translucent, which should take about 3-4 minutes. Next, stir in the garlic and cook for another 30 seconds until fragrant.
After that, toss in the chopped spinach and stir until it wilts down. This will take approximately 2-3 minutes. Remove the skillet from heat and let the mixture cool slightly.
In a mixing bowl, combine the sautéed spinach and onion with the crumbled feta cheese, lemon juice, oregano, salt, and pepper. Mix everything well to ensure the flavors blend together.
Next, preheat your oven to 400°F (200°C). Roll out the puff pastry on a lightly floured surface. Cut the pastry into 4-inch squares.
Place about 1-2 tablespoons of the spinach and feta filling in the center of each square. Fold the pastry over to create a triangle and press the edges to seal. You can use a fork to crimp the edges for an extra touch.
Now, arrange the pastries on a baking sheet lined with parchment paper. Brush the tops with the beaten egg to give them a nice golden color when baked.
Bake the pastries for about 20-25 minutes or until they are golden brown and puffed. Once done, let them cool slightly before serving.
Tips:
- If you want a more golden color, brush the pastries twice with the egg wash.
- Try adding other ingredients like caramelized onions or sun-dried tomatoes for extra flavor.
- These pastries can be frozen before baking. Just bake them straight from the freezer, adding a few extra minutes to the cooking time.
Nutrition Facts:
- Calories: 190 per pastry
- Total Fat: 12g
- Saturated Fat: 5g
- Cholesterol: 40mg
- Sodium: 250mg
- Total Carbohydrates: 14g
- Dietary Fiber: 1g
- Protein: 6g
13 Maple Syrup Glazed Carrots

Maple Syrup Glazed Carrots are a simple and delicious side dish that can brighten up any meal. The natural sweetness of the carrots combines perfectly with the rich flavor of maple syrup, making them a delightful treat. This dish is quick to prepare and is sure to be a hit at your next family gathering!
Prep Time: 10 minutes
Cook Time: 15 minutes
Total Time: 25 minutes
Servings: 4
Ingredients:
- 1 pound baby carrots
- 2 tablespoons unsalted butter
- 3 tablespoons pure maple syrup
- Salt and pepper, to taste
- Fresh parsley, for garnish (optional)
Instructions:
Start by washing the baby carrots under cold running water to remove any dirt. You can leave them whole or slice them in half if you prefer smaller pieces.
Next, add the butter to a large skillet and melt it over medium heat. Once the butter is bubbling, add the carrots to the skillet. Stir them well to ensure they are coated in the melted butter.
Drizzle the maple syrup over the carrots, and season with salt and pepper to taste. Stir again to combine all the flavors. Keep cooking for about 10-12 minutes, stirring occasionally, until the carrots are tender and glazed.
Once they are done, remove the skillet from the heat. If you like, you can sprinkle some fresh parsley on top for an extra touch. These carrots are best served warm, so bring them to the table right away!
Tips:
- For added flavor, try adding a pinch of cinnamon or nutmeg to the glaze.
- If you want crunch, use baby carrots rather than larger ones, as they cook faster and stay crisp.
- You can prepare this dish ahead of time and reheat it gently before serving.
Nutrition Facts:
- Calories: 150
- Fat: 6g
- Sodium: 80mg
- Carbohydrates: 23g
- Fiber: 3g
- Sugar: 10g
- Protein: 1g
14 Herbed Focaccia Bread
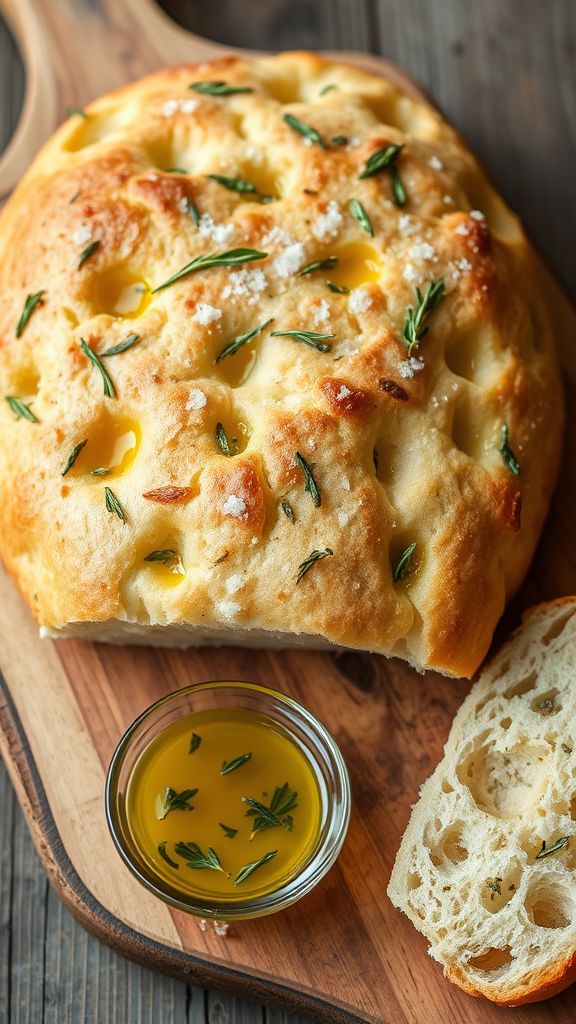
Herbed Focaccia Bread is a delightful Italian flatbread that’s easy to make and packed with flavor. It’s perfect for dipping in olive oil or enjoying alongside your favorite meals. With a sprinkle of fresh herbs, this bread adds a touch of warmth to any table.
Prep Time: 15 minutes
Cook Time: 20 minutes
Additional Time: 1 hour 30 minutes
Total Time: 2 hours 5 minutes
Servings: 8
Ingredients:
- 2 cups all-purpose flour
- 1 cup warm water (about 110°F)
- 1 packet (2¼ tsp) instant yeast
- 1 tsp sugar
- 1 tsp salt
- 2 tbsp olive oil (plus more for drizzling)
- 2 tbsp fresh herbs (like rosemary, thyme, or basil, chopped)
- Coarse sea salt for sprinkling
Instructions:
In a large mixing bowl, combine the warm water, sugar, and yeast. Stir gently and let it sit for about 5 minutes until it becomes frothy. This means your yeast is ready!
Add the flour, salt, and olive oil to the bowl. Mix well until a dough forms. You can use a spoon or your hands for this. The dough will be sticky, which is perfect for focaccia.
Knead the dough on a floured surface for about 5 minutes until it is smooth and elastic. Place the dough back in the bowl and cover it with a clean kitchen towel. Let it rise in a warm place for about 1 hour or until it’s doubled in size.
Once the dough has risen, preheat your oven to 425°F. Grease a baking sheet with olive oil. Transfer the dough to the baking sheet and gently stretch it out to fit the pan. Use your fingers to make dimples all over the surface.
Drizzle more olive oil on top of the dough and sprinkle the fresh herbs and coarse sea salt. Make sure to cover as much of the bread as possible with the herbs for great flavor.
Bake in the preheated oven for about 20 minutes or until the focaccia is golden brown. Once baked, let it cool for a few minutes before slicing and serving.
Tips:
- For extra flavor, you can add minced garlic or grated Parmesan cheese to the dough.
- This bread is best enjoyed fresh, but you can store leftovers in an airtight container for up to 2 days.
- Feel free to experiment with different herbs or toppings, like sun-dried tomatoes or olives.
Nutrition Facts:
- Calories: 180 per serving
- Total Fat: 6g
- Saturated Fat: 1g
- Carbohydrates: 27g
- Fiber: 1g
- Protein: 4g
- Sodium: 200mg
15 Lemon Tart with Fresh Berries

The Lemon Tart with Fresh Berries is a delightful dessert that is perfect for any occasion. With a zesty lemon flavor and a topping of fresh berries, it’s both refreshing and beautiful. The combination of tart and sweet makes it a crowd-pleaser!
Prep Time: 20 minutes
Cook Time: 25 minutes
Additional Time: 1 hour (for cooling)
Total Time: 1 hour 45 minutes
Servings: 8
Ingredients:
- 1 pre-made tart crust
- 1 cup granulated sugar
- 3 large eggs
- 1/2 cup fresh lemon juice (about 4 lemons)
- 1 tablespoon lemon zest
- 1/2 cup heavy cream
- A pinch of salt
- Fresh berries for topping (strawberries, blueberries, raspberries, etc.)
Instructions:
Start by preheating your oven to 350°F (175°C). Place the tart crust in a 9-inch tart pan and set it aside.
In a large bowl, whisk together the granulated sugar and the eggs until they are smooth. Pour in the fresh lemon juice and add the lemon zest. Mix everything well until combined.
Next, gently fold in the heavy cream and a pinch of salt. Make sure everything is well blended.
Pour the lemon mixture into the prepared tart crust. Bake in the preheated oven for 25 minutes, or until the filling is just set but still has a little jiggle in the center.
Once done, remove the tart from the oven and let it cool at room temperature for about 1 hour. After it cools, transfer it to the refrigerator to chill for an additional 30 minutes.
Before serving, top the cooled tart with an assortment of fresh berries. Slice and enjoy the refreshing flavors of your homemade lemon tart!
Tips:
- For an extra burst of flavor, try adding a few sprigs of mint on top of the berries.
- Be sure to zest the lemons before juicing them; it makes for easier preparation.
- If you want a sweeter tart, you can adjust the sugar to taste.
Nutrition Facts:
- Calories: 250 per slice
- Total Fat: 16g
- Saturated Fat: 10g
- Cholesterol: 85mg
- Sodium: 70mg
- Carbohydrates: 25g
- Fiber: 1g
- Sugar: 17g
- Protein: 3g
16 Baked Ziti with Ricotta and Spinach
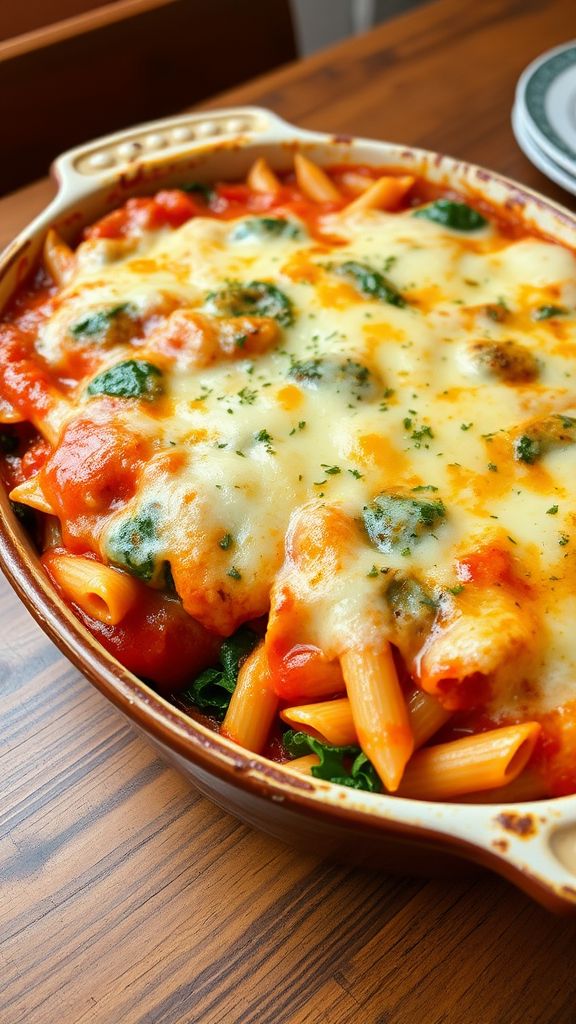
Baked Ziti with Ricotta and Spinach is a delicious and hearty dish that is perfect for any family gathering or special occasion. It combines flavorful pasta with creamy ricotta and fresh spinach, creating a meal everyone will love. This recipe is easy to make and will fill your home with delightful aromas as it bakes.
Prep Time: 20 minutes
Cook Time: 30 minutes
Total Time: 50 minutes
Servings: 6-8
Ingredients:
- 12 ounces ziti pasta
- 2 tablespoons olive oil
- 1 medium onion, chopped
- 2 cloves garlic, minced
- 10 ounces fresh spinach, chopped
- 15 ounces ricotta cheese
- 1 cup grated Parmesan cheese
- 3 cups marinara sauce
- 1 teaspoon Italian seasoning
- 1/2 teaspoon salt
- 1/4 teaspoon black pepper
- 2 cups shredded mozzarella cheese
Instructions:
First, preheat your oven to 375°F (190°C). In a large pot, cook the ziti pasta according to the package instructions until al dente. Drain and set aside.
Next, heat the olive oil in a large skillet over medium heat. Add the chopped onion and cook until soft, about 5 minutes. Add the minced garlic and cook for an additional 30 seconds, stirring constantly to avoid burning.
Stir in the chopped spinach and cook until wilted, which should take about 2-3 minutes. Remove from heat and let it cool slightly. In a large bowl, combine the ricotta cheese, grated Parmesan cheese, Italian seasoning, salt, and black pepper. Mix well.
In a large mixing bowl, combine the cooked ziti pasta with the spinach mixture and the marinara sauce. Then, gently fold in the ricotta cheese mixture until everything is well combined.
Pour half of the ziti mixture into a greased 9×13 inch baking dish. Sprinkle half of the shredded mozzarella cheese on top. Then, add the remaining ziti mixture and top with the rest of the mozzarella.
Cover the baking dish with aluminum foil and bake for 20 minutes. After that, remove the foil and bake for another 10 minutes or until the cheese is bubbly and golden brown. Allow it to cool for a few minutes before serving. Enjoy!
Tips:
- You can add cooked ground beef or sausage for extra protein and flavor.
- Feel free to substitute fresh spinach with frozen spinach; just make sure to drain any excess water.
- For a little kick, add some red pepper flakes to the marinara sauce.
Nutrition Facts:
- Calories: 450 per serving
- Total Fat: 20g
- Saturated Fat: 10g
- Cholesterol: 60mg
- Sodium: 800mg
- Total Carbohydrates: 45g
- Dietary Fiber: 4g
- Sugars: 6g
- Protein: 20g
17 Roasted Beet Salad with Goat Cheese
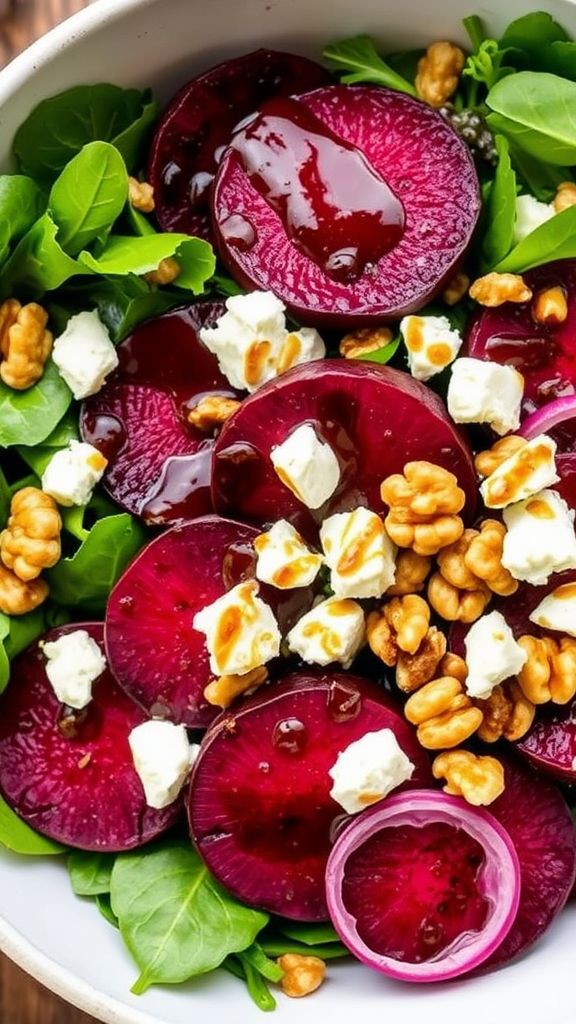
This Roasted Beet Salad with Goat Cheese is a delicious and vibrant dish that showcases the natural sweetness of roasted beets paired with creamy goat cheese. It’s perfect for any time of the year, especially around Easter, as it brings a splash of color to your table!
Prep Time: 15 minutes
Cook Time: 45 minutes
Total Time: 1 hour
Servings: 4
Ingredients:
- 4 medium-sized beets, scrubbed clean
- 2 tablespoons olive oil
- 4 cups mixed greens (like arugula, spinach, or baby kale)
- ½ cup crumbled goat cheese
- ¼ cup walnuts, toasted
- 1 small red onion, thinly sliced
- 2 tablespoons balsamic vinegar
- Salt and pepper, to taste
Instructions:
First, preheat your oven to 400°F (200°C). Wrap each beet in aluminum foil and place them on a baking sheet. Drizzle a little olive oil over the beets, then sprinkle with a pinch of salt. Fold the foil around the beets to seal them.
Roast the beets in the oven for about 45 minutes, or until they are tender. You can check if they are done by inserting a fork or knife into one; it should go in easily. Once roasted, take them out and let them cool before peeling.
While the beets are cooling, prepare the salad base. In a large bowl, combine the mixed greens, sliced red onion, and toasted walnuts. Toss them gently to mix everything together.
Once the beets are cool, peel off their skins and slice them into bite-sized pieces. Add the roasted beet slices to the salad bowl. Crumble the goat cheese on top.
In a small bowl, whisk together the balsamic vinegar, remaining olive oil, and a bit of salt and pepper to create the dressing. Drizzle it over the salad, and toss gently to combine all the flavors.
Tips:
- For added flavor, you can add a pinch of herbs like thyme or parsley to the dressing.
- If you like a bit of sweetness, consider adding some sliced apples or pears to the salad.
- Make sure to toast the walnuts for a richer flavor. You can do this by placing them in a dry pan over medium heat for a few minutes until golden.
Nutrition Facts:
- Serving size: 1 salad
- Calories: 250
- Total Fat: 18g
- Saturated Fat: 4g
- Cholesterol: 10mg
- Sodium: 200mg
- Total Carbohydrates: 20g
- Dietary Fiber: 4g
- Sugars: 5g
- Protein: 6g
18 Cranberry Orange Salad

This Cranberry Orange Salad is a refreshing and colorful dish that perfectly combines sweet and tart flavors. It’s a great addition to any festive meal, especially for Easter. Easy to make and packed with nutrients, this salad will brighten up your table!
Prep Time: 15 minutes
Total Time: 15 minutes
Servings: 6
Ingredients:
- 2 cups fresh cranberries
- 1 cup orange segments (fresh or canned)
- 1 cup mini marshmallows
- 1/2 cup chopped walnuts or pecans (optional)
- 1/2 cup plain yogurt
- 1/4 cup honey
- 1 tablespoon orange juice
- Zest of 1 orange
Instructions:
Start by rinsing the fresh cranberries under cold water. Drain them well and place them in a large mixing bowl. If you’re using the canned orange segments, drain the liquid and add them to the cranberries.
Next, toss in the mini marshmallows and chopped nuts, if you’re using them. These ingredients add a nice crunch and sweetness to the salad.
In a separate bowl, mix together the plain yogurt, honey, orange juice, and the zest of the orange. Stir until the mixture is smooth and well combined. This dressing will add creaminess to your salad.
Now, pour the yogurt dressing over the cranberry mixture. Gently fold the ingredients together, making sure everything is coated with the dressing. Be careful not to mash the cranberries.
Finally, serve immediately, or chill in the fridge for about 30 minutes before serving. This chilling step can help meld the flavors together.
Tips:
- For a sweeter salad, you can add more honey to the dressing.
- If you want a bit of tang, consider adding a squeeze of lemon juice.
- This salad can be stored in the fridge for up to two days, making it a great make-ahead dish!
Nutrition Facts:
- Calories: 150
- Protein: 3g
- Carbohydrates: 35g
- Fat: 4g
- Fiber: 5g
- Sugar: 20g
19 Easter Cookie Decorating Kit

Get ready for a fun and creative way to celebrate Easter with this Easter Cookie Decorating Kit! This kit includes all the ingredients you need to bake delicious cookies and decorate them in a festive manner. It’s a perfect activity for families to enjoy together.
Prep Time: 20 minutes
Additional Time: 30 minutes
Total Time: 50 minutes
Servings: 24 cookies
Ingredients:
- 2 ¾ cups all-purpose flour
- 1 teaspoon baking powder
- ½ teaspoon salt
- 1 cup unsalted butter, softened
- 1 ½ cups granulated sugar
- 1 large egg
- 2 teaspoons vanilla extract
- ½ teaspoon almond extract (optional)
- 3 cups powdered sugar
- 2 tablespoons milk
- Food coloring (various colors)
- Sprinkles and edible decorations
Instructions:
Start by preheating your oven to 350°F (175°C). In a bowl, mix the flour, baking powder, and salt together. This will be your dry mixture.
Next, in a large mixing bowl, cream together the butter and granulated sugar until the mixture is light and fluffy. This should take about 3-4 minutes. Then add the egg, vanilla extract, and almond extract if you’re using it. Mix until everything is well combined.
Gradually add the dry mixture to the wet mixture. Mix until the dough comes together. Once mixed, wrap the dough in plastic wrap and chill it in the fridge for about 30 minutes. This will make it easier to roll out.
After chilling, remove the dough from the fridge and roll it out on a floured surface to about ¼ inch thick. Use your favorite cookie cutters to cut out shapes. Place the cookies on a baking sheet lined with parchment paper.
Bake for about 10-12 minutes or until the edges are lightly golden. Let them cool completely before decorating.
To make the icing, combine the powdered sugar and milk in a bowl. Mix until smooth. Divide the icing into separate bowls and add a few drops of food coloring to each bowl. This will give you different colors for decorating.
Once everything is ready, let the kids (or adults!) decorate the cookies with their colored icing, sprinkles, and other edible decorations.
Tips:
- Use different cookie cutters to create a variety of shapes like bunnies, eggs, and flowers for Easter.
- If your dough is too sticky, add a little more flour when rolling it out.
- Try using different types of sprinkles to make your cookies more colorful and fun!
Nutrition Facts:
- Calories: 120 per cookie
- Total Fat: 5g
- Saturated Fat: 3g
- Cholesterol: 20mg
- Sodium: 50mg
- Carbohydrates: 17g
- Fiber: 0g
- Sugar: 8g
- Protein: 1g
20 Traditional Polish Sausage and Sauerkraut

Traditional Polish Sausage and Sauerkraut is a cozy dish that brings comfort and tradition to the table. Perfect for gatherings, this recipe combines flavorful sausage with tangy sauerkraut for a hearty meal. Let’s dive into making this delightful dish!
Prep Time: 15 minutes
Cook Time: 1 hour
Total Time: 1 hour 15 minutes
Servings: 4
Ingredients:
- 1 pound Polish sausage (kielbasa)
- 2 cups sauerkraut, drained
- 1 medium onion, sliced
- 2 cloves garlic, minced
- 1 tablespoon olive oil
- 1/2 cup chicken broth
- 1 teaspoon caraway seeds (optional)
- Salt and pepper to taste
- Fresh parsley for garnish (optional)
Instructions:
Start by heating 1 tablespoon of olive oil in a large skillet over medium heat. Once the oil is hot, add the sliced onion and sauté for about 3-4 minutes until the onions are soft.
Next, stir in the minced garlic and cook for an additional 30 seconds, just until fragrant. This will add a wonderful aroma to your dish.
Now, it’s time to add the sauerkraut to the skillet. Mix it well with the sautéed onions and garlic. If you like a touch of extra flavor, sprinkle in the caraway seeds.
Slice the Polish sausage and nestle it on top of the sauerkraut mixture. Pour in the chicken broth and season with salt and pepper. Bring everything to a simmer.
Cover the skillet and let it cook for about 30-40 minutes on low heat. This will help the flavors blend beautifully. Stir occasionally so that nothing sticks to the bottom.
Once the sausage is heated through and the flavors are melded, it’s ready to be served. Garnish with some fresh parsley for a pop of color, if desired.
Tips:
- You can substitute the Polish sausage with smoked sausage or Bratwurst for a different twist.
- Feel free to add other vegetables like carrots or potatoes for added nutrition and texture.
- This dish tastes even better the next day! Store leftovers in the refrigerator and enjoy again.
Nutrition Facts:
- Calories: 350
- Protein: 18g
- Carbohydrates: 22g
- Fat: 24g
- Sodium: 800mg
Enjoy your Traditional Polish Sausage and Sauerkraut! It’s a dish full of flavor and history.