15 No-Bake Easter Desserts
Looking for no-bake Easter desserts that’ll impress your family without taking hours in the kitchen? You’re not alone! Many people want to enjoy delicious treats but struggle with time and heat in the kitchen. These easy recipes will help you whip up delightful desserts in no time, making your Easter celebration sweeter and simpler than ever!
Shop Our Must-Haves


1 Chocolate Coconut Bunny Bites

These Chocolate Coconut Bunny Bites are delightful treats perfect for Easter! They combine the rich flavors of chocolate and the sweet taste of coconut, creating a fun and festive snack that kids and adults will love. Plus, they are super easy to make since there’s no baking involved!
Prep Time: 20 minutes
Additional Time: 30 minutes
Total Time: 50 minutes
Servings: 12 bites
Ingredients:
- 1 cup shredded coconut
- 1 cup almond flour
- 1/4 cup honey or maple syrup
- 1/4 cup unsweetened cocoa powder
- 1 teaspoon vanilla extract
- 1/2 teaspoon salt
- 1 cup dark chocolate chips
- 1 tablespoon coconut oil
Instructions:
Start by mixing the shredded coconut, almond flour, honey, cocoa powder, vanilla extract, and salt in a large bowl. Stir until it becomes a sticky mixture. This will be the base for your bunny bites.
Next, use your hands to form small bunny shapes with the mixture. You can shape them like little bunnies or just little balls if you prefer. Place them on a baking sheet lined with parchment paper.
Once all the bunny bites are shaped, pop them into the refrigerator for about 30 minutes. This helps them firm up a bit so they hold their shape better.
While the bites are chilling, melt the dark chocolate chips and coconut oil together. You can do this in a microwave-safe bowl in short bursts or over a double boiler on the stove. Stir until smooth.
After the bunny bites have set, take them out of the fridge and dip each one in the melted chocolate. Make sure to coat them well for that fabulous chocolate layer!
Place the coated bites back onto the parchment paper and let them cool until the chocolate hardens. You can chill them in the fridge to speed up the process, or just let them sit at room temperature.
Tips:
- For a fun twist, add colored sprinkles on top before the chocolate hardens for extra decoration!
- If you want to make them more festive, you can shape the bites like egg shapes instead of bunnies.
- Store any leftovers in an airtight container in the fridge for up to one week.
Nutrition Facts:
- Calories: 120 per bite
- Fat: 8g
- Carbohydrates: 10g
- Protein: 2g
- Fiber: 2g
2 Springtime Berry Parfait
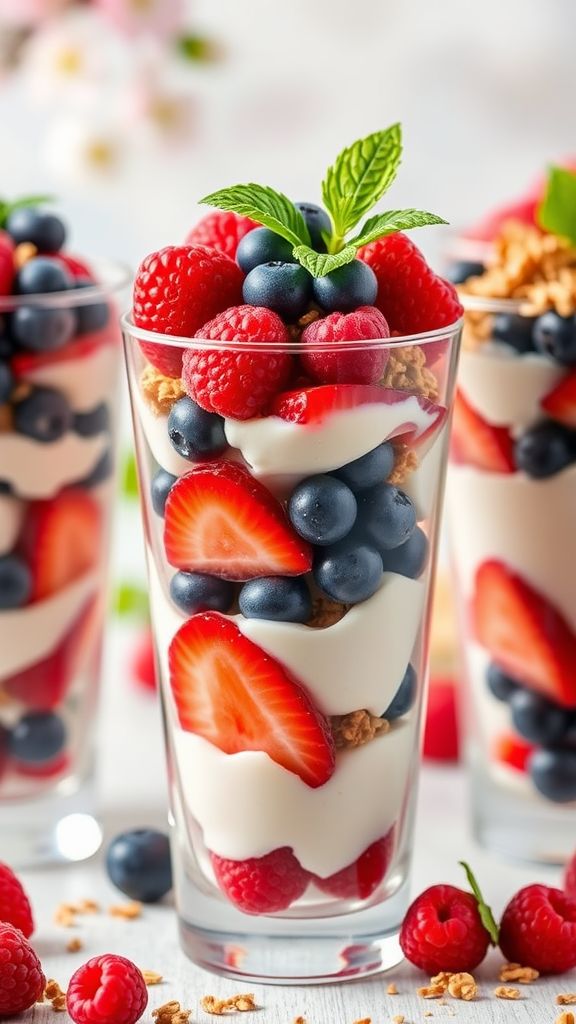
Celebrate the arrival of warmer weather with a delicious and colorful Springtime Berry Parfait! This easy no-bake dessert layers fresh berries with creamy yogurt and crunchy granola. It’s not only tasty but also looks beautiful and is perfect for any spring gathering.
Prep Time: 15 minutes
Total Time: 15 minutes
Servings: 4
Ingredients:
- 2 cups mixed fresh berries (strawberries, blueberries, raspberries)
- 2 cups vanilla yogurt (Greek yogurt works well too)
- 1 cup granola
- 2 tablespoons honey or maple syrup (optional for extra sweetness)
- Fresh mint leaves for garnish (optional)
Instructions:
Start by washing the mixed berries thoroughly. If you’re using strawberries, slice them into smaller pieces for easier layering.
Next, gather four serving glasses or bowls to layer the parfait. Begin by adding a layer of vanilla yogurt at the bottom of each glass. Use about ½ cup of yogurt for each layer.
Then, on top of the yogurt, add a layer of the mixed berries. A mix of colors will make it look even more appealing. Aim for about ¼ cup of berries in each glass.
After that, sprinkle a layer of granola over the berries. You’ll want to use approximately ¼ cup of granola per glass. This will add a nice crunch to your parfait.
Repeat the process to create additional layers until the glasses are full. Finish with a dollop of yogurt on top and garnish it with a few berries and fresh mint leaves if you like.
Once prepared, serve immediately, or refrigerate for a short while if you want it to cool. Enjoy your refreshing spring treat!
Tips:
- For a healthier option, use unsweetened yogurt and skip the honey or syrup.
- Mix and match with your favorite seasonal fruits like mango or kiwi for variety!
- Prepare the layers ahead of time and store them separately to assemble just before serving.
Nutrition Facts:
- Calories: 210 per serving
- Protein: 8g
- Carbohydrates: 36g
- Fat: 6g
- Fiber: 4g
3 Vanilla Pudding Easter Eggs
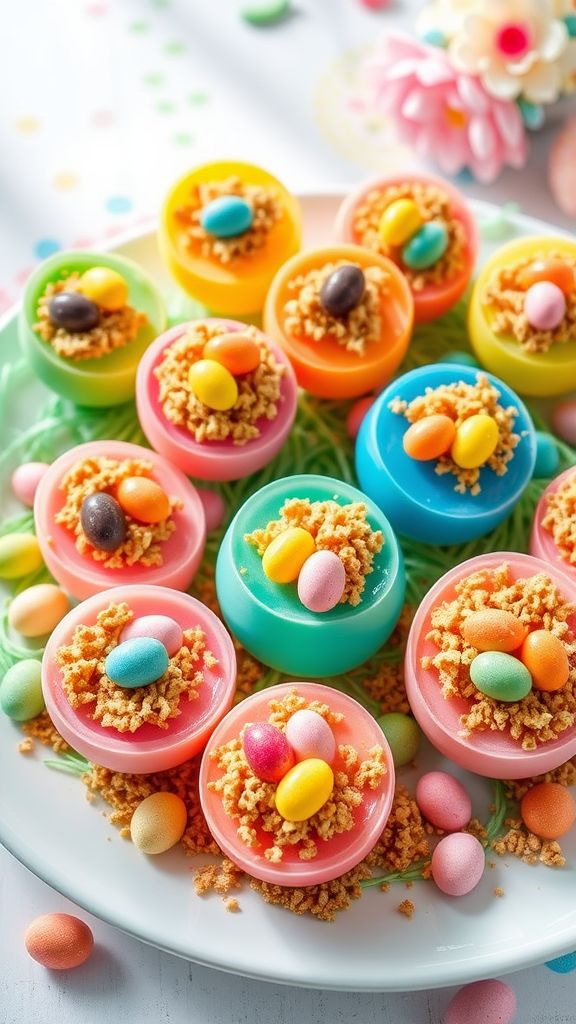
These Vanilla Pudding Easter Eggs are a fun and delicious way to celebrate Easter! Not only are they simple to make, but they’re also a hit with both kids and adults. You’ll love how creamy they are, and they look great on any festive table.
Prep Time: 20 minutes
Additional Time: 2 hours
Total Time: 2 hours 20 minutes
Servings: 12 eggs
Ingredients:
- 1 package of vanilla pudding mix (3.4 oz)
- 2 cups of milk
- 1 teaspoon of vanilla extract
- 1 package of gelatin (any color)
- 1 cup of crushed graham crackers (to resemble dirt)
- 12 plastic egg halves
- Easter-themed candies (such as jelly beans or chocolate eggs for decoration)
Instructions:
Start by mixing the vanilla pudding mix with the milk in a medium bowl. Whisk it well until there are no lumps. Add in the vanilla extract and mix again. Let the pudding sit for about 5 minutes to thicken properly.
Next, carefully fill each half of the plastic egg with the prepared vanilla pudding. Make sure to leave a little space at the top, as the pudding may expand slightly. Once all the egg halves are filled, place them in the fridge for about 2 hours until they are nicely set.
While you’re waiting, prepare the gelatin according to the package instructions, which usually involves mixing it with boiling water and allowing it to cool. Once it’s ready, lightly coat the outside of each filled egg half with gelatin. This step helps stick the crushed graham crackers to the pudding.
Now it’s time to cover the pudding! Roll the gelatin-coated egg halves in the crushed graham crackers to give them a fun "dirt" look. Once all the eggs are coated, place them back in the fridge for another 30 minutes to set.
Finally, assemble your eggs by placing the halves together. Top each egg with your favorite Easter-themed candies for a festive touch. Enjoy your beautiful and tasty Vanilla Pudding Easter Eggs!
Tips:
- You can use different flavors of pudding for a variety of colors and tastes.
- Feel free to add food coloring to the pudding mix for added fun.
- For a healthier twist, use Greek yogurt instead of pudding.
Nutrition Facts:
- Calories: 150 per egg
- Protein: 2g
- Carbohydrates: 22g
- Fat: 6g
- Sugar: 10g
4 No-Bake Carrot Cake Truffles

These No-Bake Carrot Cake Truffles are a delightful treat that combines the flavors of classic carrot cake with the ease of no-bake preparation. Perfect for any occasion, these truffles are creamy, sweet, and packed with carrot goodness. Let’s get started!
Prep Time: 15 minutes
Additional Time: 30 minutes
Total Time: 45 minutes
Servings: 12-15 truffles
Ingredients:
- 1 cup finely grated carrots
- 1 cup almond flour (or substitute with finely crushed graham crackers)
- 1/2 cup finely chopped walnuts or pecans
- 1/4 cup shredded coconut (optional)
- 1/4 cup maple syrup or honey
- 1 teaspoon vanilla extract
- 1 teaspoon ground cinnamon
- 1/4 teaspoon salt
- 1/2 cup Cream Cheese, softened
- 1 cup white chocolate chips or dark chocolate chips (for coating)
Instructions:
Start by getting a large mixing bowl. In that bowl, combine the finely grated carrots, almond flour, finely chopped walnuts, shredded coconut, maple syrup, vanilla extract, ground cinnamon, and salt. Mix everything together until it’s well combined.
Next, add the softened cream cheese to the mixture. Using your hands or a spatula, blend it until you have a sticky and smooth dough. If the mixture is too crumbly, add a little more maple syrup until it holds together nicely.
Once your mixture is ready, take about a tablespoon of the dough and roll it into a ball. Place each ball on a baking sheet lined with parchment paper. Once you have rolled all the mixture into balls, place the baking sheet in the refrigerator for about 30 minutes to let them firm up.
While the truffles are chilling, melt the white or dark chocolate chips in the microwave or over a double boiler. If you’re microwaving, do it in 30-second intervals, stirring in between to prevent burning.
After the truffles have chilled and the chocolate is melted, dip each truffle into the melted chocolate. Ensure they are fully coated, and then place them back on the parchment-lined baking sheet. Repeat this process until all truffles are covered.
Finally, let the chocolate-coated truffles set at room temperature or refrigerate them for a quicker hardening process. Once set, enjoy your delicious No-Bake Carrot Cake Truffles!
Tips:
- You can roll the truffles in crushed nuts or coconut for extra texture before the chocolate sets.
- Store the truffles in an airtight container in the fridge, where they will keep for up to a week.
- Feel free to add spices like nutmeg or ginger to give your truffles a unique flavor twist!
Nutrition Facts:
- Calories per truffle: 120
- Total Fat: 8g
- Saturated Fat: 4g
- Cholesterol: 15mg
- Sodium: 50mg
- Total Carbohydrate: 11g
- Dietary Fiber: 1g
- Sugars: 5g
- Protein: 2g
5 Lemon Cream Cheese Tart
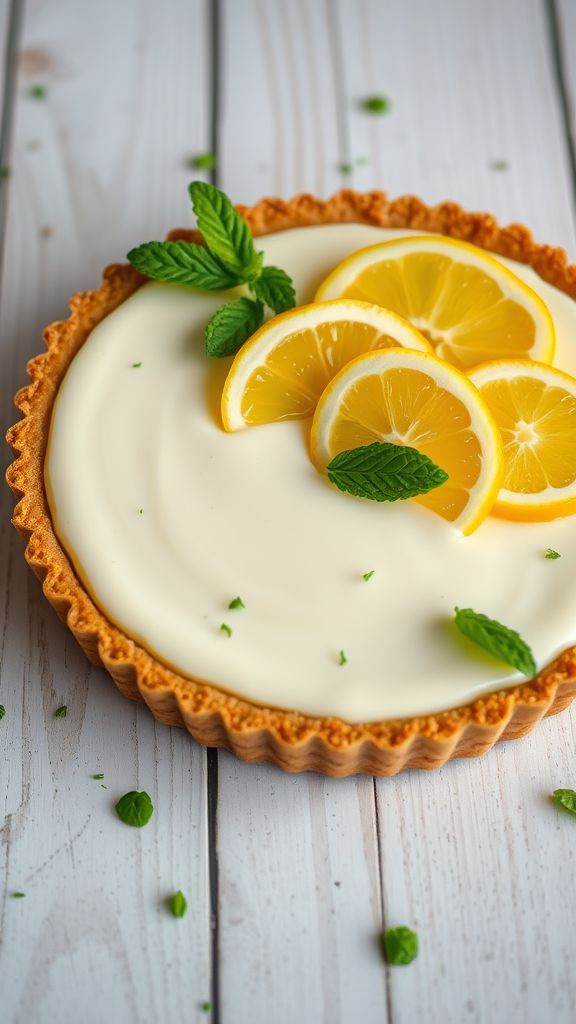
This Lemon Cream Cheese Tart is a delightful treat that combines zesty lemon with creamy richness. It’s perfect for spring gatherings or any time you need a refreshing dessert. Plus, it’s super easy to make and requires no baking!
Prep Time: 20 minutes
Additional Time: 2 hours
Total Time: 2 hours 20 minutes
Servings: 8
Ingredients:
- 1 pre-made graham cracker crust
- 8 oz cream cheese, softened
- 1 cup powdered sugar
- 1 cup heavy whipping cream
- 1/2 cup lemon juice (freshly squeezed)
- Zest of 1 lemon
- 1 tsp vanilla extract
- Lemon slices (for garnish)
- Fresh mint leaves (for garnish)
Instructions:
In a mixing bowl, beat the softened cream cheese with an electric mixer until it’s smooth. Gradually add the powdered sugar while mixing until combined. Make sure there are no lumps for a creamy texture.
Next, mix in the lemon juice, lemon zest, and vanilla extract until everything is well blended. The mixture should be luscious and lemony!
In another bowl, whip the heavy cream until stiff peaks form. This will give your tart a light and airy texture. Gently fold the whipped cream into the cream cheese mixture. Be careful not to over-mix, or you’ll deflate the cream!
Pour the filling into the graham cracker crust and smooth the top with a spatula. Cover the tart with plastic wrap and refrigerate for at least 2 hours. This will help it set nicely.
Once the tart is chilled, remove it from the fridge. Garnish with lemon slices and fresh mint leaves on top before serving. Slice and enjoy the refreshing flavors!
Tips:
- For a sweeter taste, add more powdered sugar to the filling.
- Use a pre-made crust to save time, or make your own from scratch if you prefer.
- Serve with a dollop of extra whipped cream for added indulgence!
Nutrition Facts:
- Calories: 320 per slice
- Total Fat: 22g
- Saturated Fat: 13g
- Cholesterol: 70mg
- Sodium: 150mg
- Total Carbohydrates: 26g
- Dietary Fiber: 0g
- Sugars: 15g
- Protein: 4g
6 Mini Easter Nest Cheesecakes
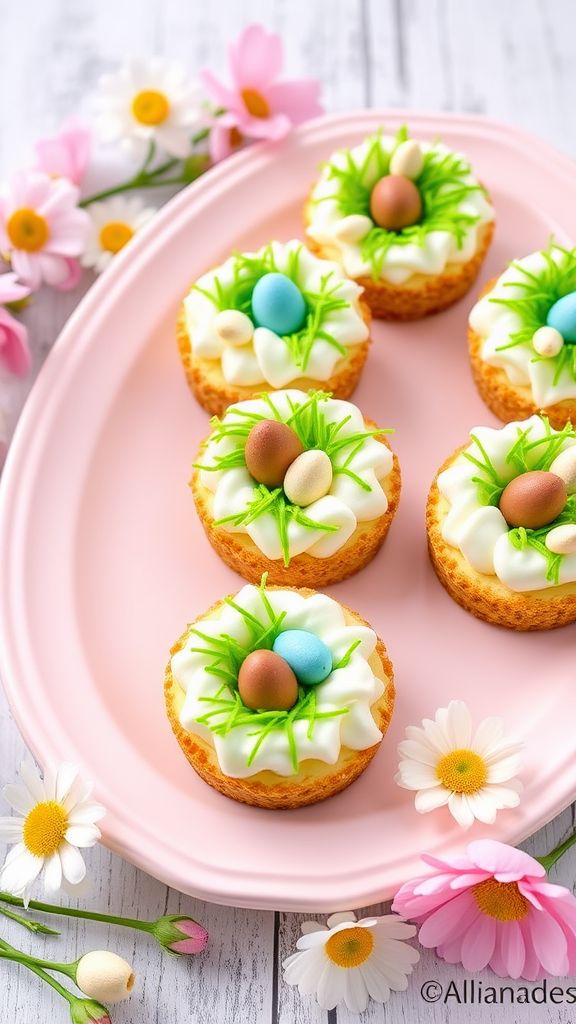
These Mini Easter Nest Cheesecakes are a fun and delicious treat perfect for celebrating Easter! They’re easy to make, require no baking, and are adorable little desserts that everyone will love. With creamy cheesecake filling and a crunchy chocolate nest on top, they’re sure to impress your family and friends.
Prep Time: 20 minutes
Additional Time: 2 hours
Total Time: 2 hours 20 minutes
Servings: 12
Ingredients:
- 1 ½ cups graham cracker crumbs
- ⅓ cup sugar
- ½ cup unsalted butter, melted
- 16 oz cream cheese, softened
- 1 cup powdered sugar
- 1 tsp vanilla extract
- 1 cup whipped cream
- 1 ½ cups shredded coconut
- 1 cup chocolate Easter eggs (such as Cadbury eggs or jelly beans)
Instructions:
Start by mixing the graham cracker crumbs, sugar, and melted butter in a bowl. Stir until everything is well combined and crumbly.
Next, scoop about 2 tablespoons of the mixture into the bottom of each mini cupcake liner. Press it down firmly to form the crust for the cheesecakes. Set these aside while you prepare the filling.
In a separate large mixing bowl, beat the cream cheese until smooth. Slowly add the powdered sugar and vanilla extract while continuing to mix. Once everything is well combined and creamy, gently fold in the whipped cream until there are no streaks.
Spoon the cheesecake mixture over the crusts in your cupcake liners, filling them about ¾ full.
Now for the fun part! In a small bowl, mix the shredded coconut with a few drops of green food coloring to give it a grass-like appearance. Sprinkle some of this coconut "grass" on top of each cheesecake.
Finally, place 2-3 chocolate Easter eggs in the center of each nest. Put your cheesecakes in the refrigerator for at least 2 hours to set. Once they are set, you can enjoy your delightful Mini Easter Nest Cheesecakes!
Tips:
- Use paper cupcake liners to make removing the cheesecakes easier.
- For added flavor, you can mix in a tablespoon of lemon juice into the cheesecake filling.
- If you can’t find shredded coconut, use crushed green candy for the nests.
Nutrition Facts:
- Calories: 220 per serving
- Total Fat: 14g
- Saturated Fat: 8g
- Cholesterol: 40mg
- Sodium: 130mg
- Total Carbohydrates: 23g
- Dietary Fiber: 1g
- Sugars: 10g
- Protein: 2g
7 Fruity Pebbles Rice Krispie Treats
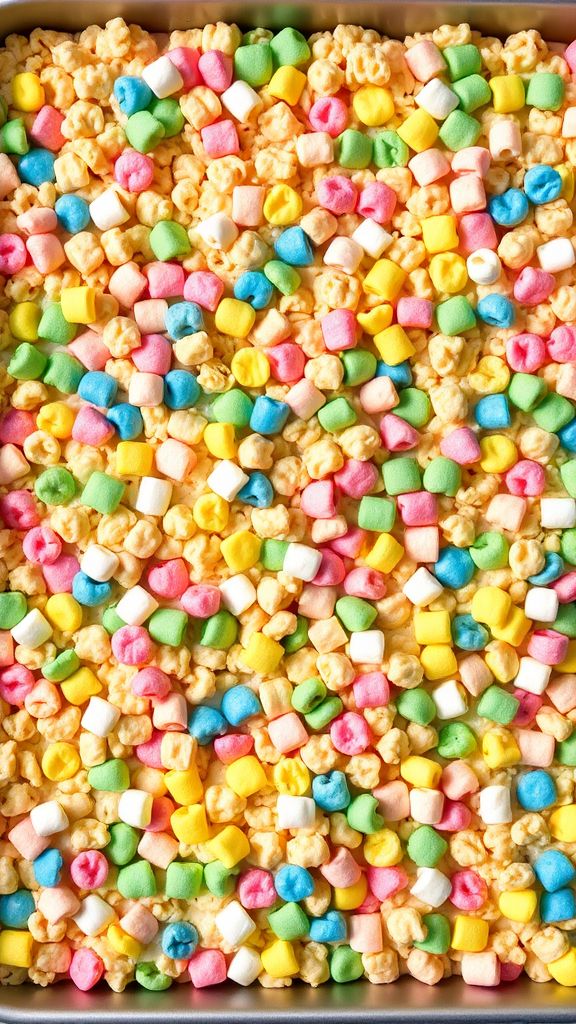
These Fruity Pebbles Rice Krispie Treats are a colorful twist on the classic dessert. With their fun cereal mix and gooey marshmallows, they’re perfect for any celebration, especially Easter! Enjoy making these no-bake treats with family and friends.
Prep Time: 10 minutes
Total Time: 10 minutes
Servings: 12 treats
Ingredients:
- 4 cups Fruity Pebbles cereal
- 3 tablespoons butter
- 1 package (10 oz) mini marshmallows
- 1 teaspoon vanilla extract
- Cooking spray (for greasing the pan)
Instructions:
Start by greasing a 9×13 inch baking dish with cooking spray. This will help the treats come out easily later. Set it aside for now.
In a large saucepan over medium heat, melt the 3 tablespoons of butter. Stir it until it’s all melted and bubbly. Next, add the 10 oz of mini marshmallows to the melted butter. Stir continuously until all the marshmallows are melted and smooth.
Once the marshmallows are melted, remove the pan from the heat. Now, stir in the 1 teaspoon of vanilla extract for that extra flavor. Then, gently fold in the 4 cups of Fruity Pebbles cereal. Mix until all the cereal is well coated with the sticky marshmallow mixture.
Quickly pour the mixture into your greased baking dish. Use a spatula or your hands to press it down firmly in an even layer. Allow the treats to cool for a few minutes before cutting them into squares.
Once they’re set, enjoy your fruity and colorful treats!
Tips:
- For a fun twist, add some chocolate chips or candy sprinkles on top before it cools.
- Store any leftovers in an airtight container to keep them fresh.
- If you want soft treats, don’t press the mixture down too hard when spreading it in the pan.
Nutrition Facts:
- Calories: 130 per treat
- Total Fat: 5g
- Saturated Fat: 3g
- Cholesterol: 15mg
- Sodium: 40mg
- Total Carbohydrates: 21g
- Dietary Fiber: 0g
- Sugars: 10g
- Protein: 1g
8 Peanut Butter Chocolate Egg Squares
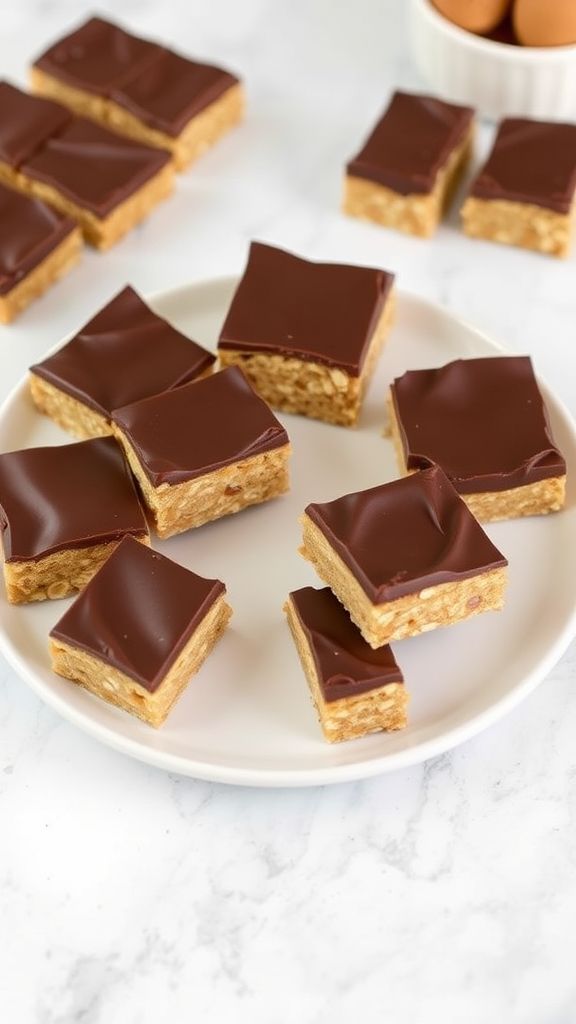
These Peanut Butter Chocolate Egg Squares are a delicious and fun treat that everyone will love! With a creamy peanut butter center and a rich chocolate coating, these squares are perfect for Easter gatherings or just to enjoy anytime. Plus, they’re super easy to make since there’s no baking involved!
Prep Time: 15 minutes
Additional Time: 30 minutes
Total Time: 45 minutes
Servings: 12 squares
Ingredients:
- 1 cup peanut butter (smooth or crunchy)
- 1/2 cup honey or maple syrup
- 2 cups rolled oats
- 1/2 cup chocolate chips
- 1/4 cup unsweetened cocoa powder
- 1/2 teaspoon vanilla extract
- 1/4 teaspoon salt
Instructions:
First, in a large mixing bowl, combine peanut butter and honey (or maple syrup) stirring until smooth. Make sure to mix well so all the ingredients blend together perfectly.
Next, add in the rolled oats, cocoa powder, vanilla extract, and salt. Stir everything until it forms a thick and sticky mixture. If the mixture seems too dry, you can add a little more peanut butter or honey until it gets to the right consistency.
Line a square baking dish (8×8 inches works great) with parchment paper for easy removal later. Then, press the mixture into the dish evenly, spreading it out with a spatula or your hands. Make sure it’s packed tightly.
Now, it’s time to melt the chocolate chips. You can do this in a microwave-safe bowl in 30-second intervals, stirring each time until nice and smooth. Once it’s melted, pour the chocolate over the peanut butter layer, spreading it evenly to cover the top completely.
Finally, place the dish in the fridge and let it chill for about 30 minutes. Once set, take it out and cut into squares. Enjoy your delicious Peanut Butter Chocolate Egg Squares!
Tips:
- For extra flavor, try adding chopped nuts or dried fruit to the peanut butter mixture.
- You can substitute almond butter or cashew butter if you prefer a different taste.
- Keep the squares stored in an airtight container in the refrigerator for up to a week.
Nutrition Facts:
- Calories: 180 per square
- Protein: 5g
- Fat: 9g
- Carbohydrates: 20g
- Fiber: 3g
- Sugar: 7g
9 Marshmallow Fluff Bunny Dip
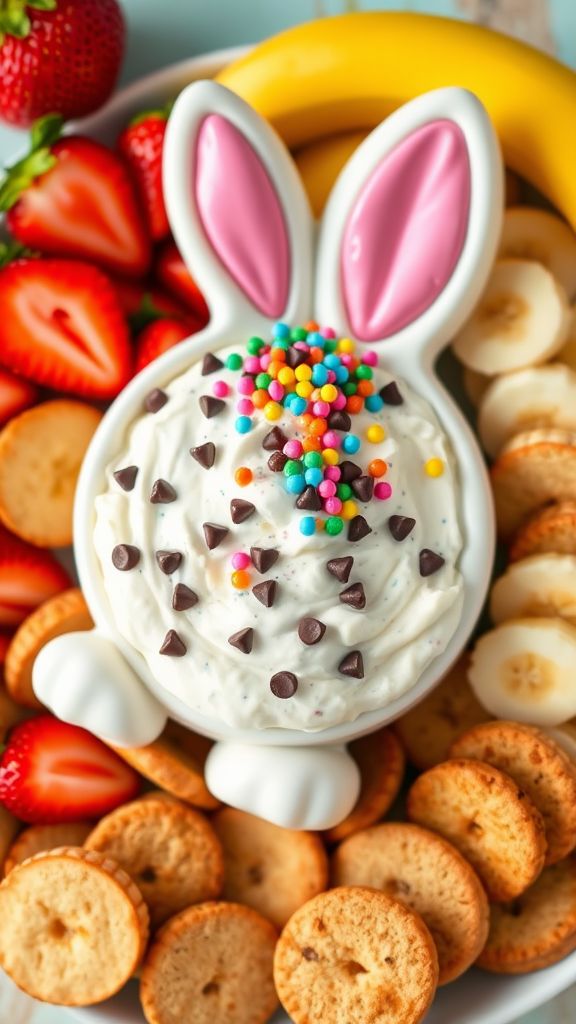
Get ready to hop into a sweet treat that is perfect for Easter! This Marshmallow Fluff Bunny Dip is creamy, fluffy, and super fun to make. Serve it with your favorite dippers like fruits or cookies, and watch it disappear in no time!
Prep Time: 10 minutes
Total Time: 10 minutes
Servings: 8
Ingredients:
- 1 cup Marshmallow Fluff
- 1 cup cream cheese, softened
- 1/2 cup powdered sugar
- 1 teaspoon vanilla extract
- 1/4 cup mini chocolate chips
- 1/4 cup colored sprinkles (for decoration)
- Fruits (like strawberries and bananas) or cookies (for dipping)
Instructions:
In a mixing bowl, combine softened cream cheese and marshmallow fluff. Use a hand mixer to blend them together until the mixture is smooth and creamy. This should take just a couple of minutes.
Next, add the powdered sugar and vanilla extract to the bowl. Continue to mix until everything is well combined and there are no lumps. The dip should be light and fluffy in texture.
Now, gently fold in the mini chocolate chips. This adds a little surprise when you dip your treats into the fluffy goodness. Make sure the chips are evenly distributed throughout the dip.
Finally, transfer the dip into a fun serving bowl. Sprinkle some colored sprinkles on top to give it a festive look perfect for Easter. You can even shape it like a bunny if you’re feeling creative!
Tips:
- For a fun twist, try adding some crushed graham crackers on top for a bit of crunch.
- If you want a lighter version, you can use low-fat cream cheese and reduce the sugar.
- Experiment with different dippers like pretzel sticks or marshmallows for extra fun!
Nutrition Facts:
- Calories: 140 per serving
- Total Fat: 5g
- Saturated Fat: 3g
- Cholesterol: 20mg
- Sodium: 50mg
- Total Carbohydrates: 22g
- Dietary Fiber: 0g
- Sugars: 10g
- Protein: 2g
10 No-Bake Strawberry Shortcake Cups
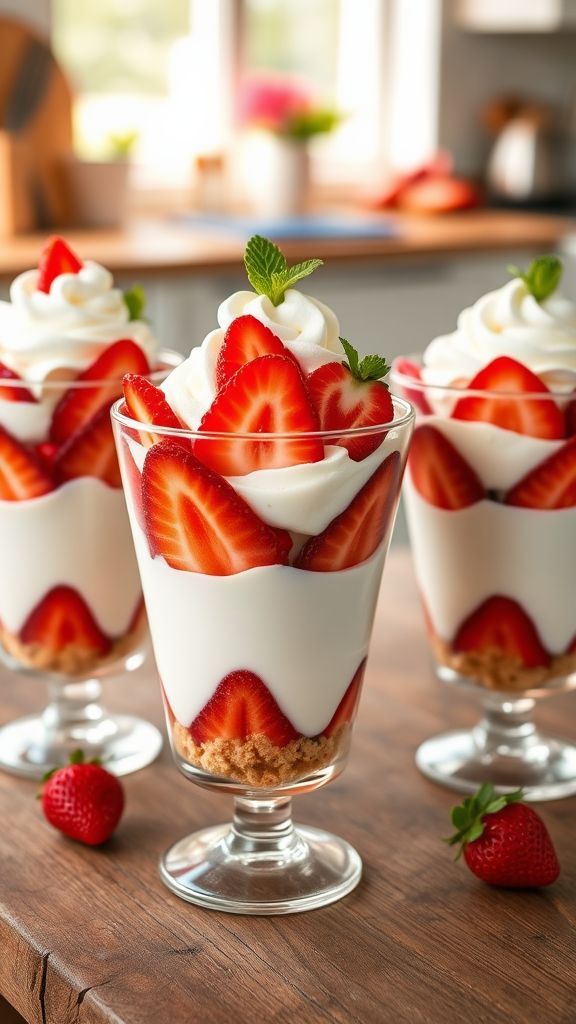
Get ready for a delicious treat that’s super easy to make! These No-Bake Strawberry Shortcake Cups are perfect for any occasion, especially during the warm weather. With layers of creamy goodness and fresh strawberries, they are sure to impress your family and friends.
Prep Time: 15 minutes
Total Time: 15 minutes
Servings: 4
Ingredients:
- 1 cup of heavy whipping cream
- 1/2 cup of powdered sugar
- 1 teaspoon of vanilla extract
- 1 cup of sliced fresh strawberries
- 1 cup of store-bought shortcake cookies or graham cracker crumbs
- Mint leaves for garnish (optional)
Instructions:
Start by washing the sliced fresh strawberries. You want them to be clean and fresh. Set them aside.
In a mixing bowl, pour the heavy whipping cream. Use a hand mixer or a stand mixer to beat the cream until it thickens. This will take a few minutes, so be patient.
Once the cream starts to thicken, add in the powdered sugar and vanilla extract. Continue to beat until soft peaks form. This means the cream should hold its shape but still be smooth.
Now, it’s time to layer your cups! Start by adding a layer of the shortcake cookies or graham cracker crumbs at the bottom of each cup.
Next, add a layer of the whipped cream mixture on top of the cookies. Then, add a layer of the sliced strawberries.
Repeat the layers until you fill each cup. Finish off with a dollop of whipped cream and a few strawberry slices on top. If you like, you can add a mint leaf for decoration.
Chill the cups for about 15 minutes in the refrigerator before serving. This helps the flavors blend and makes them extra refreshing.
Tips:
- Use ripe strawberries for the best flavor.
- For added fun, you can mix in some chopped nuts or chocolate chips between the layers.
- If you want to make it a bit healthier, you can use Greek yogurt instead of whipped cream.
Nutrition Facts:
- Calories: 300 per serving
- Protein: 4g
- Fat: 18g
- Carbohydrates: 35g
- Sugar: 20g
11 Coconut Cream Easter Tart
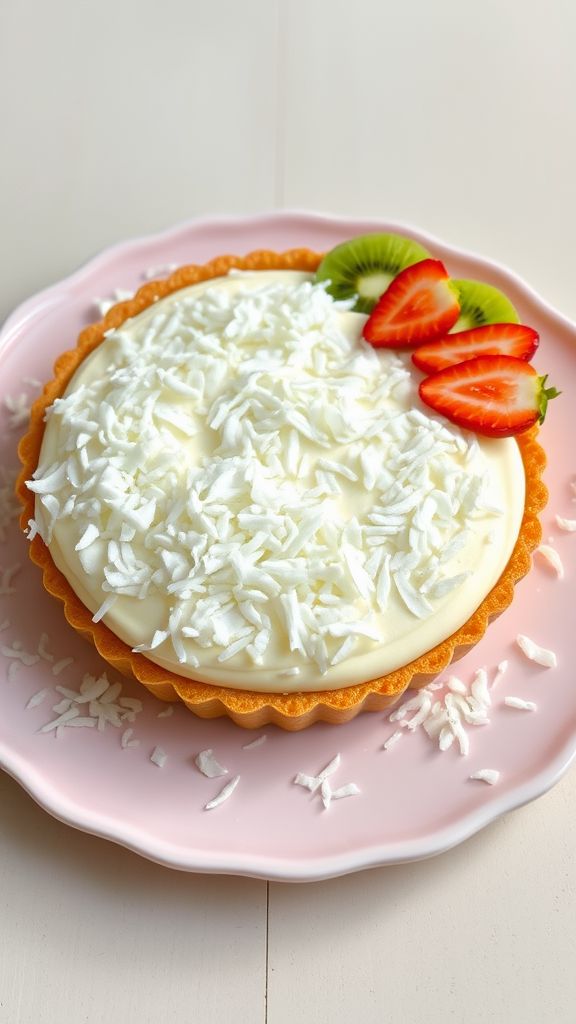
The Coconut Cream Easter Tart is a delightful and creamy dessert that’s perfect for celebrating the holiday. With its rich coconut flavor and a smooth, luscious filling, it’s sure to impress your family and friends. Plus, it’s a no-bake treat, making it easy to whip up in no time!
Prep Time: 20 minutes
Additional Time: 4 hours
Total Time: 4 hours 20 minutes
Servings: 8
Ingredients:
- 1 ½ cups Graham cracker crumbs
- ½ cup unsweetened shredded coconut
- ½ cup unsalted butter, melted
- 1 (14 oz) can sweetened condensed milk
- 1 cup heavy whipping cream
- 1 tsp vanilla extract
- ½ cup coconut cream
- ¼ cup powdered sugar
- Extra shredded coconut for topping
Instructions:
Start by making the crust. In a mixing bowl, combine the Graham cracker crumbs, shredded coconut, and melted butter. Stir until all the crumbs are well-coated. Press this mixture firmly into the bottom of a tart pan to form an even layer.
Next, make the creamy filling. In a separate bowl, whisk together the sweetened condensed milk, vanilla extract, and coconut cream until smooth.
In another bowl, whip the heavy cream with an electric mixer until soft peaks form. Gradually add the powdered sugar and continue to whip until stiff peaks form. Gently fold the whipped cream into the coconut mixture. Be careful not to deflate the whipped cream.
Pour the coconut filling into the prepared crust, spreading it out evenly. Cover the tart with plastic wrap and refrigerate for at least 4 hours to allow it to set properly.
When you’re ready to serve, remove the tart from the fridge. Sprinkle extra shredded coconut on top for decoration. Slice and enjoy this delightful Coconut Cream Easter Tart with your loved ones!
Tips:
- For extra flavor, try toasting the shredded coconut before using it in the tart.
- You can also add chocolate shavings or fresh fruit on top for a fun twist.
- Make sure to chill the tart long enough so it can hold its shape when sliced.
Nutrition Facts:
- Calories: 320
- Total Fat: 22g
- Saturated Fat: 14g
- Cholesterol: 45mg
- Sodium: 150mg
- Total Carbohydrates: 30g
- Dietary Fiber: 2g
- Sugars: 18g
- Protein: 3g
12 Chocolate-Dipped Fruit Skewers
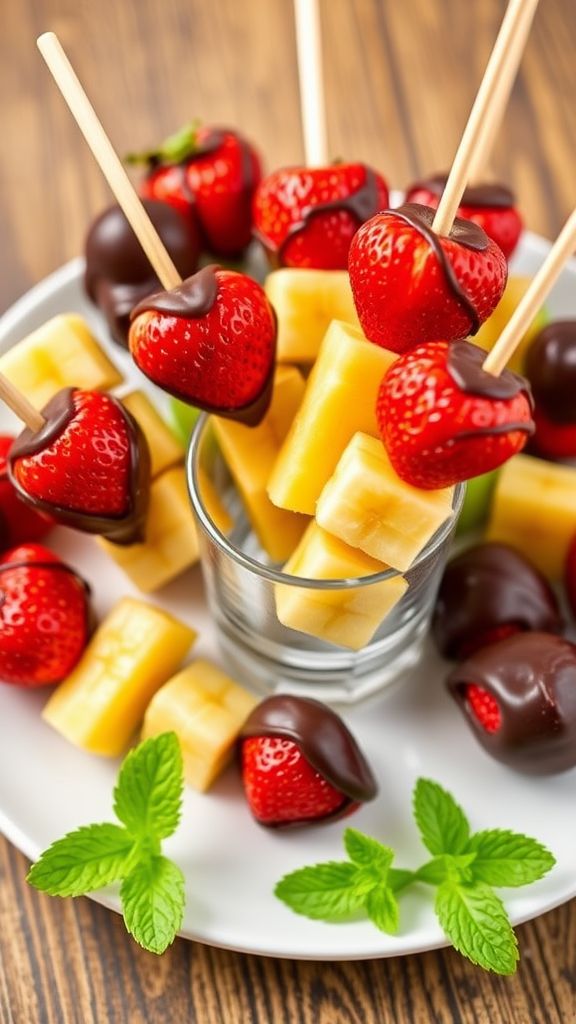
Chocolate-Dipped Fruit Skewers are a delightful treat perfect for any occasion! They’re easy to make and allow you to enjoy fresh fruit while indulging in rich chocolate. Gather your favorite fruits and get ready to create a fruity masterpiece that will impress everyone.
Prep Time: 15 minutes
Additional Time: 30 minutes
Total Time: 45 minutes
Servings: 8
Ingredients:
- 1 cup dark chocolate chips (or milk chocolate, if preferred)
- 2 tablespoons coconut oil (optional, for smoother chocolate)
- 1 cup strawberries, hulled and halved
- 1 cup pineapple chunks
- 1 cup banana slices
- 1 cup grapes (red or green)
- Skewers (6-inch or 8-inch)
Instructions:
Start by preparing your fruits. Wash and cut the strawberries in half, cut the pineapple into chunks, slice the bananas, and wash the grapes. Make sure all the fruit pieces are roughly the same size for easy skewering.
In a microwave-safe bowl, combine the dark chocolate chips and coconut oil if you’re using it. Heat in the microwave in 30-second intervals, stirring after each interval until the chocolate is completely melted and smooth. This should take about 1-2 minutes.
Now it’s time to assemble your skewers! Take a skewer and thread a piece of strawberry, followed by a chunk of pineapple, a slice of banana, and a few grapes. Continue alternating the fruit until the skewer is filled, leaving some space at the ends for easier handling. Repeat this process for all the skewers.
Once all the skewers are assembled, dip each skewer into the melted chocolate. Allow any excess chocolate to drip off before placing them on a baking sheet lined with parchment paper. You can dip them fully or just drizzle chocolate over the fruits as a fun alternative.
After dipping, place your skewers in the refrigerator for about 30 minutes. This will help the chocolate harden and create a delicious coating on your fruits. Once set, remove from the fridge and serve!
Tips:
- Feel free to mix and match your favorite fruits like kiwi, apples, or even oranges for more variety.
- You can sprinkle some sea salt or colorful sprinkles on top of the chocolate before it hardens for extra flair.
- For a healthier option, use dark chocolate which has a richer taste and less sugar.
Nutrition Facts:
- Calories: 150 per skewer
- Total Fat: 7g
- Saturated Fat: 4g
- Cholesterol: 0mg
- Sodium: 10mg
- Total Carbohydrates: 23g
- Dietary Fiber: 2g
- Sugars: 15g
- Protein: 2g
13 Whimsical Jelly Bean Bars

These Whimsical Jelly Bean Bars are a fun and colorful treat that will make any gathering feel special! Perfect for Easter or any celebration, these bars are easy to make and even easier to enjoy. With a delightful mix of creamy and crunchy textures, they are sure to bring a smile to everyone’s face.
Prep Time: 20 minutes
Additional Time: 1 hour
Total Time: 1 hour 20 minutes
Servings: 12 bars
Ingredients:
- 2 cups crushed graham crackers
- 1 cup unsweetened shredded coconut
- 1/2 cup unsalted butter, melted
- 1 cup sweetened condensed milk
- 1 teaspoon vanilla extract
- 2 cups assorted jelly beans
- 1 cup mini chocolate chips
Instructions:
Start by gathering all your ingredients to make the preparation easier. In a large mixing bowl, combine the crushed graham crackers and shredded coconut. Mix them well until they are evenly combined.
Next, pour in the melted butter and stir to combine. This mixture should look crumbly but sticking together nicely. Then, add the sweetened condensed milk and vanilla extract to the bowl. Mix everything until it’s fully incorporated.
Now, gently fold in the jelly beans and mini chocolate chips. Make sure they are evenly spread throughout the mixture. Line an 8×8-inch baking dish with parchment paper, allowing some overhang for easy removal later.
Scoop the mixture into the prepared baking dish and press it down firmly. The more compact it is, the better the bars will hold together. Once pressed, cover the dish with plastic wrap and place it in the refrigerator for about 1 hour to set.
After an hour, remove the bars from the refrigerator and lift them out using the parchment paper. Place them on a cutting board and slice them into bars. Enjoy your colorful and delicious jelly bean bars!
Tips:
- For a more vibrant look, use different types of jelly beans with various colors and flavors.
- Try adding other mix-ins like chopped nuts or dried fruits for extra flavor and texture.
- Keep the bars stored in an airtight container in the fridge to maintain freshness.
Nutrition Facts:
- Calories: 180 per bar
- Total Fat: 8g
- Saturated Fat: 5g
- Cholesterol: 10mg
- Sodium: 60mg
- Total Carbohydrate: 27g
- Dietary Fiber: 2g
- Sugars: 12g
- Protein: 2g
14 Easy No-Bake Lemon Mousse
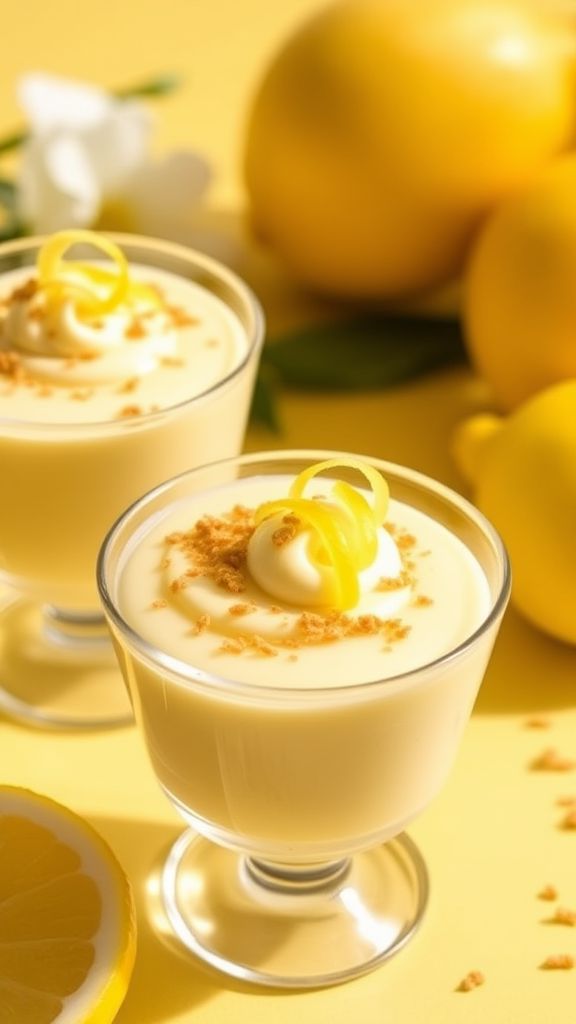
This Easy No-Bake Lemon Mousse is a light and refreshing dessert that’s perfect for any occasion, especially springtime! It’s tangy, sweet, and so creamy. Best of all, it requires no baking, and it’s really quick to make!
Prep Time: 15 minutes
Additional Time: 2 hours
Total Time: 2 hours 15 minutes
Servings: 6
Ingredients:
- 1 cup heavy whipping cream
- 1/2 cup powdered sugar
- 1 cup lemon curd
- 1 teaspoon vanilla extract
- 1 tablespoon lemon juice
- Graham cracker crumbs (for topping, optional)
- Lemon zest (for garnish, optional)
Instructions:
Start by chilling a mixing bowl and electric beaters in the refrigerator for about 10 minutes. This helps the cream whip up better.
In the chilled bowl, pour in 1 cup of heavy whipping cream. Using an electric mixer, beat the cream on medium speed until soft peaks form. This will take about 3 to 5 minutes.
Next, add 1/2 cup of powdered sugar, 1 teaspoon of vanilla extract, and 1 tablespoon of lemon juice to the whipped cream. Continue to mix until it’s well combined and has a fluffy texture.
Now, gently fold in 1 cup of lemon curd into the mixture. Be careful not to deflate the whipped cream; use a spatula to fold it together nicely.
Once everything is combined, spoon the lemon mousse into serving cups or bowls. Cover and refrigerate for at least 2 hours to let it set and chill.
Before serving, you can sprinkle some graham cracker crumbs on top for a crunchy texture or add a touch of lemon zest for extra flavor and decoration.
Tips:
- For a more intense lemon flavor, add a bit more lemon juice or zest to the mixture.
- You can use store-bought lemon curd, or make your own for a fresher taste.
- This mousse can be made a day ahead of time, which is perfect for planning your celebrations!
Nutrition Facts:
- Calories: 250
- Total Fat: 18g
- Saturated Fat: 11g
- Cholesterol: 65mg
- Sodium: 45mg
- Carbohydrates: 20g
- Sugars: 15g
- Protein: 2g
15 Rainbow Fruit and Yogurt Cups
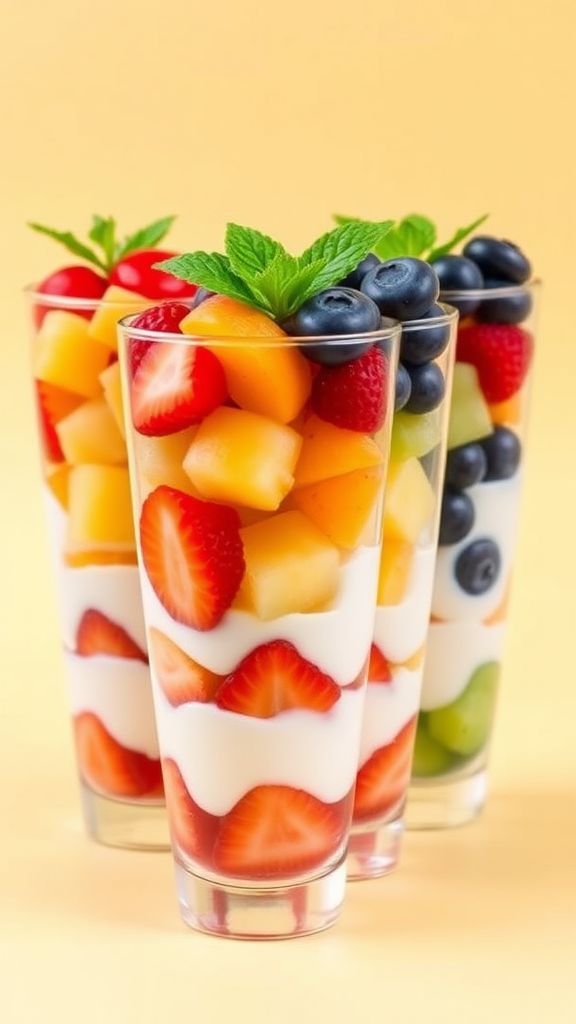
Rainbow Fruit and Yogurt Cups are a fun and healthy treat that look as beautiful as they taste! Perfect for springtime celebrations or any day when you want a colorful dessert, these cups are packed with fresh fruit and creamy yogurt.
Prep Time: 15 minutes
Total Time: 15 minutes
Servings: 4
Ingredients:
- 1 cup of plain or vanilla yogurt
- 1 cup of strawberries, sliced
- 1 cup of orange segments
- 1 cup of pineapple chunks
- 1 cup of green grapes, halved
- 1 cup of blueberries
- 1 tablespoon of honey or maple syrup (optional)
- Mint leaves for garnish (optional)
Instructions:
Start by gathering all your ingredients on a clean surface. This makes the process quicker and more enjoyable. If you like, you can sweeten your yogurt with honey or maple syrup by stirring it in until it is well mixed.
Next, take four cups or bowls and layer the ingredients. Start with a generous spoonful of yogurt at the bottom of each cup.
Then, add a layer of sliced strawberries on top of the yogurt. Follow this with the orange segments and then the pineapple chunks. Make sure each layer is visible to show off the rainbow effect.
After the pineapple, add the green grapes and top it off with blueberries. Each cup should be a stunning reflection of rainbow colors!
Finally, you can garnish each cup with a mint leaf for a touch of fresh flavor. Serve your Rainbow Fruit and Yogurt Cups right away for the best taste and presentation.
Tips:
- Choose seasonal fruits for the freshest flavors.
- For extra fun, use different flavored yogurts to create more colorful layers.
- You can make these cups a few hours ahead and store them in the fridge until you’re ready to serve.
Nutrition Facts:
- Calories: 150 per serving
- Protein: 5g
- Carbohydrates: 30g
- Fat: 2g
- Sugar: 12g
Enjoy making and eating these vibrant Rainbow Fruit and Yogurt Cups!