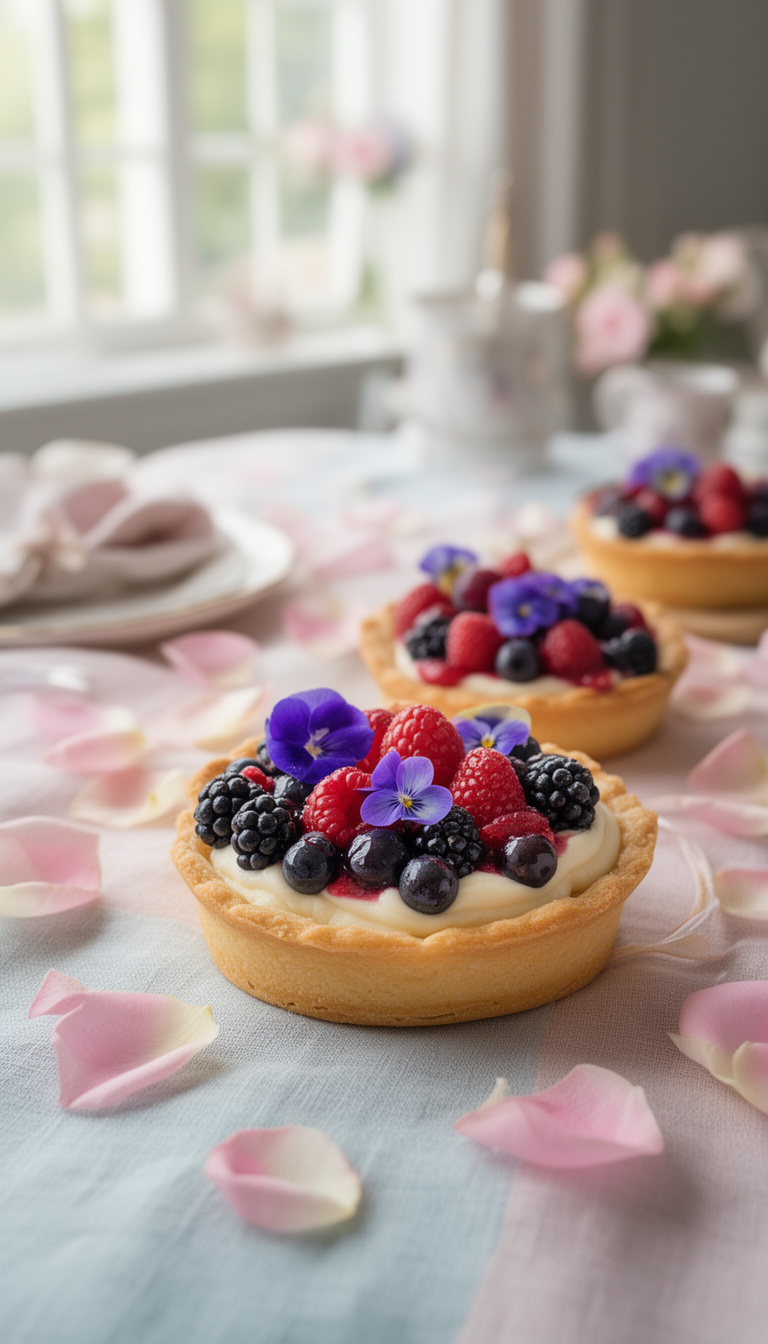
Mini Mother’s Day Fruit Tart for Intimate Brunches
French fruit tarts are one of those desserts that look like they came from a patisserie window, but they’re genuinely achievable at home. A buttery shortcrust shell filled with silky vanilla pastry cream, then topped with fresh seasonal fruit — it’s elegant without being fussy.
Making them in individual portions means no slicing, no mess, and everyone gets their own beautiful tart. That matters at a small brunch where presentation counts.
You can build the components a day ahead, then assemble the morning of. That’s the real reason to make these — the timing works in your favor.
Getting the Pastry Shell Right Without Shrinkage
The biggest issue with tart shells is shrinkage — the dough pulls away from the sides during baking and you lose that clean edge. Two things prevent it: keeping the dough cold at every stage, and resting it in the fridge after pressing it into the tins.
Don’t skip the blind baking step. Line the shells with parchment and fill them with dried beans or rice before the first bake. Without that weight, the sides collapse inward. Once the edges look set and pale golden, pull the weights out and finish baking until the base is dry and lightly golden.
Shop Our Must-Haves
Pastry Cream Texture: What You’re Aiming For
Pastry cream should be thick enough to hold its shape when piped but still spoonable — think a very firm pudding. If it’s runny, your fruit will sink and the tart will weep. If it’s gluey or lumpy, you cooked it too fast over too high a heat.
Whisk constantly once the hot milk hits the egg mixture, and don’t walk away. Press plastic wrap directly onto the surface before chilling — this stops a skin forming. A well-made pastry cream will keep in the fridge for up to three days, so make it first.
Make-Ahead and Storage Notes
- The pastry cream can be made up to 3 days ahead and stored in the fridge with plastic wrap pressed to the surface.
- Baked and cooled tart shells can be stored at room temperature in an airtight container for up to 2 days before filling.
- Assemble the tarts no more than 4–6 hours before serving — the shells soften overnight in the fridge once filled.
- Swap the fruit based on what’s in season. Mandarin segments, halved grapes, or thinly sliced mango all work well.
- If your pastry cream develops lumps after chilling, press it through a fine-mesh sieve and whisk vigorously — it’ll smooth out.
Mini Mother’s Day Fruit Tart for Intimate Brunches
Tart Shell
Pastry Cream
Fruit Topping
Glaze
- 🔪Six 4-inch (10cm) round tart tins with removable bottoms
- 🥣Medium saucepan (2-quart capacity)
- ⚡Whisk
- 🍳Fine-mesh sieve
- 🥄Rolling pin
- 📏Pastry brush
- 🔧Piping bag or zip-lock bag with corner snipped
- 🍰Mixing bowls (medium and large)
- 🫙Plastic wrap
- 🌡️Dried beans or pie weights for blind baking
- 🔪Wire cooling rack
Make the Dough
In a large bowl, whisk together 1 ¼ cups flour, 2 tablespoons sugar, and ¼ teaspoon salt. Scatter in the cold cubed butter and use your fingertips to work it into the flour until the mixture looks like coarse breadcrumbs with a few pea-sized butter pieces remaining.
Drizzle in 2 tablespoons ice water and stir with a fork. Squeeze a small handful — if it holds together, it’s ready.
If it crumbles, add the third tablespoon. Form the dough into a flat disc, wrap in plastic wrap, and refrigerate for at least 30 minutes.
Temper the Eggs
While the dough chills, make the pastry cream. In a medium bowl, whisk together the 3 egg yolks, 3 tablespoons sugar, and 2 tablespoons cornstarch until pale and smooth.
Heat 1 cup whole milk in a saucepan over medium heat until it just begins to steam and small bubbles appear around the edges — do not boil. Slowly pour about half the hot milk into the egg mixture in a thin stream, whisking constantly.
Pour the tempered egg mixture back into the saucepan with the remaining milk.
Cook and Chill Cream
Return the saucepan to medium heat and whisk constantly for 3–5 minutes until the cream thickens noticeably and large, slow bubbles begin to plop at the surface. Cook for one more full minute after the first bubble appears — this cooks out the cornstarch flavor.
Remove from heat, whisk in 1 teaspoon vanilla and 1 tablespoon butter until smooth. Pour through a fine-mesh sieve into a clean bowl.
Press plastic wrap directly onto the surface and refrigerate for at least 2 hours.
Line the Tins
Preheat your oven to 375°F (190°C). On a lightly floured surface, roll the chilled dough to about ⅛-inch thickness.
Cut out six circles roughly 6 inches in diameter. Gently press each circle into a 4-inch tart tin, working the dough up the sides without stretching it.
Trim any excess dough flush with the rim using a rolling pin or knife. Prick the base of each shell several times with a fork.
Refrigerate the lined tins for 15 minutes.
Blind Bake Shells
Cut six small squares of parchment paper and press one into each tart shell. Fill each with dried beans or pie weights.
Bake for 12 minutes until the edges look set and just barely golden. Carefully remove the parchment and weights, then return the shells to the oven for another 10–13 minutes until the bases are dry to the touch, pale golden, and no raw dough patches remain.
Let the shells cool completely in the tins on a wire rack before removing — at least 20 minutes.
Fill the Shells
Once the pastry cream is fully chilled and set, whisk it briefly to loosen it to a smooth, pipeable consistency. Transfer it to a piping bag.
Pipe or spoon the cream into each cooled tart shell, filling to just below the rim. Use the back of a spoon to smooth the surface level.
Keep the filled shells refrigerated while you prepare the fruit.
Top and Glaze
Arrange the sliced strawberries, blueberries, raspberries, and kiwi over the pastry cream in whatever pattern you like — concentric circles look classic, scattered and natural looks relaxed. In a small saucepan, warm 3 tablespoons apricot jam with 1 tablespoon water over low heat, stirring until fluid and smooth.
Strain out any large pieces. Using a pastry brush, lightly glaze the fruit with the warm jam mixture.
Refrigerate the finished tarts for at least 15 minutes before serving so the glaze sets.
Unmold and Serve
To release the tarts, set each tin on top of a narrow jar or can and gently press down — the outer ring will drop away cleanly. Slide a thin spatula under each tart to separate it from the base, or serve directly on the metal base if preferred.
The tarts are ready when the shell is crisp and holds its shape without bending, the pastry cream is firm and doesn’t jiggle, and the glaze has a light sheen. Serve within 4 hours of assembly for the crispest shells.
Per serving (1 tart) — values are estimates