Budget-Friendly Elegant Fruit Platter That Still Looks Expensive
A well-arranged fruit platter can look like it came from a catering company, even when you spent under $20 at the grocery store. The difference between a bowl of fruit and a showstopper platter is almost entirely about how you cut and arrange it.
You’ll want to make one of these for potlucks, brunches, baby showers, or any gathering where you want to bring something impressive without spending a fortune. Seasonal fruit, a few smart cuts, and some strategic color placement do most of the work.
Choosing Fruit That Looks Expensive Without Costing Much
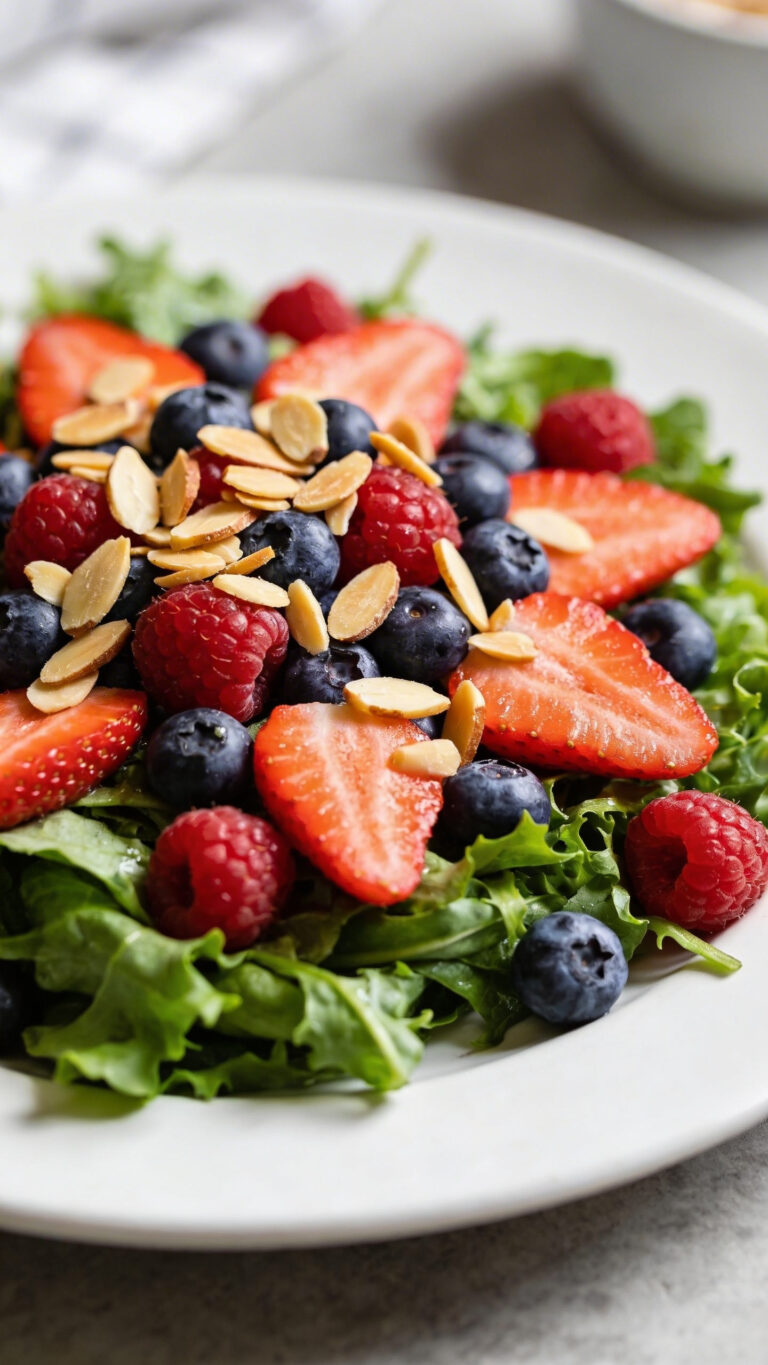
The fruits that photograph well and look luxurious aren’t always the priciest ones. Strawberries, grapes, and cantaloupe are consistently affordable and visually striking. Kiwi slices add a bright green color that reads as fancy, and a single mango can go a long way when fanned out in thin slices.
Avoid pre-cut supermarket fruit — it’s more expensive and often waterlogged. Buy whole fruit and cut it yourself. Check what’s in season, because in-season fruit costs less, tastes better, and looks more vibrant than out-of-season options.

Most Loved Products


Cutting Techniques That Make Fruit Look Intentional
Fanning strawberries, halving grapes, and cutting melon into uniform wedges or balls immediately makes a platter look thought-out rather than thrown together. A melon baller costs about $5 and creates round shapes that feel deliberate and polished.
Keep your cuts consistent — uneven chunks look rushed, while uniform slices look controlled. Slice kiwi into rounds rather than chunks, fan out mango slices by cutting them thin and overlapping them slightly, and leave some strawberries whole with their green tops on for height and visual contrast.
Platter Timing and Storage
- Assemble no more than 1 to 2 hours before serving — fruit releases moisture over time and the platter will start to look wet if built too far in advance.
- If you need to prep ahead, cut and store each fruit separately in airtight containers in the fridge, then arrange the platter 30 minutes before guests arrive.
- Raspberries and blackberries are fragile — add them last, right before serving, so they don’t get crushed under other fruit.
- A wooden charcuterie board gives the platter a warmer, more upscale look than a white plastic plate at no extra cost.
- For a brunch setting, add a small bowl of yogurt dip or honey in the center of the platter to fill space and give guests something to dip into.
Budget-Friendly Elegant Fruit Platter That Still Looks Expensive
Fruit
Garnish
- 🔪Large flat serving board or platter (at least 14 inches wide)
- 🥣Sharp chef’s knife
- ⚡Cutting board
- 🍳Melon baller (optional but recommended)
- 🥄Small paring knife
- 📏Paper towels for patting fruit dry
Wash and Dry
Wash all fruit under cold running water and lay it out on paper towels to dry thoroughly. Pat each piece dry — excess moisture makes the platter look wet and causes fruit to slide around.
Dry fruit also holds its position better when arranged.
Prep the Melon
Cut the cantaloupe into two halves and scoop out the seeds. Use a melon baller to scoop 12 to 15 uniform balls from one half, or slice the other half into thin crescent wedges about ½ inch thick.
If using wedges, run your knife between the flesh and the rind to remove the skin, then cut each wedge into 2-inch pieces.
Fan the Strawberries
Fan the strawberries by placing each hulled berry stem-side down and making 3 to 4 thin vertical cuts from just below the top to the tip, keeping the top intact. Gently press down and fan the slices outward.
Leave about one-third of the strawberries whole with their green tops on — the tops add height and visual variety to the platter.
Slice the Mango
Slice the mango thinly, cutting parallel slices about ¼ inch thick from the flesh once it’s been peeled and the pit removed. Squeeze a small amount of lemon juice over the mango and any other light-colored fruit to slow browning.
Arrange the mango slices in a slightly overlapping fan shape.
Build the Platter
Start building the platter by placing your largest, most colorful items first — the melon wedges or balls and the fanned strawberries. Position them in clusters rather than mixing everything together.
Place the kiwi rounds in a slightly overlapping row, then tuck the mango fan alongside them. Fill gaps with halved grapes, then nestle blueberries and raspberries into any remaining open spaces.
Garnish and Finish
Finish by tucking 6 to 8 fresh mint leaves into the gaps between fruit clusters — the green pops against the reds and oranges and makes the whole arrangement look intentional. Drizzle honey lightly over the platter if desired, using a spoon to create thin lines rather than pouring it on.
The platter is ready when every section of the board is covered, colors alternate throughout, and no single fruit dominates one area — it should look full but not crowded.
Per serving (1 serving (approximately 1 cup of mixed fruit)) — values are estimates