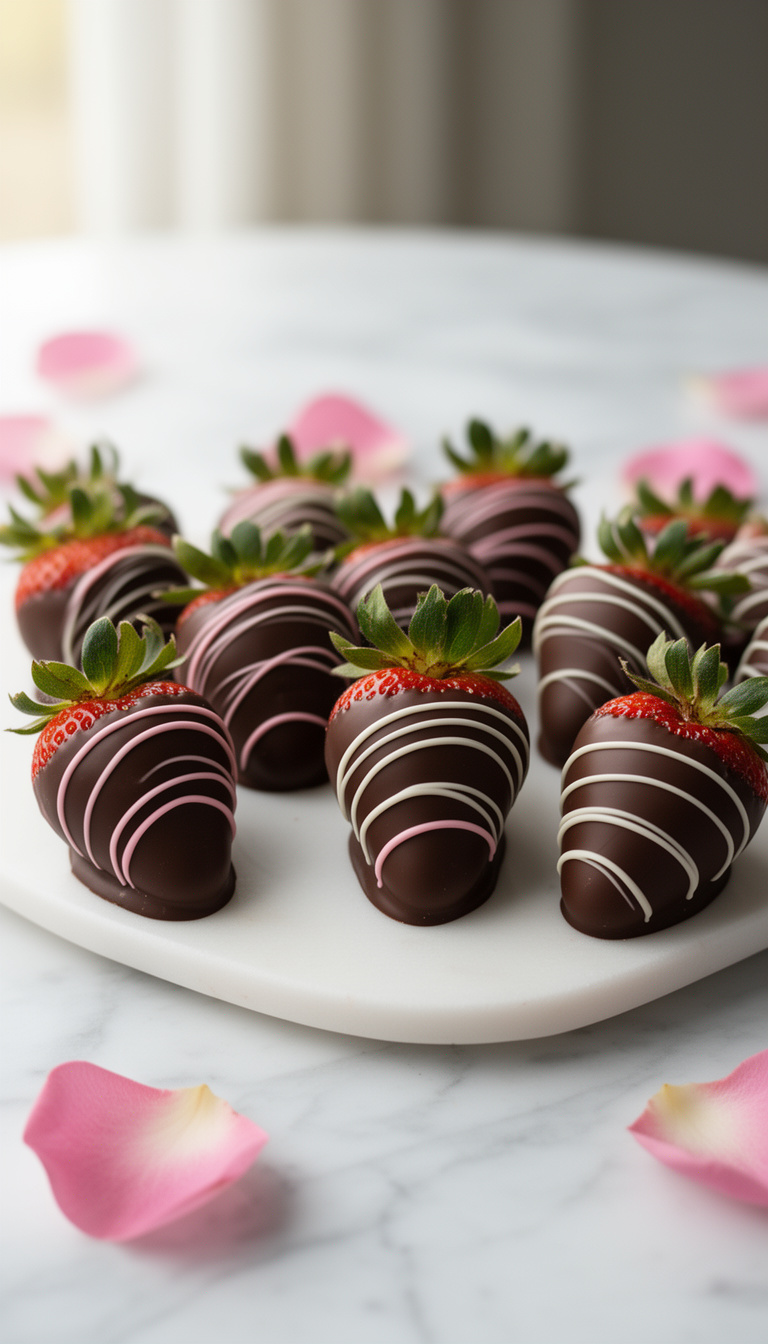
Decorated Mother’s Day Chocolate Covered Strawberries with Drizzle Designs
Chocolate covered strawberries look like something from a fancy gift shop, but you can make a stunning batch at home in under an hour of active work. They’re a genuinely thoughtful Mother’s Day treat — fresh, beautiful, and far better than anything pre-packaged.
The drizzle designs are what set these apart. A simple zigzag of white chocolate over dark, or a few pink-tinted lines, turns a plain dipped berry into something gift-worthy.
You don’t need special equipment or professional skills — just good chocolate, dry strawberries, and a little patience while they set.
Choosing and Preparing Your Strawberries
The single biggest factor in how your strawberries turn out is moisture. Any water on the berry causes the chocolate to seize or develop a streaky, dull finish instead of a glossy shell. Wash your berries at least 2 hours before dipping — ideally the night before — and lay them on a paper towel-lined tray to dry completely.
Look for large, firm berries with the green tops still attached. The stem acts as a natural handle for dipping and looks prettier in the final presentation. Avoid overripe or soft berries; they’ll release moisture into the chocolate as they sit.
Our Best Picks
Working With Chocolate for a Smooth, Glossy Coat
Use high-quality chocolate bars or chocolate melting wafers rather than chocolate chips. Chips contain stabilizers that prevent them from melting into a smooth, fluid consistency — you’ll end up with a thick, clumpy coating that’s hard to work with.
Melt chocolate in short 20-second bursts in the microwave, stirring between each interval. Stop when about 90% of the chocolate has melted, then stir the residual heat through the rest. Overheating is the most common mistake — scorched chocolate turns grainy and can’t be saved. For the drizzle, thin your contrasting chocolate with a small amount of coconut oil to get a fluid, easy-to-pipe consistency.
Getting the Best Results
- Bring strawberries to room temperature before dipping — cold berries cause the chocolate to set too fast and can crack.
- If your chocolate seizes or turns grainy, it’s been overheated or got water in it. Start with a fresh batch; seized chocolate can’t be fixed.
- For a cleaner presentation, place finished strawberries in small paper candy cups before serving or gifting.
- Store finished strawberries uncovered in the refrigerator — covering them traps condensation and dulls the chocolate finish.
Decorated Mother’s Day Chocolate Covered Strawberries with Drizzle Designs
Drizzle
Decoration
- 🔪2 microwave-safe bowls (medium size)
- 🥣2 small microwave-safe bowls for drizzle chocolates
- ⚡Baking sheet, at least 13×18 inches
- 🍳Parchment paper or silicone baking mat
- 🥄2 small piping bags or zip-lock bags
- 📏Scissors
- 🔧Toothpicks or skewers for swirling designs
- 🍰Paper towels
Dry the Berries
Wash all 24 strawberries under cold water, then pat them completely dry with paper towels. Spread them in a single layer on a paper towel-lined tray and let them air-dry at room temperature for at least 2 hours — overnight is better.
The berries must be fully dry before dipping or the chocolate won’t adhere properly.
Melt Dark Chocolate
Line a large baking sheet with parchment paper and set it near your workspace. Place 12 oz of chopped dark chocolate in a medium microwave-safe bowl.
Microwave on 50% power in 20-second intervals, stirring thoroughly between each, until about 90% of the chocolate has melted — roughly 3 to 4 intervals total. Stir continuously until the remaining chocolate melts from residual heat.
The finished chocolate should look glossy and feel just barely warm to the touch, not hot.
Dip the Strawberries
Hold a strawberry by its stem and dip it into the melted dark chocolate, submerging it about three-quarters of the way up. Lift it out and let the excess chocolate drip back into the bowl for 3 to 4 seconds.
Give it a gentle shake if needed, then lay it on the prepared parchment-lined baking sheet. Repeat with all 24 strawberries, working quickly.
If the chocolate starts to thicken, microwave it for 10 seconds at 50% power and stir again.
Add Immediate Decorations
If you’re adding nonpareils or sprinkles, do it now while the chocolate is still wet — scatter them lightly over the berries immediately after dipping. Work berry by berry so the coating doesn’t set before the decorations land.
Skip this step for berries you plan to drizzle, as the drizzle looks cleaner on a plain base.
Prepare Drizzle Chocolates
Melt 4 oz of white chocolate in a small microwave-safe bowl using the same 20-second interval method. Stir in 1/2 teaspoon of coconut oil until fully combined — the oil thins the chocolate so it flows easily through a piping bag.
In a separate small bowl, melt the pink candy melts with the remaining 1/2 teaspoon coconut oil the same way. Transfer each drizzle chocolate into its own small piping bag or zip-lock bag, then snip a very small hole — about 1/16 inch — from the tip.
Drizzle the Designs
Hold a drizzle bag about 4 to 6 inches above the dipped strawberries and move your hand in a quick back-and-forth motion to create thin zigzag lines. For a layered look, drizzle white chocolate first, let it set for 60 seconds, then follow with pink.
To create a swirl pattern, drizzle parallel lines of two colors close together, then drag a toothpick across the lines perpendicular to them. Work on 4 to 6 berries at a time so the base coat doesn’t get too firm before you finish.
Place Final Decorations
Press any sugar flowers, heart sprinkles, or other toppers onto the wet drizzle immediately after piping. A small dab of melted chocolate acts as glue for decorations that need to be placed precisely.
If you want to add luster dust, wait until the chocolate is fully set and dry, then brush it on lightly with a dry pastry brush.
Chill Until Set
Slide the baking sheet into the refrigerator and chill the strawberries for at least 90 minutes, or until the chocolate is completely firm and doesn’t leave a fingerprint when lightly touched. The chocolate should look glossy and set, the drizzle lines should be hard, and the berries should lift cleanly off the parchment without any chocolate sticking to the paper.
Serve within 24 hours for the best texture — the berries will start releasing moisture after that.
Per serving (1 decorated strawberry) — values are estimates