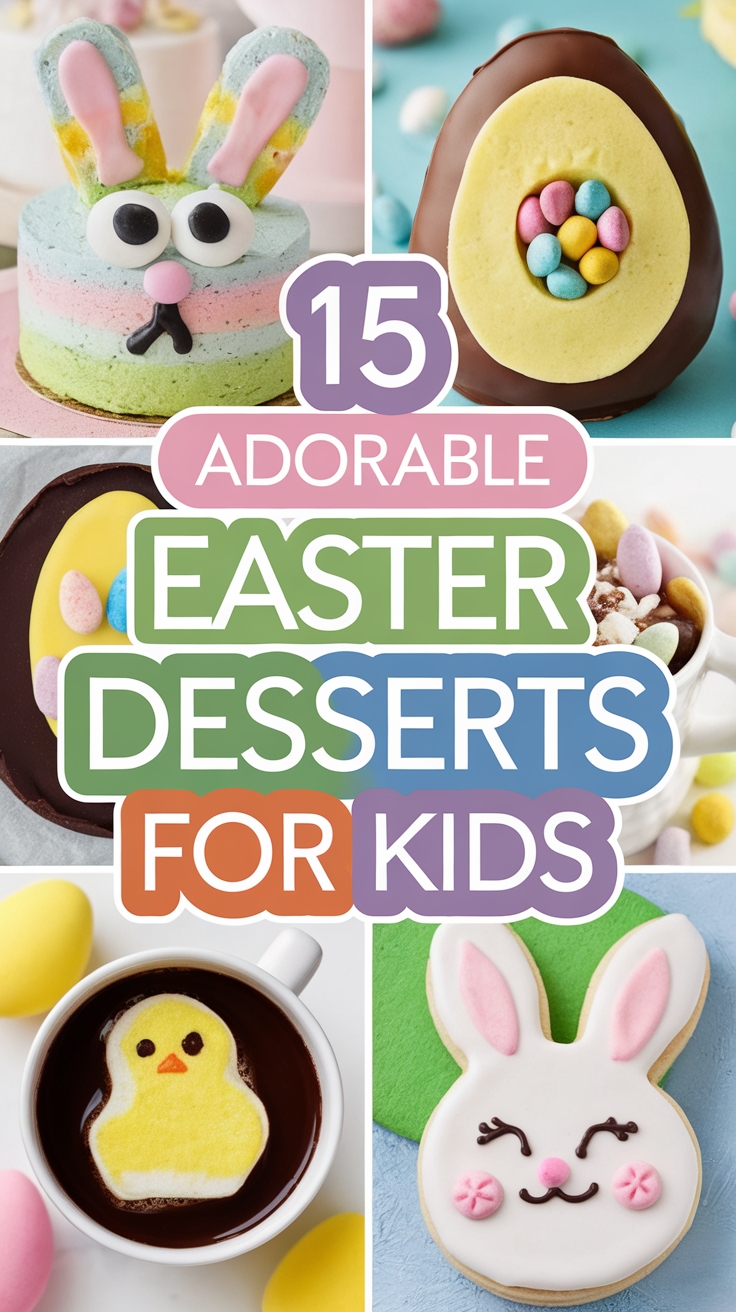
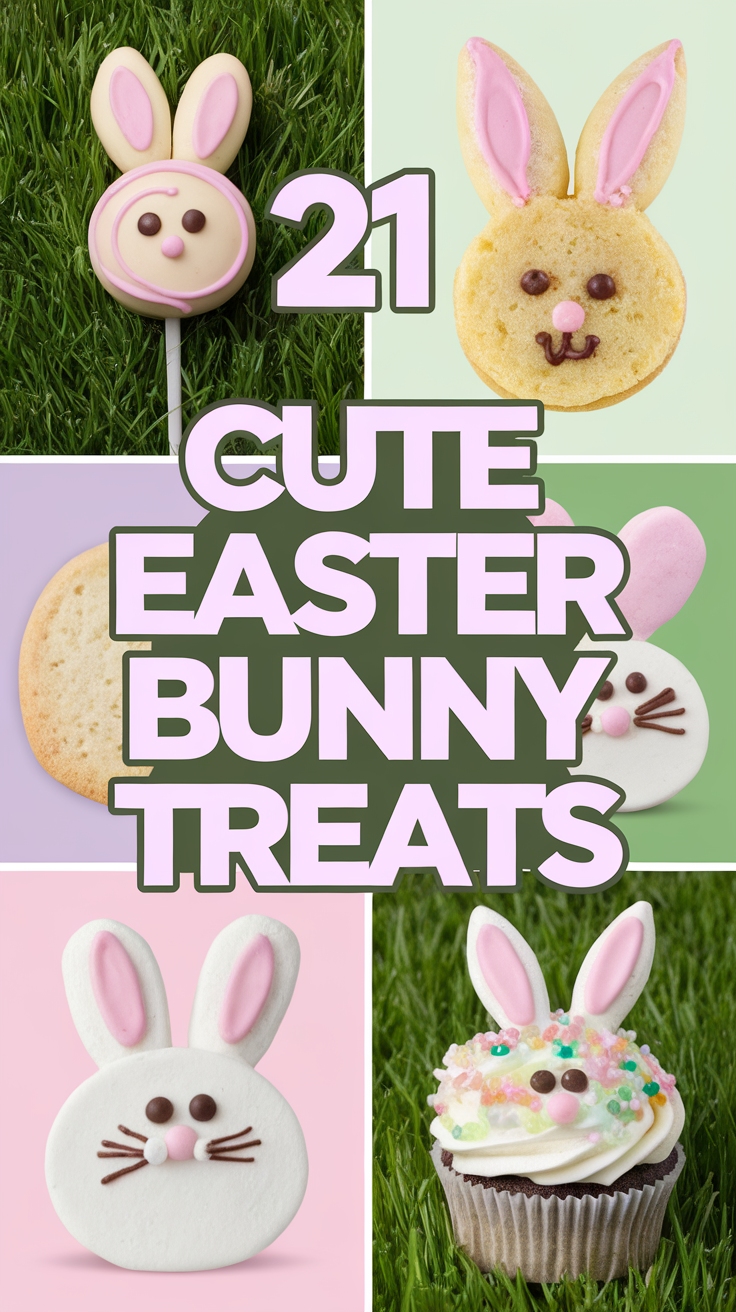
21 Adorable Easter Bunny Treats
Easter is right around the corner, and what could be more fun than whipping up some adorable bunny treats? You want to make the holiday special and delicious, but finding the right recipes can be a challenge. Don’t worry! Here, you’ll discover 21 creative and easy recipes that will delight your family and friends, making your celebration even more memorable. Let’s hop to it!
Shop Our Must-Haves


1 Bunny Burrow Cookies
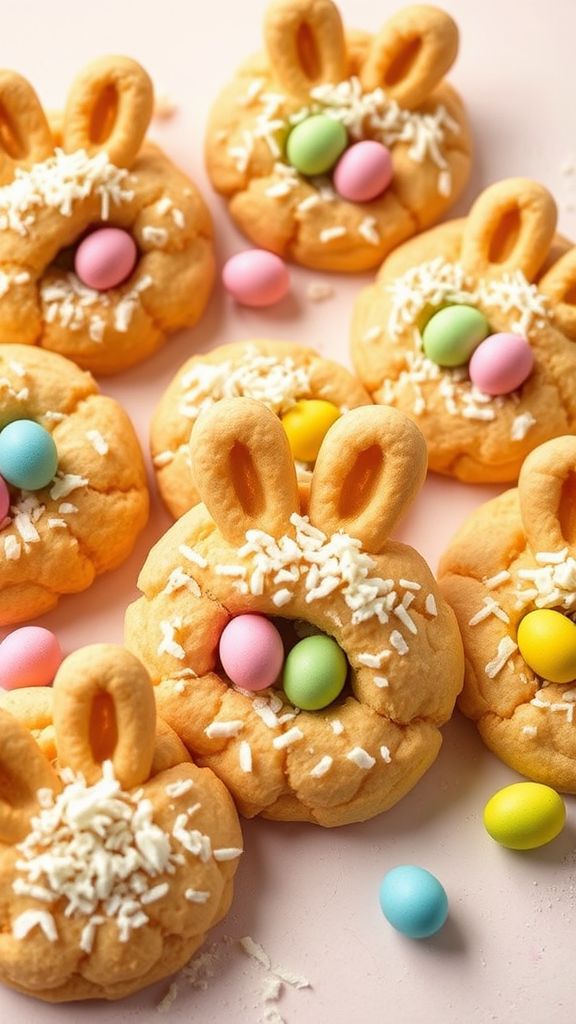
Bunny Burrow Cookies are adorable and tasty treats that will hop right into your heart! Packed with delightful flavors and colorful decorations, these cookies are perfect for Easter gatherings or just for fun. Let’s jump right into making these charming cookies!
Prep Time: 15 minutes
Cook Time: 10 minutes
Additional Time: 30 minutes
Total Time: 55 minutes
Servings: 24 cookies
Ingredients:
- 2 ½ cups all-purpose flour
- 1 teaspoon baking soda
- ½ teaspoon salt
- 1 cup unsalted butter, softened
- 1 cup granulated sugar
- 1 cup brown sugar, packed
- 2 large eggs
- 2 teaspoons vanilla extract
- 1 cup chocolate chips
- ½ cup mini marshmallows
- 1 cup shredded coconut (optional)
- Colored candy eggs for decoration
Instructions:
Start by preheating your oven to 350°F (175°C). Line baking sheets with parchment paper for easy cleanup later.
In a medium bowl, whisk together the flour, baking soda, and salt. Set this mixture aside for now. In a large bowl, beat the butter, granulated sugar, and brown sugar together until creamy. This should take about 2-3 minutes with an electric mixer.
Next, add the eggs one at a time, mixing well after each addition. Stir in the vanilla extract to enhance the flavor. Gradually add the dry ingredients to the wet mixture, being careful not to overmix.
Now, fold in the chocolate chips and mini marshmallows. If you’re using it, add the shredded coconut too. The dough should be thick and sticky.
Scoop tablespoons of dough onto the prepared baking sheets, leaving some space between each cookie. Bake in the preheated oven for about 10 minutes, or until the edges are lightly golden.
Once they’re done baking, remove the cookies and let them cool on the sheets for 5 minutes before transferring them to a wire rack. After they are fully cool, decorate the cookies with colored candy eggs on top to create your bunny burrows!
Tips:
- For even-sized cookies, use a cookie scoop to portion out the dough.
- Store the cookies in an airtight container at room temperature for up to a week.
- To make them extra special, drizzle melted chocolate on top of the cookies after decorating.
Nutrition Facts:
- Calories: 150 per cookie
- Total Fat: 7g
- Saturated Fat: 4g
- Cholesterol: 25mg
- Sodium: 100mg
- Total Carbohydrates: 22g
- Dietary Fiber: 1g
- Sugars: 10g
- Protein: 2g
2 Carrot Patch Cupcakes
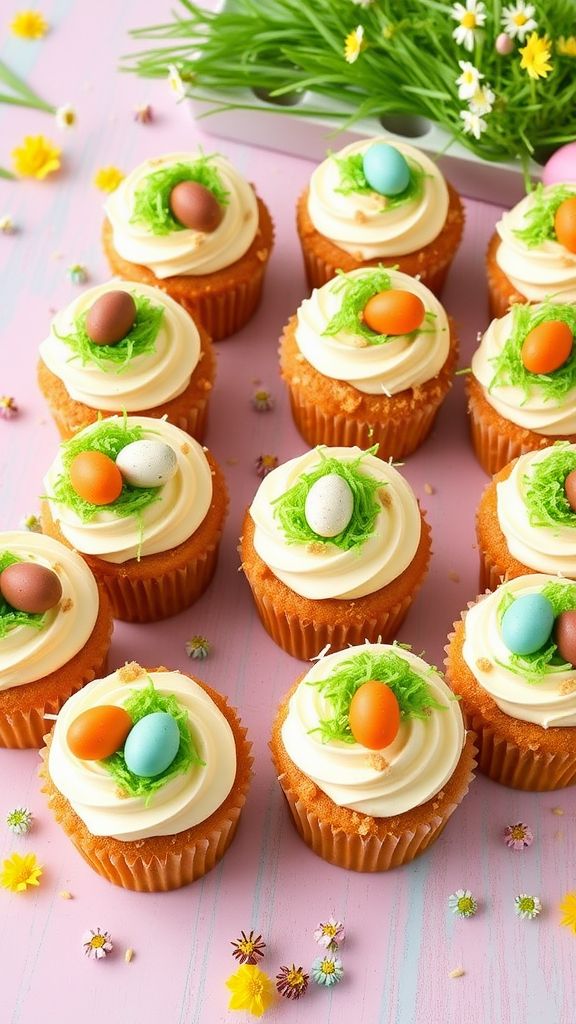
Get ready to impress your friends and family with these adorable Carrot Patch Cupcakes! They’re perfect for spring celebrations and are so fun to make. With yummy flavors and cute toppings, they’ll be a hit at any gathering.
Prep Time: 20 minutes
Cook Time: 20 minutes
Additional Time: 30 minutes
Total Time: 1 hour 10 minutes
Servings: 12 cupcakes
Ingredients:
- 1 cup all-purpose flour
- 1/2 cup granulated sugar
- 1/2 cup brown sugar, packed
- 1/4 cup vegetable oil
- 2 large eggs
- 1 cup grated carrots
- 1 teaspoon vanilla extract
- 1 teaspoon baking soda
- 1/2 teaspoon baking powder
- 1/2 teaspoon salt
- 1 teaspoon ground cinnamon
- 1 tub cream cheese frosting
- 1 cup crushed graham crackers
- 12 chocolate candy eggs (or jelly beans)
- Green frosting or green shredded coconut (for decoration)
Instructions:
Preheat your oven to 350°F (175°C). Line a cupcake tin with 12 cupcake liners to prepare for baking.
In a large mixing bowl, combine all-purpose flour, granulated sugar, brown sugar, baking soda, baking powder, salt, and ground cinnamon. Stir these dry ingredients together until evenly mixed.
In another bowl, whisk together vegetable oil, eggs, grated carrots, and vanilla extract. Once mixed well, pour this wet mixture into the bowl with the dry ingredients. Stir until just combined; be careful not to overmix!
Scoop the batter into each cupcake liner, filling them about two-thirds full. Bake in the preheated oven for 20 minutes, or until a toothpick inserted into the center comes out clean. Be sure to keep an eye on them!
When the cupcakes are done, take them out of the oven and let them cool in the pan for about 5 minutes. After that, transfer them to a wire rack to cool completely, which should take about 30 minutes.
Once the cupcakes are completely cool, it’s time to frost them! Spread a generous layer of cream cheese frosting on top of each cupcake. Then, sprinkle the crushed graham crackers over the frosting to create the look of dirt.
Finally, place a chocolate candy egg or jelly bean on top of each cupcake to represent the cute little carrots. If you want, add some green frosting or shredded coconut around the egg to make it look like grass.
Tips:
- Try adding a bit of pineapple for extra moisture and sweetness in the cupcake batter.
- You can also use mini chocolate chips for a fun twist in the frosting!
- Don’t hesitate to get creative with your decorations—add edible flowers or different colored candies for a festive touch!
Nutrition Facts:
- Calories: 210 per cupcake
- Protein: 2g
- Carbohydrates: 30g
- Fat: 10g
- Sugar: 15g
- Fiber: 1g
3 Marshmallow Bunny Pops
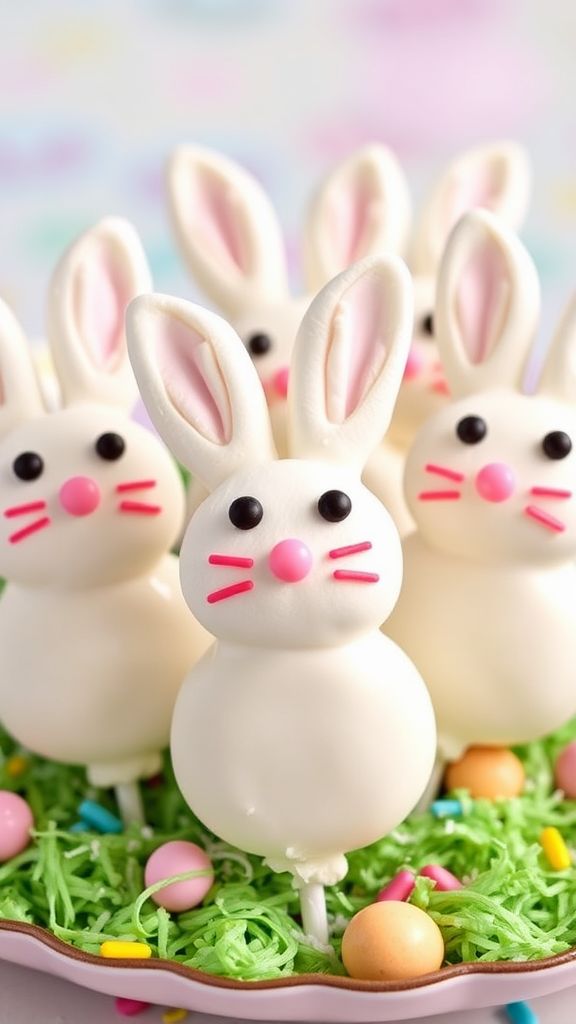
Get ready to make some fun and adorable Marshmallow Bunny Pops! These sweet treats are perfect for Easter celebrations and will delight kids and adults alike. With just a few simple ingredients, you can create these cute bunny pops that are sure to be a hit.
Prep Time: 15 minutes
Additional Time: 30 minutes
Total Time: 45 minutes
Servings: 12 pops
Ingredients:
- 12 large marshmallows
- 12 lollipop sticks
- 2 cups white chocolate chips
- Food coloring (pink and black)
- Mini chocolate chips for eyes
- Sprinkles for decoration
- Shredded coconut (optional, for bunny tails)
Instructions:
First, start by melting the white chocolate chips in a microwave-safe bowl. Heat them in 30-second intervals, stirring between each until smooth. Be careful not to overheat the chocolate.
Next, carefully dip each marshmallow into the melted chocolate. Make sure they are fully coated. Then, gently insert a lollipop stick into the bottom of each chocolate-covered marshmallow and set them aside to cool.
While the chocolate is still soft, you can add decorations. Use the pink food coloring to create little bunny noses, and the black food coloring for the eyes. Alternatively, you can use mini chocolate chips for the eyes.
If you want to add some fun, sprinkle some sprinkles over the chocolate before it hardens. You can also roll the bottom of the bunny pops in shredded coconut to create a fluffy bunny tail.
Let the pops sit at room temperature for about 30 minutes or until the chocolate cools and hardens completely. Once done, your adorable Marshmallow Bunny Pops are ready to serve!
Tips:
- If you want the bunnies to look extra cute, use colorful sprinkles for decoration.
- You can use dark or milk chocolate instead of white chocolate for a different flavor.
- Add a little coconut oil to the chocolate when melting to make it smoother.
Nutrition Facts:
- Calories: 110 per pop
- Total Fat: 4g
- Saturated Fat: 2.5g
- Cholesterol: 0mg
- Sodium: 5mg
- Total Carbohydrates: 14g
- Dietary Fiber: 0g
- Sugars: 11g
- Protein: 1g
4 Chocolate-Dipped Bunny Pretzels
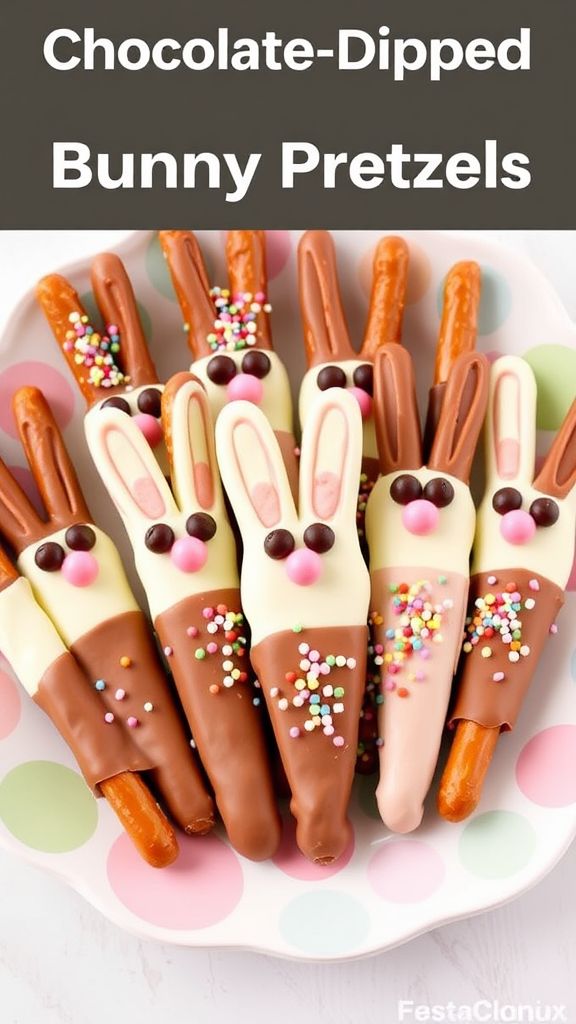
These Chocolate-Dipped Bunny Pretzels are a fun and delicious treat, perfect for Easter celebrations! The salty pretzels paired with sweet chocolate make a tasty snack that everyone will love. Plus, they are cute and easy to make!
Prep Time: 20 minutes
Additional Time: 30 minutes
Total Time: 50 minutes
Servings: 12 pretzels
Ingredients:
- 1 cup of pretzel rods
- 1 cup of white chocolate chips
- 1 cup of milk chocolate chips
- 1/2 cup of mini chocolate chips (for eyes)
- 1/4 cup of pink or red candy melts (for the nose)
- Sprinkles (for decoration)
Instructions:
Start by lining a baking sheet with parchment paper. This will keep your pretzels from sticking and make cleanup easy later.
Next, melt the white chocolate chips in a microwave-safe bowl. Heat them in the microwave for 30 seconds, stir, and then heat in 15-second intervals until smooth. Be careful not to overheat!
Once melted, dip half of each pretzel rod into the white chocolate. Make sure to cover it well. Then, place the dipped pretzels on the lined baking sheet and let them sit for a few minutes to set.
Now, melt the milk chocolate chips in a separate bowl the same way you did with the white chocolate. Dip the other half of the pretzel rods into the milk chocolate, getting a nice thick layer. Rest them back on the baking sheet.
While the chocolate is still soft, use the mini chocolate chips to create little eyes. Add a small drop of pink or red candy melts for the noses. You can also sprinkle some fun decorations on top.
Now, place the baking sheet in the refrigerator for about 30 minutes. This will help the chocolate harden nicely.
Once the chocolate has set, your Chocolate-Dipped Bunny Pretzels are ready to enjoy!
Tips:
- Use colored sprinkles to make your pretzels more festive!
- You can use different types of chocolate, like dark or butterscotch, for variety.
- Store any leftover pretzels in an airtight container to keep them fresh.
Nutrition Facts:
- Calories: 150 per pretzel
- Fat: 7g
- Carbohydrates: 20g
- Protein: 1g
- Sugar: 10g
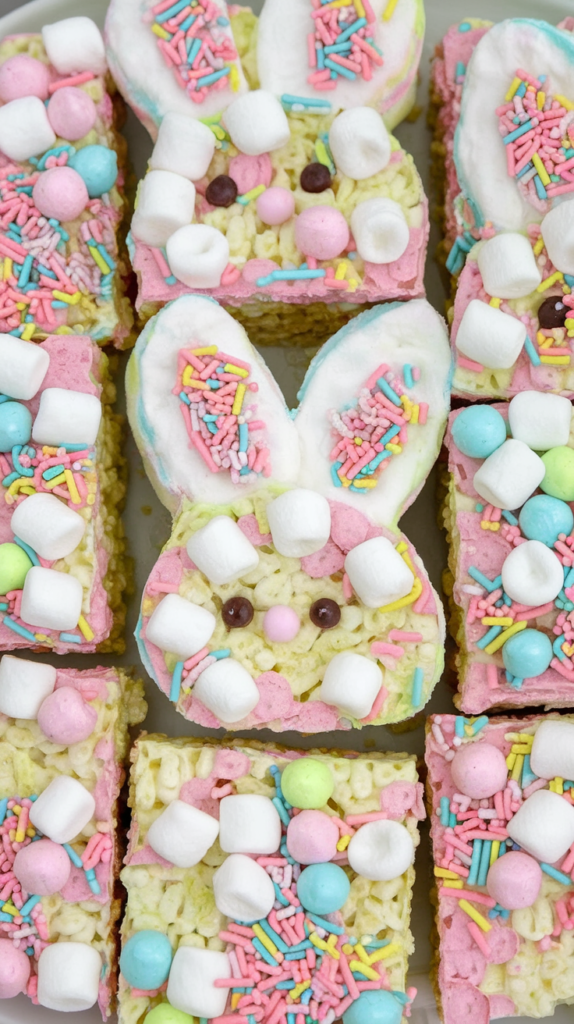
5 Bunny Tail Rice Krispie Treats
These Bunny Tail Rice Krispie Treats are a fun and cute treat to celebrate Easter! They are sweet, crunchy, and perfect for kids and adults alike. With just a few simple ingredients, you can whip up these delightful bunny tails in no time!
Prep Time: 15 minutes
Additional Time: 30 minutes
Total Time: 45 minutes
Servings: 12 treats
Ingredients:
- 3 tablespoons of unsalted butter
- 1 package (10 oz) of marshmallows
- 6 cups of Rice Krispies cereal
- 1 cup of mini marshmallows
- 1 cup of shredded coconut
- 1/2 cup of white chocolate chips
- 1/4 cup of pastel-colored candy-coated chocolate eggs (for decoration)
Instructions:
Start by melting the butter in a large pot over low heat. Once it’s melted, add the marshmallows and stir until completely melted and smooth. This mixture should be gooey and puffy!
Next, remove the pot from the heat and add the Rice Krispies cereal. Mix well until the cereal is fully coated with the marshmallow mixture. Be careful not to crush the cereal; you want it nice and crunchy!
Now, let’s add the fun! Stir in the mini marshmallows and shredded coconut for that fluffy bunny tail effect. Mix everything together until it’s all combined.
Once your mixture is ready, press it firmly into a greased 9×13-inch pan. Make sure to spread it out evenly. This helps to form the treats and makes them nice and compact.
Allow the mixture to cool for about 30 minutes. Once cool, you can start shaping the mixture into small, round balls that resemble bunny tails. Aim for about 1.5 inches in diameter for each tail.
For the finishing touch, melt the white chocolate chips in the microwave in short intervals, stirring in between until smooth. Dip the tops of your bunny tails into the melted chocolate, then gently roll them in the shredded coconut to give them that fluffy look.
Finally, place a few pastel-colored candy-coated chocolate eggs on each bunny tail for decoration. Let them sit for a bit until the chocolate sets, and then your Bunny Tail Rice Krispie Treats are ready to enjoy!
Tips:
- To make the shredded coconut extra fluffy, you can toast it lightly in the oven before coating the treats.
- Use a cookie scoop for easier and more uniform shaping of the bunny tails.
- Feel free to add other decorations, like edible glitter or sprinkles, to make your treats even more festive!
Nutrition Facts:
- Calories: 150 per treat
- Total Fat: 6g
- Saturated Fat: 4g
- Cholesterol: 10mg
- Sodium: 80mg
- Total Carbohydrates: 23g
- Dietary Fiber: 0g
- Sugars: 10g
- Protein: 1g
6 Easter Egg Nest Brownies
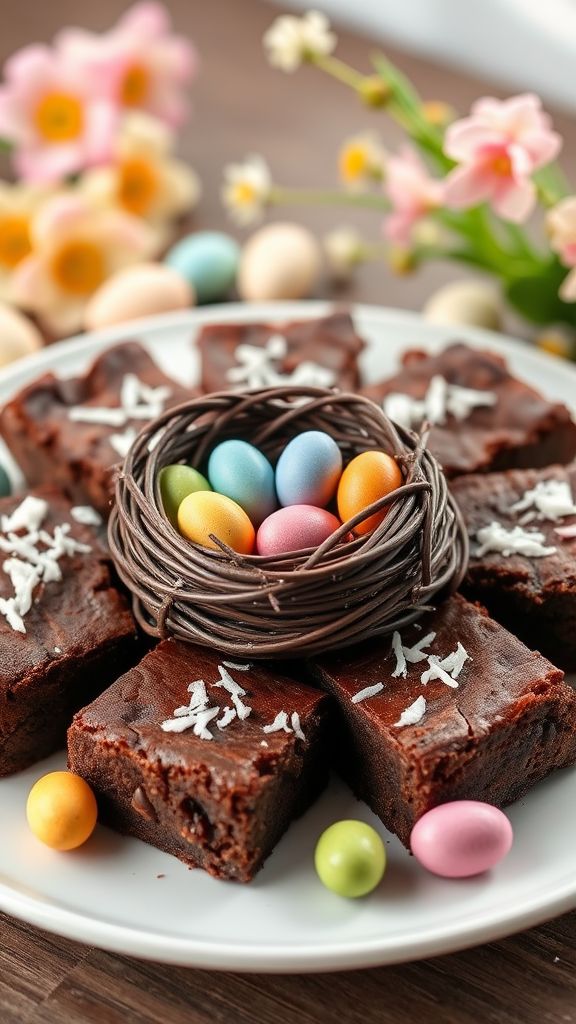
Easter Egg Nest Brownies are a fun and tasty treat that everyone will love! These rich and fudgy brownies are topped with a delightful nest of chocolate and candy eggs, making them perfect for your Easter celebrations. Get ready to impress your friends and family with this sweet and simple recipe.
Prep Time: 15 minutes
Cook Time: 25 minutes
Additional Time: 30 minutes
Total Time: 1 hour 10 minutes
Servings: 12
Ingredients:
- 1 box of brownie mix (plus ingredients needed to prepare it, usually water, oil, and eggs)
- 1 cup of chocolate chips
- 2 cups of shredded coconut
- 1/2 cup of mini chocolate eggs (like Cadbury eggs)
- 2 tablespoons of butter
- 1/4 teaspoon of salt
Instructions:
Start by preheating your oven to 350°F (175°C). Prepare the brownie mix according to the package instructions. This usually involves mixing the brownie mix with water, oil, and eggs.
Grease a 9×9 inch baking pan. Pour the brownie batter into the pan and spread it evenly. Bake the brownies for 20-25 minutes or until a toothpick inserted into the center comes out clean. Once done, let the brownies cool in the pan for about 30 minutes.
While the brownies are cooling, you can make the chocolate nest. In a saucepan over low heat, melt the butter and chocolate chips together. Stir until smooth, then remove from heat.
Add the shredded coconut and salt to the melted chocolate, mixing well until everything is coated. Once the brownies are completely cool, spread the chocolate coconut mixture over the top of the brownies, forming a nest shape.
Finally, decorate your chocolate nest with the mini chocolate eggs. Press them gently into the nest and let everything set for about 30 minutes. Cut into squares and serve!
Tips:
- You can use regular-sized chocolate eggs if you can’t find mini ones; just be sure to adjust how many you add!
- Feel free to add sprinkles for extra color and fun!
- If you want extra flavor, consider adding a dash of vanilla extract to the melted chocolate.
Nutrition Facts:
- Calories: 200 per serving
- Total Fat: 10g
- Saturated Fat: 6g
- Cholesterol: 20mg
- Sodium: 100mg
- Total Carbohydrates: 30g
- Dietary Fiber: 1g
- Sugars: 18g
- Protein: 2g
7 Fluffy Bunny Marshmallow Bars
These Fluffy Bunny Marshmallow Bars are the perfect sweet treat to celebrate Easter! They’re soft, chewy, and filled with fluffy marshmallows that will delight both kids and adults. Plus, they’re super easy to make and will surely impress your friends and family.
Prep Time: 15 minutes
Total Time: 15 minutes
Servings: 12 bars
Ingredients:
- 4 cups of mini marshmallows
- 3 cups of crispy rice cereal
- 1/2 cup of unsalted butter (melted)
- 1 teaspoon of vanilla extract
- 1/4 teaspoon of salt
- Food coloring (pastel colors for a fun look)
- Sprinkles (optional for decoration)
Instructions:
Start by lining a 9×13 inch baking pan with parchment paper. This will help you lift the bars out easily later.
In a large bowl, mix the melted butter, vanilla extract, and salt together until well combined. Next, add in the mini marshmallows and stir gently until they are fully coated.
Now, using a microwave-safe bowl, melt the remaining marshmallows in the microwave. Heat them in 30-second intervals, stirring in between, until they are nice and gooey. Once melted, pour this gooey marshmallow mixture over the crispy rice cereal. Use a spatula to mix it all together.
If you want to add color, separate the mixture into different bowls and add a few drops of food coloring to each. Mix until you get your desired pastel colors.
Once everything is well combined, press the mixture evenly into the lined baking pan. Make sure to press down firmly, so the bars hold together.
For the final touch, sprinkle with some fun sprinkles if you like. Allow the bars to cool for about 10 minutes, then cut them into squares and enjoy your delightful Easter treat!
Tips:
- To make cutting easier, you can spray your knife with cooking spray before slicing the bars.
- Feel free to mix in some chocolate chips or nuts for added flavor and texture.
- Store the bars in an airtight container for up to 5 days for the best freshness.
Nutrition Facts:
- Calories: 150 per bar
- Fat: 7g
- Carbohydrates: 22g
- Sugars: 10g
- Protein: 1g
8 Bunny Ears Fruit Kebabs

These Bunny Ears Fruit Kebabs are a fun and cute way to celebrate Easter! They’re not only colorful but also healthy and delicious. Perfect for kids and adults alike, these fruit kebabs are a great snack or dessert that everyone will enjoy.
Prep Time: 15 minutes
Additional Time: 0 minutes
Total Time: 15 minutes
Servings: 8
Ingredients:
- 1 cup of strawberries, hulled and halved
- 1 cup of banana, sliced
- 1 cup of green grapes, halved
- 1 cup of pineapple chunks
- 8 wooden skewers
- Optional: Mini marshmallows for added "ears"
Instructions:
Start by washing all the fruits thoroughly. Make sure to dry them with a clean towel to ensure they’re not slippery on the skewers.
Next, take the wooden skewers and begin threading the fruits in any order you like. You can start with a strawberry, followed by a banana slice, then a green grape, and finish with a pineapple chunk.
Leave some space at the top of each skewer to create the "bunny ears." You can add mini marshmallows on top for a fun touch that looks like bunny ears.
Repeat the assembly for all skewers until you have eight colorful fruit kebabs ready to serve.
Tips:
- Mix it up! Feel free to use other fruits like blueberries, kiwi, or cantaloupe. Get creative!
- Make it a party! These are perfect for Easter gatherings, so involve the kids in making their own kebabs.
- Keep it fresh. If you’re not serving them right away, store the fruit kebabs in the fridge to keep them fresh.
Nutrition Facts:
- Calories: 80 per serving
- Total Fat: 0.2g
- Sodium: 1mg
- Carbohydrates: 21g
- Fiber: 2g
- Sugar: 13g
- Protein: 1g
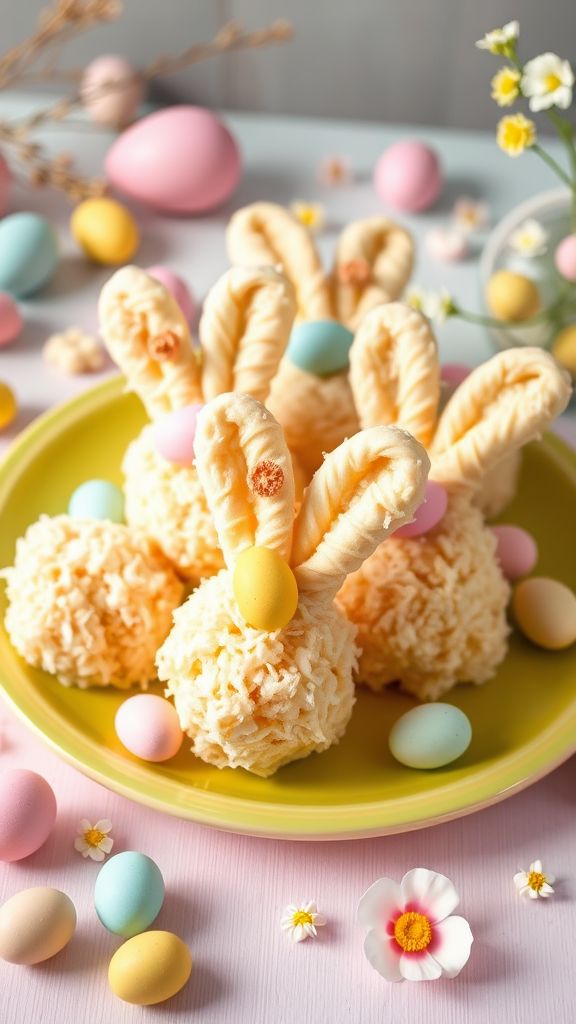
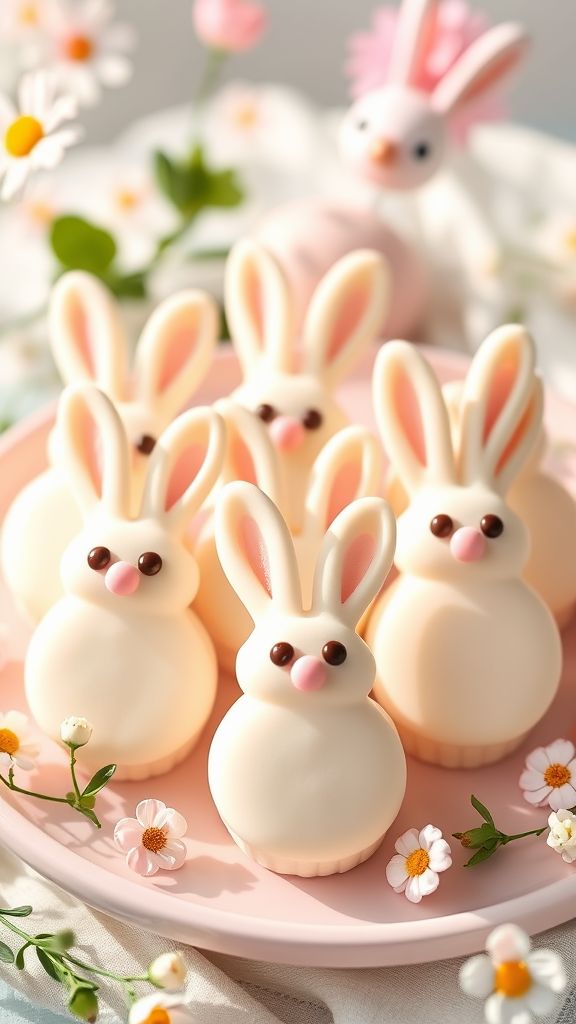
9 Coconut Delight Bunny Bites

These Coconut Delight Bunny Bites are adorable little treats perfect for Easter celebrations! They are cute, tasty, and super easy to make. Get ready to impress your friends and family with these delightful bites!
Prep Time: 20 minutes
Additional Time: 30 minutes
Total Time: 50 minutes
Servings: 12
Ingredients:
- 1 cup sweetened shredded coconut
- 1 cup cream cheese, softened
- 1/2 cup powdered sugar
- 1 tsp vanilla extract
- 12 mini chocolate chips (for eyes)
- 12 whole almonds (for ears)
- 1/4 cup dark chocolate (for melting)
Instructions:
First, grab a medium-sized bowl and mix the softened cream cheese, powdered sugar, and vanilla extract together until smooth. This will create your creamy filling.
Next, fold in the sweetened shredded coconut. Make sure you blend it well so that all the coconut is coated in the creamy mixture.
Now, take a tablespoon of the mixture and form it into a small ball using your hands. This will be the body of your bunny bite. Repeat this step until you’ve formed all your bites and place them on a plate.
Once you have the bunny bites ready, pop them in the fridge for about 30 minutes to firm them up. This will help them hold their shape.
While your bites are chilling, melt the dark chocolate in a microwave-safe bowl. Heat it in short bursts, stirring in between, until it is smooth.
After the bunny bites have chilled, take them out of the fridge. Dip the top of each bite into the melted chocolate. Quickly add two mini chocolate chips for eyes and press in two whole almonds on top for ears.
Place your finished Coconut Delight Bunny Bites back on the plate and let them set for a few minutes. Once the chocolate has hardened, they are ready to enjoy!
Tips:
- For extra fun, you can color the coconut with food coloring to make different bunny colors!
- Use white chocolate instead of dark chocolate if you prefer a sweeter treat.
- Store the bunny bites in the refrigerator to keep them fresh and tasty.
Nutrition Facts:
- Calories: 150 per serving
- Total Fat: 10g
- Saturated Fat: 5g
- Cholesterol: 15mg
- Carbohydrates: 14g
- Sugar: 10g
- Protein: 2g
10 Adorably Sweet Bunny Bark

This Adorably Sweet Bunny Bark is a fun and festive treat perfect for celebrating Easter! It combines colorful chocolate and cute bunny-shaped candies, making it a delightful snack for kids and adults alike. Get ready to indulge in this simple and tasty dessert!
Prep Time: 15 minutes
Total Time: 15 minutes
Servings: 12
Ingredients:
- 12 oz white chocolate chips
- 1 cup pastel-colored M&M’s or chocolate eggs
- 1/2 cup bunny-shaped marshmallow candies
- Sprinkles (optional)
Instructions:
Start by lining a baking sheet with parchment paper. This helps with easy removal later.
Next, melt the white chocolate chips in a microwave-safe bowl. Heat them on medium power for 30 seconds. Stir and repeat until fully melted and smooth. Be careful not to overheat!
Once the chocolate is melted, pour it onto the prepared baking sheet. Use a spatula to spread it evenly into a rectangle or your desired shape.
Now it’s time to add some fun! Sprinkle the pastel M&M’s and bunny-shaped marshmallows over the melted chocolate. Press them down gently so they stick.
If you like, you can also add some colorful sprinkles on top for extra flair.
Let the bark sit for about 30 minutes until it is completely set. You can speed up this process by placing it in the fridge!
Finally, once the bark is firm, break it into pieces. Enjoy your adorably sweet bunny bark!
Tips:
- You can use dark or milk chocolate instead of white chocolate for a different flavor.
- Feel free to add any other candies you like, such as gummy bunnies or other chocolates.
- Store the leftover bunny bark in an airtight container to keep it fresh.
Nutrition Facts:
- Calories: 150
- Total Fat: 7g
- Saturated Fat: 4g
- Carbohydrates: 20g
- Sugars: 15g
- Protein: 1g
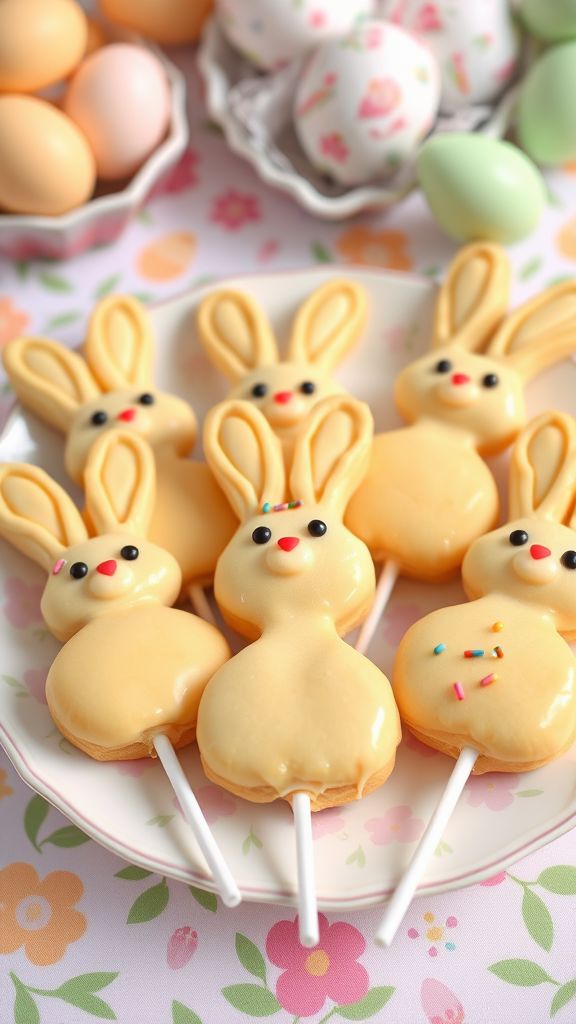
11 Carrot-Shaped Cake Pops

Carrot-Shaped Cake Pops are a fun and festive treat perfect for Easter! These adorable cake pops look like carrots and taste delicious. They are easy to make and will surely impress your friends and family.
Prep Time: 30 minutes
Total Time: 1 hour
Servings: 12 cake pops
Ingredients:
- 1 box of carrot cake mix (plus ingredients as directed on the box)
- 1 cup frosting (cream cheese frosting works well)
- 1 cup orange candy melts
- 1 tablespoon vegetable oil
- Green sprinkles or green fondant for the leaves
- Lollipop sticks
Instructions:
First, prepare the carrot cake according to the instructions on the box. Once baked, let it cool completely.
Once cool, crumble the cake into a large mixing bowl. Add the frosting a little at a time and mix until the cake becomes moldable. You want the mixture to be wet enough to hold together but not too sticky.
Next, take small amounts of cake mixture and shape them into carrot forms, tapering them at one end. Place each shaped carrot onto a tray lined with parchment paper.
Once all the pops are shaped, insert a lollipop stick into the wider end of each carrot. Put the tray in the freezer for about 15-20 minutes to help them firm up.
While the carrot pops are chilling, melt the orange candy melts in a microwave-safe bowl. Stir in the vegetable oil to make the mixture smooth and glossy.
Now, take the chilled carrot pops out of the freezer. Dip each pop in the melted orange candy, turning it to coat evenly. Let any excess drip off.
After coating, sprinkle some green sprinkles on top or attach green fondant for the leaves. Place the finished cake pops upright in a decorative stand or a piece of foam to set.
Finally, allow them to dry completely before serving!
Tips:
- For a brighter color, add a few drops of orange food coloring to the candy melts.
- If you want to get creative, you can use chocolate melts for a different flavor profile.
- These cake pops can be made a day in advance; just store them in an airtight container in the refrigerator.
Nutrition Facts:
- Calories: 150 per cake pop
- Total Fat: 7g
- Saturated Fat: 2g
- Cholesterol: 15mg
- Sodium: 180mg
- Total Carbohydrates: 21g
- Dietary Fiber: 0g
- Sugars: 12g
- Protein: 2g
12 Bunny Bundt Cake
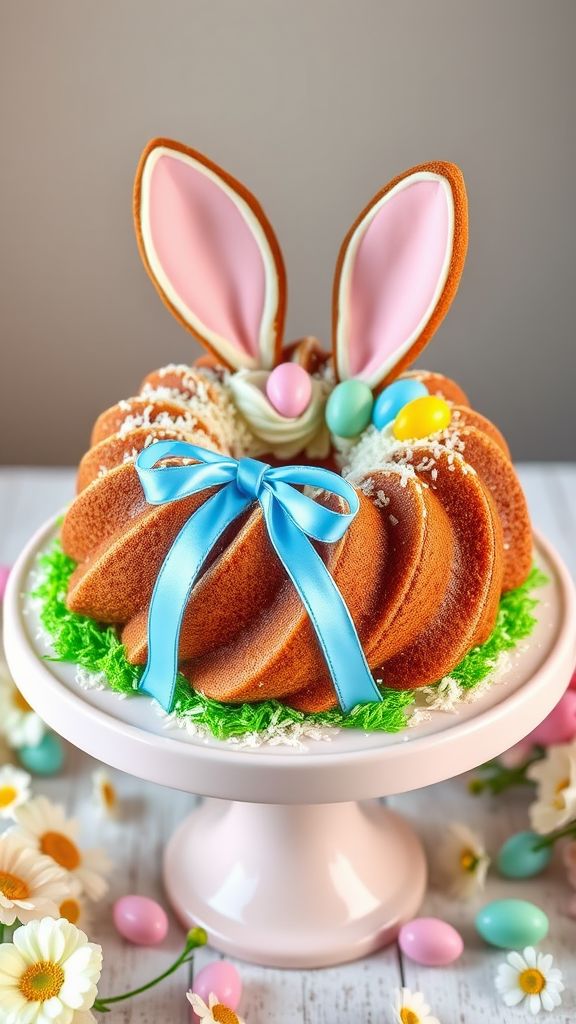
This delightful Bunny Bundt Cake is perfect for Easter celebrations! It’s not only cute but also a tasty treat that will impress your family and friends. With a simple cake mix base, you can quickly whip this up and enjoy the holiday spirit.
Prep Time: 20 minutes
Cook Time: 40 minutes
Additional Time: 1 hour
Total Time: 2 hours
Servings: 12
Ingredients:
- 1 box of vanilla cake mix
- 3 large eggs
- 1 cup of water
- 1/2 cup of vegetable oil
- 1 cup of shredded coconut (for texture)
- 1/4 cup of blue or pastel-colored frosting
- 1/4 cup of white frosting
- Candy eye decorations
- Gummy or chocolate eggs (for decoration)
- Green colored coconut (optional, for grass effect)
Instructions:
Preheat your oven to 350°F (175°C) and grease a bundt pan with non-stick spray. Make sure to cover all the curves and crevices so the cake comes out easily.
In a large mixing bowl, combine the cake mix, eggs, water, and vegetable oil. Mix everything until it’s smooth and creamy. Then, gently fold in the shredded coconut for a fun texture.
Pour the batter into the prepared bundt pan. Bake in the preheated oven for about 40 minutes, or until a toothpick inserted in the center comes out clean. Let the cake cool in the pan for about 10 minutes before transferring it onto a wire rack to cool completely.
Once the bundt cake is cool, it’s time to decorate! Place the cake on a serving plate and spread a thin layer of white frosting all over the top and sides. This will act as the glue for your decorations.
To create the bunny face, use the blue or pastel-colored frosting to make a bow on top of the cake. Next, attach the candy eyes and add gummy or chocolate eggs at the base. If you like, sprinkle the top with green-colored coconut to mimic grass, making it feel more festive!
Tips:
- For an extra fun twist, add vanilla or almond extract to the batter for added flavor.
- You can use food coloring to tint your frosting or coconut to match your Easter theme.
- Store leftover cake in an airtight container at room temperature for up to three days.
Nutrition Facts:
- Calories: 320 per serving
- Fat: 12g
- Carbohydrates: 49g
- Protein: 3g
- Sugar: 24g
13 Jelly Bean Bunny Surprise
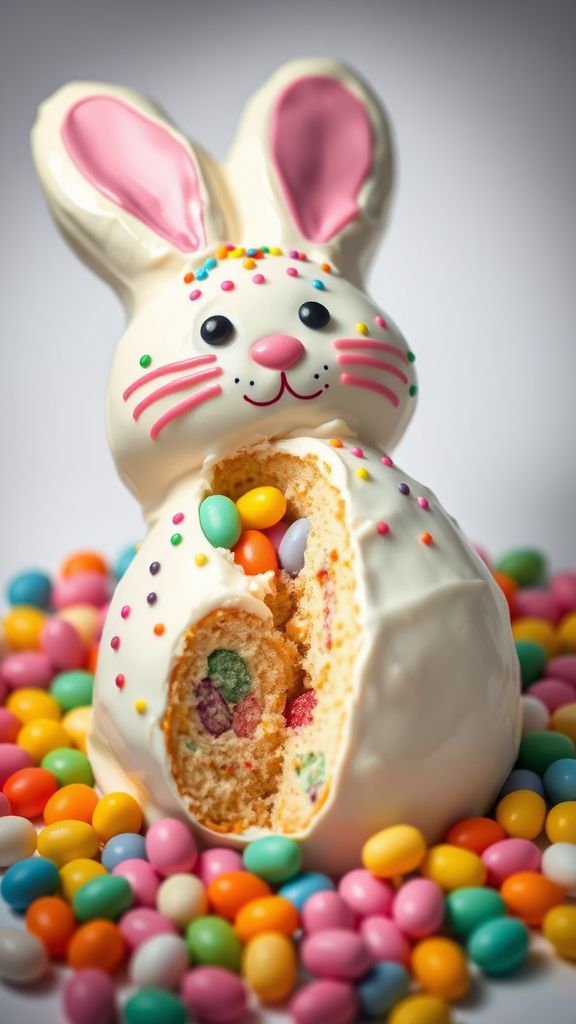
Get ready for a sweet and colorful treat perfect for Easter! The Jelly Bean Bunny Surprise is filled with delicious jelly beans hidden inside a soft, fluffy bunny-shaped cake. It’s a fun and tasty surprise that will delight kids and adults alike.
Prep Time: 30 minutes
Additional Time: 1 hour
Total Time: 1 hour 30 minutes
Servings: 12
Ingredients:
- 1 box of white cake mix
- Ingredients needed for the cake mix (usually water, oil, and eggs)
- 1 cup assorted jelly beans
- 1 tub of vanilla frosting
- Food coloring (optional, for frosting)
- Edible glitter or sprinkles (optional for decoration)
Instructions:
Begin by preheating your oven to 350°F (175°C). Prepare a bunny-shaped cake pan by greasing it with butter or cooking spray. This will ensure the cake comes out easily after baking.
Next, mix the white cake mix according to the instructions on the box. This usually involves combining water, oil, and eggs. Stir until the batter is smooth and well combined.
Pour half of the batter into the prepared bunny-shaped pan. Then, take your jelly beans and sprinkle them evenly over the batter. Make sure to distribute them well so every slice will get a surprise!
Carefully pour the remaining cake batter over the jelly beans. Gently smooth the top with a spatula. Bake in the preheated oven for about 25-30 minutes, or until a toothpick inserted into the center comes out clean.
Once the cake is done, remove it from the oven and let it cool in the pan for about 10 minutes. Then, carefully turn the cake out onto a wire rack to cool completely for about an hour.
While the cake is cooling, you can prepare the frosting. If you like, add food coloring to your frosting to make it colorful! Once the cake is completely cool, spread the frosting generously over the entire bunny.
For a little extra fun, sprinkle some edible glitter or sprinkles on top to make it sparkle!
Tips:
- To make it extra special, you can add different flavors of jelly beans to surprise your guests.
- If you don’t have a bunny-shaped pan, you can bake the cake in a regular round pan and decorate it to look like a bunny.
- Store any leftovers in an airtight container at room temperature for up to 3 days.
Nutrition Facts:
- Calories: 250 per slice
- Total Fat: 10g
- Saturated Fat: 2.5g
- Carbohydrates: 40g
- Sugars: 20g
- Protein: 2g
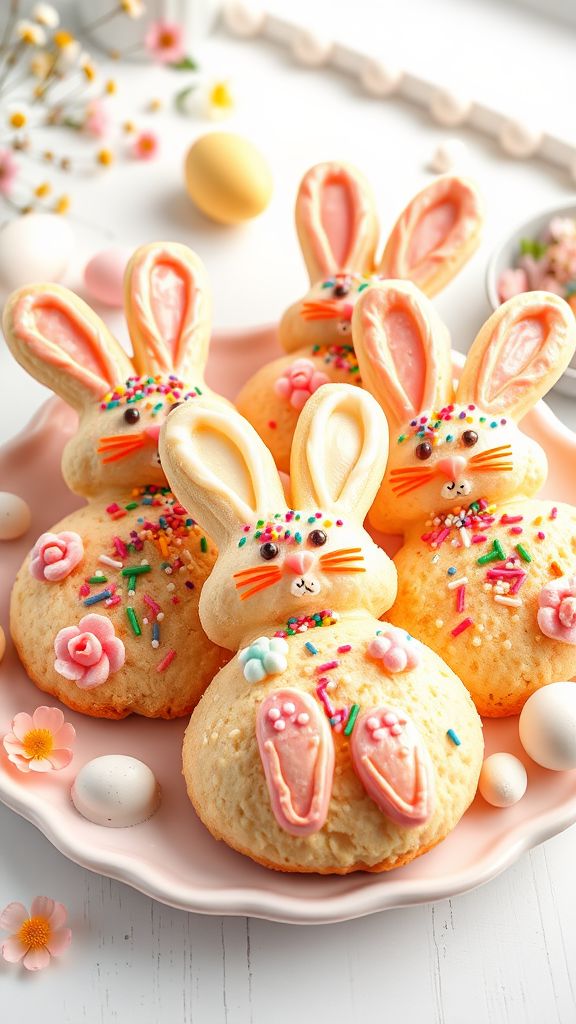
14 Silly Bunny Sandwich Cookies

These Silly Bunny Sandwich Cookies are a fun and delicious treat perfect for Easter! With their cute bunny shapes and colorful icing, these cookies will bring smiles to everyone. They are easy to make and even more fun to decorate!
Prep Time: 30 minutes
Total Time: 1 hour
Servings: 12 cookies
Ingredients:
- 1 cup unsalted butter, softened
- 1 cup granulated sugar
- 1 egg
- 1 teaspoon vanilla extract
- 2 ½ cups all-purpose flour
- ½ teaspoon baking powder
- ¼ teaspoon salt
- Decorative icing (various colors)
- Candy (for eyes and nose, like chocolate chips or mini M&Ms)
Instructions:
Start by preheating your oven to 350°F (175°C). Prepare a baking sheet by lining it with parchment paper.
In a large bowl, cream together the butter and sugar until it’s light and fluffy. This should take about 3-5 minutes. Next, add in the egg and vanilla extract, mixing until well combined.
In another bowl, whisk together the flour, baking powder, and salt. Gradually add this dry mixture to the wet ingredients, stirring until a dough forms.
Now, take the dough and roll it out on a floured surface until it’s about ¼ inch thick. Use a bunny-shaped cookie cutter to cut out the cookie shapes and place them on the prepared baking sheet, leaving some space in between.
Bake the cookies in the preheated oven for about 10-12 minutes, or until the edges are just golden. Once done, remove them from the oven and let them cool on a wire rack.
Once the cookies have cooled completely, it’s time to assemble! Spread a layer of decorative icing on one cookie and gently press another cookie on top to create a sandwich. Use additional icing and candy to decorate your bunny cookies as you like!
Tips:
- Try using different shapes for the cookies; you can make carrots or eggs for variety!
- For a fun twist, add sprinkles to the icing for extra color and crunch.
- Store the cookies in an airtight container to keep them fresh lasting longer!
Nutrition Facts:
- Calories: 200 per cookie
- Total Fat: 10g
- Saturated Fat: 6g
- Cholesterol: 30mg
- Sodium: 60mg
- Total Carbohydrate: 26g
- Dietary Fiber: 0g
- Sugars: 10g
- Protein: 2g
15 Colorful Bunny Scones
These Colorful Bunny Scones are perfect for any Easter celebration! They are light, fluffy, and bursting with fun colors that are sure to delight everyone. Serve them at brunch or as a sweet treat throughout the day.
Prep Time: 20 minutes
Cook Time: 15 minutes
Total Time: 35 minutes
Servings: 12 scones
Ingredients:
- 2 cups all-purpose flour
- 1/4 cup granulated sugar
- 1 tablespoon baking powder
- 1/2 teaspoon salt
- 1/2 cup cold unsalted butter, cubed
- 1/2 cup milk
- 1 teaspoon vanilla extract
- 1/2 cup colorful sprinkles
- 1/2 cup fruit puree (strawberry, blueberry, or mango)
- 1 egg (for egg wash)
- Extra sprinkles for topping
Instructions:
Start by preheating your oven to 400°F (200°C). Line a baking sheet with parchment paper to keep the scones from sticking.
In a large mixing bowl, combine flour, sugar, baking powder, and salt. Mix well to ensure the baking powder is evenly distributed throughout the dry ingredients.
Next, add the cubed butter into the flour mixture. Use your fingers or a pastry cutter to blend the butter into the flour until it resembles coarse crumbs.
Then, pour in the milk and vanilla extract. Mix until just combined. Be careful not to overmix. Gently fold in the colorful sprinkles and the fruit puree of your choice. This will give your scones a beautiful and vibrant color.
Turn the dough onto a floured surface and knead it gently for a minute. Shape the dough into a circle about 1 inch thick. Cut it into 12 wedges like a pizza.
Place the wedges on the prepared baking sheet. Beat the egg gently and brush it over the tops of the scones for a shiny finish. Sprinkle a few extra sprinkles on top for extra fun.
Bake for about 15 minutes, or until they are golden brown. Let the scones cool for a few minutes on the baking sheet before transferring them to a wire rack.
Tips:
- You can store leftover scones in an airtight container for up to 3 days.
- Experiment with different fruit purees to create a variety of colors and flavors!
- Serve warm with butter or jam for an extra tasty treat.
Nutrition Facts:
- Calories: 180 per scone
- Total Fat: 8g
- Saturated Fat: 5g
- Cholesterol: 20mg
- Sodium: 130mg
- Total Carbohydrates: 25g
- Dietary Fiber: 1g
- Sugars: 8g
- Protein: 3g
16 Chewy Bunny Gummy Treats
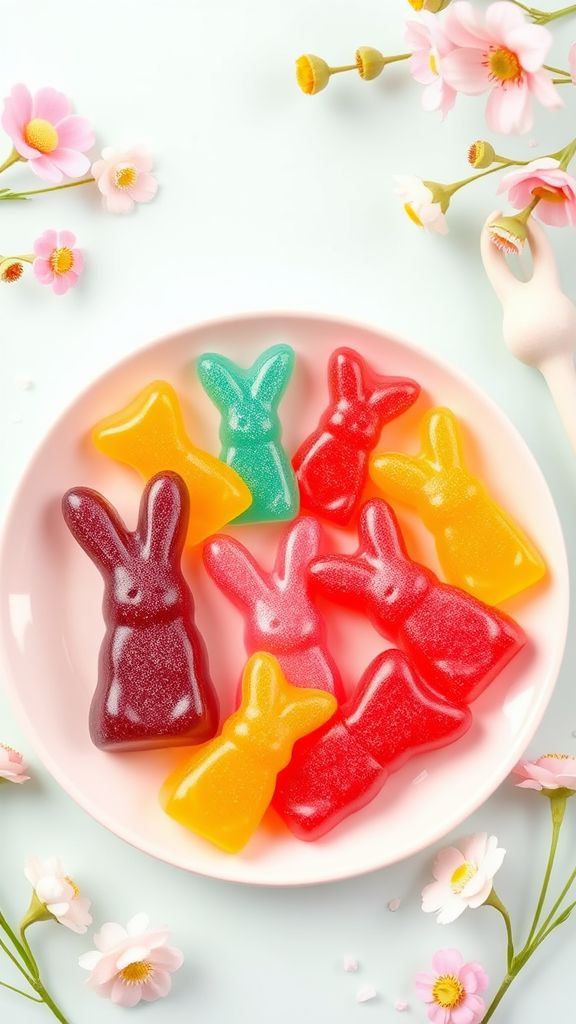
Making your own Chewy Bunny Gummy Treats is a fun and tasty activity! These adorable gummy snacks are perfect for an Easter celebration or just a sweet treat to enjoy. They are easy to make and even better to eat.
Prep Time: 15 minutes
Total Time: 1 hour
Servings: 12 treats
Ingredients:
- 1 cup fruit juice (your choice, like apple or grape)
- 2 tablespoons honey or maple syrup
- 3 tablespoons gelatin powder (unflavored)
- 1/4 cup water
- Food coloring (optional, for colorful bunnies)
- Bunny-shaped silicone molds
Instructions:
Start by gathering all your ingredients and silicone molds. This makes the process smoother and more fun!
In a small saucepan, combine the fruit juice and honey over low heat. Stir the mixture until it warms up nicely, but do not let it boil. This should take about 2-3 minutes.
Now, slowly sprinkle the gelatin powder into the warm juice while whisking vigorously. This will prevent any clumps from forming. Keep stirring until the gelatin has fully dissolved into the mixture.
If you want colorful bunnies, add a few drops of food coloring to your mixture. Mix it in well to ensure your gummies are vibrant and fun!
Next, pour in the water and stir everything together until it’s well combined. Remove the saucepan from the heat.
Carefully pour the mixture into your bunny-shaped silicone molds. Fill each mold to the top for the best results. If you have extra liquid, you can pour it into a small dish as a fun gummy treat too!
Place the filled molds in the refrigerator for about 45 minutes to an hour, or until the gummies are firm. Once set, gently pop the bunny gummies out of the molds and enjoy!
Tips:
- Use natural fruit juice without added sugars for a healthier treat.
- Store your gummy treats in an airtight container in the fridge for up to one week.
- Get creative! You can try mixing different fruit juices to create unique flavors.
Nutrition Facts:
- Calories: 50 per treat
- Total Fat: 0g
- Sodium: 5mg
- Total Carbohydrates: 12g
- Sugars: 10g
- Protein: 1g
Enjoy making and sharing these chewy bunny treats! They’re sure to be a hit with both kids and adults.
17 Fruit-filled Bunny Pastries

These adorable Fruit-filled Bunny Pastries are perfect for celebrating Easter! They’re easy to make and filled with delicious fruity goodness, making them a delightful treat for both kids and adults. Get ready to impress your friends and family with these cute bunny shaped pastries!
Prep Time: 20 minutes
Cook Time: 15 minutes
Additional Time: 10 minutes (cooling)
Total Time: 45 minutes
Servings: 12
Ingredients:
- 1 package of puff pastry sheets (thawed)
- 1/2 cup of cream cheese, softened
- 1/4 cup of powdered sugar
- 1 cup of mixed fresh fruits (like strawberries, blueberries, and raspberries)
- 1 egg (for egg wash)
- 1 teaspoon of vanilla extract
- 1 tablespoon of lemon juice
- Flour (for dusting)
Instructions:
First, preheat your oven to 375°F (190°C). This will ensure your pastries cook evenly and get a nice golden brown color.
Next, on a lightly floured surface, roll out the puff pastry sheets. Try to make them about 1/8 inch thick. Then, cut the sheets into bunny shapes using a bunny cookie cutter or by cutting them freehand.
In a small bowl, mix the softened cream cheese and powdered sugar until smooth. Add the vanilla extract and lemon juice and stir well until fully combined. This will be the creamy filling for your bunnies.
Now, take one bunny pastry shape and place a small spoonful of the cream cheese mixture in the center. Then, add a few pieces of the mixed fresh fruits on top. Make sure you don’t overfill, or they will spill out while baking.
Next, place another bunny pastry on top to form a sandwich. Carefully press around the edges to seal them. You can use a fork to crimp the edges for a cute design and extra sealing.
Whisk the egg in a small bowl and brush it on top of the pastries for a shiny finish. This will help give them a beautiful golden color as they bake.
Finally, place the pastries on a baking sheet lined with parchment paper and bake in the oven for 15 minutes or until they are puffy and golden brown. Once baked, let them cool for about 10 minutes before serving.
Tips:
- For extra flavor, you can add some cinnamon or nutmeg to the cream cheese mixture.
- Try using different types of fruit depending on your preference or what’s in season!
- If you don’t have fresh fruit, you can use canned pie filling for a quick and easy alternative.
Nutrition Facts:
- Calories: 180 per pastry
- Total Fat: 9g
- Saturated Fat: 4g
- Cholesterol: 20mg
- Sodium: 75mg
- Total Carbohydrates: 22g
- Dietary Fiber: 1g
- Sugars: 6g
- Protein: 3g
18 Bunny-shaped Pancake Stack
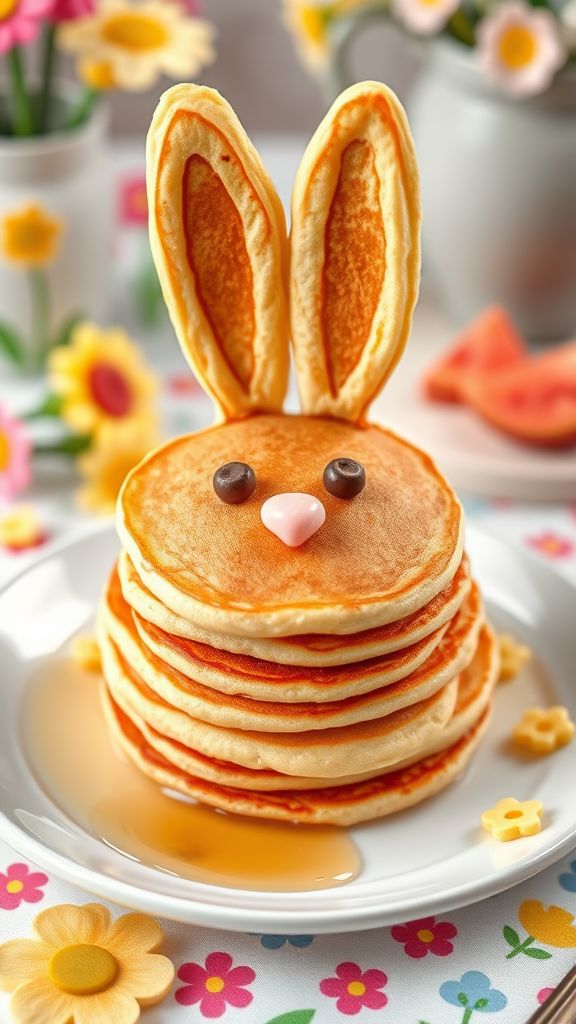
Make breakfast fun this Easter by whipping up a delightful Bunny-shaped Pancake Stack! These adorable pancakes will bring smiles to the faces of your family and friends. Let’s hop into this easy and enjoyable recipe!
Prep Time: 10 minutes
Cook Time: 15 minutes
Additional Time: 5 minutes
Total Time: 30 minutes
Servings: 4
Ingredients:
- 1 cup all-purpose flour
- 2 tablespoons sugar
- 1 tablespoon baking powder
- 1/2 teaspoon salt
- 1 cup milk
- 1 large egg
- 2 tablespoons melted butter
- 1 teaspoon vanilla extract
- Cooking spray or butter (for greasing the pan)
- Chocolate chips or fruit (for decorating)
- Maple syrup (optional, for serving)
Instructions:
In a medium bowl, combine the flour, sugar, baking powder, and salt. Mix these dry ingredients well so everything is blended together.
In another bowl, whisk together the milk, egg, melted butter, and vanilla extract until smooth. Slowly pour the wet mixture into the bowl with the dry ingredients. Stir until just combined, being careful not to overmix.
Heat a non-stick skillet or griddle over medium heat and lightly grease it with cooking spray or butter. Pour about 1/4 cup of batter onto the skillet for each pancake.
To create the bunny shapes, use about 2 tablespoons of batter to form the bunny’s head and an additional 1/4 cup for the body. You can make the ears by adding two smaller blobs of batter on top of the head.
Cook the pancakes until bubbles form on the surface, about 2-3 minutes. Then, flip them over and cook for another 2-3 minutes until golden brown. Once cooked, remove them from the skillet and let them cool slightly.
Stack the bunny pancakes on a plate and use chocolate chips or fruit to make cute faces. Drizzle with maple syrup if desired.
Tips:
- You can use food coloring to tint the pancake batter for a fun twist!
- For a fluffy texture, let the batter rest for a few minutes before cooking.
- Experiment with toppings like shredded coconut or sprinkles to add extra flair!
Nutrition Facts:
- Calories: 200 per serving
- Protein: 6g
- Carbohydrates: 30g
- Fat: 6g
- Sugar: 5g
- Fiber: 1g
19 Creamy Bunny Cheesecake Bites
Get ready to impress your friends and family this Easter with these adorable Creamy Bunny Cheesecake Bites! They are creamy, delightful, and shaped like bunnies, making them the perfect treat for any celebration. Easy to make and even easier to eat, these bites will hop straight into your heart!
Prep Time: 20 minutes
Additional Time: 2 hours
Total Time: 2 hours 20 minutes
Servings: 12 bunny bites
Ingredients:
- 1 cup cream cheese, softened
- 1/2 cup powdered sugar
- 1/2 cup heavy whipping cream
- 1 teaspoon vanilla extract
- 1 cup graham cracker crumbs
- 1/4 cup unsalted butter, melted
- Chocolate chips or candy eyes for decoration
- Pink icing for bunny noses
Instructions:
In a mixing bowl, beat 1 cup of softened cream cheese and 1/2 cup of powdered sugar together until smooth. This will create a rich, creamy base for your cheesecake bites.
Next, add 1/2 cup of heavy whipping cream and 1 teaspoon of vanilla extract to the mixture. Whip everything together until it forms soft peaks. This will give your cheesecake bites their lovely, fluffy texture.
In another bowl, combine 1 cup of graham cracker crumbs with 1/4 cup of melted unsalted butter. Stir until the crumbs are well coated. This crumb mixture will serve as the base for your bunny bites.
Now, take a mini muffin tin and press the graham cracker mixture into the bottom of each cup, forming a small crust. Make sure to pack it down firmly for a sturdy base.
Spoon the cheesecake mixture over the crusts, filling each muffin cup nearly to the top. Use a spatula to smooth the surface.
Once all cups are filled, cover the tin with plastic wrap and place it in the refrigerator for at least 2 hours. This helps the bites set properly.
After chilling, carefully remove the cheesecake bites from the muffin tin. Use a butter knife to gently loosen the edges if needed.
Now it’s time to decorate! Place two chocolate chips or candy eyes on top of each cheesecake bite to create bunny faces. Use a small dot of pink icing for the bunny noses.
Finally, serve your Creamy Bunny Cheesecake Bites and watch everyone enjoy these delightful treats!
Tips:
- For a colorful touch, you can use pastel colored frosting or sprinkles instead of pink icing.
- If you want a stronger flavor, add a bit of lemon zest to the cheesecake mixture.
- Use mini cupcake liners for easy serving and cleanup.
Nutrition Facts:
- Calories: 150 per bite
- Total Fat: 10g
- Saturated Fat: 6g
- Cholesterol: 30mg
- Sodium: 80mg
- Carbohydrates: 15g
- Dietary Fiber: 0g
- Sugars: 8g
- Protein: 2g
20 Baked Bunny Biscotti
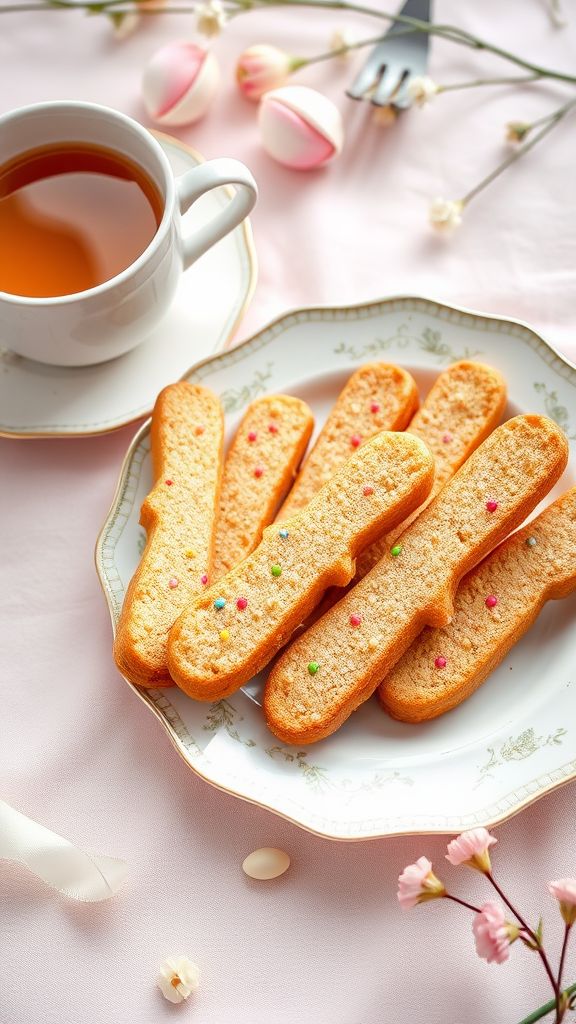
These Baked Bunny Biscotti are a fun and tasty treat, perfect for Easter! With a delightful crunch and a hint of sweetness, they will impress your family and friends. Enjoy them with a cup of coffee or tea while celebrating the holiday!
Prep Time: 20 minutes
Cook Time: 35 minutes
Additional Time: 30 minutes (cooling)
Total Time: 1 hour 25 minutes
Servings: 12 biscotti
Ingredients:
- 2 cups all-purpose flour
- 1 cup granulated sugar
- 2 large eggs
- 1/4 cup unsalted butter, melted
- 1 teaspoon vanilla extract
- 1 teaspoon baking powder
- 1/2 teaspoon salt
- 1/2 cup mini chocolate chips
- 1/2 cup chopped nuts (optional)
- Colored sprinkles for decoration (optional)
Instructions:
Start by preheating your oven to 350°F (175°C). Line a baking sheet with parchment paper for easy cleanup.
In a big bowl, mix the flour, sugar, baking powder, and salt together. In another bowl, whisk the eggs, melted butter, and vanilla extract until combined. Pour the wet mixture into the dry ingredients and mix well. If you like, stir in the mini chocolate chips and chopped nuts for extra flavor.
Shape the dough into a log about 12 inches long and place it on the prepared baking sheet. Flatten it slightly to about 1 inch thick. Bake for about 25 minutes or until it’s lightly golden.
Once done, remove the log from the oven and let it cool for about 30 minutes. After cooling, slice the log diagonally into 1-inch thick pieces. Place the slices back on the baking sheet, cut side up.
Now, bake the biscotti again for another 10 minutes. Flip them over and bake for an additional 5-10 minutes until they are crispy and dry. Keep an eye on them to avoid burning.
Finally, let the biscotti cool completely before decorating with colored sprinkles, if desired. Enjoy with your favorite beverage!
Tips:
- For a sweeter taste, you can add more sugar to the dough.
- Feel free to try different types of nuts or add dried fruit for variety.
- Store the biscotti in an airtight container for up to 2 weeks for maximum freshness.
Nutrition Facts:
- Calories: 150 per biscotti
- Total Fat: 6g
- Saturated Fat: 3g
- Cholesterol: 30mg
- Sodium: 85mg
- Total Carbohydrates: 23g
- Dietary Fiber: 1g
- Sugars: 8g
- Protein: 2g
21 Sweet Bunny Pie Pops
These Sweet Bunny Pie Pops are a fun and delicious treat perfect for Easter celebrations! With flaky pastry and sweet filling, these cute bunny-shaped pops will delight both kids and adults alike. Get ready to hop into the kitchen and have some fun!
Prep Time: 30 minutes
Additional Time: 15 minutes
Total Time: 45 minutes
Servings: 12 pie pops
Ingredients:
- 1 package of refrigerated pie crusts (about 14 ounces)
- 1 cup of fruit filling (like strawberry, cherry, or apple)
- 1 egg (for egg wash)
- 1 tablespoon of water
- Sprinkles (optional, for decoration)
- Lollipop sticks or wooden skewers
Instructions:
Start by preheating your oven to 375°F (190°C). Next, unroll the pie crusts on a clean surface and use a cookie cutter or knife to cut out bunny shapes. You will need two shapes for each pie pop; one for the front and one for the back.
Once you have your bunny shapes ready, place half of them on a lined baking sheet. Add a generous spoonful of your favorite fruit filling in the center of each bunny shape, but be careful not to overfill them.
Next, take the remaining bunny shapes and place a lollipop stick or wooden skewer in the middle of each one. Now, gently press the stick into the filling to secure it. Then, place the backs of the bunnies over the filling and press down the edges with a fork to seal them.
In a small bowl, whisk together the egg and water to create an egg wash. Brush the tops of each bunny pie pop with the egg wash to give them a nice golden color when baked. You can also sprinkle some sugar or sprinkles on top if you want to add a little extra sweetness.
Bake the bunny pie pops in the preheated oven for approximately 15 minutes or until they are golden brown. Once done, take them out and let them cool for a few minutes before serving.
Tips:
- Use different fruit fillings to create a variety of flavors.
- If you don’t have a bunny-shaped cookie cutter, you can draw a bunny shape on paper and cut around it as a guide.
- For an extra fun touch, decorate your pie pops with icing or colored sprinkles after they have cooled.
Nutrition Facts:
- Calories: 200
- Total Fat: 10g
- Saturated Fat: 3g
- Cholesterol: 30mg
- Sodium: 150mg
- Total Carbohydrates: 25g
- Dietary Fiber: 1g
- Sugars: 5g
- Protein: 2g