21 Cute Easter Treats for Kids
Looking for fun ways to celebrate Easter? You’re not alone! Many parents feel the pressure to create memorable treats that will delight their kids. With these 21 cute Easter treats, you’ll discover simple, delicious recipes that will bring joy and creativity to your festivities. Let’s make this Easter unforgettable together!
Shop Our Must-Haves


1 Bunny Butt Cupcakes

Bunny Butt Cupcakes are a fun and festive treat perfect for Easter celebrations! These adorable cupcakes are decorated to look like a cute bunny bottom, making them a hit for kids and adults alike. With fluffy frosting and a few simple decorations, everyone will love these sweet delights.
Prep Time: 30 minutes
Total Time: 30 minutes
Servings: 12 cupcakes
Ingredients:
- 1 box of chocolate cake mix
- 1 cup of water
- 1/3 cup of vegetable oil
- 3 large eggs
- 1 jar of white frosting
- 1 cup of mini marshmallows
- 12 candy-coated chocolate eggs
- 1 pack of shredded coconut (optional)
- Pink sprinkles for decoration (optional)
Instructions:
First, preheat your oven to 350°F (175°C). Prepare a cupcake pan by lining it with cupcake liners. In a large mixing bowl, follow the instructions on the chocolate cake mix box, combining the cake mix, water, vegetable oil, and eggs. Mix until well blended.
Next, pour the batter evenly into the lined cupcake pan. Bake the cupcakes in the oven for about 18-20 minutes, or until a toothpick inserted comes out clean. Once baked, remove them from the oven and let them cool completely on a wire rack.
While the cupcakes are cooling, take a small bowl and mix the shredded coconut with a few drops of green food coloring if you want to make it look like grass. This is optional!
Once the cupcakes are cool, use a spatula to spread a generous layer of white frosting on the top of each cupcake. Then, take two mini marshmallows and place them at the bottom of the cupcake to form the "bunny’s butt."
Next, place a candy-coated chocolate egg in front of the marshmallows, creating the look of a cute bunny tail. If desired, you can sprinkle some shredded coconut around the marshmallows to look like grass. Add a little sprinkle of pink on top of the marshmallows to add a fun detail.
Finally, let your Bunny Butt Cupcakes sit for a few minutes before serving. Make sure to show them off at your Easter gathering!
Tips:
- You can use any flavor of cake mix if chocolate isn’t your favorite.
- If you don’t have mini marshmallows, you can also use large marshmallows cut in half.
- Get creative! Use different colored sprinkles or candy for unique bunny butts.
Nutrition Facts:
- Calories: 200 per cupcake
- Total Fat: 9 grams
- Saturated Fat: 3 grams
- Cholesterol: 40 mg
- Sodium: 180 mg
- Total Carbohydrates: 29 grams
- Dietary Fiber: 1 gram
- Sugars: 15 grams
- Protein: 2 grams
2 Chocolate Egg Nests
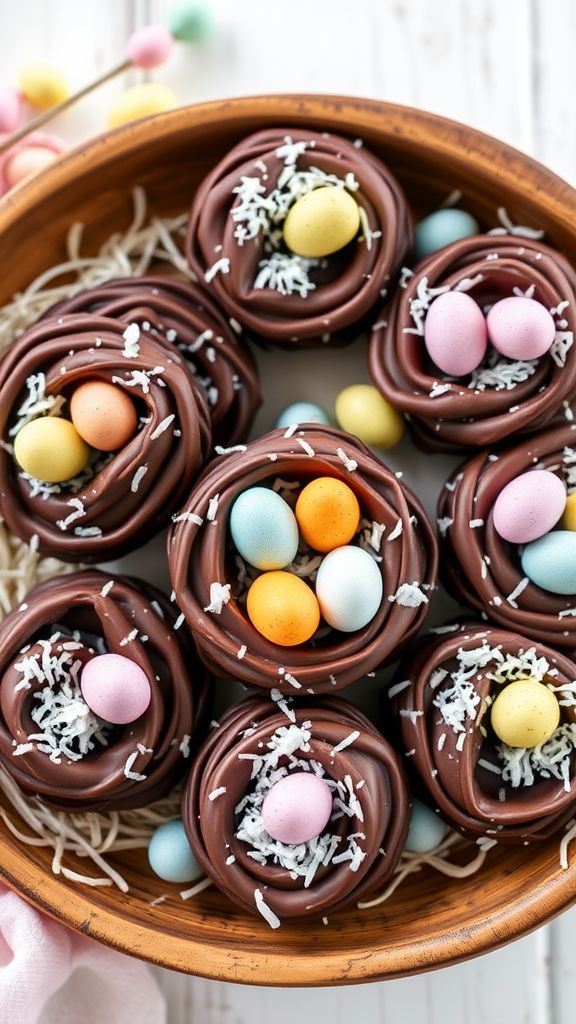
Chocolate Egg Nests are a delightful and fun treat that brings the joy of Easter right into your kitchen. These sweet nests, made from chocolate and crispy cereal, are perfect for holding little candy eggs. They are easy to make and will surely bring a smile to everyone who sees them!
Prep Time: 15 minutes
Total Time: 15 minutes
Servings: 12 nests
Ingredients:
- 2 cups chocolate chips (semi-sweet or milk chocolate)
- 3 cups crispy rice cereal
- 1 cup shredded coconut (optional)
- Mini candy eggs for filling (such as chocolate eggs or jelly beans)
- 1 tablespoon butter (for greasing)
Instructions:
Start by melting the chocolate chips in a microwave-safe bowl. Heat them in 30-second intervals, stirring in between, until the chocolate is completely smooth. This should take about 1-2 minutes in total.
Once the chocolate is melted, add the crispy rice cereal and shredded coconut (if using) to the bowl. Gently stir until all the cereal is well coated with the chocolate. Be careful not to crush the cereal too much.
Next, take a muffin tin and grease it lightly with butter. This will help the nests come out easily later. Now, scoop about 2 tablespoons of the chocolate mixture into each muffin cup. Press the mixture down slightly and then use your fingers to shape it into a nest, creating a small hollow in the center.
After you have formed all the nests, place the muffin tin in the refrigerator for about 10 minutes to allow the nests to firm up. Once they are set, gently remove them from the muffin tin.
Now it’s time to fill your crunchy nests! Place a few mini candy eggs in the center of each nest. Arrange them nicely and you’re ready to showcase your beautiful Chocolate Egg Nests.
Tips:
- For extra flavor, you can add a pinch of salt to the melted chocolate.
- To get creative, try using different colored candy eggs to make it more festive.
- If you don’t have coconut, you can skip it or use mini marshmallows instead for a different texture.
Nutrition Facts:
- Calories: 130 per nest
- Total Fat: 6g
- Saturated Fat: 4g
- Cholesterol: 1mg
- Sodium: 45mg
- Total Carbohydrates: 19g
- Dietary Fiber: 1g
- Sugars: 10g
- Protein: 1g
3 Peep Marshmallow Pops
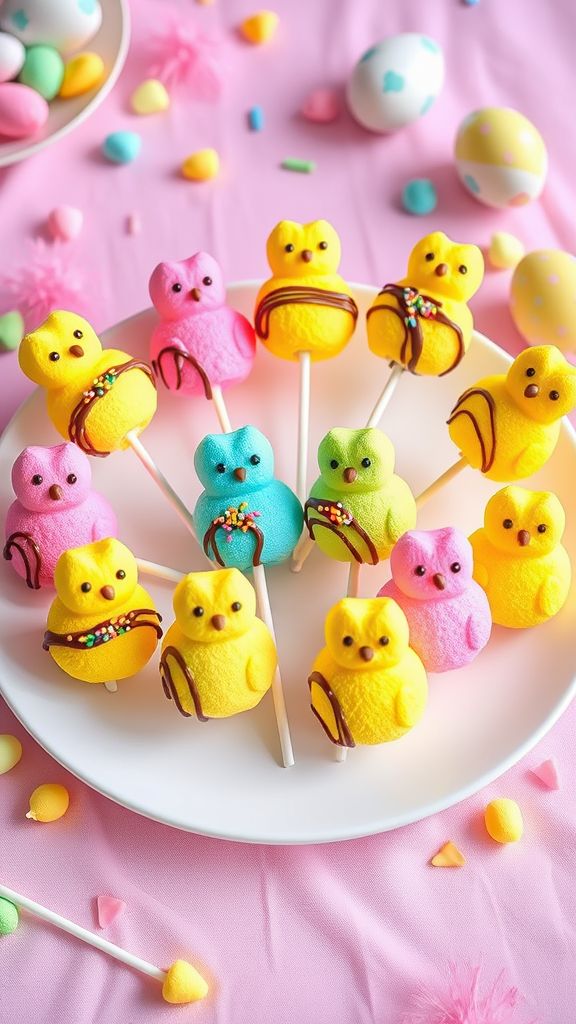
Peep Marshmallow Pops are a fun and colorful treat perfect for Easter. These sweet snacks are simple to make and are sure to delight kids and adults alike. Plus, they’re an exciting way to add some festive flair to your celebrations!
Prep Time: 15 minutes
Total Time: 15 minutes
Servings: 12 pops
Ingredients:
- 12 Peeps marshmallow chicks (your choice of colors)
- 12 lollipop sticks or wooden skewers
- 1 cup chocolate chips (milk or white chocolate)
- 1 tablespoon vegetable oil (optional, for thinning chocolate)
- Sprinkles (optional, for decoration)
Instructions:
Start by gathering all your ingredients and preparing a baking sheet lined with parchment paper. This will help prevent the pops from sticking.
Next, carefully insert a lollipop stick into the bottom of each Peep. Make sure it goes in about halfway so it stays secure. Place the Peeps on the prepared baking sheet.
In a microwave-safe bowl, melt the chocolate chips. You can do this by microwaving them in 30-second intervals, stirring after each interval until they are smooth. If the chocolate is too thick, add 1 tablespoon of vegetable oil to thin it out a bit.
Once the chocolate is melted, dip each Peep into the chocolate. Make sure to coat them well. You can swirl them around to cover any spots that need more chocolate.
After dipping, let any excess chocolate drip off. You can add sprinkles on top while the chocolate is still wet for a festive look.
Place the finished pops back on the parchment paper and allow them to set. You can let them sit at room temperature, or pop them in the fridge for a few minutes to speed up the process.
Tips:
- Try using different types of chocolate, like dark or colored chocolate, to switch things up.
- For an extra treat, add crushed candies or nuts on top of the melted chocolate before it hardens.
- These pops can be stored in an airtight container for a week.
Nutrition Facts:
- Calories: 120 per pop
- Fat: 5g
- Carbohydrates: 17g
- Protein: 1g
- Sugars: 12g
4 Springtime Fruit Kabobs
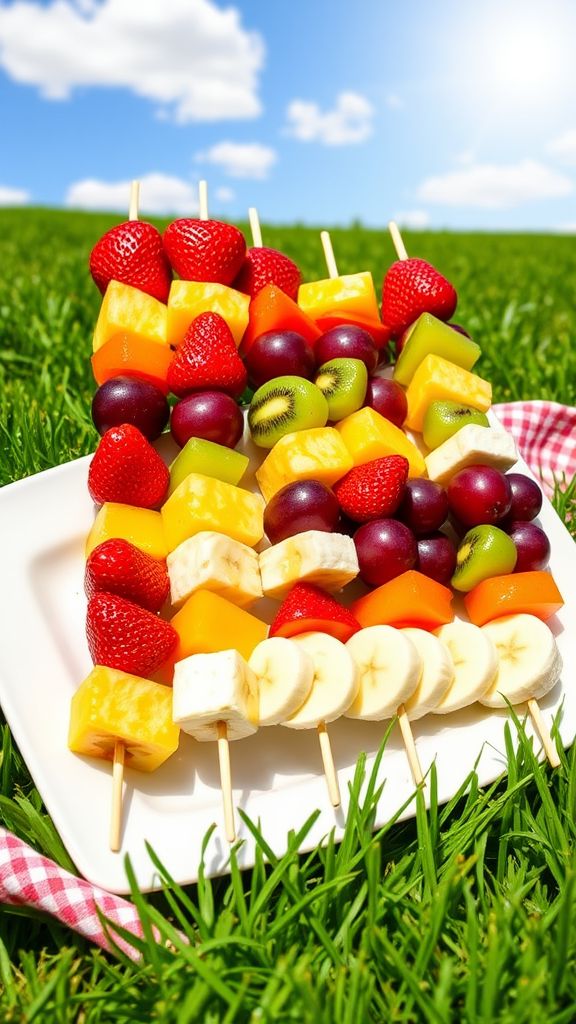
Springtime Fruit Kabobs are a colorful and fun treat that everyone will love! These fruity skewers are perfect for picnics, parties, or just a sunny day. They are easy to make and can be customized with your favorite fruits.
Prep Time: 15 minutes
Additional Time: 10 minutes
Total Time: 25 minutes
Servings: 4
Ingredients:
- 1 cup strawberries, hulled and halved
- 1 cup pineapple chunks
- 1 cup grapes, halved if large
- 1 cup kiwi, peeled and sliced
- 1 banana, sliced
- 1 tablespoon honey (optional)
- Wooden skewers (6-8 inches long)
Instructions:
Start by washing all the fruits thoroughly. Make sure to remove the stems from the strawberries and peel the kiwi. Cut the kiwi into slices and then into smaller pieces.
Next, take your wooden skewers and begin threading the fruit onto them. You can mix and match the fruits in any order you like. A fun pattern could be a strawberry, a piece of banana, a grape, a kiwi, and then a pineapple chunk.
Once all the fruit is on the skewers, you can drizzle some honey over them for extra sweetness if you want. This step is optional but adds a delicious flavor.
Now, place the finished kabobs on a serving platter. If you like, let them chill in the refrigerator for about 10 minutes before serving. This makes them cool and refreshing, especially on a warm day.
Tips:
- Use seasonal fruits for the best flavor and freshness.
- Change up the fruits based on what you have on hand or what you enjoy.
- To make it a fun activity, involve kids in assembling the kabobs!
Nutrition Facts:
- Calories: 150
- Total Fat: 0.5g
- Sodium: 1mg
- Total Carbohydrates: 38g
- Dietary Fiber: 4g
- Sugars: 25g
- Protein: 2g
5 Carrot Patch Brownies
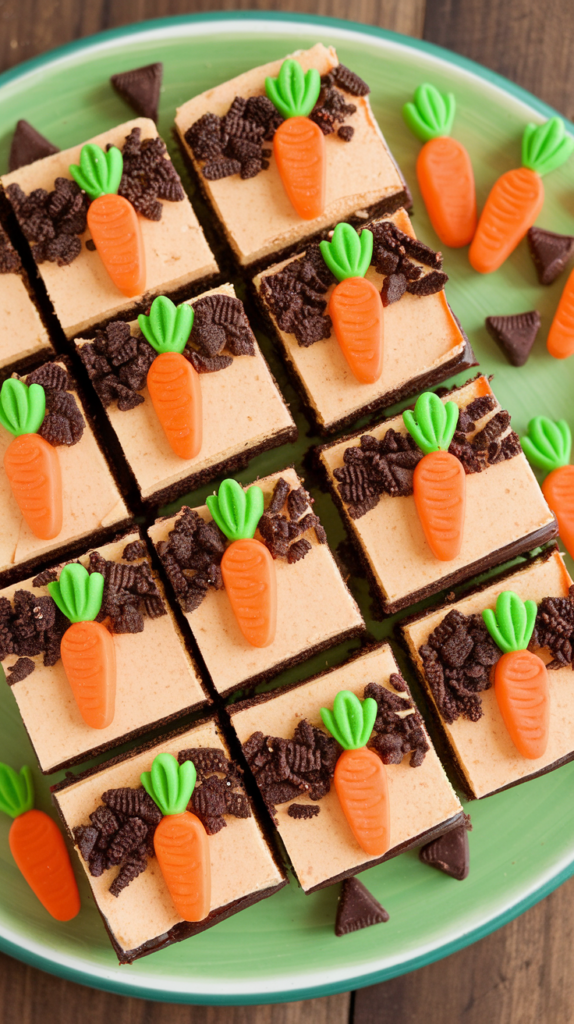
Carrot Patch Brownies are a delightful twist on traditional brownies, perfect for celebrating Easter. With chocolatey goodness paired with a touch of surprise, these brownies feature a creamy carrot filling and a fun decoration that resembles a garden. Let’s hop into this scrumptious treat that’s sure to impress family and friends!
Prep Time: 20 minutes
Cook Time: 30 minutes
Additional Time: 15 minutes
Total Time: 1 hour 5 minutes
Servings: 12
Ingredients:
- 1 cup unsalted butter, melted
- 2 cups granulated sugar
- 4 large eggs
- 1 teaspoon vanilla extract
- 1 cup all-purpose flour
- 1 cup unsweetened cocoa powder
- 1/2 teaspoon salt
- 1 teaspoon baking powder
- 1 cup shredded carrots
- 1/2 cup cream cheese, softened
- 1/4 cup powdered sugar
- 1/2 teaspoon vanilla extract (for the cream cheese filling)
- Gummy carrot candies (for decoration)
- Chocolate crumbs or Oreo crumbs (for a dirt effect)
Instructions:
Preheat your oven to 350°F (175°C). Grease a 9×13 inch baking pan or line it with parchment paper for easy removal. This step is important to prevent sticking!
In a mixing bowl, combine the melted butter and granulated sugar. Stir until well combined. Then, add the eggs one at a time, mixing well after each addition. Finally, mix in the vanilla extract.
In a separate bowl, whisk together the flour, cocoa powder, salt, and baking powder. Gradually add the dry ingredients to the wet mixture, stirring until just combined. Be careful not to overmix!
Fold in the shredded carrots gently. This adds a nice texture and sweetness to the brownies. Pour the brownie batter into the prepared pan and spread it evenly.
In another bowl, mix the cream cheese, powdered sugar, and 1/2 teaspoon of vanilla extract until smooth. Dollop spoonfuls of the cream cheese mixture over the brownie batter. Use a knife to swirl it gently for a marbled effect.
Bake in the preheated oven for 30 minutes or until a toothpick inserted in the center comes out clean. Once done, allow the brownies to cool in the pan for about 15 minutes before removing and letting them cool completely on a wire rack.
Once cooled, crumble some Oreo crumbs or chocolate crumbs on top to create the “dirt” for your carrot patch. Then, place the gummy carrot candies on top for a fun decoration. Cut into squares and serve!
Tips:
- Make sure your butter is melted and not hot when mixing; otherwise, it can cook the eggs!
- For added fun, sprinkle some green frosting around the gummy carrots to resemble grass.
- Store any leftovers in an airtight container in the fridge for up to four days.
Nutrition Facts:
- Calories: 250 per serving
- Total Fat: 12g
- Saturated Fat: 7g
- Cholesterol: 65mg
- Sodium: 120mg
- Total Carbohydrates: 35g
- Dietary Fiber: 2g
- Sugars: 20g
- Protein: 3g
6 Egg-cellent Rice Krispie Treats
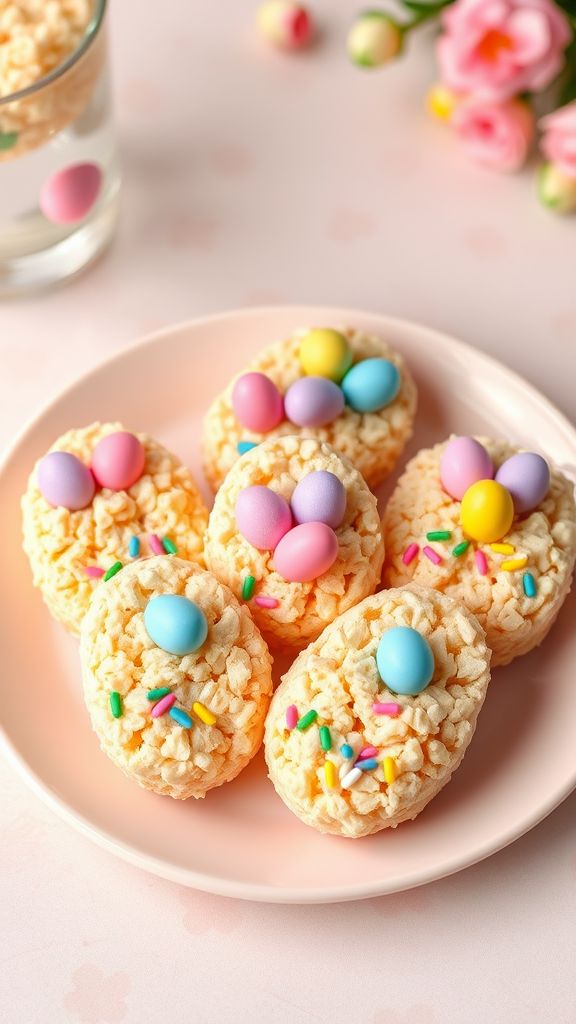
Get ready for a fun and crispy treat that’s perfect for Easter! These Egg-cellent Rice Krispie Treats are not only easy to make, but they will also delight everyone with their colorful, egg-shaped form. Let’s hop into this delightful recipe!
Prep Time: 15 minutes
Additional Time: 30 minutes
Total Time: 45 minutes
Servings: 12
Ingredients:
- 3 tablespoons unsalted butter
- 1 package (10 oz) marshmallows
- 6 cups Rice Krispies cereal
- 1 teaspoon vanilla extract
- 1 cup pastel chocolate eggs (mini)
- 1 cup colored sprinkles (optional)
Instructions:
Start by melting the butter in a large saucepan over low heat. Once the butter is melted, add the marshmallows, stirring constantly until they are completely melted and smooth. This should take about 5 minutes.
Next, remove the saucepan from the heat and stir in the vanilla extract. Then, gradually add in the Rice Krispies cereal, mixing well until all the cereal is coated evenly with the marshmallow mixture.
Allow the mixture to cool for a minute, then fold in the pastel chocolate eggs for a festive touch. If you want to make these treats even brighter, you can add some colored sprinkles to the mix.
Now, using a greased spatula or your hands (lightly greased), press the mixture into a greased 9×13 inch baking dish. Make sure it’s packed tightly so the treats won’t fall apart.
Let the treats sit at room temperature for about 30 minutes or until they are cool and firm. Once set, cut them into squares or use a cookie cutter to create egg shapes for that extra Easter fun!
Tips:
- For a fun twist, try adding different types of candy or even dried fruit into the mixture.
- To keep your hands from sticking while shaping the treats, lightly grease them with butter or cooking spray.
- Store the Egg-cellent Rice Krispie Treats in an airtight container to keep them fresh for up to a week.
Nutrition Facts:
- Calories: 150
- Total Fat: 5g
- Saturated Fat: 3g
- Cholesterol: 10mg
- Sodium: 100mg
- Total Carbohydrates: 24g
- Dietary Fiber: 0g
- Sugars: 12g
- Protein: 1g
7 Fluffy Bunny Pancakes

Fluffy Bunny Pancakes are a fun and tasty breakfast treat, perfect for celebrating Easter! These adorable pancakes are light, airy, and can be customized to your liking with fun toppings. Let’s hop into the kitchen and make some fluffy bunny magic!
Prep Time: 10 minutes
Cook Time: 15 minutes
Total Time: 25 minutes
Servings: 4
Ingredients:
- 1 cup all-purpose flour
- 2 tablespoons sugar
- 2 teaspoons baking powder
- 1/2 teaspoon salt
- 1 cup milk
- 1 large egg
- 2 tablespoons melted butter
- 1 teaspoon vanilla extract
- Cooking spray or additional butter for the pan
- Optional toppings: whipped cream, fruit, chocolate chips, or bunny-shaped sprinkles
Instructions:
In a large mixing bowl, combine the flour, sugar, baking powder, and salt. Make sure it’s mixed well. This will help your pancakes rise and be fluffy!
In another bowl, whisk together the milk, egg, melted butter, and vanilla extract until it’s smooth. Then, pour this mixture into the dry ingredients. Stir gently until just combined. Be careful not to overmix; it’s okay if there are a few lumps.
Heat a non-stick skillet over medium heat and lightly coat it with cooking spray or butter. Pour about 1/4 cup of batter onto the skillet for each pancake. Cook for about 2-3 minutes or until you see bubbles forming on the surface. Flip the pancakes and cook for another 1-2 minutes until golden brown.
Once done, stack the pancakes on a plate. Get creative with toppings! Use whipped cream for bunny tails, slice fruit into bunny ears, or sprinkle some chocolate chips for added sweetness.
Tips:
- For extra fluffy pancakes, let the batter rest for about 5 minutes before cooking.
- If you want to add a hint of flavor, mix in some cinnamon or vanilla extract into the batter.
- To keep pancakes warm while cooking more, place the finished pancakes in a low oven, around 200°F (93°C).
Nutrition Facts:
- Calories: 250 per serving
- Total Fat: 9g
- Saturated Fat: 4g
- Cholesterol: 50mg
- Sodium: 300mg
- Total Carbohydrates: 38g
- Dietary Fiber: 1g
- Sugars: 5g
- Protein: 6g
8 Colorful Easter Jell-O Cups
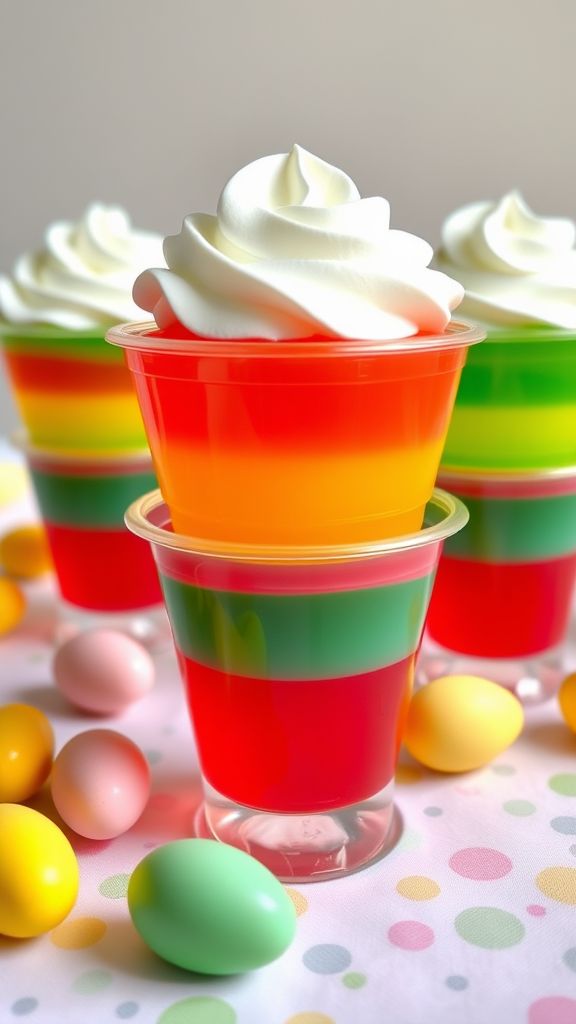
These Colorful Easter Jell-O Cups are a fun and festive treat for your Easter celebrations! Bright and vibrant, they are perfect for kids and adults alike. Easy to make, these Jell-O cups will add a splash of color to your holiday table.
Prep Time: 20 minutes
Additional Time: 4 hours (to chill)
Total Time: 4 hours 20 minutes
Servings: 12 Jell-O cups
Ingredients:
- 3 packages of Jell-O (different colors)
- 4 cups of boiling water
- 4 cups of cold water
- 1 can of whipped cream (for topping)
- Plastic cups or small dessert dishes (12 total)
Instructions:
Start by boiling 4 cups of water in a pot. Once boiling, take it off the heat and add the first package of Jell-O. Stir until it’s completely dissolved. This usually takes about 2 minutes.
Next, add 1 cup of cold water to the dissolved Jell-O. Then, carefully pour the mixture into your plastic cups, filling them about one-third full. Place these in the refrigerator for about 1 hour to set.
While the first layer is chilling, repeat this process for the second package of Jell-O. Use boiling water to dissolve it, then mix in 1 cup of cold water. After the first layer has set for an hour, carefully add the second layer on top of the first. Return the cups to the fridge for another hour.
After the second layer is set, make the third layer with the final package of Jell-O using the same method. Once the third layer is ready and chilled, go ahead and add a dollop of whipped cream on top of each cup for a creamy finish.
Lastly, let your Jell-O cups chill in the refrigerator for an additional 2 hours before serving.
Tips:
- For added flair, you can layer different flavors of Jell-O in the cups.
- Consider using clear plastic cups to highlight the colorful layers.
- You can use fruity garnishes like sliced strawberries or mini candy eggs for extra decoration.
Nutrition Facts:
- Calories: 100 per cup
- Fat: 0g
- Sodium: 35mg
- Carbohydrates: 25g
- Sugars: 20g
- Protein: 1g
9 Silly Chick Cookie Sandwiches
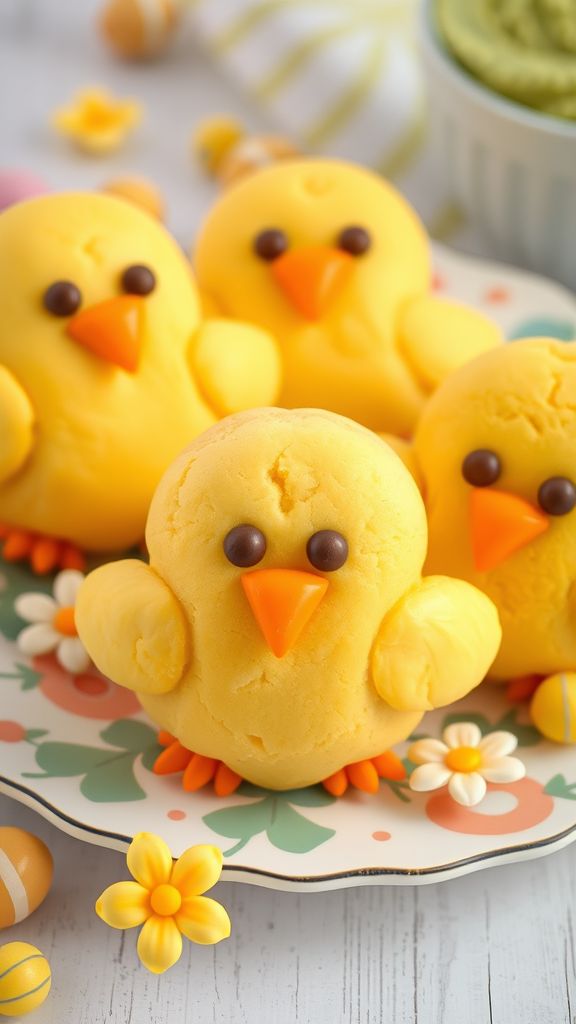
Silly Chick Cookie Sandwiches are a fun and delicious treat that everyone will love, especially during Easter! These cute cookie sandwiches look like little chicks and are perfect for a festive celebration. They’re easy to make and even more fun to eat!
Prep Time: 30 minutes
Additional Time: 1 hour
Total Time: 1 hour 30 minutes
Servings: 12 cookie sandwiches
Ingredients:
- 1 cup unsalted butter, softened
- 1 cup granulated sugar
- 1 cup powdered sugar
- 1 large egg
- 1 tsp vanilla extract
- 2 ½ cups all-purpose flour
- ½ tsp baking powder
- ½ tsp salt
- Yellow frosting (store-bought or homemade)
- Candy corn (for beaks)
- Chocolate chips (for eyes)
Instructions:
First, start by preheating your oven to 350°F (175°C). In a large bowl, cream together the softened butter, granulated sugar, and powdered sugar until it’s light and fluffy. This will take about 3-4 minutes.
Next, add the egg and vanilla extract to the mix and blend well. In another bowl, whisk together the flour, baking powder, and salt. Gradually incorporate this dry mixture into the wet mixture. Mix until just combined.
Now, use a tablespoon to scoop dough onto a baking sheet lined with parchment paper. Make sure to leave some space between each scoop, as the cookies will spread a little. Bake the cookies in the preheated oven for about 10-12 minutes or until they are lightly golden at the edges.
After baking, let the cookies cool on the baking sheet for about 5 minutes then transfer them to a wire rack to cool completely. Once cooled, it’s time to assemble the cookie sandwiches!
Spread a generous layer of yellow frosting on the flat side of one cookie and top it with another cookie. Gently press them together. For the final touch, place two chocolate chips on top of the frosting for the eyes and a piece of candy corn for the beak.
Let the sandwiches sit for at least 1 hour to allow the frosting to set before serving.
Tips:
- Use different colors of frosting if you want to make various animal shapes.
- Add sprinkles on the frosting for extra fun!
- Store any leftovers in an airtight container to keep them fresh.
Nutrition Facts:
- Calories: 210 per sandwich
- Total Fat: 10g
- Saturated Fat: 6g
- Cholesterol: 30mg
- Sodium: 80mg
- Total Carbohydrates: 30g
- Dietary Fiber: 0g
- Sugars: 15g
- Protein: 2g
10 Little Lamb Meringues
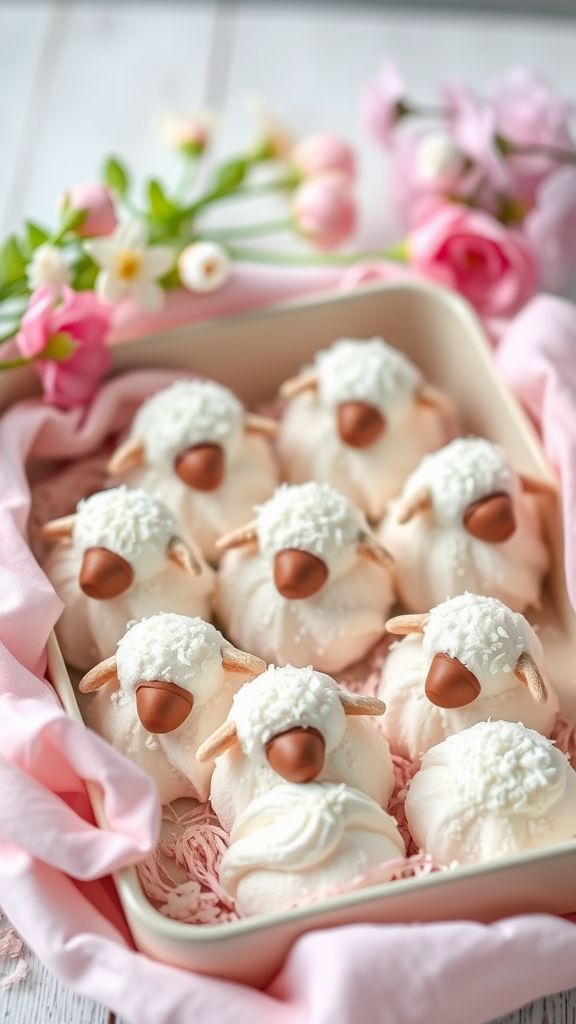
These adorable Little Lamb Meringues are perfect for adding a sweet and playful touch to your Easter celebrations. Light, fluffy, and simply delightful, they are sure to bring smiles to both children and adults alike. With just a few ingredients, you can create these charming little treats that look as good as they taste!
Prep Time: 15 minutes
Total Time: 1 hour
Servings: 12 meringues
Ingredients:
- 2 large egg whites
- 1/4 teaspoon cream of tartar
- 1/2 cup granulated sugar
- 1/2 teaspoon vanilla extract
- 2 tablespoons mini chocolate chips (for eyes)
- 1 standard size chocolate chip (for the nose)
- 2 tablespoons shredded coconut (for fluff)
Instructions:
Start by preheating your oven to 200°F (95°C). Line a baking sheet with parchment paper. This will help the meringues not to stick.
In a clean bowl, add the egg whites and cream of tartar. Use a hand mixer or stand mixer to beat them until they form stiff peaks. This means that when you lift the mixer, the egg whites hold their shape firmly.
Gradually add in the granulated sugar, one tablespoon at a time, while continuing to beat the mixture. You want the sugar to dissolve completely. When finished, mix in the vanilla extract gently.
Next, using a spoon or piping bag, scoop or pipe the meringue onto the baking sheet, forming small dollops. Aim for shapes that resemble little lambs or rounded clouds.
Sprinkle the shredded coconut on top of each meringue as the fluffy wool. Then, place mini chocolate chips for the eyes and a standard size chocolate chip for the nose.
Put the baking sheet in the oven to bake for about 45-60 minutes. The meringues should be crisp on the outside and slightly soft inside. Once done, turn off the oven and let them sit inside for an extra 30 minutes to cool completely.
Once cooled, gently remove the meringues from the parchment paper and serve. Enjoy your delightful Little Lamb Meringues!
Tips:
- Make sure your mixing bowl is completely clean and dry. Any grease or moisture can affect the meringue.
- If you like, you can color the meringue with food coloring before piping to make them even more festive.
- Store any leftovers in an airtight container to keep them crisp.
Nutrition Facts:
- Calories: 25 per meringue
- Protein: 0.5g
- Fat: 0.1g
- Carbohydrates: 6g
- Sugar: 5g
- Sodium: 5mg
11 Easter Egg Surprise Cake
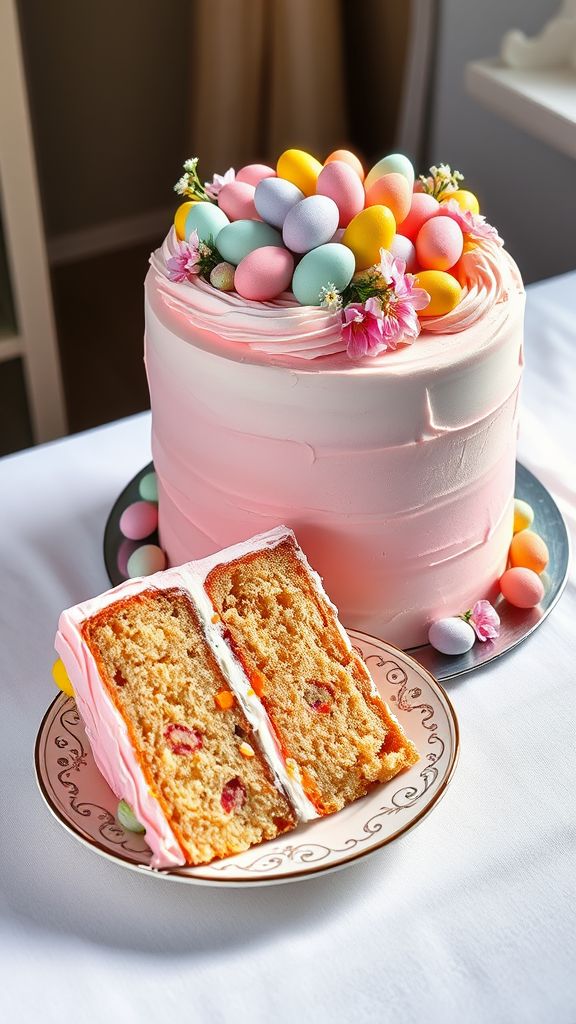
Easter Egg Surprise Cake is a fun and delightful dessert that will make your Easter celebrations even sweeter. This cake not only looks beautiful but also hides colorful candy eggs inside. It’s the perfect treat to surprise your family and friends!
Prep Time: 30 minutes
Cook Time: 25 minutes
Additional Time: 1 hour
Total Time: 1 hour 55 minutes
Servings: 10
Ingredients:
- 2 cups all-purpose flour
- 1 ½ cups granulated sugar
- ½ cup unsalted butter (softened)
- 1 cup milk
- 3 ½ teaspoons baking powder
- 1 teaspoon vanilla extract
- ½ teaspoon salt
- 3 large eggs
- 1 cup assorted chocolate or candy eggs (mini)
- Frosting of choice (for decoration)
Instructions:
Start by preheating your oven to 350°F (175°C). Grease and flour two round cake pans. This will help the cakes come out easily when they are baked.
In a large mixing bowl, cream together the softened butter and granulated sugar until it’s light and fluffy. This should take about 3–4 minutes. Then, add the eggs one at a time, mixing well after each addition.
Next, mix in the vanilla extract and milk. You’ll want to combine these dry and wet ingredients gradually. In a separate bowl, whisk together the flour, baking powder, and salt. Slowly add these dry ingredients to the wet mixture and stir until everything is just combined.
Now, pour half of the batter into each prepared cake pan. Carefully place min candy eggs into the center of each layer, pushing them down a little so they sink into the batter. Make sure to spread them evenly.
Bake for 25 minutes or until a toothpick inserted in the center comes out clean. Once baked, allow the cakes to cool in the pans for about 10 minutes before transferring them to a wire rack. Let them cool completely before frosting.
Finally, once the cakes are cool, you can frost the top of one layer, stack the other layer on top, and then frost the sides and the top of the cake. Decorate with additional candy eggs for a festive touch!
Tips:
- You can use different types of candy eggs, like jelly beans or even chocolate-covered candies, for a fun twist.
- If you’re short on time, consider using store-bought frosting to speed up the process.
- For an even more colorful effect, add food coloring to the frosting.
Nutrition Facts:
- Calories: 350 per slice
- Total Fat: 14g
- Saturated Fat: 8g
- Cholesterol: 80mg
- Sodium: 220mg
- Total Carbohydrates: 54g
- Dietary Fiber: 1g
- Sugars: 28g
- Protein: 5g
12 Bunny Face Fruit Pizzas
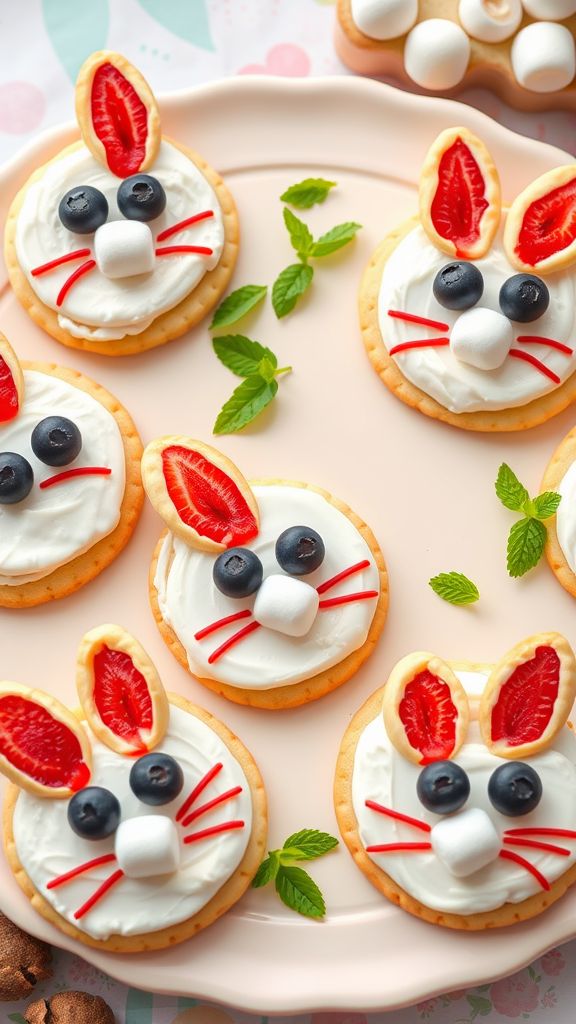
Bunny Face Fruit Pizzas are a fun and creative way to celebrate Easter! With a delightful cookie base topped with colorful fruits, these pizzas are not only tasty but also adorable. Your kids will love helping to make these sweet treats for the holiday!
Prep Time: 15 minutes
Total Time: 15 minutes
Servings: 8
Ingredients:
- 1 large pre-made sugar cookie dough tube
- 1 cup of cream cheese, softened
- 2 tablespoons of powdered sugar
- 1 teaspoon of vanilla extract
- 1 cup of strawberries, sliced
- 1 banana, sliced
- 1 cup of blueberries
- 4 chocolate chips (for eyes)
- 2 mini marshmallows (for nose)
- Mint leaves (for decoration)
Instructions:
Start by preheating your oven according to the sugar cookie dough package instructions. Roll out the cookie dough on a clean surface until it’s about ¼ inch thick. Then, cut out round shapes using a cookie cutter or a glass.
Place the cookie rounds on a baking sheet lined with parchment paper. Bake them in the oven until they are lightly golden. This usually takes around 10-12 minutes. Once done, allow the cookies to cool completely.
While the cookies cool, prepare the creamy spread. In a medium bowl, mix the softened cream cheese, powdered sugar, and vanilla extract until it’s smooth and creamy.
Once the cookies are cool, spread a generous layer of the cream cheese mixture on top of each cookie. Now, it’s time to make the bunny faces! Use the sliced strawberries for the ears, the banana and blueberries for the eyes, and place the chocolate chips and mini marshmallows to complete the face.
Finally, add some fresh mint leaves for a pop of color. Arrange the fruit pizzas on a platter, and they’re ready to serve!
Tips:
- Use any fruits you like! Try adding kiwi or raspberries for variety.
- Get creative with the cookie base! If you want a healthier option, you can use an oatmeal cookie dough instead.
- Allow kids to create their own bunny faces with different fruit combinations for a fun activity.
Nutrition Facts:
- Calories: 150
- Total Fat: 6g
- Saturated Fat: 3g
- Cholesterol: 15mg
- Sodium: 50mg
- Total Carbohydrates: 22g
- Dietary Fiber: 1g
- Sugars: 8g
- Protein: 2g
13 Chewy Chocolate Carrot Cookies

These Chewy Chocolate Carrot Cookies are a delightful treat that combines the sweetness of carrots and the rich flavor of chocolate. They are super soft and perfect for any occasion, especially Easter! Your family will love how these cookies taste and they won’t even know there’s a healthy twist.
Prep Time: 15 minutes
Total Time: 30 minutes
Servings: 12 cookies
Ingredients:
- 1 cup shredded carrots
- 1/2 cup brown sugar
- 1/4 cup granulated sugar
- 1/2 cup unsalted butter, softened
- 1 large egg
- 1 teaspoon vanilla extract
- 1 cup all-purpose flour
- 1/2 teaspoon baking soda
- 1/2 teaspoon salt
- 1 teaspoon ground cinnamon
- 1/2 cup chocolate chips
Instructions:
Start by preheating your oven to 350°F (175°C). This will make sure your cookies bake evenly. Next, grab a mixing bowl and combine the softened butter, brown sugar, and granulated sugar. Mix them together until they are light and fluffy.
Then, add the egg and vanilla extract to the butter and sugar mixture. Stir well until everything is well combined. In another bowl, mix the flour, baking soda, salt, and cinnamon together.
Slowly add the dry ingredients to the wet ingredients. Stir gently until there are no more dry spots. Now, fold in the shredded carrots and chocolate chips. Be careful not to over mix; you just want everything to be evenly combined.
Using a tablespoon, drop spoonfuls of the cookie dough onto a baking sheet lined with parchment paper. Make sure to leave some space between the cookies because they will spread a little while baking.
Bake in your preheated oven for about 12-15 minutes, or until the edges are a lovely golden brown. Once done, let the cookies cool on the baking sheet for a few minutes before transferring them to a wire rack to cool completely.
Tips:
- For extra flavor, consider adding 1/4 cup of chopped nuts such as walnuts or pecans.
- To make these cookies even more chocolatey, swap some regular chocolate chips for dark chocolate chips.
- Store any leftover cookies in an airtight container for up to a week to keep them fresh.
Nutrition Facts:
- Calories: 130 per cookie
- Total Fat: 7g
- Saturated Fat: 4g
- Cholesterol: 20mg
- Sodium: 100mg
- Total Carbohydrates: 18g
- Dietary Fiber: 1g
- Sugars: 8g
- Protein: 1g
14 Pastel Pretzel Treats
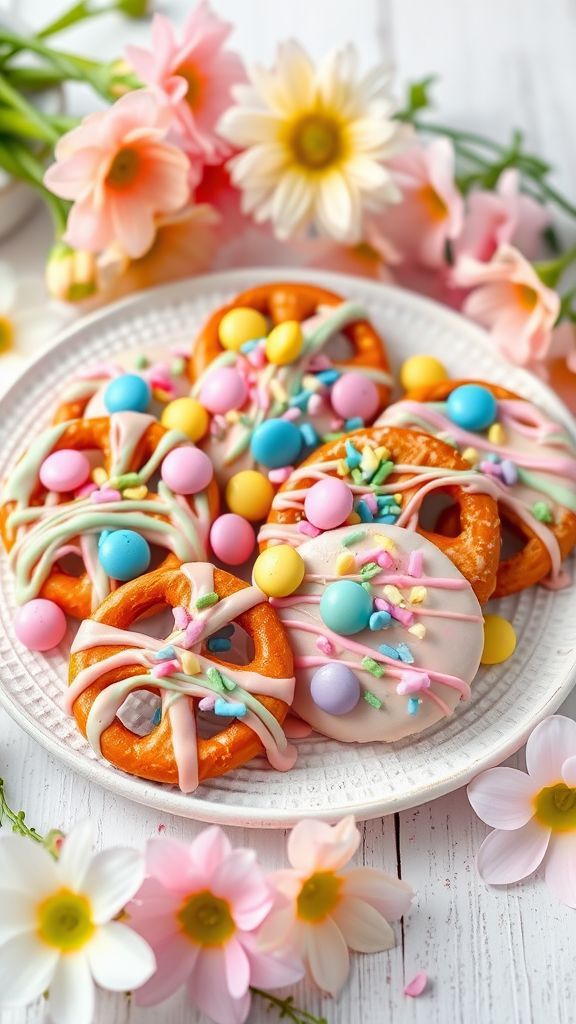
These Pastel Pretzel Treats are a fun and colorful snack that’s perfect for Easter! They combine the salty crunch of pretzels with sweet, creamy chocolate and vibrant pastel candies. Easy to make, these treats will bring joy to any spring celebration.
Prep Time: 15 minutes
Total Time: 15 minutes
Servings: 12
Ingredients:
- 2 cups pretzel snaps (small pretzel squares)
- 1 cup chocolate melting wafers (pastel colors preferred)
- 1/2 cup pastel M&M’s or chocolate eggs
- 1/4 cup sprinkles (optional)
Instructions:
Start by preheating your oven to 200°F (93°C). Line a baking sheet with parchment paper. This will keep your treats from sticking.
Arrange the pretzel snaps in a single layer on the prepared baking sheet. Make sure they are not crowded, so every pretzel gets covered nicely with chocolate.
Now, melt the chocolate melting wafers according to the package instructions. You can do this in a microwave-safe bowl by heating in 30-second intervals and stirring in between until smooth.
Once your chocolate is melted, drizzle a small amount over each pretzel snap. You can use a spoon or a squeeze bottle for precision. Don’t worry about perfection; a little mess adds to the charm!
While the chocolate is still warm, place a pastel M&M or chocolate egg on top of each pretzel. If you want to add a little extra flair, sprinkle some colorful sprinkles on top before the chocolate sets.
Let the treats cool until the chocolate hardens. You can speed this up by placing the tray in the refrigerator for about 10 minutes.
Tips:
- If you want to add a bit of flavor, try using flavored melting chocolate like vanilla or strawberry!
- For a fun twist, use different shaped pretzels like pretzel sticks or twists.
- Store these treats in an airtight container at room temperature for up to a week.
Nutrition Facts:
- Calories: 120
- Total Fat: 5g
- Saturated Fat: 3g
- Cholesterol: 0mg
- Sodium: 150mg
- Total Carbohydrates: 17g
- Dietary Fiber: 0g
- Sugars: 10g
- Protein: 1g
15 Cottontail Cheesecake Cups
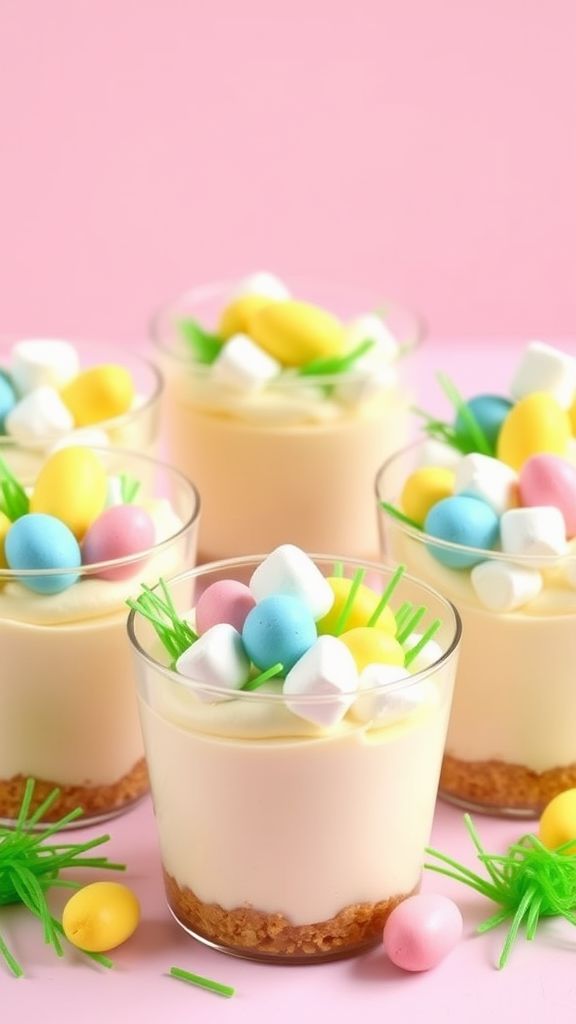
These Cottontail Cheesecake Cups are a delightful and fun treat perfect for Easter celebrations! With a creamy cheesecake filling and a cute bunny theme, these dessert cups will surely impress your family and friends. Plus, they are easy to make and can be prepared ahead of time!
Prep Time: 20 minutes
Additional Time: 2 hours
Total Time: 2 hours 20 minutes
Servings: 6
Ingredients:
- 1 package of cream cheese (8 oz), softened
- 1/2 cup of sugar
- 1/2 teaspoon of vanilla extract
- 1 cup of whipped cream
- 1 package of graham cracker crumbs (about 1 1/2 cups)
- 1/2 cup of butter (melted)
- 1 cup of mini marshmallows
- 1 cup of chocolate eggs (for decoration)
- Green candy grass (for garnish)
Instructions:
In a large mixing bowl, combine the cream cheese, sugar, and vanilla extract. Using an electric mixer, beat the mixture until it is smooth and creamy. This will be the base of your cheesecake filling.
Next, gently fold in the whipped cream until the mixture is light and fluffy. Be careful not to deflate the whipped cream; you want the filling to stay airy.
In a separate bowl, mix the graham cracker crumbs with the melted butter. Stir until the crumbs are evenly coated with butter. This will create a delicious crust for your cheesecake cups.
Now, take serving cups or dessert glasses and spoon a layer of the graham cracker mixture at the bottom of each cup. Press it down slightly with your fingers to create a firm base.
Add a generous layer of the cheesecake filling on top of the graham cracker crust. Fill the cups until they are almost full. Top each cheesecake cup with mini marshmallows for an extra sweet touch.
Finally, decorate the cups with chocolate eggs and a handful of green candy grass to make them look like little bunny gardens. Place the cheesecake cups in the refrigerator and let them chill for at least two hours before serving.
Tips:
- For an extra flavor boost, add a few drops of lemon juice to the cheesecake mixture.
- Use different types of candies for decoration to give your cheesecake cups a unique look.
- Make sure the cream cheese is softened to room temperature for easy mixing.
Nutrition Facts:
- Calories: 320 per serving
- Fat: 18g
- Carbohydrates: 36g
- Sugar: 24g
- Protein: 4g
16 Jelly Bean Trail Mix
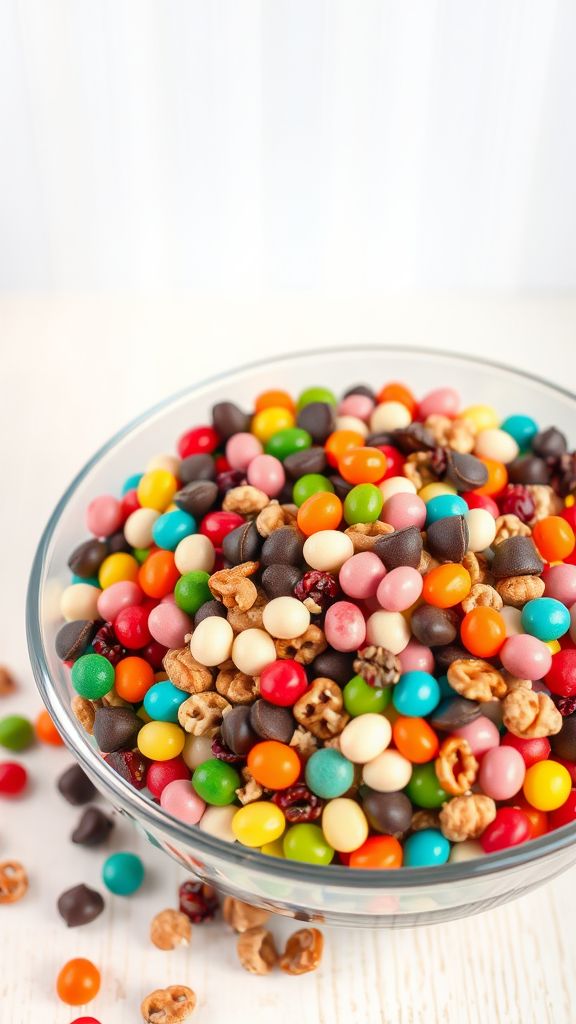
Jelly Bean Trail Mix is a colorful and fun snack that’s perfect for Easter or anytime you want a sweet treat! It’s easy to make and great for sharing with friends and family. This mix combines chewy jelly beans with crunchy nuts and tasty chocolate for a delightful combination that everyone will love!
Prep Time: 10 minutes
Total Time: 10 minutes
Servings: 8
Ingredients:
- 2 cups jelly beans (your favorite flavors)
- 1 cup mixed nuts (like almonds, cashews, and peanuts)
- 1 cup chocolate chips (milk or dark chocolate)
- 1 cup pretzel bites (small ones, for crunch)
- ½ cup dried fruit (like raisins or cranberries)
Instructions:
First, gather all your ingredients. Make sure they are measured out and ready to go.
In a large mixing bowl, combine the jelly beans, mixed nuts, chocolate chips, pretzel bites, and dried fruit.
Stir everything together gently so that the ingredients are evenly mixed. You want the colors and textures to combine nicely.
Once mixed, you can serve the trail mix right away or store it for later. To store, place it in an airtight container and keep it in a cool, dry place.
Enjoy this tasty Jelly Bean Trail Mix as a snack on its own or as part of an Easter celebration!
Tips:
- Feel free to swap out any ingredients to suit your taste. You can use different nuts or add in mini marshmallows!
- This trail mix is a great gift idea! Pack it in a jar or a bag for friends and family.
- Keep an eye on the portions, as jelly beans and chocolate can be high in sugar.
Nutrition Facts:
- Calories: 220 per serving
- Total Fat: 10g
- Saturated Fat: 3g
- Sodium: 50mg
- Total Carbohydrates: 34g
- Sugars: 18g
- Protein: 4g
17 Whimsical Flower Cupcake Cones
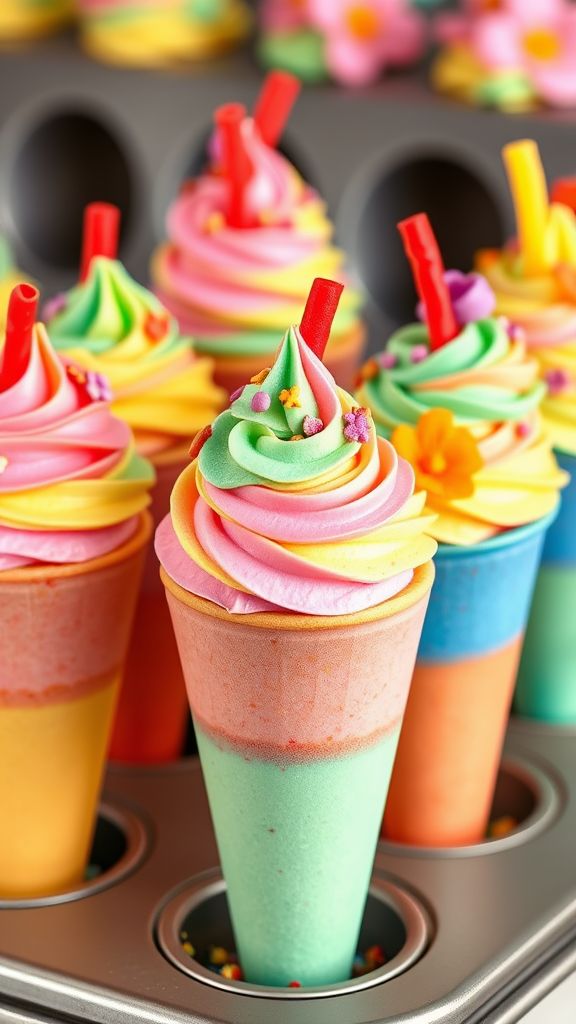
These Whimsical Flower Cupcake Cones are the perfect treat for spring celebrations or Easter gatherings. They are colorful, fun, and easy to make, providing a delightful twist on traditional cupcakes. Not only do they look amazing, but they also taste delicious!
Prep Time: 20 minutes
Total Time: 20 minutes
Servings: 12
Ingredients:
- 12 sugar cones
- 1 box cake mix (any flavor you like)
- Ingredients needed for cake mix (usually water, eggs, and oil)
- 1 batch buttercream frosting (store-bought or homemade)
- Food coloring (assorted colors)
- Edible flowers or candy flower decorations
- Sprinkles (optional)
- Green licorice or candy for stems (optional)
Instructions:
Start by preparing the cake mix according to the box instructions. Mix in the water, eggs, and oil until smooth.
Next, line a muffin tin with cupcake liners, but instead of pouring the batter into liners, carefully fill each sugar cone about halfway with the cake batter. Stand the cones in the muffin tin for support.
Bake the cones in a preheated oven according to the cake mix instructions, usually around 18-20 minutes. Keep an eye on them, as they may cook a bit quicker due to their shape. Once done, let them cool completely on a wire rack.
While the cones cool, prepare your buttercream frosting. Divide the frosting into several bowls and use food coloring to tint each portion in bright, spring-like colors.
Once the cones are cool, it’s time to decorate. Take a piping bag or a zip-top bag with the corner cut off, and swirl the colored frosting on top of each cupcake cone. You can alternate colors for a rainbow effect!
Now, add the finishing touches! Stick small edible flowers or candy decorations into the frosting, making it look like a colorful garden. If desired, place green licorice or candy on the sides to resemble stems.
Tips:
- Experiment with different frosting designs by using various piping tips for unique looks.
- Add sprinkles or edible glitter for extra sparkle and charm!
- Keep the finished cones in the refrigerator if you’re making them in advance.
Nutrition Facts:
- Calories: 220 per cone
- Total Fat: 9g
- Saturated Fat: 3g
- Cholesterol: 30mg
- Sodium: 150mg
- Total Carbohydrates: 34g
- Dietary Fiber: 1g
- Sugars: 20g
- Protein: 2g
18 Chocolate Dipped Peeps

Chocolate Dipped Peeps are a fun and easy treat that make a perfect addition to your Easter celebrations! They’re colorful, sweet, and coated in delicious chocolate. Kids will love to help with this simple recipe!
Prep Time: 15 minutes
Additional Time: 30 minutes
Total Time: 45 minutes
Servings: 12
Ingredients:
- 1 package of Peeps (any color you like)
- 8 ounces of chocolate chips (milk chocolate or dark chocolate)
- 1 teaspoon of vegetable oil or coconut oil (optional, for a smoother chocolate)
- Sprinkles (optional, for decoration)
Instructions:
Start by preparing your area with a baking sheet lined with wax paper or parchment paper. This is where you’ll place the chocolate dipped Peeps.
Next, place the chocolate chips in a microwave-safe bowl. If you’re using oil, add it to the chocolate. Microwave the chocolate in 30-second intervals, stirring in between, until the chocolate is completely melted and smooth.
Once the chocolate is ready, take a Peep and gently dip it into the chocolate. Use a fork to lift the Peep out, allowing the excess chocolate to drip off. Carefully place the dipped Peep onto the prepared baking sheet.
Repeat this process for all the Peeps. If you want to add sprinkles, sprinkle them on the chocolate before it hardens. Set the baking sheet in the refrigerator for about 30 minutes, allowing the chocolate to fully set.
After the chocolate has hardened, your Chocolate Dipped Peeps are ready to enjoy! Serve them on a platter or store them in an airtight container.
Tips:
- You can use white chocolate or colored chocolate melts for a fun twist!
- If you want to get creative, try adding different toppings like crushed nuts or coconut flakes.
- Keep the melted chocolate warm while working by placing the bowl in a larger bowl of hot water.
Nutrition Facts:
- Calories per Peep: 50
- Total Fat: 2.5g
- Saturated Fat: 1.5g
- Cholesterol: 0mg
- Sodium: 15mg
- Total Carbohydrates: 9g
- Dietary Fiber: 0g
- Sugars: 8g
- Protein: 1g
19 Rainbow Bunny Bark
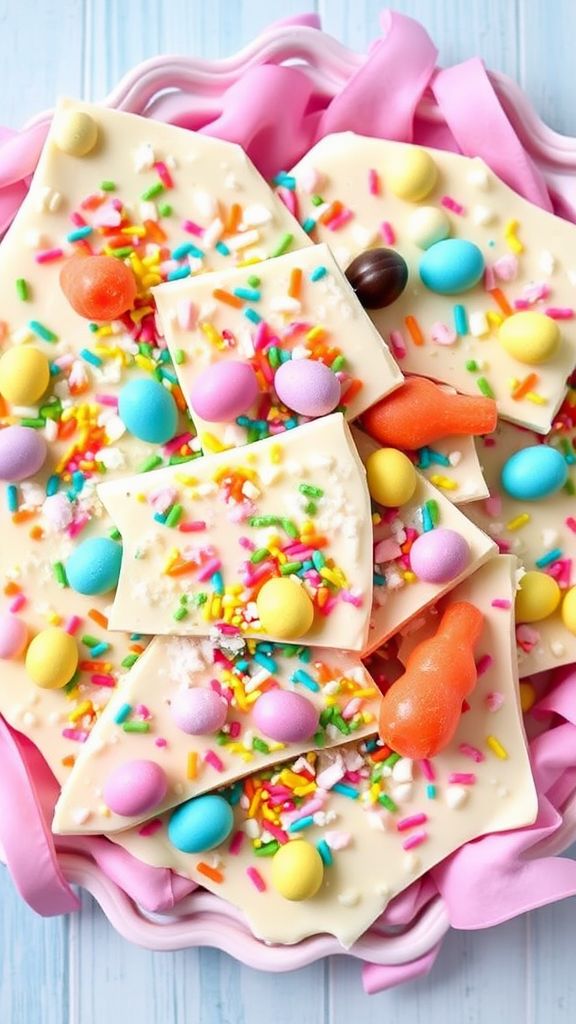
This Rainbow Bunny Bark is a fun and colorful treat perfect for celebrating Easter! The bright colors and delightful candies make it exciting and tasty. It’s easy to make and great for sharing with family and friends.
Prep Time: 15 minutes
Additional Time: 30 minutes
Total Time: 45 minutes
Servings: 12
Ingredients:
- 12 oz white chocolate chips
- 1 cup rainbow sprinkles
- 1 cup mini chocolate eggs
- 1 cup gummy bunnies or other gummy candies
- A pinch of sea salt (optional)
Instructions:
Start by preparing a baking tray. Line a baking sheet with parchment paper so the bark won’t stick. Set it aside for later.
Next, melt the white chocolate chips. You can do this in a microwave-safe bowl. Heat the chocolate in 30-second intervals, stirring in between until it’s completely melted and smooth.
Once the chocolate is melted, pour it onto the prepared baking sheet. Spread it out evenly with a spatula to create an even layer.
While the chocolate is still warm, sprinkle the rainbow sprinkles generously over the top. Then, add the mini chocolate eggs and gummy bunnies. Press them down gently into the melted chocolate.
For a finishing touch, sprinkle a pinch of sea salt over the bark if you like a sweet and salty flavor.
Let the bark sit at room temperature for about 30 minutes or until it hardens completely. You may also place it in the fridge to speed up the process.
Once hardened, break the bark into pieces. Serve it on a plate or bag it up as gifts to share with others. Enjoy your colorful treat!
Tips:
- You can use any type of candy or sprinkles you like to customize your Rainbow Bunny Bark.
- If you have leftover chocolate, you can melt it again and use it for more layers of bark.
- Be careful not to overheat the chocolate; it can become lumpy if melted too long.
Nutrition Facts:
- Calories: 160 per serving
- Total Fat: 7g
- Saturated Fat: 4g
- Cholesterol: 0mg
- Sodium: 25mg
- Total Carbohydrates: 23g
- Dietary Fiber: 0g
- Sugars: 17g
- Protein: 1g
20 Egg-citing Mini Cheesecakes

These Egg-citing Mini Cheesecakes are the perfect sweet treat to celebrate Easter! With a creamy filling and a fun egg shape, they are sure to wow your friends and family. Plus, they are simple to make and even easier to eat!
Prep Time: 20 minutes
Additional Time: 2 hours
Total Time: 2 hours 20 minutes
Servings: 12 mini cheesecakes
Ingredients:
- 1 cup of graham cracker crumbs
- 1/4 cup of granulated sugar
- 1/2 cup of butter, melted
- 2 packages (8 oz each) of cream cheese, softened
- 1/2 cup of sour cream
- 3/4 cup of powdered sugar
- 2 large eggs
- 1 teaspoon of vanilla extract
- Food coloring (pink, blue, yellow, etc.)
- Mini chocolate eggs for topping
Instructions:
Start by preheating your oven to 325°F (160°C). Get your muffin tin ready by lining it with cupcake liners. This will help you easily remove the mini cheesecakes later.
In a medium bowl, mix the graham cracker crumbs, granulated sugar, and melted butter until everything is combined. Press this mixture firmly into the bottom of each cupcake liner in the muffin tin to form a crust.
Now, in a large bowl, beat the softened cream cheese with an electric mixer until it’s smooth. Add the sour cream, powdered sugar, eggs, and vanilla extract. Mix until everything is well combined and has no lumps.
Next, divide the cheesecake batter into separate bowls for coloring. Add a few drops of food coloring to each bowl and mix until you have your desired shades. This will give each mini cheesecake a fun color!
Pour the colored batter over the crusts in the muffin tin, filling each cup almost to the top. Bake in the preheated oven for about 20 minutes until the edges are set but the center is still slightly jiggly. Let them cool for a bit, then transfer to the refrigerator to chill for at least 2 hours.
Once they are chilled and ready to serve, carefully peel back the cupcake liners and place the mini cheesecakes on a serving platter. Top each one with a mini chocolate egg for that extra festive touch!
Tips:
- For a fun twist, mix some crushed cookies into the crust for added flavor.
- Make sure the cream cheese is softened for smoother batter.
- Try different colors for the batter to create a rainbow effect!
Nutrition Facts:
- Calories: 220 per mini cheesecake
- Total Fat: 15g
- Saturated Fat: 8g
- Cholesterol: 60mg
- Sodium: 150mg
- Total Carbohydrates: 18g
- Dietary Fiber: 1g
- Sugars: 10g
- Protein: 3g
21 Sweet Garden Vegetable Dip and Dippers
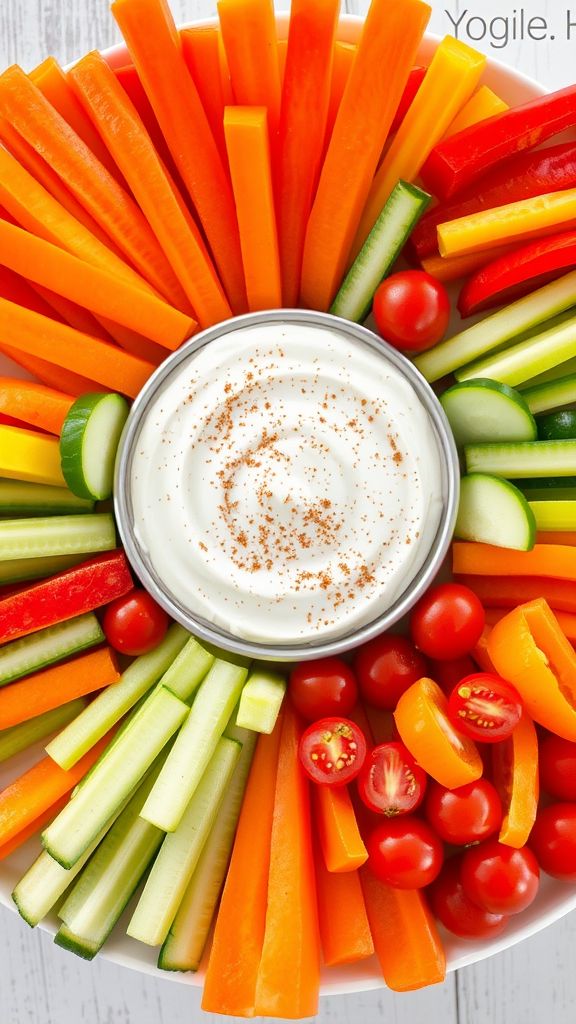
Looking for a tasty and fresh snack? This Sweet Garden Vegetable Dip and Dippers is perfect for gatherings or just a healthy treat at home. With colorful vegetables and a creamy, sweet dip, it’s both nutritious and delicious!
Prep Time: 15 minutes
Total Time: 15 minutes
Servings: 4-6
Ingredients:
- 1 cup plain Greek yogurt
- 1/4 cup honey
- 1 teaspoon vanilla extract
- 1/2 teaspoon ground cinnamon
- 1 cup carrots, cut into sticks
- 1 cup cucumber, cut into sticks
- 1 cup bell peppers (red, yellow, or green), cut into strips
- 1 cup cherry tomatoes
- 1 cup celery, cut into sticks
Instructions:
Start by preparing the dip. In a medium-sized bowl, combine 1 cup of plain Greek yogurt, 1/4 cup honey, 1 teaspoon vanilla extract, and 1/2 teaspoon ground cinnamon. Mix everything together until it’s smooth and well combined. This sweet dip is sure to please!
Next, wash and cut your vegetables. Make sure the carrots, cucumbers, bell peppers, cherry tomatoes, and celery are cut into easy-to-hold sticks or pieces. Arrange them neatly on a platter for a colorful presentation.
Now, it’s time to serve! Place the yogurt dip in the center of the vegetable platter. This makes it easy for everyone to dip their veggies when they want to snack.
Tips:
- For extra flavor, try adding chopped fresh herbs like parsley or dill to the dip.
- You can also use different vegetables like zucchini or radishes for variety.
- If you’re preparing this ahead of time, cover the dip and refrigerate it until you’re ready to serve.
Nutrition Facts:
- Calories: 120 per serving
- Total Fat: 2g
- Sodium: 30mg
- Carbohydrates: 22g
- Fiber: 2g
- Protein: 6g