22 Fun Easter Cookies to Make
Easter cookies are not just treats; they’re a way to bring family and friends together! Imagine the joy on kids’ faces as they decorate colorful cookies and create sweet memories. In this collection, you’ll discover 22 delightful recipes that make baking fun, easy, and perfect for the holiday. Get ready to whip up some tasty treats that everyone will love!
Shop Our Must-Haves


1 Bunny-Ear Sugar Cookies

Get ready to hop into spring with these adorable Bunny-Ear Sugar Cookies! They’re sweet, fun to make, and perfect for your Easter celebrations. Kids will love helping to decorate these fluffy cookies, making them a delightful activity for the whole family.
Prep Time: 20 minutes
Cook Time: 10 minutes
Additional Time: 30 minutes (for chilling dough)
Total Time: 1 hour
Servings: 24 cookies
Ingredients:
- 2 ¾ cups all-purpose flour
- 1 teaspoon baking powder
- ½ teaspoon salt
- 1 cup unsalted butter, softened
- 1 ½ cups granulated sugar
- 1 egg
- 1 teaspoon vanilla extract
- 1 teaspoon almond extract
- Pink and white icing for decoration
- Sprinkles (optional) for decoration
Instructions:
Start by preheating your oven to 350°F (175°C). In a bowl, whisk together flour, baking powder, and salt. Set this mixture aside for later.
In another large bowl, cream together the softened butter and sugar until fluffy. This usually takes about 2-3 minutes. Once mixed, add in the egg and both extracts (vanilla and almond). Beat until everything is well combined.
Now, gradually add the dry ingredients into the wet mixture. Stir until everything is just mixed. Don’t overdo it! Gather the dough into a ball, wrap it in plastic wrap, and chill it in the fridge for about 30 minutes. This makes the dough easier to handle.
After chilling, roll out the dough on a floured surface to about ¼ inch thick. Use a bunny-shaped cookie cutter to cut out the cookies. You can use a smaller cutter to make cute bunny ears, too!
Place the cookies on ungreased baking sheets, leaving space in between. Bake for 8-10 minutes until the edges are lightly golden. Take them out and let them cool on the sheets for a few minutes before transferring them to a wire rack.
Once they are completely cool, it’s time to decorate! Use the pink and white icing to make cute bunny faces and add sprinkles for extra fun!
Tips:
- To make the icing easier to spread, add a few drops of water.
- If you want even more flavor, try adding a dash of cinnamon to the dough.
- Store the cookies in an airtight container to keep them fresh for a longer time.
Nutrition Facts:
- Calories: 120 per cookie
- Total Fat: 6g
- Saturated Fat: 3.5g
- Cholesterol: 15mg
- Sodium: 30mg
- Total Carbohydrates: 16g
- Dietary Fiber: 0g
- Sugars: 7g
- Protein: 1g
2 Colorful Egg-Shaped Delights

These Colorful Egg-Shaped Delights are perfect for celebrating Easter! They’re fun, tasty, and great for kids to help with. Let’s get started on creating these delightful cookies.
Prep Time: 20 minutes
Cook Time: 10 minutes
Additional Time: 30 minutes (for cooling and decorating)
Total Time: 60 minutes
Servings: 24 cookies
Ingredients:
- 2 ½ cups all-purpose flour
- 1 tsp baking powder
- ½ tsp salt
- 1 cup unsalted butter, softened
- 1 cup granulated sugar
- 1 large egg
- 1 tsp vanilla extract
- Food coloring (various colors)
- Royal icing for decorating
- Sprinkles (optional)
Instructions:
Start by preheating your oven to 350°F (175°C). In a medium bowl, whisk together the flour, baking powder, and salt. Set this bowl aside.
In a large mixing bowl, beat the butter and sugar together until it becomes light and fluffy. This should take about 2-3 minutes. Next, add the egg and vanilla extract to the mix, and continue beating until well combined.
Now, gradually add the dry ingredients to the butter mixture. Mix until everything is just combined. This dough will be soft but should stick together nicely.
Divide the dough into 3-4 equal parts and place each part into a separate bowl. Add different colors of food coloring to each bowl and mix until you achieve your desired colors. Once mixed, shape the dough into egg shapes.
Place the eggs on a baking sheet lined with parchment paper. Leave some space between each one as they will spread a little while baking. Bake in the preheated oven for about 8-10 minutes or until the edges turn a light golden color.
Once done, remove the cookies from the oven and let them cool on a wire rack. After they have cooled for about 30 minutes, you can start decorating with royal icing and sprinkles. Make your cookies as colorful as you like!
Tips:
- For an extra crispy texture, leave the cookies in the oven for an additional minute or two but keep an eye on them to avoid burning.
- To make clean and even icing, use a piping bag with a small round tip for detailed designs.
- If you want a flavor twist, try adding lemon or almond extract instead of vanilla.
Nutrition Facts:
- Calories: 150 per cookie
- Total Fat: 7g
- Saturated Fat: 4.5g
- Cholesterol: 20mg
- Sodium: 60mg
- Total Carbohydrates: 20g
- Dietary Fiber: 0g
- Sugars: 8g
- Protein: 1g
3 Chocolate Chip Carrot Cookies

These Chocolate Chip Carrot Cookies are a delightful surprise! They combine the sweetness of chocolate chips with the subtle crunch of carrots, making them perfect for Easter or any day. Enjoy these tasty, warm cookies with friends and family.
Prep Time: 15 minutes
Cook Time: 10-12 minutes
Additional Time: 5 minutes
Total Time: 30 minutes
Servings: 24 cookies
Ingredients:
- 1 cup all-purpose flour
- 1/2 teaspoon baking soda
- 1/2 teaspoon baking powder
- 1/4 teaspoon salt
- 1 teaspoon ground cinnamon
- 1/2 cup unsalted butter, softened
- 1/2 cup brown sugar, packed
- 1/4 cup granulated sugar
- 1 large egg
- 1 teaspoon vanilla extract
- 1 cup finely grated carrots (about 2 medium-sized carrots)
- 1 cup chocolate chips
- 1/2 cup chopped nuts (optional)
Instructions:
Start by preheating your oven to 350°F (175°C). Line a baking sheet with parchment paper to keep the cookies from sticking.
In a medium bowl, mix together the flour, baking soda, baking powder, salt, and cinnamon. Set this aside for later.
In a large bowl, cream together the butter, brown sugar, and granulated sugar until it’s light and fluffy. This usually takes about 2-3 minutes with an electric mixer.
Add the egg and vanilla extract to the butter mixture. Beat everything until it’s well combined.
Now, gradually stir in the flour mixture until just combined. Make sure not to overmix!
Fold in the grated carrots and chocolate chips gently. If you’re using nuts, add them in now.
Scoop tablespoon-sized balls of dough onto the prepared baking sheet, leaving space between each cookie.
Bake the cookies for 10-12 minutes, or until the edges are lightly golden. They’ll continue to cook a little after you take them out, so don’t worry if they seem soft in the middle.
Let the cookies cool on the baking sheet for about 5 minutes before transferring them to a wire rack to cool completely.
Tips:
- For extra flavor, try adding a pinch of nutmeg or ginger to the cinnamon.
- Make sure to finely grate the carrots so they mix well in the cookie dough.
- Store leftover cookies in an airtight container to keep them fresh for a longer time.
Nutrition Facts:
- Calories: 120 per cookie
- Total Fat: 6g
- Saturated Fat: 4g
- Cholesterol: 15mg
- Sodium: 50mg
- Total Carbohydrates: 16g
- Dietary Fiber: 1g
- Sugars: 8g
- Protein: 1g
4 Springtime Flower Blossoms

These delightful Springtime Flower Blossoms are perfect for celebrating Easter or any springtime gathering. With their cute flower shapes and bright colors, they are sure to bring a smile to everyone’s face. Plus, these cookies are easy to make with a few simple ingredients!
Prep Time: 20 minutes
Total Time: 1 hour
Servings: 24 cookies
Ingredients:
- 2 cups all-purpose flour
- 1/2 teaspoon baking powder
- 1/4 teaspoon salt
- 1 cup unsalted butter, softened
- 1 cup granulated sugar
- 1 large egg
- 1 teaspoon vanilla extract
- 1/4 teaspoon almond extract
- Colored sugar or sprinkles for decoration
- Cookie cutters in flower shapes
Instructions:
Start by preheating your oven to 350°F (175°C). In a medium bowl, whisk together the flour, baking powder, and salt until well combined. Set this mixture aside for now.
In a large mixing bowl, use a mixer to cream the butter and sugar together until the mixture is light and fluffy. This should take about 2-3 minutes. Next, add in the egg, vanilla extract, and almond extract. Beat everything together until it’s fully combined.
Gradually mix in the dry ingredients from the first bowl. Blend until you have a smooth cookie dough. If the dough feels too sticky, you can chill it in the refrigerator for about 10-15 minutes to make it easier to handle.
Once the dough is ready, roll it out on a floured surface to about 1/4 inch thick. Use your flower-shaped cookie cutters to cut out the cookies. Place them on a baking sheet lined with parchment paper, leaving some space between each cookie.
Sprinkle the colored sugar or sprinkles on top of each cookie before baking. Then, pop the baking sheet into the preheated oven and bake the cookies for 10-12 minutes or until the edges are lightly golden. Once done, allow the cookies to cool on a wire rack.
Tips:
- You can use different shapes of cookie cutters to create a variety of flowers.
- For even more fun, use different colored icing to decorate the cookies after they cool.
- Store any leftover cookies in an airtight container to keep them fresh.
Nutrition Facts:
- Calories: 120 per cookie
- Total Fat: 7g
- Saturated Fat: 4g
- Cholesterol: 25mg
- Sodium: 50mg
- Total Carbohydrates: 12g
- Dietary Fiber: 0g
- Sugars: 5g
- Protein: 1g
5 Pastel PEEP Cookie Sandwiches

Pastel PEEP Cookie Sandwiches are a fun and colorful treat perfect for celebrating Easter! These delightful cookies are sandwiched around creamy frosting and topped with adorable pastel marshmallow Peeps. They’re not only tasty but also a great activity to do with family or friends.
Prep Time: 20 minutes
Additional Time: 30 minutes
Total Time: 50 minutes
Servings: 12 sandwiches
Ingredients:
- 1 cup unsalted butter, softened
- 1 cup granulated sugar
- 1 cup brown sugar, packed
- 2 large eggs
- 2 teaspoons vanilla extract
- 3 cups all-purpose flour
- 1 teaspoon baking soda
- 1/2 teaspoon salt
- 1 cup pastel colored frosting (store-bought or homemade)
- 12 pastel marshmallow Peeps
- Sprinkles (optional, for decoration)
Instructions:
Start by preheating your oven to 350°F (175°C). Line two baking sheets with parchment paper to prevent sticking.
In a large bowl, cream together the softened butter, granulated sugar, and brown sugar until it’s light and fluffy. This should take about 2-3 minutes.
Next, add the eggs and vanilla extract to the butter mixture. Mix until everything is well combined.
In a separate bowl, whisk together the all-purpose flour, baking soda, and salt. Gradually add this dry mixture to the wet ingredients. Mix until the dough is just combined; try not to over-mix it.
Scoop the cookie dough onto the prepared baking sheets, placing about 2 inches apart. You can use a tablespoon or a cookie scoop for even-sized cookies. Bake in the preheated oven for about 10-12 minutes or until the edges are lightly golden.
Once baked, remove the cookies from the oven and let them cool on the baking sheets for 5 minutes. After that, transfer them to a wire rack to cool completely.
Once the cookies are cool, it’s time to assemble! Spread a generous amount of pastel colored frosting onto the flat side of one cookie. Top it with another cookie, flat side down, to make a sandwich.
Finally, place a pastel marshmallow Peep on top of each cookie sandwich. You can add some sprinkles for extra color if you want!
Tips:
- For a fun twist, try using chocolate frosting instead of pastel frosting.
- Store any extra cookies in an airtight container to keep them fresh for longer.
- Experiment with different flavors of frosting to customize your sandwich!
Nutrition Facts:
- Calories: 200 per sandwich
- Total Fat: 10g
- Saturated Fat: 5g
- Cholesterol: 30mg
- Sodium: 100mg
- Total Carbohydrates: 28g
- Dietary Fiber: 0g
- Sugars: 15g
- Protein: 2g
6 Vanilla Buttercream Bunny Faces

These Vanilla Buttercream Bunny Faces are the perfect treat for Easter celebrations! With their cute designs and delicious flavors, they’re sure to bring joy to any gathering. Get ready for a fun and sweet baking experience!
Prep Time: 30 minutes
Additional Time: 30 minutes
Total Time: 1 hour
Servings: 12 cookie faces
Ingredients:
- 2 ¾ cups all-purpose flour
- 1 teaspoon baking powder
- ½ teaspoon salt
- 1 cup unsalted butter, softened
- 1 ½ cups granulated sugar
- 1 teaspoon vanilla extract
- 1 large egg
- 2 cups powdered sugar (for buttercream)
- ¼ cup vanilla extract (for buttercream)
- ½ cup unsalted butter, softened (for buttercream)
- Food coloring (pink, black, and any other colors for decoration)
- Candy eyes
- Mini chocolate chips or sprinkles for decoration
Instructions:
In a large bowl, mix the flour, baking powder, and salt together until combined. This will be your dry mix.
In another bowl, cream together the softened butter and granulated sugar until it’s light and fluffy. This should take about 3-5 minutes. Add in the vanilla extract and egg, mixing well until fully incorporated.
Slowly add the dry mix to the wet mix and stir until a dough forms. Once it’s combined, wrap the dough in plastic wrap and refrigerate for about 30 minutes. This helps the dough to firm up for easy rolling.
Preheat your oven to 350°F (175°C) while the dough chills. Once ready, take the dough out and roll it out on a lightly floured surface to about ¼ inch thick. Use bunny-shaped cookie cutters to cut out your shapes and place them on a baking sheet lined with parchment paper.
Bake the cookies for about 10-12 minutes or until the edges are lightly golden. Allow them to cool on a wire rack until completely cool.
While the cookies cool, prepare the vanilla buttercream. In a bowl, beat the softened butter until creamy. Gradually add the powdered sugar and vanilla extract, mixing until smooth and fluffy. If the buttercream is too thick, add a tiny bit of milk to reach your desired consistency.
Once the cookies are cool, start piping the buttercream on each bunny face. Use different colors to make each bunny unique. Place the candy eyes and use mini chocolate chips or sprinkles for noses and mouths. Let the buttercream set before serving.
Tips:
- For extra flavor, try adding a lemon or almond extract to the dough.
- If you want softer cookies, do not overbake them; they should be slighty soft when taken out.
- Have fun decorating with different edible items to create even more bunny variations!
Nutrition Facts:
- Calories: 200
- Total Fat: 9g
- Saturated Fat: 5g
- Cholesterol: 30mg
- Sodium: 50mg
- Total Carbohydrates: 30g
- Dietary Fiber: 0g
- Sugars: 15g
- Protein: 2g
7 Coconut Macaroon Nests

Coconut Macaroon Nests are a fun and delicious treat perfect for Easter! These sweet, chewy cookies shaped like nests can hold some tasty candies. It’s a delightful recipe to make with family and friends. Let’s get started!
Prep Time: 20 minutes
Cook Time: 15 minutes
Additional Time: 10 minutes (for cooling)
Total Time: 45 minutes
Servings: 12
Ingredients:
- 2 ½ cups shredded coconut
- 2/3 cup sweetened condensed milk
- 1 teaspoon vanilla extract
- 2 large egg whites
- 1/4 teaspoon salt
- Chocolate eggs or mini candies (for filling)
Instructions:
Begin by preheating your oven to 325°F (160°C). Line a baking sheet with parchment paper to keep your nests from sticking.
In a large bowl, combine shredded coconut, sweetened condensed milk, and vanilla extract. Stir the mix well until everything is fully combined.
In another bowl, whip the egg whites and salt until soft peaks form. This helps make your nests light and airy. Gently fold the egg whites into the coconut mixture until it is just combined. Be careful not to deflate the egg whites too much.
Next, scoop about a tablespoon of the mixture and shape it into a small mound on the prepared baking sheet. Use your fingers to create a small indentation in the center, making it look like a nest. Repeat this with the remaining mixture, leaving some space between each mound.
Place the baking sheet in the oven and bake the nests for about 15 minutes, or until they are golden brown. Once they are done, remove them from the oven and let them cool on the baking sheet for about 10 minutes.
Once the nests are cool, gently place the chocolate eggs or mini candies in the center of each nest. Now your Coconut Macaroon Nests are ready to enjoy!
Tips:
- If you like, you can dip the nests in chocolate for an extra delicious treat!
- Feel free to add food coloring to the candy for a more festive look!
- Make sure to store leftovers in an airtight container to keep them fresh.
Nutrition Facts:
- Calories: 210
- Total Fat: 7g
- Saturated Fat: 5g
- Cholesterol: 35mg
- Sodium: 50mg
- Total Carbohydrates: 35g
- Dietary Fiber: 2g
- Sugars: 20g
- Protein: 3g
8 Lemon Zest Chick Cookies

Lemon Zest Chick Cookies are the perfect addition to your Easter celebrations! These cute and zesty cookies are sure to be a hit with everyone. With a bright lemon flavor and the fun shape of little chicks, they bring a cheerful touch to any springtime gathering.
Prep Time: 15 minutes
Cook Time: 10 minutes
Additional Time: 30 minutes (for chilling)
Total Time: 55 minutes
Servings: 24 cookies
Ingredients:
- 2 ½ cups all-purpose flour
- 1 teaspoon baking powder
- ½ teaspoon salt
- 1 cup unsalted butter, softened
- 1 cup granulated sugar
- 1 large egg
- 2 teaspoons vanilla extract
- Zest of 1 large lemon
- 2 tablespoons lemon juice
- Yellow icing for decorating (optional)
- Chocolate chips or sprinkles (optional)
Instructions:
In a bowl, mix together the flour, baking powder, and salt. Stir until well combined and set it aside.
In a separate bowl, beat the butter and sugar together until the mixture is light and fluffy. This should take about 3 minutes. Add the egg, vanilla extract, lemon zest, and lemon juice. Mix until everything is well combined.
Gradually add the dry ingredient mixture to the wet ingredients. Mix until a dough forms. If the dough is too soft, chill it in the refrigerator for about 30 minutes.
Preheat the oven to 350°F (175°C). Drop tablespoons of the dough onto a baking sheet lined with parchment paper, leaving space in between them. You can shape the dough into chick forms if you’d like!
Bake the cookies in the preheated oven for 10 minutes until the edges are lightly golden. Allow them to cool on the baking sheet for a few minutes before transferring them to a wire rack.
Once cool, decorate the cookies with yellow icing to create cute chick faces, and add chocolate chips or sprinkles for eyes if desired.
Tips:
- You can substitute lime for lemon zest for a different zesty flavor.
- For extra fun, use food coloring to make the icing bright and colorful!
- If you want to store the cookies, keep them in an airtight container to maintain freshness.
Nutrition Facts:
- Calories: 120 per cookie
- Total Fat: 7g
- Saturated Fat: 4g
- Cholesterol: 25mg
- Sodium: 50mg
- Total Carbohydrates: 14g
- Dietary Fiber: 0g
- Sugars: 5g
- Protein: 1g
9 Whimsical Jellybean Sprinkle Cookies

These Whimsical Jellybean Sprinkle Cookies are a delightful treat that’s perfect for any festive occasion! Bursting with color and flavor, they will surely bring smiles to everyone who tries them. These cookies are simple to make, and they look as fun as they taste!
Prep Time: 20 minutes
Additional Time: 15 minutes
Total Time: 35 minutes
Servings: 24 cookies
Ingredients:
- 2 cups all-purpose flour
- 1 teaspoon baking powder
- 1/2 teaspoon salt
- 1/2 cup unsalted butter, softened
- 1 cup granulated sugar
- 1 large egg
- 1 teaspoon vanilla extract
- 1/2 cup colorful jellybeans, chopped
- 1/2 cup rainbow sprinkles
Instructions:
Start by preheating your oven to 350°F (175°C) and lining a baking sheet with parchment paper. This will prevent the cookies from sticking and make cleanup easy.
In a mixing bowl, combine flour, baking powder, and salt. Stir well to mix all the dry ingredients evenly. Set this bowl aside for later use.
In another large bowl, beat the softened butter and granulated sugar together until the mixture becomes light and fluffy. This usually takes about 2-3 minutes using an electric mixer.
Now, add the egg and vanilla extract to the mixture. Mix until everything is well combined and you have a smooth batter. Don’t rush this step; it helps with the texture of your cookies!
Gradually, add the flour mixture to the wet ingredients. Mix well until all the flour is incorporated without any dry bits remaining. The dough might be a little sticky, but that’s okay!
Next, fold in the chopped jellybeans and rainbow sprinkles. This is where the fun begins as you watch the colors and textures mix into the dough. Make sure they are evenly distributed.
Using a tablespoon, scoop out the dough and roll it into balls. Place them on the prepared baking sheet, leaving some space between each cookie as they will spread a bit while baking.
Sprinkle a few extra rainbow sprinkles on top of each cookie dough ball for an even more colorful finish. This step is optional but adds a nice touch!
Bake the cookies in your preheated oven for about 10-12 minutes, or until the edges are lightly golden. Keep an eye on them to avoid overbaking.
Once they are done, remove the cookies from the oven and let them cool on the baking sheet for about 5 minutes before transferring them to a wire rack to cool completely.
Tips:
- Feel free to use different colorful candies for your cookies, like chocolate eggs or mini M&Ms.
- If you like chewy cookies, bake them for a shorter time. If you prefer them crispier, leave them in a bit longer.
- For a fun twist, add a sprinkle of coconut or nuts into the dough along with the jellybeans.
Nutrition Facts:
- Calories: 120 per cookie
- Total Fat: 5g
- Saturated Fat: 3g
- Cholesterol: 20mg
- Sodium: 50mg
- Total Carbohydrates: 18g
- Dietary Fiber: 0g
- Sugars: 8g
- Protein: 1g
10 Marshmallow Treat Egg Cookies

These Marshmallow Treat Egg Cookies are the perfect sweet surprise for your Easter celebrations! They are easy to make and have a delightful chewy texture that everyone will love. Get ready to impress your family and friends with these colorful and fun cookies!
Prep Time: 20 minutes
Total Time: 20 minutes
Servings: 12 cookies
Ingredients:
- 4 cups Rice Krispies cereal
- 3 cups mini marshmallows
- 4 tablespoons butter
- 1/2 teaspoon vanilla extract
- 1 cup chocolate chips (for melting)
- Sprinkles or edible decorations (optional)
Instructions:
Start by melting 4 tablespoons of butter in a large saucepan over low heat. Once melted, add in the 3 cups of mini marshmallows and stir them together until they are completely melted and smooth.
Next, remove the saucepan from heat and stir in 1/2 teaspoon of vanilla extract. Then, add in the 4 cups of Rice Krispies cereal and mix everything together until the cereal is fully coated in the marshmallow mixture.
Once everything is combined, let the mixture cool slightly, but not too much! While it’s still warm, use your hands (make sure to butter them a bit to prevent sticking) to form the mixture into egg shapes. Aim for about 12 cookies.
Now, it’s time to melt the 1 cup of chocolate chips. You can do this in the microwave in a microwave-safe bowl. Heat them in 30-second intervals, stirring in between, until smooth.
Dip each cookie in the melted chocolate, covering them generously. Then, place them on a baking sheet lined with parchment paper. If you want, you can sprinkle them with sprinkles or other edible decorations before the chocolate sets.
Finally, let the chocolate harden at room temperature. Enjoy your delicious Marshmallow Treat Egg Cookies!
Tips:
- For a fruity twist, you can add some chopped dried fruits or mini chocolate eggs to the Rice Krispies mixture.
- To make clean-up easier, use parchment paper on your work surface.
- Store leftover cookies in an airtight container to keep them fresh.
Nutrition Facts:
- Calories: 150 kcal per cookie
- Protein: 1 g
- Fat: 6 g
- Carbohydrates: 24 g
- Sugar: 10 g
11 Fruity Pebble Easter Cookies

Fruity Pebble Easter Cookies are a fun and colorful treat perfect for celebrating the holiday. These cookies are soft, chewy, and full of fruity flavors. The vibrant colors from the Fruity Pebbles cereal add a cheerful touch that everyone will love!
Prep Time: 15 minutes
Cook Time: 10 minutes
Additional Time: 30 minutes
Total Time: 55 minutes
Servings: 24 cookies
Ingredients:
- 1 cup unsalted butter, softened
- 1 cup granulated sugar
- 1 cup brown sugar, packed
- 2 large eggs
- 1 teaspoon vanilla extract
- 3 cups all-purpose flour
- 1 teaspoon baking soda
- 1/2 teaspoon salt
- 1 cup Fruity Pebbles cereal
- 1/2 cup white chocolate chips (optional)
- 1/2 cup pastel sprinkles (optional)
Instructions:
Start by preheating your oven to 350°F (175°C). This ensures that your cookies bake evenly and come out perfectly.
In a large mixing bowl, cream together butter, granulated sugar, and brown sugar until the mixture is light and fluffy. This usually takes about 2-3 minutes with an electric mixer.
Next, add in the eggs one at a time, mixing well after each addition. Then, stir in the vanilla extract.
In a separate bowl, whisk together the flour, baking soda, and salt. Gradually add the dry ingredients to the wet mixture, stirring until just combined.
Now, fold in the Fruity Pebbles, and if you’re using them, add the white chocolate chips and sprinkles. This step adds flavor and makes your cookies look festive.
Drop spoonfuls of the cookie dough onto a lined baking sheet, leaving space between each one. Bake them in your preheated oven for about 10 minutes or until the edges are golden. They may look slightly underbaked in the center, but they will firm up as they cool.
Let the cookies cool on the baking sheet for about 5 minutes before transferring them to a wire rack to cool completely. Enjoy your colorful and festive Fruity Pebble Easter Cookies!
Tips:
- For an extra colorful touch, feel free to add more Fruity Pebbles on top of the cookies before baking.
- If you like soft cookies, don’t overbake them. They should be slightly soft when you take them out.
- Store any leftover cookies in an airtight container for up to a week.
Nutrition Facts:
- Calories: 130 per cookie
- Protein: 1.5g
- Fat: 6g
- Carbohydrates: 20g
- Sugar: 9g
- Fiber: 0.5g
12 Almond Joy Egg Cookies

These Almond Joy Egg Cookies are a delightful treat that combines the classic flavors of chocolate, coconut, and almonds. Perfect for Easter, these cookies look like colorful eggs and are sure to be a hit with family and friends. Grab your ingredients, and let’s get baking!
Prep Time: 20 minutes
Cook Time: 15 minutes
Total Time: 35 minutes
Servings: 24 cookies
Ingredients:
- 1 cup all-purpose flour
- 1/2 cup shredded coconut
- 1/2 cup almond flour
- 1/2 cup unsweetened cocoa powder
- 1/2 cup brown sugar
- 1/4 cup granulated sugar
- 1/2 teaspoon baking powder
- 1/4 teaspoon salt
- 1/2 cup unsalted butter, softened
- 1 large egg
- 1 teaspoon vanilla extract
- 24 whole almonds
- 1 cup chocolate chips
- 1 tablespoon coconut oil (for melting chocolate)
Instructions:
Start by preheating your oven to 350°F (175°C). Line a baking sheet with parchment paper to prevent sticking. This will make cleaning up a breeze later on!
In a large mixing bowl, combine the all-purpose flour, shredded coconut, almond flour, cocoa powder, brown sugar, granulated sugar, baking powder, and salt. Stir these dry ingredients until they’re well mixed.
Next, add in the softened butter, egg, and vanilla extract. Mix everything together until you have a smooth dough. It’s okay if the mixture is a bit sticky; that’s how we want it!
Using a tablespoon, scoop out small amounts of the dough and shape them into egg-like forms. Place them on the prepared baking sheet, leaving some space between each cookie. Gently press a whole almond into the center of each shaped cookie.
Bake the cookies in the preheated oven for about 12-15 minutes. You want them to be firm but still soft in the middle. Once done, take them out and let them cool for a few minutes before transferring them to a wire rack to cool completely.
While the cookies are cooling, melt the chocolate chips with the coconut oil in a microwave-safe bowl. Stir every 30 seconds until smooth and creamy. Once the cookies have cooled, drizzle the melted chocolate over the tops, making it look extra special.
Tips:
- For an extra coconut flavor, you can sprinkle some toasted coconut flakes on top of the melted chocolate.
- If you want colorful cookies, try adding a few drops of food coloring into the dough before baking.
- Store the cookies in an airtight container at room temperature for up to a week.
Nutrition Facts:
- Calories: 130 per cookie
- Total Fat: 7g
- Saturated Fat: 4g
- Cholesterol: 15mg
- Sodium: 50mg
- Total Carbohydrate: 16g
- Dietary Fiber: 1g
- Sugars: 6g
- Protein: 2g
13 Raspberry Lemonade Crinkle Cookies
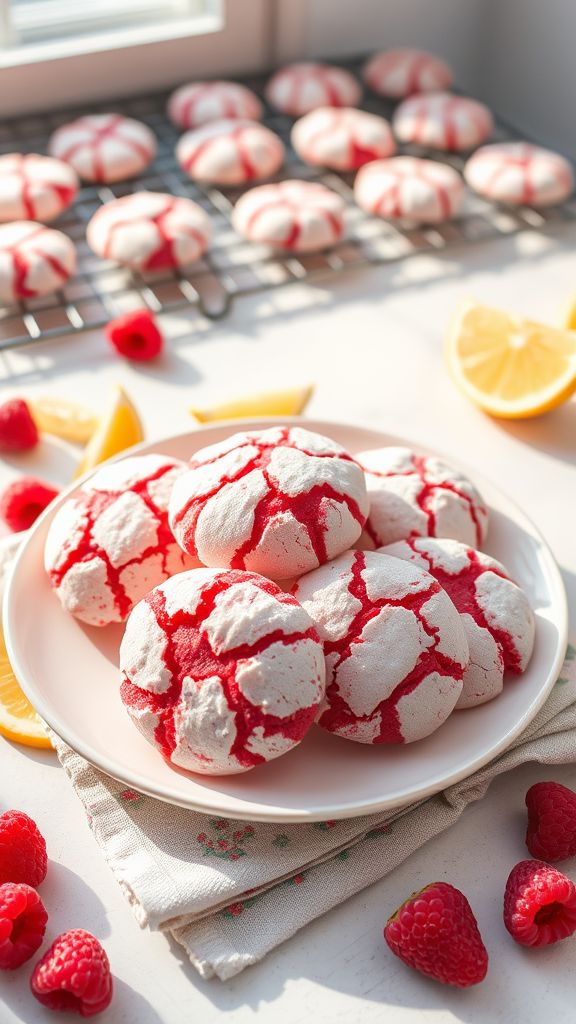
These Raspberry Lemonade Crinkle Cookies are a delightful treat perfect for any occasion! With their bright flavors and soft, chewy texture, they’re sure to put a smile on your face. The combination of raspberry and lemonade will have your taste buds dancing with joy!
Prep Time: 20 minutes
Cook Time: 10-12 minutes
Additional Time: 30 minutes (for chilling)
Total Time: 1 hour
Servings: 24 cookies
Ingredients:
- 2 cups all-purpose flour
- 1 teaspoon baking powder
- ½ teaspoon baking soda
- ½ teaspoon salt
- ½ cup unsalted butter, softened
- 1 cup granulated sugar
- 1 large egg
- 1 teaspoon vanilla extract
- 2 tablespoons fresh lemon juice
- 1 teaspoon lemon zest
- ½ cup raspberry puree (fresh or frozen)
- ½ cup powdered sugar (for rolling)
Instructions:
Begin by preheating your oven to 350°F (175°C). Line a baking sheet with parchment paper to prevent the cookies from sticking.
In a bowl, mix together flour, baking powder, baking soda, and salt. Set this dry mixture aside.
In a separate large bowl, cream together the softened butter and granulated sugar until it becomes light and fluffy. This should take about 3-4 minutes. Then, beat in the egg, followed by the vanilla extract, fresh lemon juice, and lemon zest.
Now, gradually add the dry flour mixture to the wet ingredients, stirring until just combined. Next, gently fold in the raspberry puree until it swirls through the dough.
Once your dough is ready, cover the bowl and chill it in the fridge for 30 minutes. This step helps the cookies keep their shape while baking.
After chilling, use a cookie scoop or spoon to form small balls of dough. Roll each in powdered sugar until they’re fully coated. Place them on the prepared baking sheet, leaving space between each cookie.
Bake in the preheated oven for 10-12 minutes, or until the edges are set but the centers still look soft. Remove from the oven and let them cool on the baking sheet for a few minutes before transferring to a wire rack to cool completely.
Tips:
- For a stronger raspberry flavor, you can add more raspberry puree to the dough.
- If you want to decorate, consider adding sprinkles before baking.
- Store leftover cookies in an airtight container at room temperature for up to 3 days.
Nutrition Facts:
- Calories: 110 per cookie
- Total Fat: 4.5g
- Saturated Fat: 2.5g
- Cholesterol: 15mg
- Sodium: 60mg
- Total Carbohydrates: 17g
- Dietary Fiber: 0.5g
- Sugars: 8g
- Protein: 1g
14 Cheesecake Stuffed Easter Egg Cookies

Get ready to celebrate Easter with these fun and delicious Cheesecake Stuffed Easter Egg Cookies! These cookies are soft, chewy, and filled with a creamy cheesecake filling that will melt in your mouth. Perfect for sharing with family and friends, these cute cookies are sure to brighten up any Easter celebration.
Prep Time: 20 minutes
Cook Time: 10 minutes
Additional Time: 1 hour (chilling)
Total Time: 1 hour 30 minutes
Servings: 12 cookies
Ingredients:
- 1 cup all-purpose flour
- 1/2 cup unsweetened cocoa powder
- 1/2 teaspoon baking soda
- 1/4 teaspoon salt
- 1/2 cup butter, softened
- 1/2 cup granulated sugar
- 1/4 cup brown sugar, packed
- 1 large egg
- 1 teaspoon vanilla extract
- 1 package (8 oz) cream cheese, softened
- 1/4 cup powdered sugar
- 1 teaspoon vanilla extract (for filling)
- 1/2 cup chocolate chips (for decoration)
- Colorful sprinkles (optional)
Instructions:
Start by mixing the flour, cocoa powder, baking soda, and salt in a bowl. Set this dry mixture aside.
In another bowl, cream the butter, granulated sugar, and brown sugar until it’s light and fluffy. This should take about 3 minutes. Beat in the egg and vanilla extract until everything is well combined.
Gradually stir in the dry ingredients, mixing until a dough forms. Once mixed, cover the dough with plastic wrap and place it in the refrigerator for 1 hour.
While the dough chills, prepare the cheesecake filling. In a medium bowl, beat the cream cheese until smooth. Add the powdered sugar and the additional vanilla extract, stirring until well combined. Set the filling aside.
Once the dough is ready, preheat your oven to 350°F (175°C). Take a small amount of dough (about the size of a tablespoon) and flatten it in the palm of your hand. Place a small spoonful of the cheesecake filling in the center, then fold the edges of the dough around the filling and shape it into an egg.
Place the stuffed cookies on a baking sheet lined with parchment paper, making sure to leave some space between each cookie. Bake for 10 minutes, and then let them cool on the baking sheet for a few minutes before transferring them to a wire rack to cool completely.
After the cookies have cooled, melt the chocolate chips in the microwave, stirring until smooth. Drizzle the melted chocolate over the cookies and add colorful sprinkles if desired.
Tips:
- For extra fun, you can use food coloring to dye the cheesecake filling pastel colors.
- Make sure to chill the dough properly to avoid sticky cookies.
- Store leftover cookies in an airtight container to keep them fresh.
Nutrition Facts:
- Calories: 180 per cookie
- Total Fat: 9g
- Saturated Fat: 5g
- Cholesterol: 30mg
- Sodium: 80mg
- Total Carbohydrates: 24g
- Dietary Fiber: 1g
- Sugars: 12g
- Protein: 3g
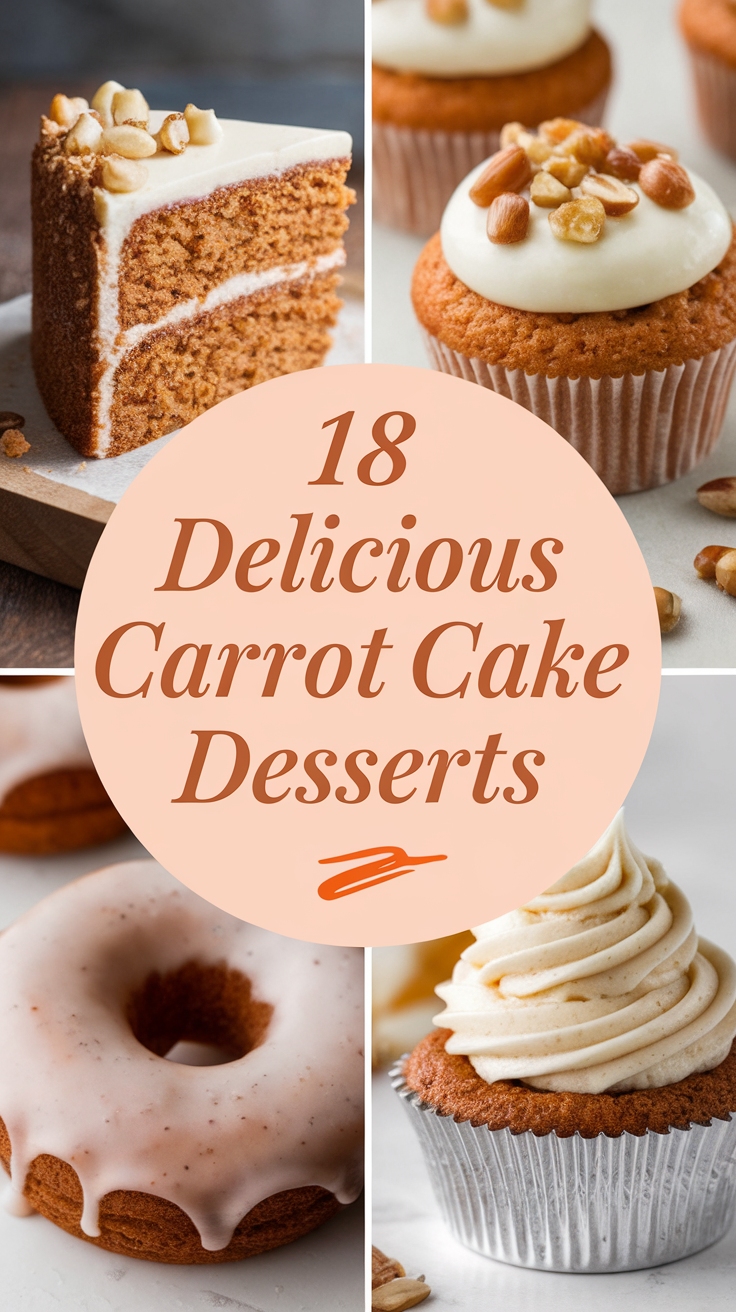
15 Carrot Cake Cookies with Cream Cheese Frosting
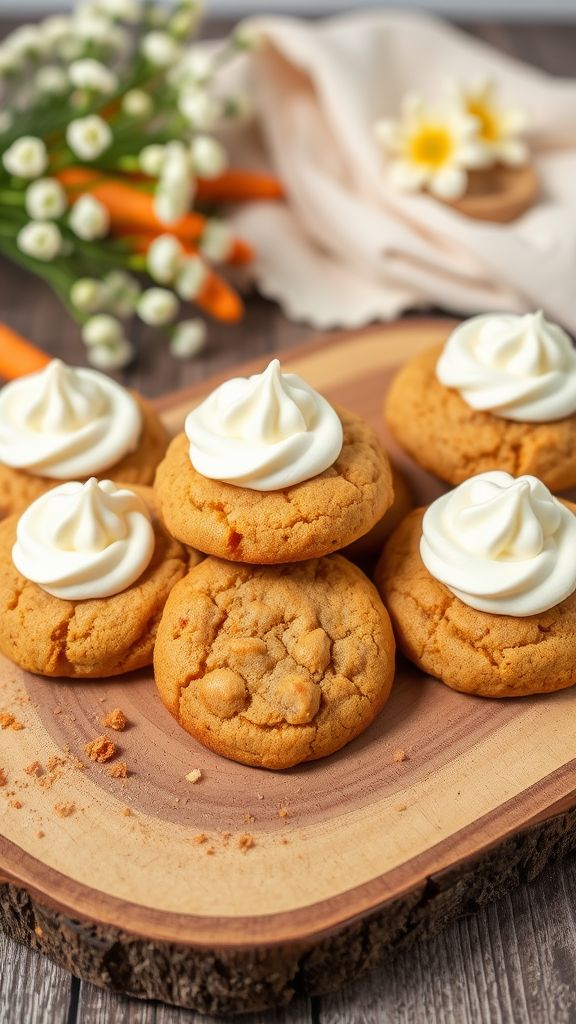
These Carrot Cake Cookies are a delightful twist on the classic dessert. Soft, chewy, and bursting with flavor, they’re perfect for any occasion, especially Easter! Topped with a rich Cream Cheese Frosting, they are sure to impress your family and friends.
Prep Time: 15 minutes
Cook Time: 12-15 minutes
Additional Time: 30 minutes (for cooling)
Total Time: 57 minutes
Servings: 24 cookies
Ingredients:
- 2 cups all-purpose flour
- 1 teaspoon baking soda
- 1 teaspoon ground cinnamon
- 1/2 teaspoon salt
- 1 cup unsalted butter, softened
- 1 cup brown sugar, packed
- 1/2 cup granulated sugar
- 2 large eggs
- 2 teaspoons vanilla extract
- 2 cups grated carrots
- 1 cup crushed pineapple, drained
- 1/2 cup chopped walnuts or pecans (optional)
Instructions:
Start by preheating your oven to 350°F (175°C). Line a baking sheet with parchment paper to prevent sticking.
In a medium bowl, mix together the flour, baking soda, cinnamon, and salt. Set this mixture aside for now.
In a large mixing bowl, beat the butter, brown sugar, and granulated sugar until it’s light and fluffy. This should take about 2-3 minutes.
Then, add in the eggs one at a time, mixing well after each addition. Stir in the vanilla extract next.
Gradually mix the dry ingredients into the wet ingredients until just combined. Be careful not to overmix!
Fold in the grated carrots, crushed pineapple, and nuts if you’re using them.
Using a cookie scoop or a tablespoon, drop the dough onto the prepared baking sheet, leaving space between each cookie as they will spread while baking.
Bake for 12-15 minutes or until the edges are lightly golden. Remove the cookies from the oven and let them cool on the baking sheet for about 5 minutes before transferring them to a wire rack to cool completely.
While the cookies are cooling, prepare the Cream Cheese Frosting. In a mixing bowl, beat together 8 ounces of cream cheese, 1/2 cup of unsalted butter, and 2 cups of powdered sugar until smooth and creamy.
Once the cookies are completely cool, spread a generous layer of frosting on each one.
Tips:
- Make sure to grate the carrots finely for better texture in the cookies.
- You can refrigerate the cookies for a firmer frosting if desired.
- These cookies can be stored in an airtight container for up to 5 days.
Nutrition Facts:
- Serving Size: 1 cookie
- Calories: 180
- Total Fat: 9g
- Saturated Fat: 5g
- Cholesterol: 30mg
- Sodium: 90mg
- Total Carbohydrates: 23g
- Dietary Fiber: 1g
- Sugars: 10g
- Protein: 2g
16 Miniature Peep Tarts
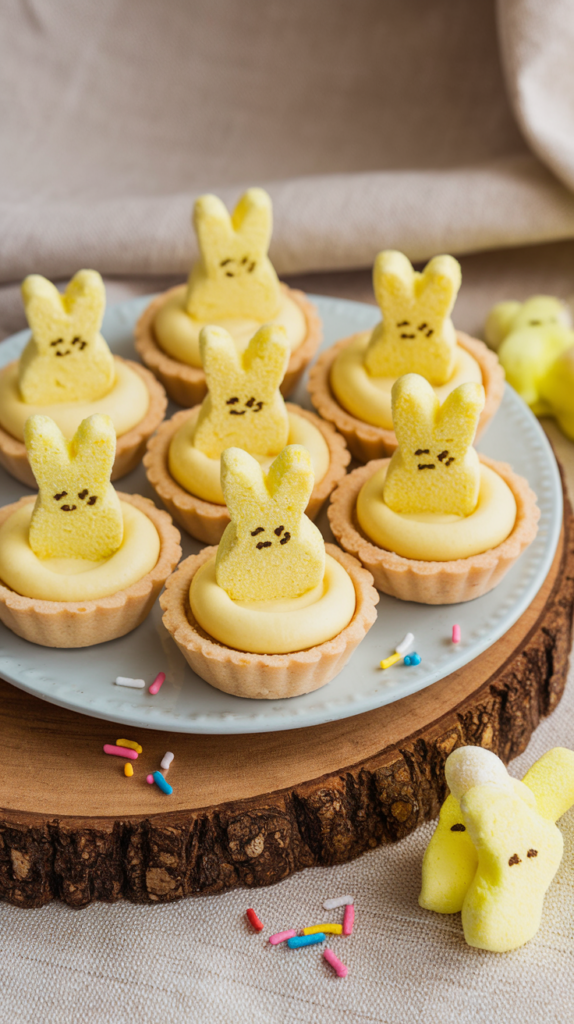
Get ready to make the cutest treats for Easter! These Miniature Peep Tarts are fun to bake and even more fun to eat. With a delicious filling and adorable marshmallow Peeps on top, these tarts are perfect for any Easter celebration.
Prep Time: 20 minutes
Total Time: 50 minutes
Servings: 12 mini tarts
Ingredients:
- 1 package of ready-made pie crusts
- 1 cup of pastry cream (store-bought or homemade)
- 1 cup of whipped cream
- 12 mini marshmallow Peeps (any color)
- Food coloring (optional, for the cream)
- Sprinkles (optional, for decoration)
Instructions:
Start by preheating your oven to 425°F (220°C). Roll out the pie crusts and use a round cutter to make circles that fit in a mini muffin tin. You need about 12 circles.
Next, place the pie crust circles into the muffin tin, gently pressing them down. Poke a few holes in the bottom with a fork to prevent bubbling. Bake them for about 10-12 minutes, until they are golden brown. Once baked, take them out and let them cool completely.
While the tarts cool, mix the pastry cream and whipped cream together in a bowl. If you want, you can add a few drops of food coloring to make it extra colorful. Make sure to gently fold the whipped cream, so it stays light and fluffy.
When the tarts are cool, fill each one with the pastry cream mixture. You can use a piping bag or a spoon for this. Now it’s time for the fun part – add one mini Peep on the top of each tart.
Finish off by sprinkling on some colorful sprinkles if you like. Let the tarts sit for a few minutes before serving, so everything can set up nicely.
Tips:
- Use different colored Peeps to create a fun and festive look.
- You can prepare the tarts a day in advance and store them in the refrigerator until serving.
- For added flavor, consider mixing in a bit of vanilla extract into the cream mixture.
Nutrition Facts:
- Calories: 150 per tart
- Total Fat: 8g
- Saturated Fat: 4g
- Carbohydrates: 20g
- Sugars: 7g
- Protein: 1g
- Fiber: 0g
17 Funfetti Easter Basket Cookies

These Funfetti Easter Basket Cookies are colorful, festive, and perfect for celebrating the holiday! With a sprinkle of colors, a hint of sweetness, and chocolate, they bring joy to any Easter gathering. Let’s get started!
Prep Time: 15 minutes
Total Time: 30 minutes
Servings: 24 cookies
Ingredients:
- 2 ¾ cups all-purpose flour
- 1 teaspoon baking powder
- 1 teaspoon baking soda
- ½ teaspoon salt
- 1 cup unsalted butter, softened
- 1 cup granulated sugar
- 1 cup brown sugar, packed
- 2 large eggs
- 2 teaspoons vanilla extract
- ½ cup rainbow sprinkles
- 1 cup chocolate chips
- 1 cup shredded coconut (optional, for ‘grass’)
- Mini chocolate eggs (for decoration)
Instructions:
First, preheat your oven to 350°F (175°C) and line two baking sheets with parchment paper. This ensures the cookies don’t stick and makes for easy cleanup.
In a mixing bowl, whisk together the flour, baking powder, baking soda, and salt. Set this dry mixture aside so the flavors can meld together.
In another large bowl, cream the butter, granulated sugar, and brown sugar until it’s light and fluffy. This should take about 2-3 minutes with a mixer. Next, add in the eggs one at a time, mixing well after each addition, then stir in the vanilla extract.
Slowly combine the dry ingredients with the wet mixture. Stir gently until everything is just mixed. Be careful not to overmix! Now, fold in the rainbow sprinkles and chocolate chips until they are evenly distributed throughout the dough.
Use a tablespoon or cookie scoop to drop spoonfuls of dough onto the prepared baking sheets. Leave enough space between each cookie, as they will spread while baking.
Bake the cookies in the preheated oven for 10-12 minutes. They should turn golden on the edges but still look soft in the center. Once done, take them out and let them cool on the baking sheets for a few minutes before transferring to a wire rack.
After cooling, you can decorate your cookies. If using, sprinkle some shredded coconut on top to create a "grass" effect. Finally, place mini chocolate eggs on top for a festive touch!
Tips:
- For extra fun, add different colors of sprinkles to customize your cookies for any occasion!
- Make sure your butter is softened to room temperature for the best texture.
- Store your cookies in an airtight container to keep them fresh for up to a week.
Nutrition Facts:
- Calories: 140 per cookie
- Total Fat: 7g
- Saturated Fat: 4g
- Cholesterol: 25mg
- Sodium: 90mg
- Total Carbohydrates: 18g
- Dietary Fiber: 0g
- Sugars: 9g
- Protein: 1g
18 S’mores Bunny Hop Cookies

Get ready for a delicious twist on the classic campfire treat! These S’mores Bunny Hop Cookies are perfect for Easter gatherings and will delight both kids and adults alike. With gooey marshmallows, creamy chocolate, and crunchy graham crackers, these cookies are sure to be a hit!
Prep Time: 15 minutes
Cook Time: 10 minutes
Additional Time: 30 minutes (for cooling)
Total Time: 55 minutes
Servings: 24 cookies
Ingredients:
- 1 cup unsalted butter, softened
- 1 cup granulated sugar
- 1 cup brown sugar, packed
- 2 large eggs
- 2 teaspoons vanilla extract
- 3 cups all-purpose flour
- 1 teaspoon baking soda
- 1/2 teaspoon salt
- 1 cup chocolate chips
- 1 cup mini marshmallows
- 1 cup graham cracker crumbs
- 1/2 cup Easter-themed sprinkles (optional)
Instructions:
First, preheat your oven to 350°F (175°C). Line two baking sheets with parchment paper to prevent sticking.
In a large mixing bowl, cream together the butter, granulated sugar, and brown sugar until it’s light and fluffy. This will take about 3-5 minutes. Then, add in the eggs and vanilla extract, mixing until well combined.
In another bowl, whisk together the flour, baking soda, and salt. Slowly add the dry ingredients to the wet mixture, mixing until just combined. It’s important not to overmix.
Next, gently fold in the chocolate chips, mini marshmallows, and graham cracker crumbs. If you’re using sprinkles, add them now for some extra fun!
Scoop tablespoon-sized amounts of dough onto the prepared baking sheets, leaving some space between each cookie to spread. Bake for about 10 minutes or until the edges are lightly golden.
Once baked, remove the cookies from the oven and let them cool on the baking sheets for about 5 minutes. Then, transfer them to wire racks to cool completely. Enjoy your sweet treats!
Tips:
- For a richer flavor, use dark chocolate chips instead of regular ones.
- Try adding peanut butter chips for an extra flavor kick.
- Store any leftover cookies in an airtight container at room temperature for up to one week.
Nutrition Facts:
- Calories: 120 per cookie
- Total Fat: 6g
- Saturated Fat: 4g
- Cholesterol: 25mg
- Sodium: 100mg
- Total Carbohydrates: 15g
- Dietary Fiber: 0g
- Sugars: 8g
- Protein: 1g
19 Edible Glitter Egg Hunt Cookies

These Edible Glitter Egg Hunt Cookies are perfect for celebrating Easter! They’re colorful, fun, and glittery, just like the joy of an egg hunt. Your friends and family will love decorating and munching on these delightful treats!
Prep Time: 20 minutes
Cook Time: 10 minutes
Additional Time: 30 minutes (cooling)
Total Time: 1 hour
Servings: 24 cookies
Ingredients:
- 2 ½ cups all-purpose flour
- 1 cup unsalted butter, softened
- 1 cup granulated sugar
- 1 large egg
- 1 teaspoon vanilla extract
- ½ teaspoon baking soda
- ½ teaspoon salt
- Edible glitter (various colors)
- Colored sprinkles for decoration
Instructions:
Start by preheating your oven to 350°F (175°C). In a large mixing bowl, cream together the softened butter and granulated sugar until light and fluffy. This usually takes about 3-5 minutes.
Next, beat in the egg and vanilla extract. Mix until everything is well combined. In another bowl, whisk together the flour, baking soda, and salt. Gradually add the dry ingredients to the wet mixture, mixing until just combined. Avoid overmixing for soft cookies.
Chill the dough in the refrigerator for about 30 minutes. This makes it easier to work with and helps the cookies hold their shape.
Once chilled, roll the dough into small balls, about 1 inch in diameter. Place them on a baking sheet lined with parchment paper, leaving some space between each cookie.
Flatten each ball slightly with the palm of your hand, then use a cookie cutter to shape them into egg-like forms if desired. Sprinkle edible glitter on top before baking.
Bake in the preheated oven for 10 minutes or until the edges are lightly golden. Let the cookies cool on the baking sheet for a few minutes before transferring them to a wire rack to cool completely.
For an extra touch, once the cookies are completely cool, add more glitter and colored sprinkles on top to create a festive look!
Tips:
- Use a mixture of glitter colors for an eye-catching effect.
- Make your own cookie cutter shapes if you want unique designs!
- Store the cookies in an airtight container to keep them fresh for longer.
Nutrition Facts:
- Calories: 120 per cookie
- Total Fat: 6g
- Saturated Fat: 4g
- Cholesterol: 18mg
- Sodium: 50mg
- Total Carbohydrates: 15g
- Dietary Fiber: 0g
- Sugars: 5g
- Protein: 1g
20 Chocolate-Dipped Strawberry Cookies

These delicious Chocolate-Dipped Strawberry Cookies are a fun treat that adds a touch of sweetness to any occasion. Their soft texture combined with the rich chocolate and fresh strawberry topping makes them irresistible. Perfect for Easter or any time you want to impress your friends and family!
Prep Time: 20 minutes
Cook Time: 12 minutes
Additional Time: 30 minutes (for cooling)
Total Time: 1 hour
Servings: 24 cookies
Ingredients:
- 1 cup unsalted butter, softened
- 1 cup granulated sugar
- 1 cup brown sugar, packed
- 2 large eggs
- 1 teaspoon vanilla extract
- 3 cups all-purpose flour
- 1 teaspoon baking soda
- 1 teaspoon baking powder
- 1/2 teaspoon salt
- 1 cup chopped fresh strawberries
- 1 1/2 cups chocolate chips (semisweet or dark)
Instructions:
Start by preheating your oven to 350°F (175°C). Prepare a baking sheet by lining it with parchment paper. This will prevent the cookies from sticking.
In a large mixing bowl, cream together the softened butter, granulated sugar, and brown sugar until the mixture is light and fluffy. This should take about 3-4 minutes. Then, add in the eggs one at a time, mixing well after each addition. Don’t forget to stir in the vanilla extract.
In a separate bowl, combine the flour, baking soda, baking powder, and salt. Gradually add this dry mixture to the wet ingredients, mixing until just combined.
Now, gently fold in the chopped fresh strawberries. Be careful not to overmix; you want to maintain those lovely berry chunks.
Scoop out tablespoons of dough and place them on the prepared baking sheet, leaving enough space between each cookie to allow for spreading. Bake the cookies in the preheated oven for 10-12 minutes, or until they are lightly golden around the edges.
Once baked, let the cookies cool on the baking sheet for about 5 minutes, then transfer them to a wire rack to cool completely.
While the cookies are cooling, melt the chocolate chips in a microwave-safe bowl. Heat them in the microwave in 30-second intervals, stirring in between until smooth.
Once the cookies have cooled, dip half of each cookie into the melted chocolate. Place the dipped cookies back onto the wire rack. Allow the chocolate to set, which should take about 30 minutes. For quicker results, you can place them in the fridge to cool.
Tips:
- For extra flavor, try adding 1/2 teaspoon of almond extract to the cookie dough.
- If you want a firmer chocolate coating, use candy melts instead of chocolate chips.
- Make sure your strawberries are fresh and not overly ripe, so they hold their shape better.
Nutrition Facts:
- Calories: 150 per cookie
- Total Fat: 7g
- Saturated Fat: 4g
- Cholesterol: 20mg
- Sodium: 90mg
- Total Carbohydrates: 22g
- Dietary Fiber: 1g
- Sugars: 10g
- Protein: 2g
21 Nutty Decorated Bunny Cluster Cookies

These Nutty Decorated Bunny Cluster Cookies are a delightful treat to make for Easter! They’re not only cute but also packed with crunchy nuts and sweet chocolate. Your family and friends will love these adorable bunny-shaped cookies, perfect for sharing.
Prep Time: 20 minutes
Total Time: 1 hour
Servings: 24 cookies
Ingredients:
- 1 cup unsalted butter, softened
- 1 cup granulated sugar
- 1/2 cup brown sugar, packed
- 2 cups all-purpose flour
- 1 cup rolled oats
- 1/2 cup chopped nuts (your choice: walnuts, almonds, or pecans)
- 1 teaspoon vanilla extract
- 1 teaspoon baking soda
- 1/2 teaspoon salt
- 1 cup mini chocolate chips
- 1/2 cup colorful sprinkles
- Bunny-shaped cookie cutter
- Melting chocolate (for decoration)
Instructions:
Preheat your oven to 350°F (175°C) and line a baking sheet with parchment paper. This will keep your cookies from sticking.
In a large bowl, cream together the butter, granulated sugar, and brown sugar until the mixture is smooth and fluffy. This should take about 2-3 minutes.
Next, add in the vanilla extract and mix well. Then, gradually add the flour, baking soda, and salt. Stir until blended together into a dough.
Now, fold in the rolled oats, chopped nuts, and mini chocolate chips. The dough will be thick and ready to scoop.
Using a tablespoon, drop spoonfuls of the dough onto the prepared baking sheet, spacing them about 2 inches apart. Gently shape them a little if needed to appear more like clusters.
Bake the cookies for about 12-15 minutes or until the edges are golden brown. Once they are done, remove them from the oven and let them cool on the baking sheet for a few minutes before transferring them to a wire rack to cool completely.
Once your cookies have cooled, melt the melting chocolate in a microwave-safe bowl. Dip the top of each cookie into the chocolate and then sprinkle with colorful sprinkles for decoration.
Let the chocolate set for about 30 minutes before serving. Your decorated bunny cluster cookies are now ready to delight everyone!
Tips:
- For extra flavor, consider adding cinnamon or nutmeg to the dough.
- To make the cookies even more festive, use pastel-colored sprinkles!
- Store any leftover cookies in an airtight container to keep them fresh for longer.
Nutrition Facts:
- Calories: 150 per cookie
- Total Fat: 8g
- Saturated Fat: 4g
- Cholesterol: 20mg
- Sodium: 80mg
- Total Carbohydrates: 18g
- Dietary Fiber: 1g
- Sugars: 8g
- Protein: 2g
22 Gingerbread Chick and Bunny Cookies

These Gingerbread Chick and Bunny Cookies are a fun and festive treat perfect for Easter! With their cute shapes and spicy flavor, they’ll bring joy to any celebration. Plus, kids will love helping to decorate them!
Prep Time: 30 minutes
Cook Time: 10 minutes
Additional Time: 1 hour (for chilling dough)
Total Time: 1 hour 40 minutes
Servings: 24 cookies
Ingredients:
- 3 cups all-purpose flour
- 1 teaspoon baking soda
- 1 tablespoon ground ginger
- 1 tablespoon ground cinnamon
- 1/2 teaspoon ground cloves
- 1/2 teaspoon salt
- 3/4 cup unsalted butter, softened
- 1 cup brown sugar, packed
- 1 egg
- 1/4 cup molasses
- 1 teaspoon vanilla extract
- Royal icing for decoration
- Colored sprinkles (optional)
Instructions:
Begin by mixing the flour, baking soda, ginger, cinnamon, cloves, and salt in a large bowl. Stir them together until they are combined. This will be your dry mixture.
In a separate bowl, use a mixer to beat together the butter and brown sugar until the mixture is light and fluffy. This usually takes about 3-4 minutes. Add the egg, molasses, and vanilla extract, and mix well until everything is incorporated.
Slowly add the dry mixture into the wet mixture, combining everything until it forms a thick dough. Once it’s ready, divide the dough into two balls, wrap them in plastic wrap, and chill them in the refrigerator for 1 hour.
After the dough is chilled, preheat your oven to 350°F (175°C). Roll out one ball of dough on a floured surface to about 1/4 inch thick. Use chick and bunny cookie cutters to cut out shapes. Place the cookies on a baking sheet lined with parchment paper.
Bake the cookies in the oven for about 10 minutes until they are firm and slightly golden around the edges. Allow them to cool on the baking sheet for a few minutes before transferring them to wire racks to cool completely.
Once the cookies have cooled, it’s time to decorate! Use royal icing to pipe on different colors and designs. Add colored sprinkles if you want to make them even more festive.
Tips:
- Make sure to chill the dough; this will help the cookies keep their shape while baking.
- Use different colors of icing for a vibrant look, and let each layer dry before adding more.
- Store the cookies in an airtight container to keep them fresh for longer!
Nutrition Facts:
- Calories: 120 per cookie
- Total Fat: 5g
- Saturated Fat: 3g
- Cholesterol: 15mg
- Sodium: 50mg
- Total Carbohydrates: 18g
- Dietary Fiber: 1g
- Sugars: 6g
- Protein: 1g