Mother’s Day Chocolate Covered Strawberries Packaged as a DIY Gift
Chocolate covered strawberries are one of those gifts that feel genuinely special without requiring a bakery degree or a big budget. You dip fresh strawberries in melted chocolate, let them set, and package them up in a way that looks like you spent real effort — because you did.
The appeal here is twofold: they taste far better than anything from a gift shop, and the handmade presentation makes them feel personal. A ribbon-tied box of strawberries you made yourself hits differently than a cellophane bag from a display case.
Choosing Chocolate That Actually Sets Properly
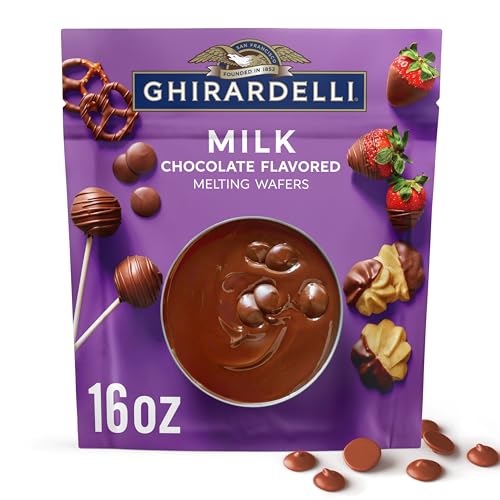
Not all chocolate behaves the same way when melted. Chocolate chips contain stabilizers that keep them from melting smoothly, which can leave you with a thick, streaky coating that doesn’t harden cleanly. For the best results, use high-quality chocolate bars or wafers — Ghirardelli baking bars, Guittard wafers, or Callebaut chips (the kind sold for baking, not snacking) all work well.
If you want that glossy, snappy finish you see on professional strawberries, you’ll need to temper the chocolate or use candy melts. Candy melts skip the tempering step entirely and set up shiny without any extra work, making them a solid option for a first-time batch.

Most Loved Products


Packaging Them So They Arrive Looking Good
The packaging is half the gift. A cardboard candy box with a plastic insert tray keeps each strawberry upright and separated so the coating doesn’t smudge. You can find these at craft stores or order them online — look for "chocolate candy boxes with inserts" or "truffle boxes."
If you can’t find a box with inserts, set each strawberry in a small paper candy cup and arrange them in a single layer in any shallow gift box lined with tissue paper. Avoid stacking them. Add a ribbon and a handwritten tag, and it looks intentional and thoughtful — no shrink wrap required.
Storing and Timing Your Batch
- Make these the day before Mother’s Day, not two days ahead — strawberries release moisture over time and the chocolate can develop condensation or start to slide.
- If your kitchen is warm, work in batches of 6 strawberries at a time so the chocolate stays fluid and you’re not rushing.
- Candy melts (found at craft stores like Michaels) are a great shortcut — they melt easily, set up glossy without tempering, and come in fun colors like pink or red for a festive look.
- To keep the bottoms flat and prevent a chocolate puddle from forming, prop each dipped strawberry against the side of the baking sheet at a slight angle rather than laying it flat.
- Room temperature strawberries dip better than cold ones — take them out of the fridge 20 minutes before you start.
Mother’s Day Chocolate Covered Strawberries Packaged as a DIY Gift
Decoration
- 🔪Parchment-lined baking sheet (half sheet, 18×13 inches)
- 🥣Medium heatproof bowl (for double boiler)
- ⚡Small saucepan (for double boiler base)
- 🍳Rubber spatula
- 🥄Small piping bag or zip-lock bag (for white chocolate drizzle)
- 📏Kitchen thermometer (optional but helpful)
- 🔧Paper towels
- 🍰Candy box with insert tray or shallow gift box with tissue paper
- 🫙Ribbon and gift tag
Dry the Strawberries
Wash the strawberries gently under cool water, then lay them on a clean kitchen towel or paper towels. Pat each one completely dry, including around the stem.
Any moisture on the surface will cause the chocolate to seize or slide off. Let them air dry for at least 15 minutes before dipping.
Melt the Chocolate
Fill a small saucepan with about 1 inch of water and bring it to a bare simmer over medium-low heat. Place a heatproof bowl on top — it should sit above the water without touching it.
Add the chopped semi-sweet chocolate to the bowl. Stir frequently with a rubber spatula as it melts, about 4-6 minutes.
Once mostly melted, remove the bowl from the heat and stir until completely smooth. If the chocolate feels too thick to dip cleanly, stir in 1 teaspoon of coconut oil.
Dip the Strawberries
Hold each strawberry by the stem and dip it into the melted chocolate, submerging it about three-quarters of the way up. Lift it out and let the excess chocolate drip back into the bowl for 3-4 seconds, then give it a gentle shake.
Set it on the parchment-lined baking sheet. Work quickly so the chocolate stays fluid — if it starts to thicken, briefly return the bowl to the warm water bath for 30 seconds.
Add Toppings
If using sprinkles or crushed toppings, scatter them over the wet chocolate immediately after dipping, before it sets. Work one or two strawberries at a time so the coating doesn’t harden before you can add the toppings.
Drizzle White Chocolate
Melt the white chocolate using the same double boiler method, about 3-4 minutes. Transfer it to a small piping bag or a zip-lock bag with one tiny corner snipped off.
Once all the strawberries are dipped and on the tray, drizzle the white chocolate back and forth over them in thin lines. You can also do the reverse — dip in white chocolate first and drizzle with dark.
Chill Until Set
Slide the baking sheet into the refrigerator and chill the strawberries uncovered for at least 1 hour, until the chocolate is completely firm and set. You’ll know they’re ready when the coating is hard to the touch, no longer tacky, and lifts cleanly off the parchment without sticking.
Don’t cover them while they’re still warm or condensation will form on the chocolate.
Package the Gift
Once fully set, transfer each strawberry into the candy box insert tray or set them in individual paper candy cups inside a gift box lined with tissue paper. Arrange them in a single layer — never stack them.
Close the box, tie with a ribbon, and attach a handwritten gift tag. Store the finished gift in the refrigerator and plan to give it within 24 hours for the best texture and appearance.
Per serving (1 strawberry) — values are estimates