10 Spring Tea Party Food Ideas for an Elegant Afternoon
Delicate finger sandwiches and flaky pastry cups filled with creamy brie — spring tea party food is all about small bites that feel a little fancy without being fussy to pull off.
You’ll find bright, seasonal flavors throughout: cool cucumber against silky smoked salmon, sweet fig jam cutting through rich cheese, fresh mint lifting a simple pea spread.
Most of these come together in under 30 minutes and can be prepped ahead, so you’re not scrambling while guests arrive.
Pour the tea, arrange everything on a tiered stand, and let the food do the talking.
1. Smoked Salmon Cucumber Canapés
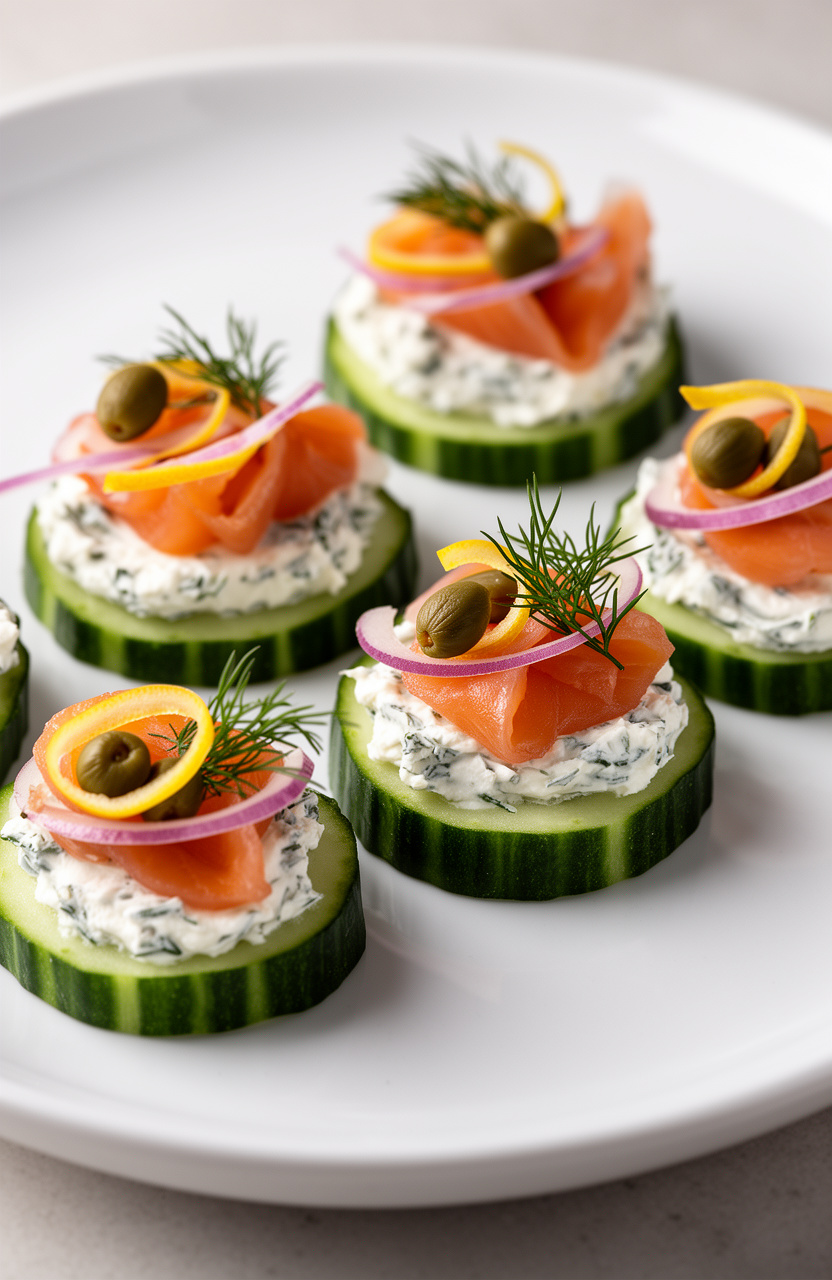
Crisp cucumber rounds topped with silky smoked salmon and tangy cream cheese create a cool, layered bite with a briny edge softened by the grassy, anise-like whisper of fresh dill scattered across each piece.
Smoked Salmon Cucumber Canapés
Cream Cheese Spread
Garnish
- 🪵Cutting board
- 🔪Sharp chef’s knife
- 🥣Medium mixing bowl
- 🔌Hand mixer or fork
- 🛍️Piping bag with star tip or zip-lock bag
- 🍴Paper towels
- 🍽️Serving platter
- 🔪Microplane or zester
- 🥄Measuring spoons
Prepare Cucumber Rounds
Wash and dry the English cucumbers thoroughly. Using a sharp knife, slice both cucumbers into 1/4-inch thick rounds, yielding approximately 24 to 30 slices.
Lay the cucumber rounds in a single layer on paper towels and pat the tops dry to remove excess moisture. This ensures the cream cheese spread adheres properly and prevents soggy canapés.
Make Cream Cheese Spread
In a medium mixing bowl, combine the softened cream cheese, 2 tablespoons of finely chopped fresh dill, 1 tablespoon of fresh lemon juice, 1 teaspoon of lemon zest, the minced shallot, and garlic powder. Using a hand mixer or fork, beat until smooth and well combined.
Season with salt and white pepper to taste. The mixture should be fluffy and spreadable.
Fill Piping Bag
Transfer the cream cheese mixture into a piping bag fitted with a star tip for an elegant presentation. Alternatively, spoon the mixture into a zip-lock bag and snip a small corner off to create a makeshift piping bag.
This ensures uniform, attractive dollops on each cucumber round.
Pipe Cream Cheese
Arrange the dried cucumber rounds on a clean serving platter. Pipe a generous rosette or swirl of the herbed cream cheese mixture onto the center of each cucumber round, using approximately 1 to 1.5 teaspoons per slice.
Ensure each round is evenly covered to the edges for a polished look.
Top With Salmon
Drape or fold a small piece of smoked salmon (approximately 1/4 oz) over the cream cheese on each canapé. Tuck the salmon gently so it sits attractively on top without sliding off.
The salmon should complement the cream cheese without overwhelming the cucumber base.
Garnish Canapés
Finish each canapé with a single caper, a small sliver of red onion, a tiny sprig of fresh dill, and a curl of lemon zest. These garnishes add color, texture, and a burst of flavor.
Work quickly and methodically so all canapés are assembled uniformly before chilling.
Chill Before Serving
Cover the assembled platter loosely with plastic wrap and refrigerate for 20 minutes before serving. This chilling time allows the cream cheese to firm up slightly so the canapés hold their shape when picked up, and lets the flavors meld together beautifully.
Serve Immediately
Remove the platter from the refrigerator and serve immediately. For best results, do not leave canapés at room temperature for more than 1 hour.
Arrange on a decorative platter with lemon wedges and extra dill sprigs for presentation.
Per serving (2 canapés) — values are estimates
Shop Our Must-Haves


2. Brie and Fig Phyllo Cups
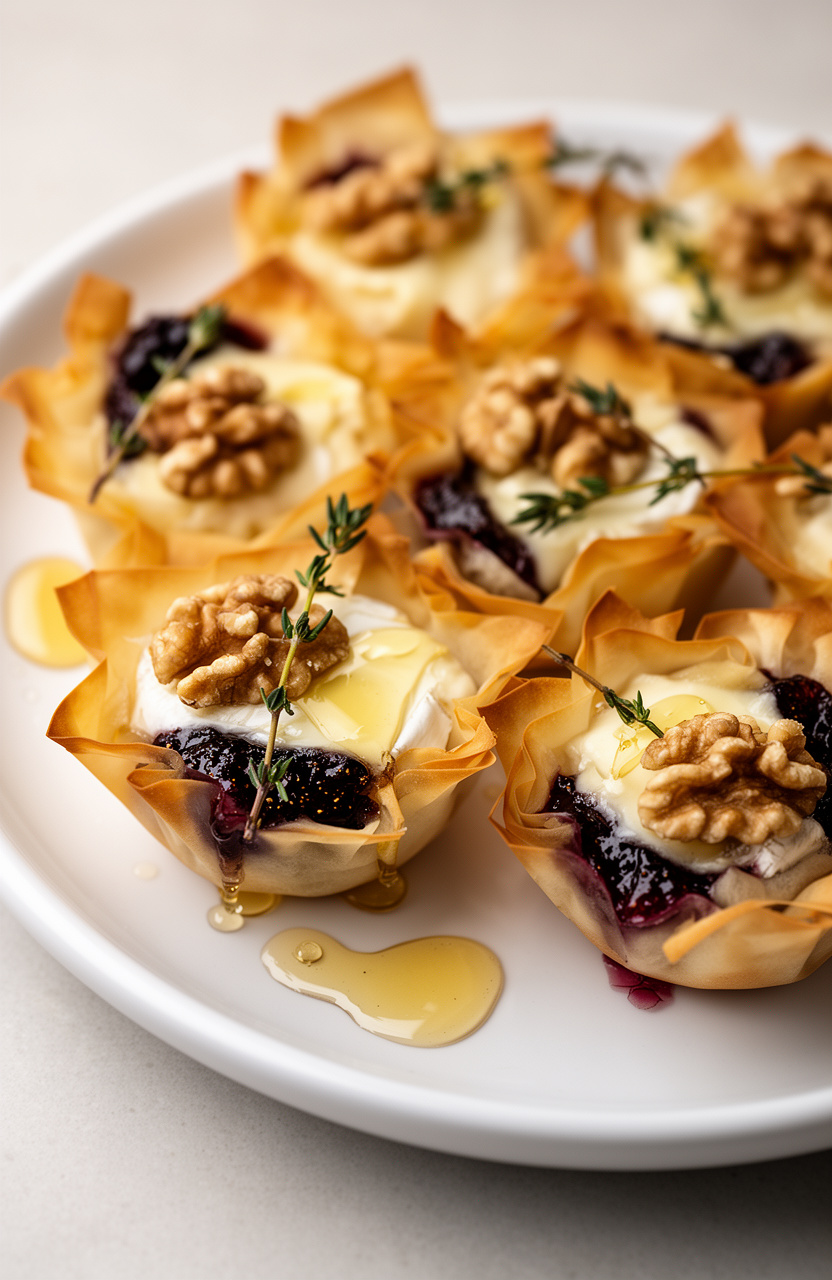
Flaky, golden phyllo cups hold cubes of softened Brie that melt into pools beneath a spoonful of dark, jammy fig preserves, finished with toasted walnuts that crack against the creamy, yielding cheese.
Brie and Fig Phyllo Cups
- 🥧Baking sheet
- 📄Parchment paper
- 🔪Small knife
- 🪵Cutting board
- 🥄Small spoon or melon baller
- 🔥Oven
Preheat the Oven
Preheat your oven to 375°F (190°C). Line a baking sheet with parchment paper and arrange the frozen mini phyllo shells on the prepared baking sheet in a single layer.
Do not thaw the shells before filling.
Prepare the Brie
Using a small knife, carefully remove the rind from the Brie cheese. Cut the Brie into small cubes approximately 1/2-inch in size, enough to fit snugly into each phyllo cup.
Work quickly so the cheese stays firm and easy to handle.
Fill the Cups
Place one small cube of Brie into each frozen phyllo shell. Using a small spoon, add approximately 1/2 teaspoon of fig preserves on top of the Brie in each cup.
The fig preserves should rest on top of the cheese without overflowing the shell.
Add the Toppings
Sprinkle a small pinch of chopped toasted walnuts or pecans over each filled cup. Add a few fresh thyme leaves to each cup, and season lightly with freshly cracked black pepper.
Bake Until Melted
Transfer the baking sheet to the preheated oven and bake for 10 to 12 minutes, until the Brie is fully melted and bubbling and the phyllo shells are golden and crispy. Watch closely in the last 2 minutes to prevent the shells from over-browning.
Finish and Serve
Remove the cups from the oven and immediately drizzle a small amount of honey over each cup. Finish with a tiny pinch of flaky sea salt.
Allow to cool for 2 to 3 minutes before transferring to a serving platter. Serve warm for the best flavor and texture.
Per serving (2 phyllo cups) — values are estimates
Most Loved Products


3. Prosciutto Wrapped Asparagus Spears
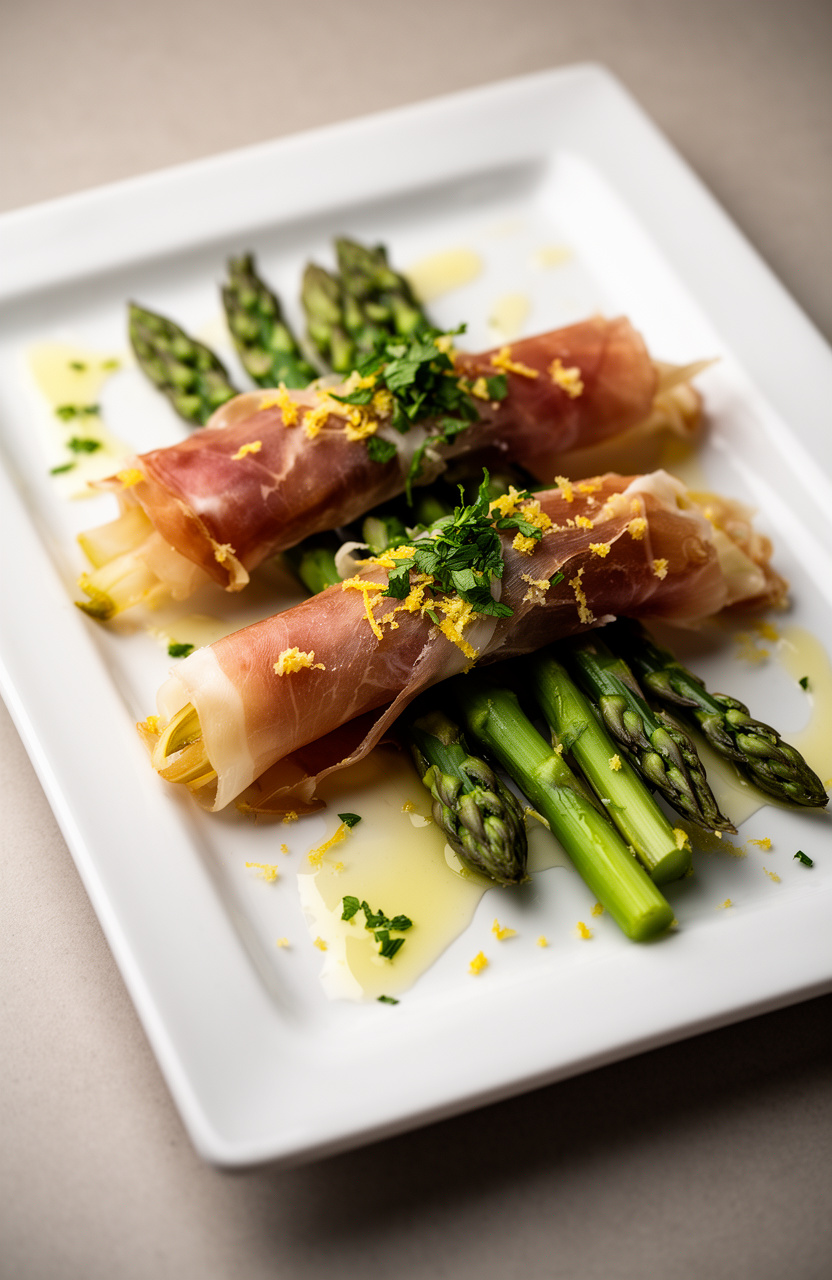
Roasting in a hot oven renders the prosciutto into a crackling, paper-thin wrap around each spear while the asparagus softens just enough to stay tender-firm. The salt-cured pork fat melts into the vegetable’s grassy bite, with black pepper cutting through the richness.
Prosciutto Wrapped Asparagus Spears
Finishing
- 🥧Large baking sheet
- 📄Parchment paper
- 🥣Small mixing bowl
- 🥄Pastry brush or spoon
- 🥢Tongs
- 🔪Microplane or zester
- 🪵Cutting board
- 🔪Sharp knife
Preheat the Oven
Preheat your oven to 425°F (220°C). Line a large baking sheet with parchment paper and set aside.
Prep the Asparagus
Wash the 16 asparagus spears and pat them completely dry with paper towels. Trim the woody ends by snapping or cutting approximately 1 to 2 inches from the bottom of each spear.
Dry asparagus ensures the prosciutto adheres properly and crisps nicely during cooking.
Season with Oil
In a small bowl, combine 2 tablespoons of extra-virgin olive oil, 1/2 teaspoon freshly ground black pepper, and 1/4 teaspoon garlic powder. Lightly brush or drizzle this mixture over the asparagus spears, turning to coat evenly.
Do not add salt, as the prosciutto provides ample saltiness.
Wrap with Prosciutto
Take one halved prosciutto strip and, starting just below the tip of an asparagus spear, wrap it in a spiral motion down toward the base, overlapping slightly as you go. Press the end of the prosciutto firmly against the spear to secure it.
Repeat with all 16 spears. The prosciutto should cover most of the asparagus stalk.
Arrange on Baking Sheet
Place the wrapped asparagus spears in a single layer on the prepared baking sheet, leaving at least half an inch of space between each spear. Avoid crowding the pan to ensure even roasting and crisping of the prosciutto.
Roast Until Crispy
Transfer the baking sheet to the preheated 425°F oven and roast for 10 to 12 minutes, until the prosciutto is golden and crispy and the asparagus is tender when pierced with a fork. Thinner spears may be done closer to 10 minutes; thicker spears may need the full 12 minutes.
Finish and Serve
Remove the asparagus from the oven and immediately drizzle with 1 tablespoon of fresh lemon juice. Sprinkle with 1 teaspoon of lemon zest and 1 tablespoon of freshly chopped flat-leaf parsley.
Transfer to a serving platter and serve hot as an appetizer.
Per serving (4 spears) — values are estimates
Shop Our Must-Haves


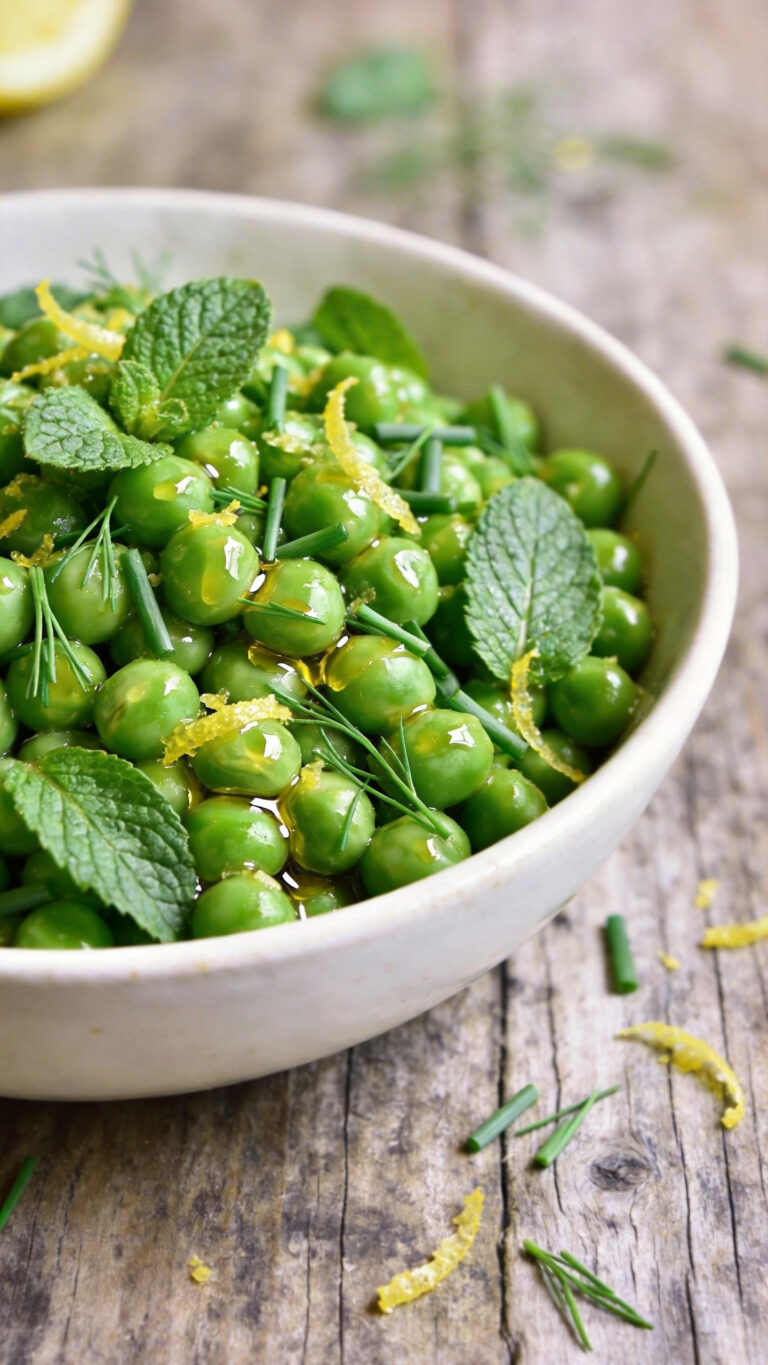
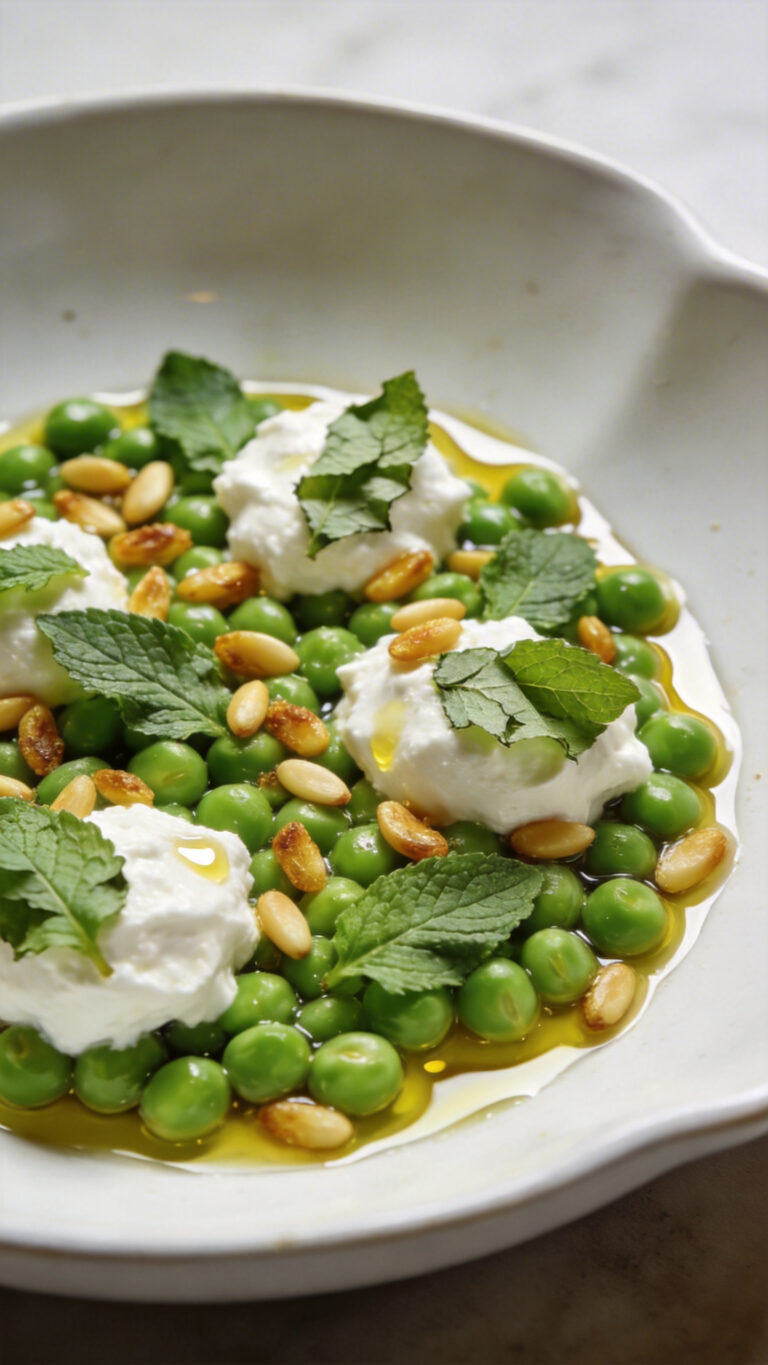
4. Pea and Mint Crostini Bites
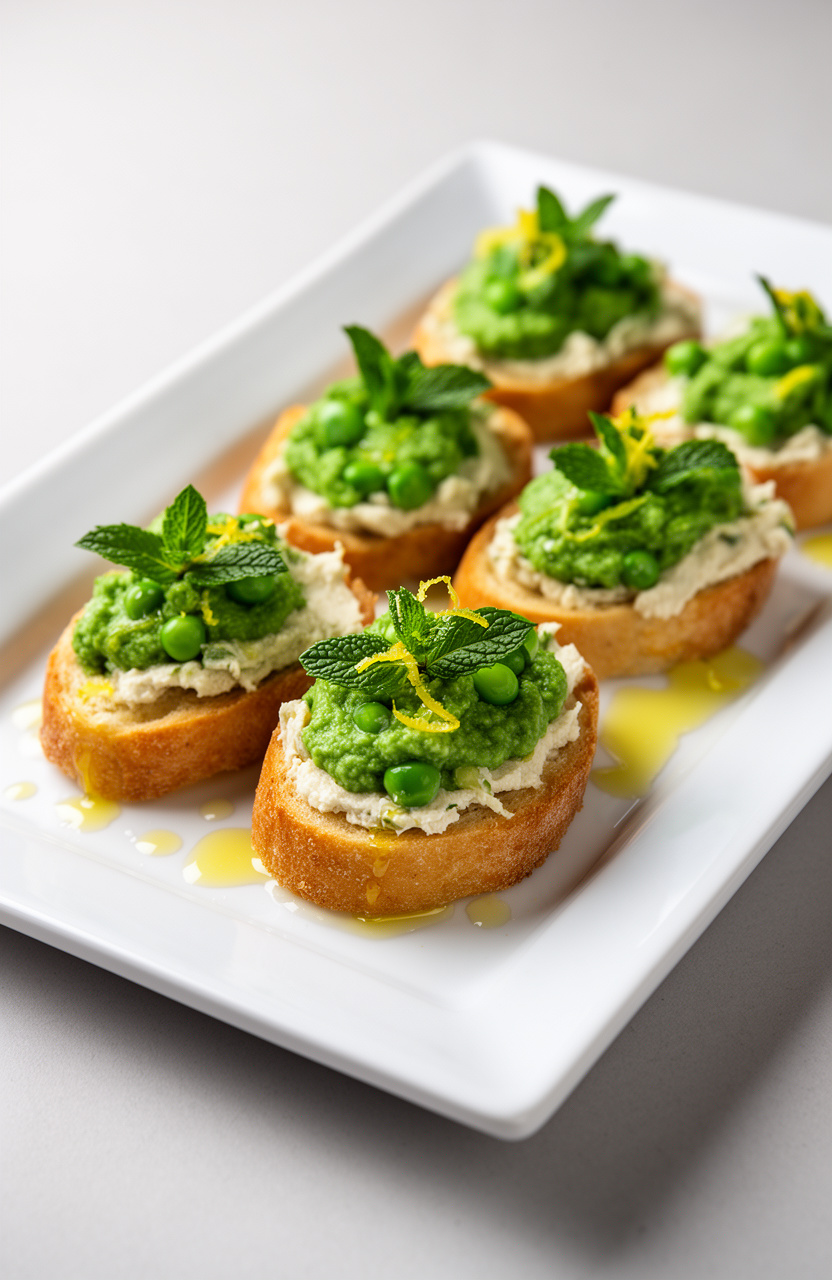
Oven-toasted baguette rounds get a swipe of bright green pea and mint purée, the contrast of golden, crunchy bread against the cool, grassy spread catching the eye before the first bite delivers a clean herbal finish.
Pea and Mint Crostini Bites
Crostini
Pea Topping
Assembly
- 🥧Baking sheet
- 🖌️Pastry brush
- 🌀Food processor or blender
- 🫕Small saucepan
- 🪵Cutting board
- 🔪Chef’s knife
- 🔪Zester or microplane
- 🥣Mixing bowl
- 🥄Spatula or spreader
- 🔥Oven
Preheat the Oven
Preheat your oven to 400°F (200°C). Arrange the baguette slices in a single layer on a large baking sheet.
Brush and Season Bread
Using a pastry brush, lightly coat each baguette slice with 2 tablespoons of the extra-virgin olive oil. Sprinkle evenly with flaky sea salt.
Bake the Crostini
Place the baking sheet in the preheated oven and bake for 10 minutes, or until the crostini are golden and crisp around the edges. Remove from the oven and let cool slightly on the pan.
Cook the Peas
While the crostini bake, place the thawed peas in a small saucepan over medium heat with a splash of water. Cook for 3 to 5 minutes until warmed through and tender.
Drain any excess water and let cool for 2 minutes.
Blend Pea Mixture
Transfer the cooked peas to a food processor. Add the fresh mint leaves, lemon juice, lemon zest, minced garlic, ricotta cheese, Parmesan cheese, crushed red pepper flakes, and the remaining 1 tablespoon of olive oil.
Pulse 8 to 10 times until you achieve a chunky, spreadable consistency — do not over-blend; some texture is desirable. Season with salt and black pepper to taste.
Assemble the Crostini
Spread a thin layer of ricotta cheese on each toasted crostini round. Top with a generous spoonful (about 1 tablespoon) of the pea and mint mixture, pressing it gently to adhere.
Garnish and Serve
Finish each crostini bite with a small fresh mint leaf, a pinch of lemon zest, and a light drizzle of extra-virgin olive oil. Arrange on a serving platter and serve immediately while the crostini are still crisp.
Per serving (2 crostini bites) — values are estimates
Our Best Picks


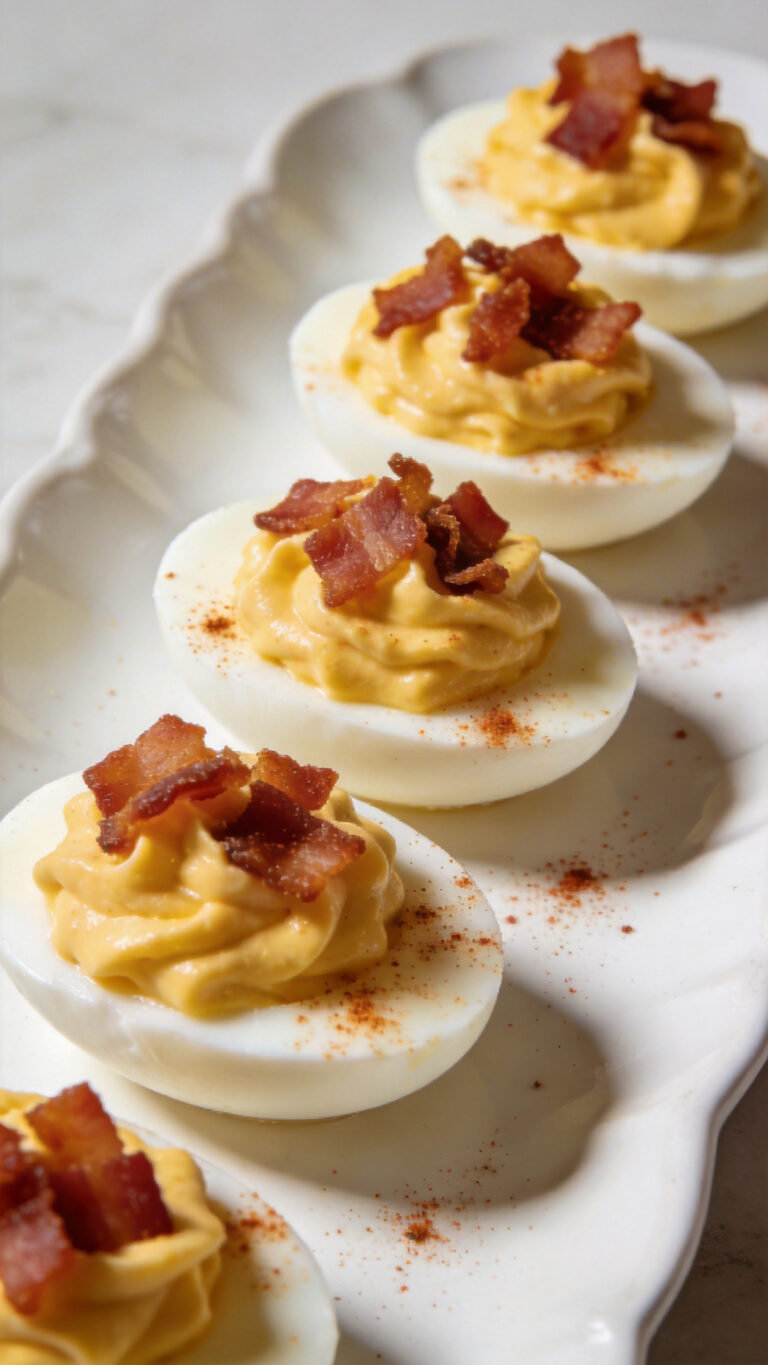
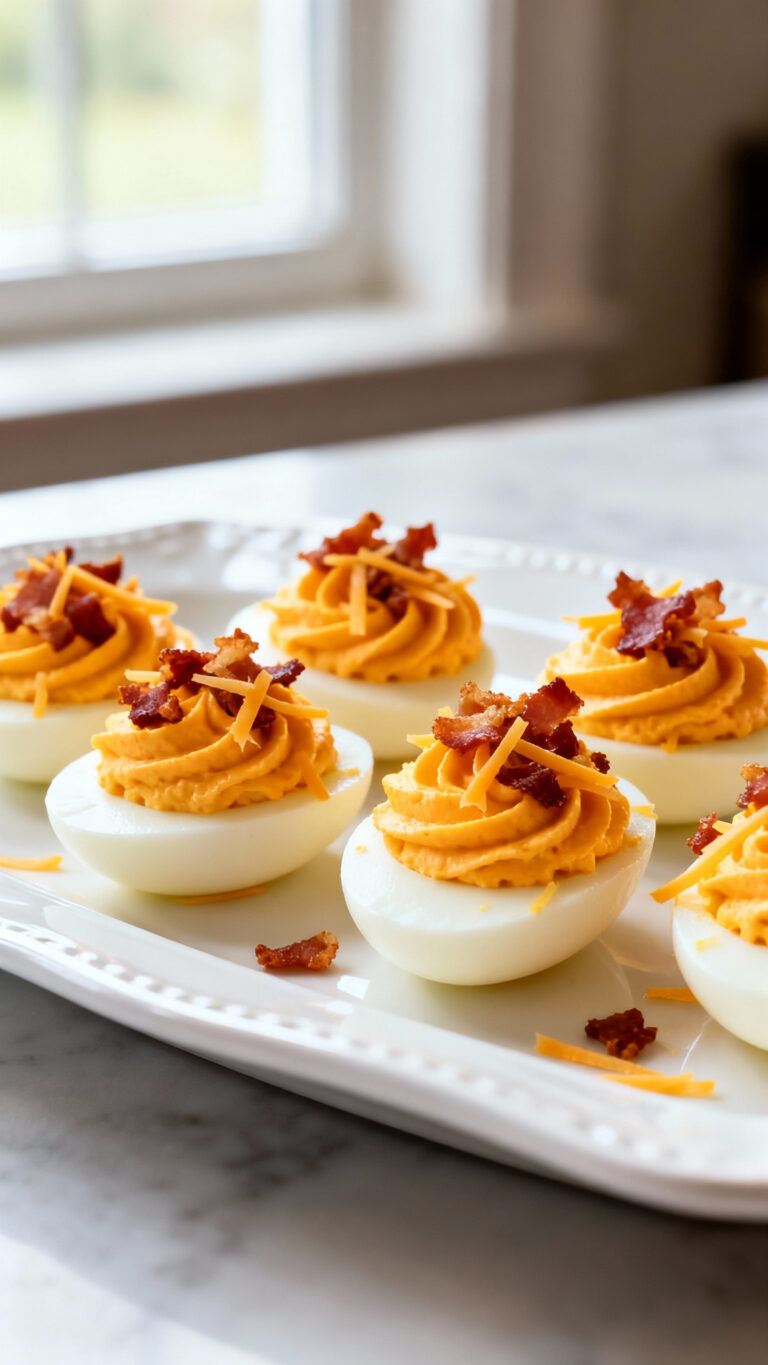
5. Deviled Eggs with Caviar
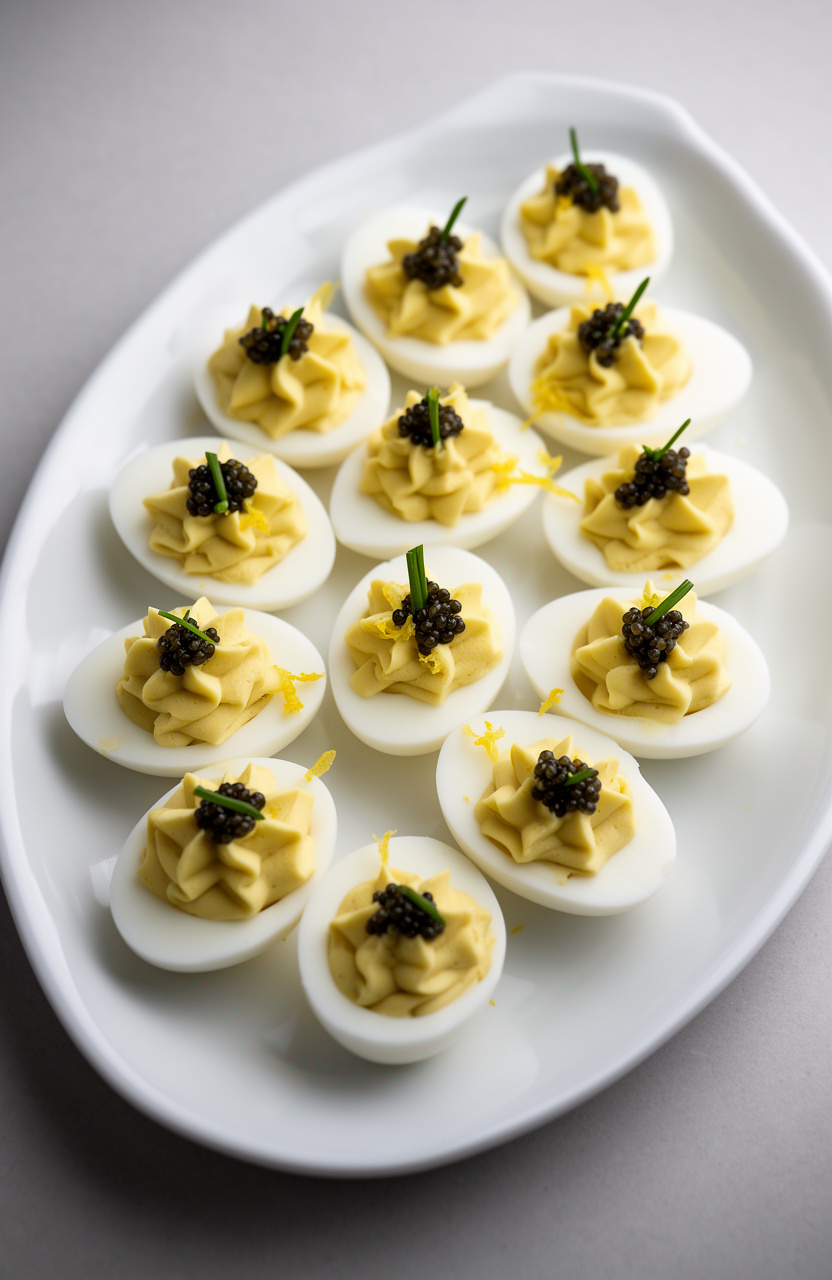
Hard-boiled eggs get halved and piped with a tangy, creamy yolk filling — Dijon mustard and lemon juice cutting through the richness of the mayo — then topped with a small spoonful of caviar that adds a briny, slightly oceanic pop against the smooth, pale yellow base.
Deviled Eggs with Caviar
Topping
- 🫕Medium saucepan
- 🥄Slotted spoon
- 🥣Ice bath bowl
- 🔪Sharp knife
- 🥣Small mixing bowl
- 🔌Fork or hand mixer
- 🎂Piping bag with star tip
- 🍽️Serving platter
- 🥄Small spoon for caviar
Hard-Boil the Eggs
Place 6 large eggs in a single layer in a medium saucepan and cover with cold water by 1 inch. Bring to a full boil over medium-high heat, then immediately reduce heat to a gentle boil and cook for exactly 12 minutes.
Ice Bath Transfer
Using a slotted spoon, immediately transfer the cooked eggs to a bowl filled with ice water. Let them cool completely in the ice bath for at least 5 minutes.
This stops the cooking and makes peeling easier.
Peel and Halve
Gently peel each cooled egg under a thin stream of cold running water. Pat dry with paper towels.
Slice each egg in half lengthwise with a sharp knife, wiping the blade clean between cuts for neat edges.
Prepare the Filling
Pop the yolks into a small mixing bowl. Mash them thoroughly with a fork until no lumps remain.
Add 3 tablespoons mayonnaise, 1 teaspoon Dijon mustard, 1 teaspoon fresh lemon juice, 1/4 teaspoon fine sea salt, 1/8 teaspoon white pepper, and 1 teaspoon minced chives. Mix until completely smooth and creamy.
Chill the Filling
Cover the yolk mixture and the egg white halves separately with plastic wrap and refrigerate for 30 minutes. Chilling firms the filling and allows the flavors to meld, making it easier to pipe cleanly.
Pipe the Filling
Transfer the chilled yolk mixture into a piping bag fitted with a star tip. Arrange the egg white halves on a serving platter.
Pipe a generous rosette of filling into each egg white cavity, slightly mounding it above the rim.
Top with Caviar
Using a small non-metallic spoon (to preserve caviar flavor), carefully place approximately 1/4 teaspoon of caviar on top of each piped egg. Handle the caviar gently to keep the pearls intact.
Garnish and Serve
Finish each deviled egg with a single fresh chive tip and a tiny pinch of lemon zest. Serve immediately on the chilled platter, or keep refrigerated for up to 2 hours before serving.
Per serving (2 deviled egg halves) — values are estimates
Top Picks Today


6. Spinach Artichoke Puff Pastry Pinwheels
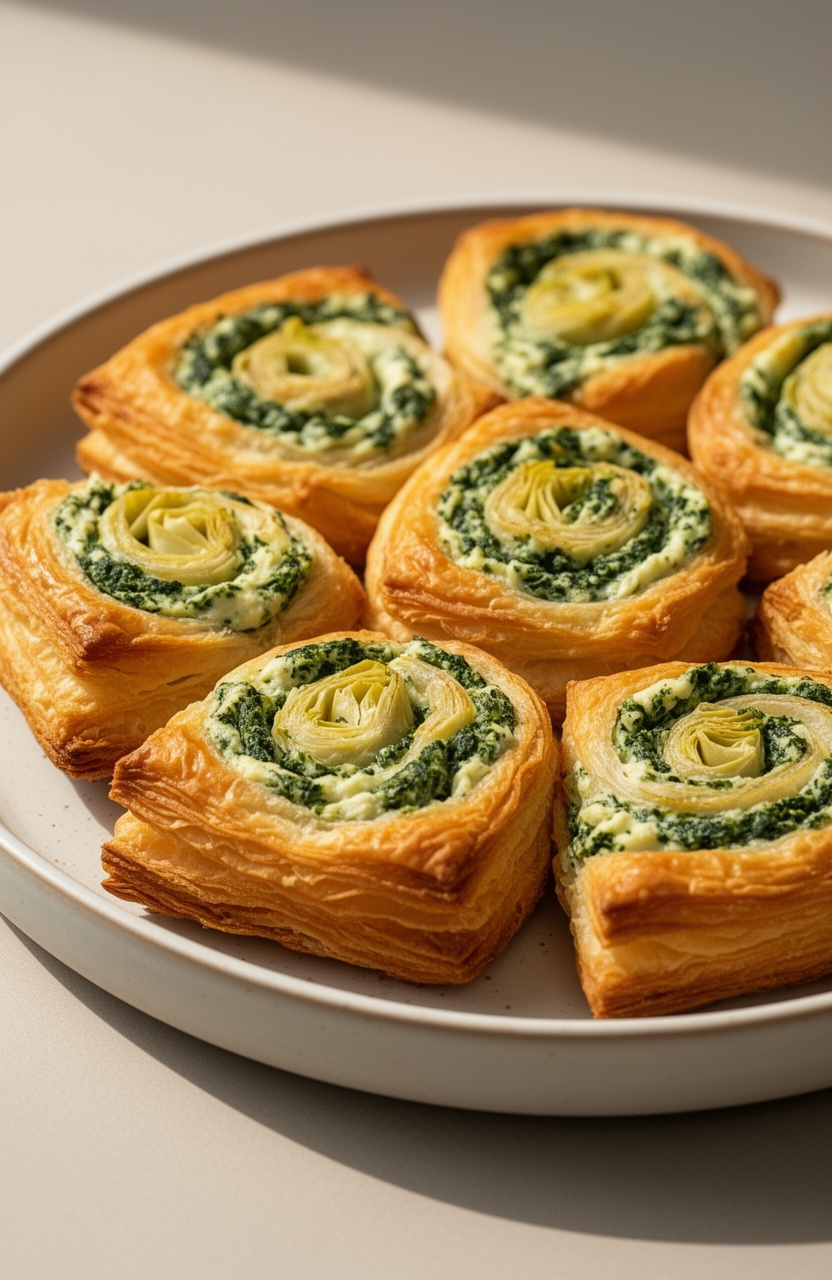
Golden puff pastry spirals around a cream cheese and spinach-artichoke filling that stays rich and slightly tangy at the center while the outer layers shatter into paper-thin, buttery flakes. Each slice reveals a tight swirl of green-flecked filling against pale, laminated dough.
Spinach Artichoke Puff Pastry Pinwheels
Pastry
Filling
- 🥧Baking sheet
- 📄Parchment paper
- 🥣Large mixing bowl
- 🔌Hand mixer or stand mixer
- 🫙Lightly floured rolling pin
- 🔪Sharp serrated knife or unflavored dental floss
- 🖌️Pastry brush
- 📄Plastic wrap
- 🪵Cutting board
Make the Filling
In a large mixing bowl, beat the softened cream cheese with a hand mixer on medium speed until smooth and fluffy, about 1 minute. Add the sour cream, minced garlic, onion powder, crushed red pepper flakes, salt, and black pepper.
Mix until fully combined. Fold in the squeezed-dry spinach, chopped artichoke hearts, shredded mozzarella, and Parmesan cheese until evenly distributed.
Taste and adjust seasoning if needed.
Prepare the Pastry
Lightly flour a clean work surface. Unfold the thawed puff pastry sheet and use a rolling pin to gently roll it into a roughly 10×12-inch rectangle, smoothing out any fold lines.
Work quickly to keep the pastry cold.
Spread the Filling
Spread the spinach artichoke filling evenly over the entire surface of the puff pastry, leaving a 1/2-inch border along one of the long edges. Use an offset spatula or the back of a spoon to spread it in an even layer, about 1/4 inch thick.
Roll and Chill
Starting from the long edge opposite the bare border, tightly roll the pastry into a log, pressing gently as you go to keep it compact. Pinch the seam closed.
Wrap the log tightly in plastic wrap and place it in the refrigerator to chill for 15 minutes until firm. This makes slicing much cleaner.
Preheat the Oven
While the log chills, preheat your oven to 400°F (200°C). Line a large baking sheet with parchment paper and set aside.
Slice the Pinwheels
Remove the chilled log from the refrigerator and unwrap it. Using a sharp serrated knife or unflavored dental floss, slice the log into 1/2-inch-thick rounds, yielding approximately 24 pinwheels.
Wipe the knife clean between cuts for neat slices. Arrange the pinwheels cut-side up on the prepared baking sheet, spacing them about 1 inch apart.
Apply Egg Wash
Brush the top of each pinwheel lightly with the beaten egg using a pastry brush. This will give them a beautiful golden-brown finish as they bake.
Bake Until Golden
Bake in the preheated 400°F (200°C) oven for 20 to 22 minutes, until the pinwheels are puffed, deeply golden brown, and the edges are crisp. Rotate the baking sheet halfway through baking for even browning.
Cool and Serve
Remove the pinwheels from the oven and allow them to cool on the baking sheet for 3 to 5 minutes before transferring to a serving platter. Serve warm or at room temperature.
Garnish with extra Parmesan or fresh parsley if desired.
Per serving (2 pinwheels) — values are estimates
Our Best Picks


7. Honey Goat Cheese Strawberry Bruschetta
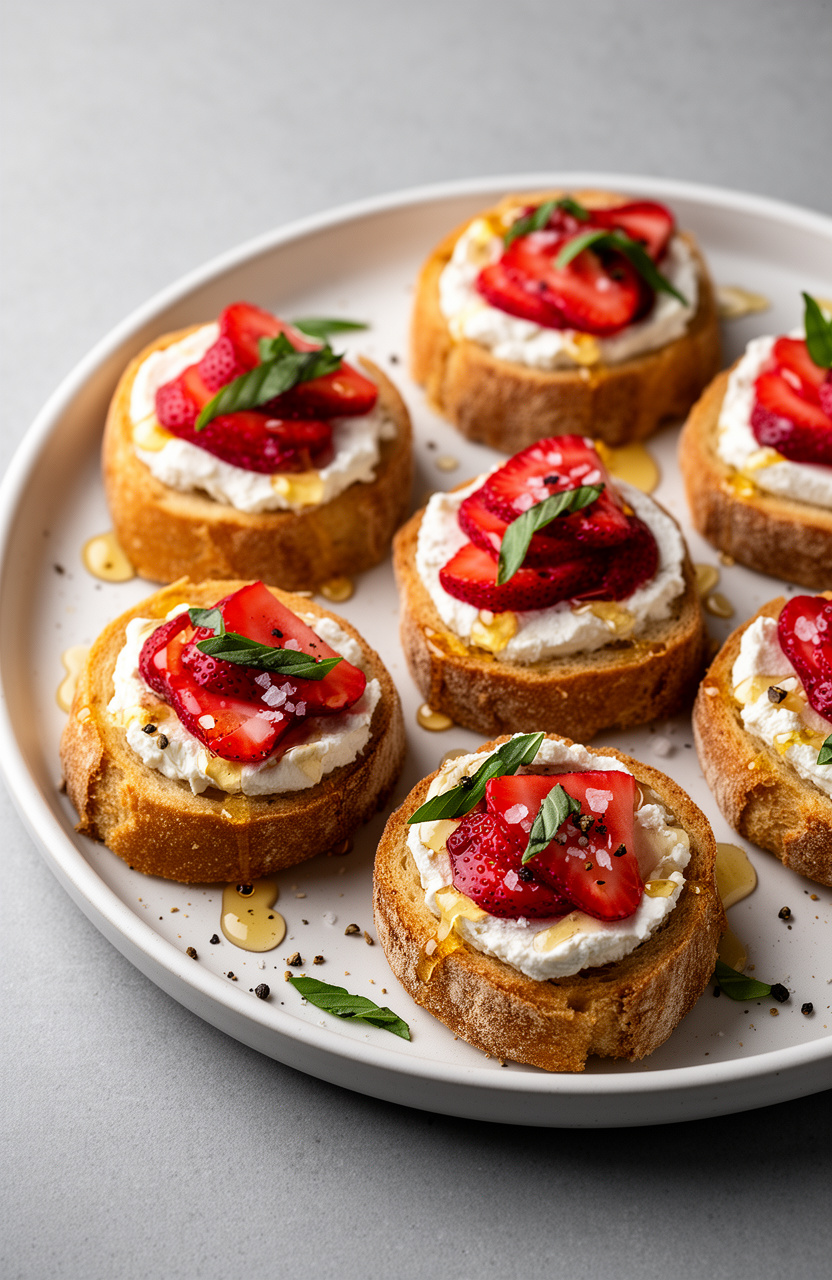
Crisp baguette rounds spread with tangy, room-temperature goat cheese get topped with a macerated strawberry mixture that softens slightly, releasing its juices into a glossy, lightly sweet layer balanced by a drizzle of floral honey.
Honey Goat Cheese Strawberry Bruschetta
- 🥧Baking sheet
- 🖌️Pastry brush
- 🥣Mixing bowl
- 🔪Serrated knife
- 🪵Cutting board
- 🔪Citrus zester
- 🥄Spoon or offset spatula
- 🔥Broiler or grill pan
Prepare Strawberry Topping
In a medium mixing bowl, combine the diced strawberries, 3 tablespoons honey, fresh lemon juice, and lemon zest. Gently stir to coat all the strawberries evenly.
Set aside at room temperature while you prepare the toast so the flavors can meld together, about 5 minutes.
Toast the Baguette
Preheat your broiler to high or heat a grill pan over medium-high heat. Arrange the 16 baguette slices in a single layer on a baking sheet.
Brush both sides of each slice lightly with olive oil using a pastry brush. Place under the broiler or on the grill pan and toast for 3 to 4 minutes per side, watching closely, until each slice is golden brown with light char marks.
Total cook time is approximately 8 minutes.
Rub with Garlic
As soon as the toasted baguette slices come off the heat, immediately rub the top side of each warm slice with the cut side of the halved garlic clove. The heat from the bread will release the garlic’s aromatic oils into the surface, adding subtle depth without overpowering the toppings.
Spread Goat Cheese
Using a spoon or small offset spatula, spread a generous layer of room-temperature soft goat cheese onto each garlic-rubbed baguette slice. Aim for about 1 tablespoon per slice, spreading it all the way to the edges for full coverage and a creamy base.
Add Strawberry Topping
Using a spoon, scoop the honey-marinated strawberry mixture over each goat cheese-covered slice, distributing evenly among all 16 pieces. Allow some of the honey juices from the bowl to drizzle over each piece for extra flavor.
Garnish and Serve
Finish each bruschetta with a sprinkle of fresh basil chiffonade, a pinch of flaky sea salt, and a crack of black pepper. Drizzle a small amount of additional honey over the tops for a glossy, sweet finish.
Arrange on a serving platter and serve immediately for the best texture and flavor contrast.
Per serving (2 bruschetta pieces) — values are estimates
Most Loved Products

8. Shrimp Avocado Endive Boats
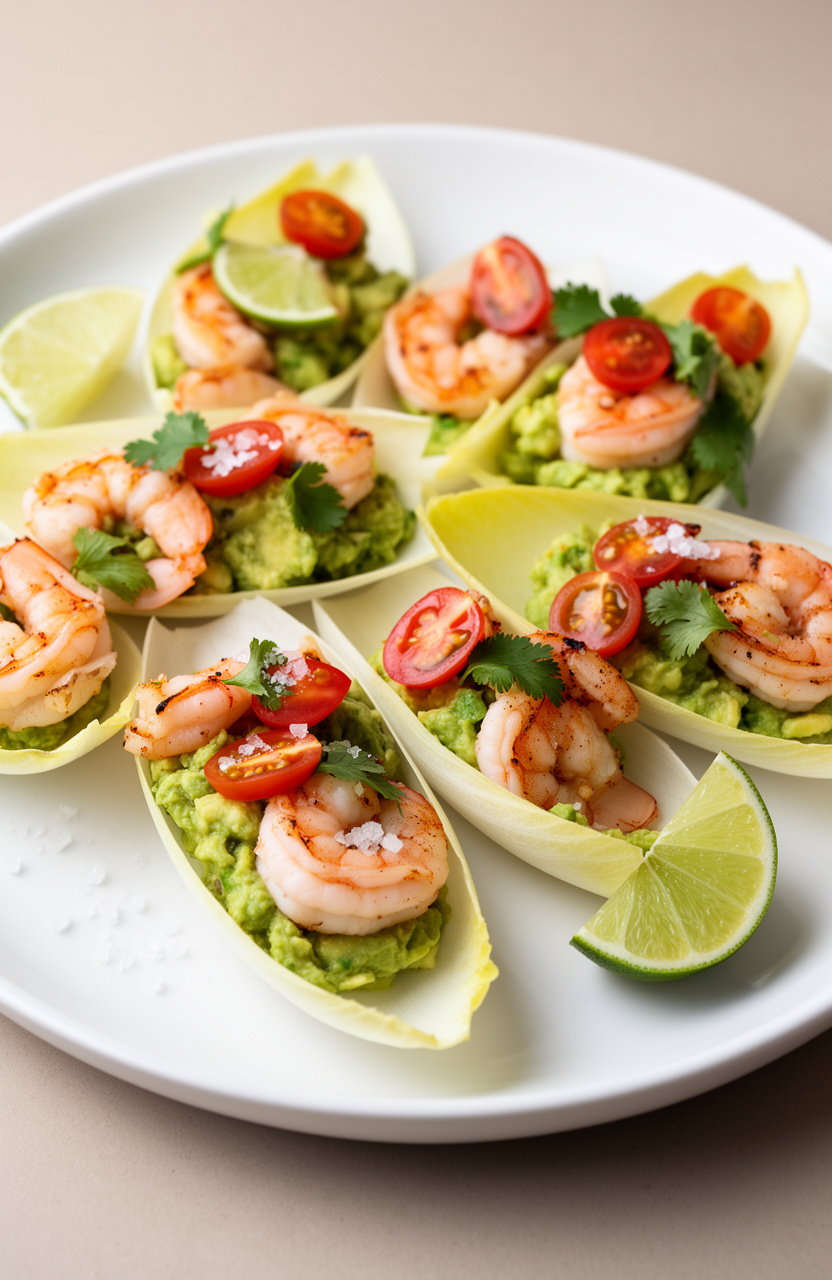
Smoked paprika-dusted shrimp, quickly seared in olive oil until pink and slightly charred at the edges, nestle into crisp endive leaves alongside cool, creamy avocado for a sharp contrast in both temperature and texture.
Shrimp Avocado Endive Boats
Shrimp
Filling
Boats
Garnish
- 🍳Large skillet or sauté pan
- 🥣Mixing bowl
- 🪵Cutting board
- 🔪Chef’s knife
- 🍴Citrus juicer or reamer
- 🔪Zester or microplane
- 🥢Tongs
- 🍽️Serving platter
- 🥄Measuring spoons
- 🍴Paper towels
Prep the Shrimp
Pat the shrimp completely dry with paper towels — this ensures a good sear. In a bowl, toss the shrimp with 1 tablespoon olive oil, 1/2 teaspoon smoked paprika, 1/4 teaspoon garlic powder, 1/4 teaspoon kosher salt, and 1/4 teaspoon black pepper until evenly coated.
Cook the Shrimp
Heat a large skillet over medium-high heat until very hot. Add the seasoned shrimp in a single layer and cook for 2 minutes on the first side without moving them, until pink and lightly charred.
Flip and cook for an additional 1–2 minutes until fully opaque and cooked through. Total cook time is 5 minutes.
Transfer to a plate and let cool to room temperature, then roughly chop each shrimp into 2–3 pieces.
Make the Avocado Filling
While the shrimp cools, dice the avocados into 1/2-inch cubes and place them in a medium mixing bowl. Add the finely diced red onion, minced jalapeño, 2 tablespoons chopped cilantro, 2 tablespoons fresh lime juice, and 1 teaspoon lime zest.
Season with 1/2 teaspoon kosher salt and 1/4 teaspoon black pepper. Gently fold together, keeping the avocado chunky.
Taste and adjust seasoning as needed.
Combine Shrimp and Avocado
Add the cooled, chopped shrimp into the avocado mixture and gently fold to combine, ensuring the shrimp is evenly distributed throughout the filling without mashing the avocado.
Chill the Filling
Cover the bowl with plastic wrap, pressing it directly against the surface of the filling to prevent browning. Refrigerate for 15 minutes to allow the flavors to meld and the filling to firm up slightly.
Prepare the Endive
While the filling chills, separate the endive leaves by trimming the base of each head and carefully pulling the leaves apart. Select the 24 largest, most cup-shaped leaves to use as boats.
Rinse gently and pat dry with paper towels. Arrange them in a single layer on a large serving platter.
Fill and Garnish
Remove the filling from the refrigerator. Spoon approximately 1 heaping tablespoon of the shrimp-avocado mixture into each endive leaf.
Top each boat with a piece or two of quartered cherry tomato and a fresh cilantro leaf. Finish with a pinch of flaky sea salt over the entire platter and serve immediately with lime wedges on the side.
Per serving (4 endive boats) — values are estimates
Recommended for You


9. Mini Caprese Skewers with Basil
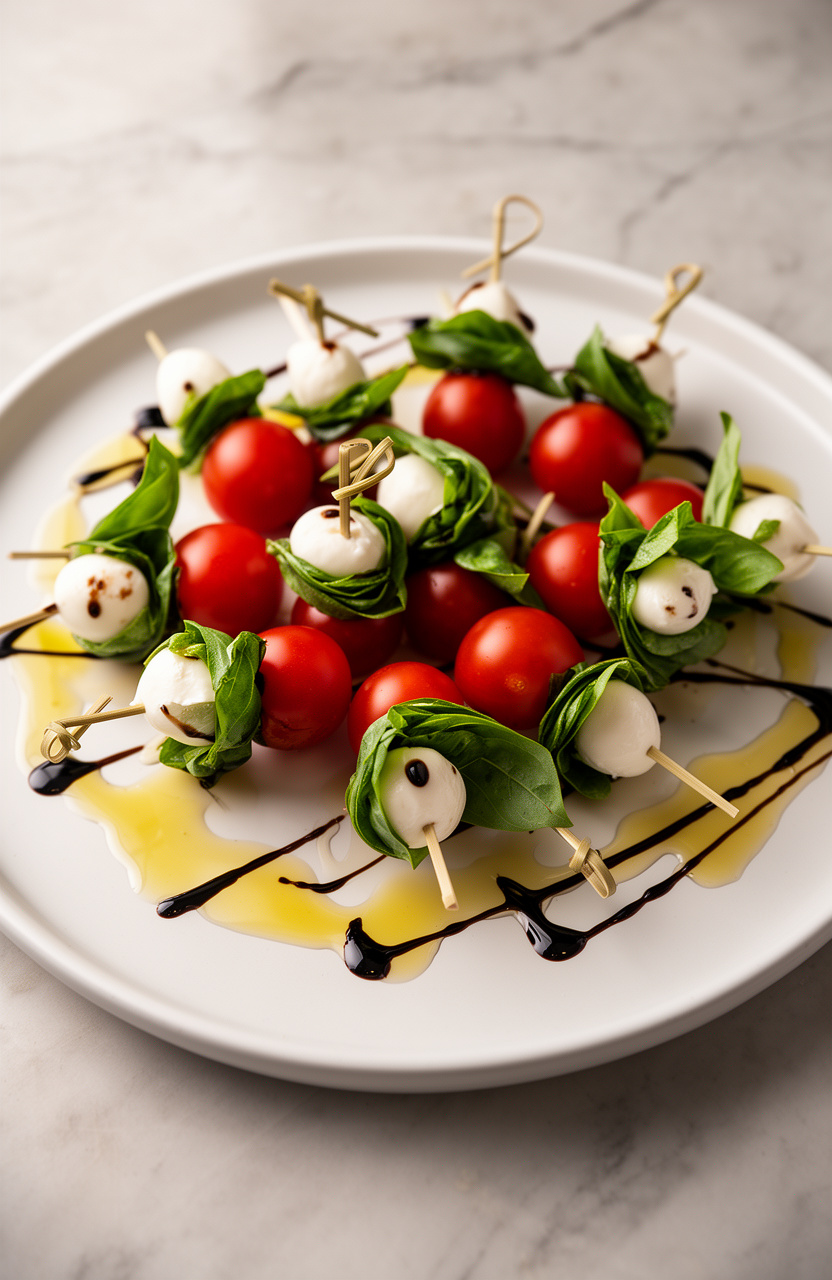
Threaded onto toothpicks or small skewers, these bright red and white bites layer juicy cherry tomatoes against cool, milky mozzarella and a single fresh basil leaf, then get a drizzle of grassy olive oil that pulls the clean, simple flavors together.
Mini Caprese Skewers with Basil
Dressing
Seasoning
- 📍24 small wooden or bamboo skewers (4-6 inch)
- 🍽️Serving platter
- 🥣Small mixing bowl
- 🥄Pastry brush or spoon
Prepare the Ingredients
Wash and thoroughly dry the cherry tomatoes and fresh basil leaves using a clean kitchen towel or paper towels. If using larger bocconcini, slice them in half to create bite-sized pieces roughly the same diameter as the cherry tomatoes.
Pat the mozzarella dry to prevent excess moisture on the skewers. This prep should take about 5 minutes.
Mix the Dressing
In a small mixing bowl, whisk together the extra-virgin olive oil, garlic powder, flaky sea salt, and freshly cracked black pepper until well combined. Set aside.
Keep the balsamic glaze separate for drizzling at the end to maintain its presentation. This takes approximately 2 minutes.
Assemble the Skewers
Thread each skewer in the following order: first slide on one cherry tomato, then fold a fresh basil leaf in half and thread it onto the skewer, followed by one mozzarella ball or half. Repeat this layering for all 24 skewers.
Arrange the completed skewers neatly on a serving platter. This assembly step takes about 8 minutes.
Dress and Serve
Using a pastry brush or small spoon, lightly coat each skewer with the olive oil mixture, ensuring the mozzarella and tomatoes are lightly coated. Drizzle the balsamic glaze decoratively over the arranged skewers in a zigzag pattern.
Serve immediately at room temperature for the best flavor.
Per serving (1 skewer) — values are estimates
Recommended for You


10. Radish Butter Tea Sandwiches
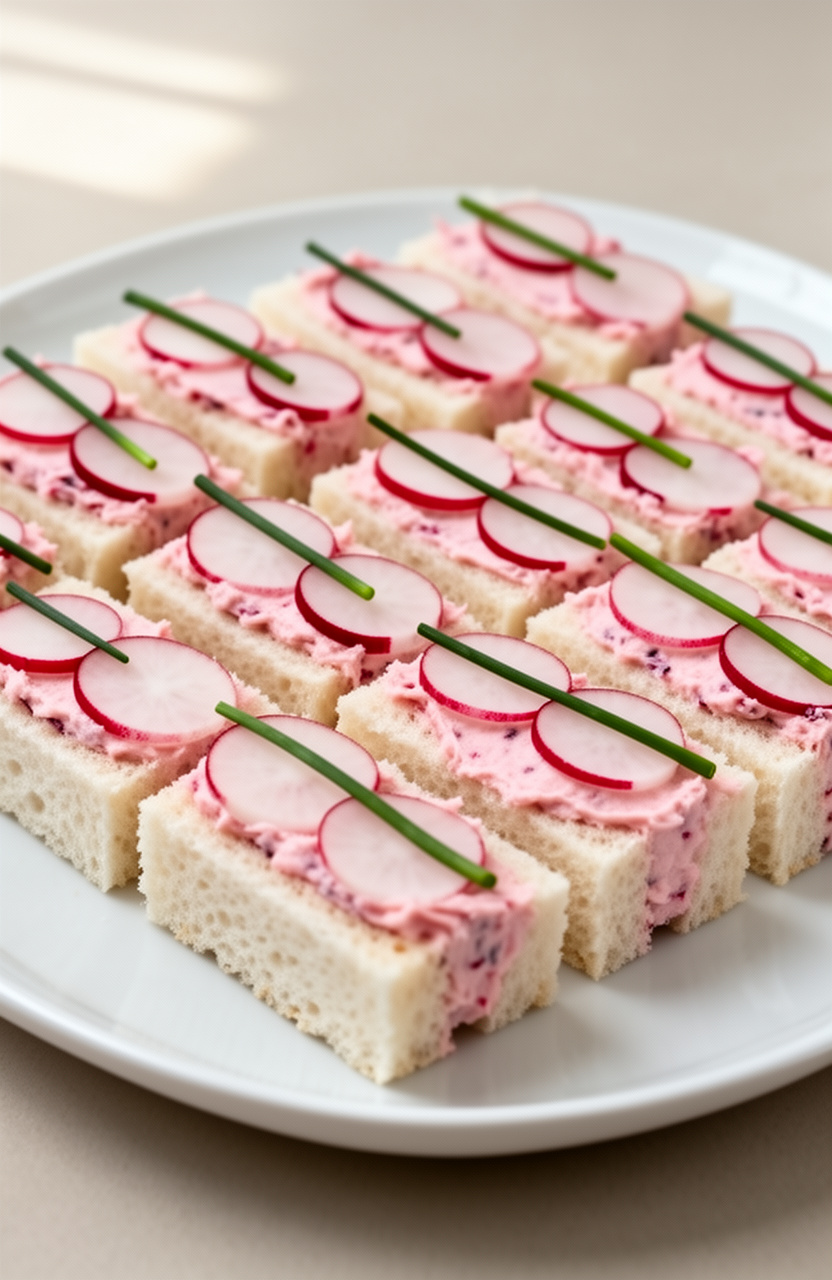
Softened butter gets folded with finely grated radish and minced chives, turning a pale pink from the radish’s natural pigment, then spread thick on crustless white bread for a cool, peppery bite with a grassy finish.
Radish Butter Tea Sandwiches
Radish Butter
Sandwiches
Garnish
- 🔪Box grater or fine microplane
- 🥣Medium mixing bowl
- 🥄Rubber spatula or wooden spoon
- 🔪Sharp chef’s knife
- 🪵Cutting board
- 🔪Mandoline slicer or sharp knife
- 🔪Offset spatula or butter knife
- 📄Plastic wrap
- 🍽️Serving platter
Prepare Grated Radishes
Wash and trim 6 medium radishes. Using the fine side of a box grater or a microplane, grate the radishes over a clean kitchen towel or several layers of paper towels.
Gather the towel around the grated radish and squeeze firmly to remove as much moisture as possible. You should have about 1/4 cup of well-drained grated radish.
Removing excess moisture is essential so the butter does not become watery.
Make Radish Butter
In a medium mixing bowl, combine the softened unsalted butter, drained grated radishes, 1 tablespoon minced fresh chives, 1 teaspoon fresh lemon juice, 1/2 teaspoon flaky sea salt, and 1/4 teaspoon black pepper. Using a rubber spatula, mix and fold everything together until fully combined and the butter is evenly flecked with pink radish and green chives.
Taste and adjust seasoning as needed.
Chill Radish Butter
Transfer the radish butter onto a sheet of plastic wrap, shape it into a rough log or mound, and wrap tightly. Refrigerate for 30 minutes until the butter is firm enough to spread cleanly without tearing the bread.
This chilling step also allows the flavors to meld together.
Slice the Radishes
While the butter chills, wash and trim the remaining 8 radishes. Using a mandoline slicer set to 1/8-inch thickness, or a very sharp knife, slice the radishes into thin, even rounds.
Pat the slices dry with paper towels and set aside.
Assemble the Sandwiches
Remove the chilled radish butter from the refrigerator. Lay all 12 bread slices on a clean cutting board.
Using an offset spatula or butter knife, spread a generous, even layer of radish butter (about 1 tablespoon) onto one side of each bread slice, covering all the way to the edges. Arrange a single, slightly overlapping layer of sliced radishes over the buttered side of 6 bread slices.
Sprinkle the radish slices lightly with flaky sea salt. Top each with one of the remaining buttered bread slices, butter-side down, pressing gently to adhere.
Trim and Cut Sandwiches
Using a sharp serrated knife, carefully trim all four crusts from each sandwich to create clean, square edges. Wipe the knife blade clean between cuts for neat results.
Cut each trimmed sandwich into 4 equal fingers (rectangles) or triangles, yielding 24 pieces total.
Garnish and Serve
Arrange the finger sandwiches cut-side up on a serving platter. Garnish the top of each sandwich with a few fresh chive tips or a small pinch of microgreens.
Serve immediately for the best texture, or cover loosely with a slightly damp paper towel and plastic wrap and refrigerate for up to 1 hour before serving.
Per serving (2 finger sandwiches) — values are estimates